rrf-mesh-level: Custom Mesh Bed Probing with Python
-
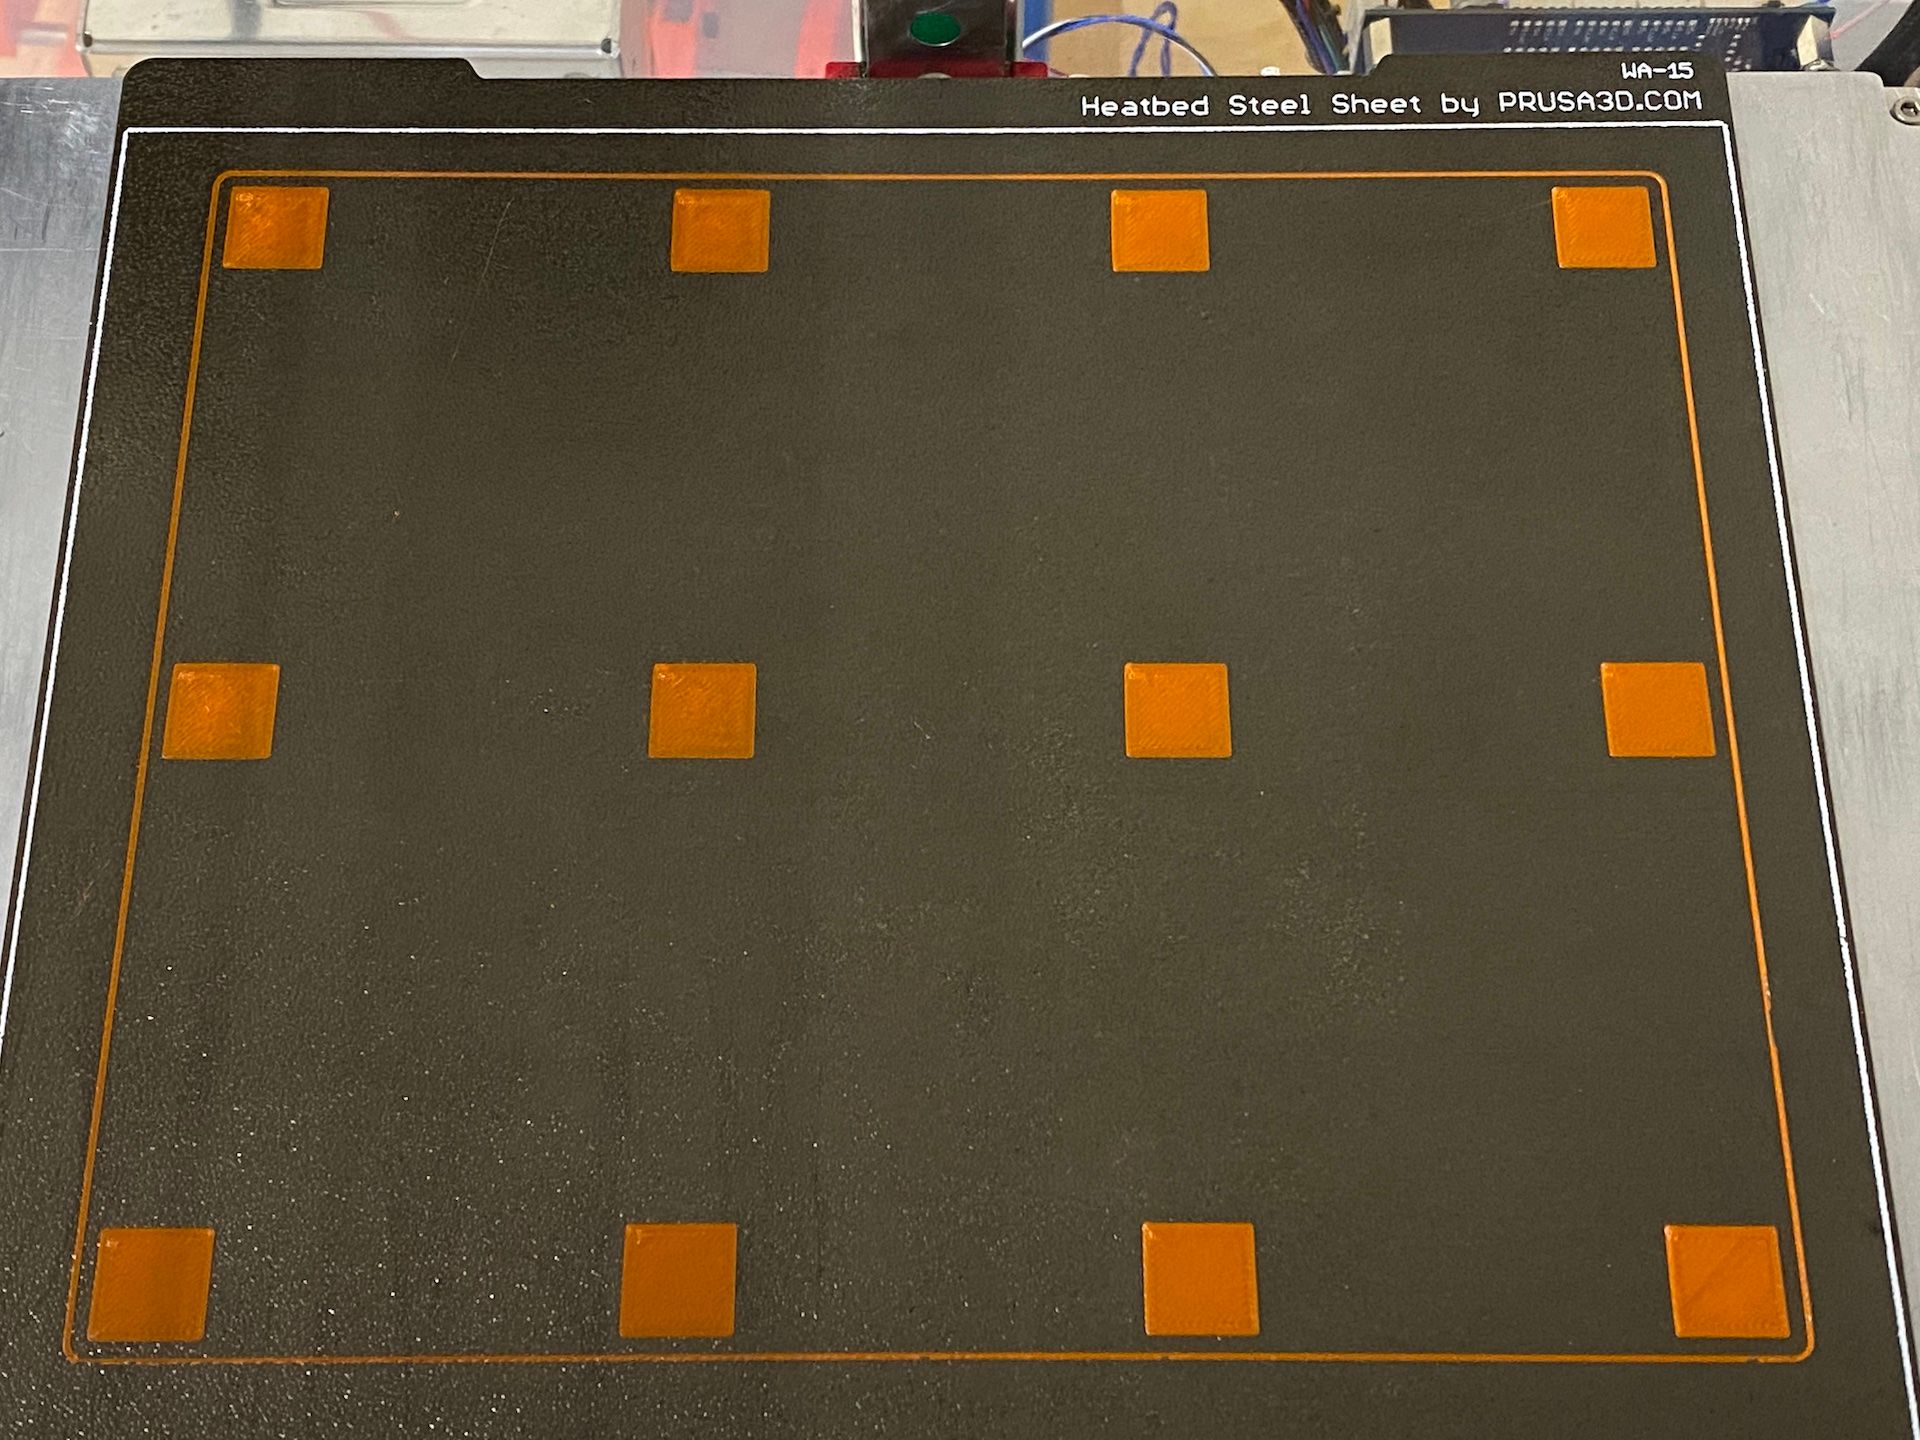
For my E3D Tool Changer I want to have a magnetic bed with swapable build plates. A somewhat surprising roadblock has been using an inductive probe on this bed with
G29. With a high enough mesh density its inevitable that the probe samples the magnets and returns a false result:
With some GCode meta commands, execonmcode, an attached SBC and Python we can build an accurate heightmap from a set of probe points that miss all of the magnets:

Source Code
I've put everything into a project on github: rrf-mesh-level so you can do this too.
Results
Before I talk about how its done lets see how it prints. The best build plate that I have is the Prusa textured sheet so that's what I'm testing on:
The lowest square (some over extrusion is present):
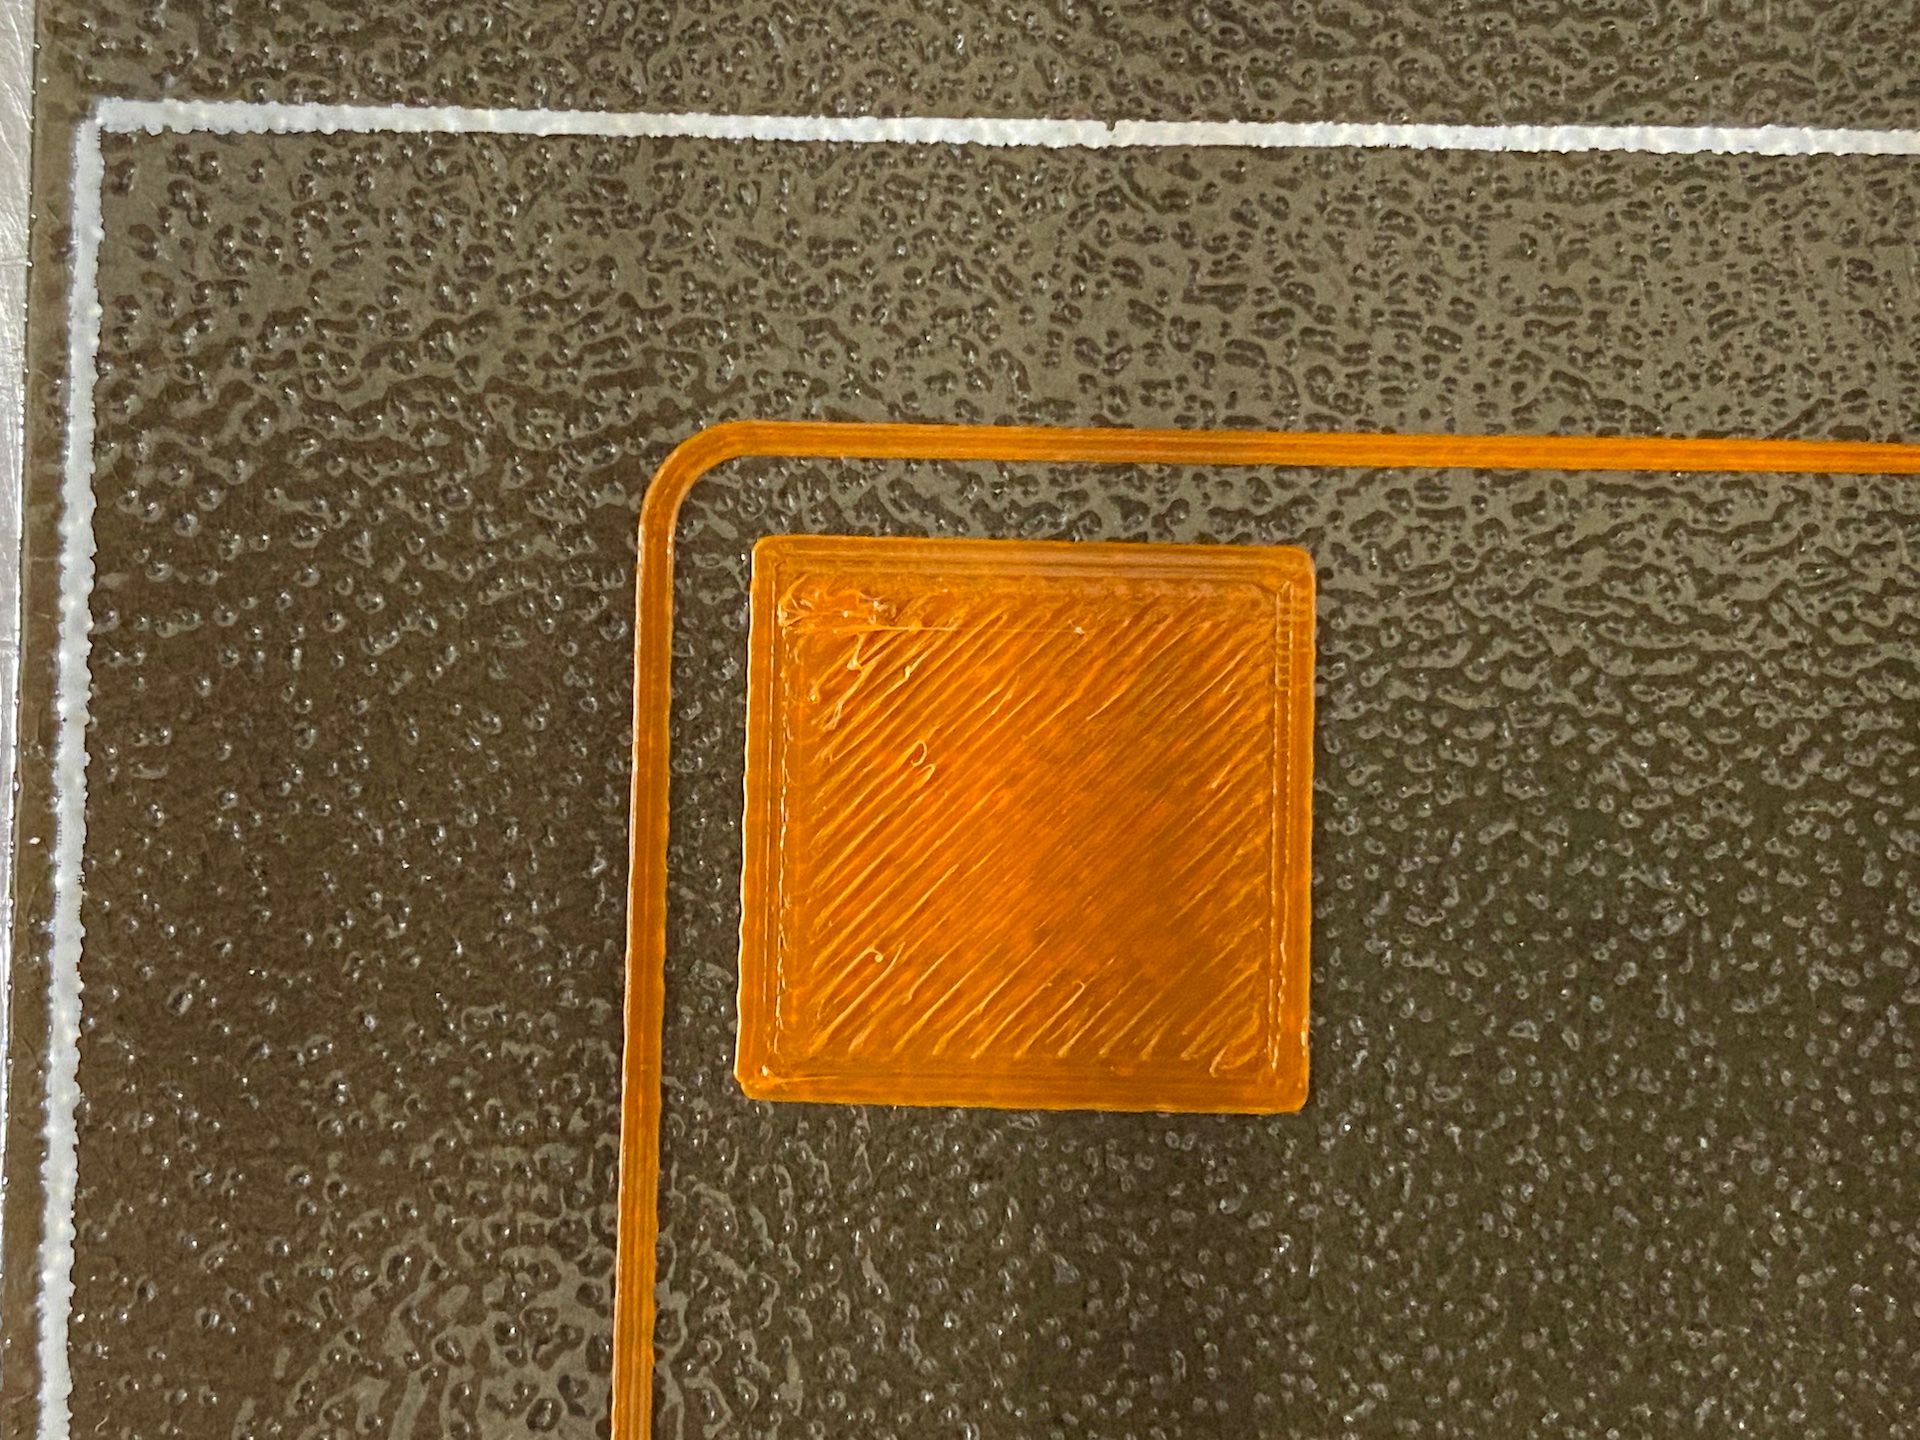
An average square:
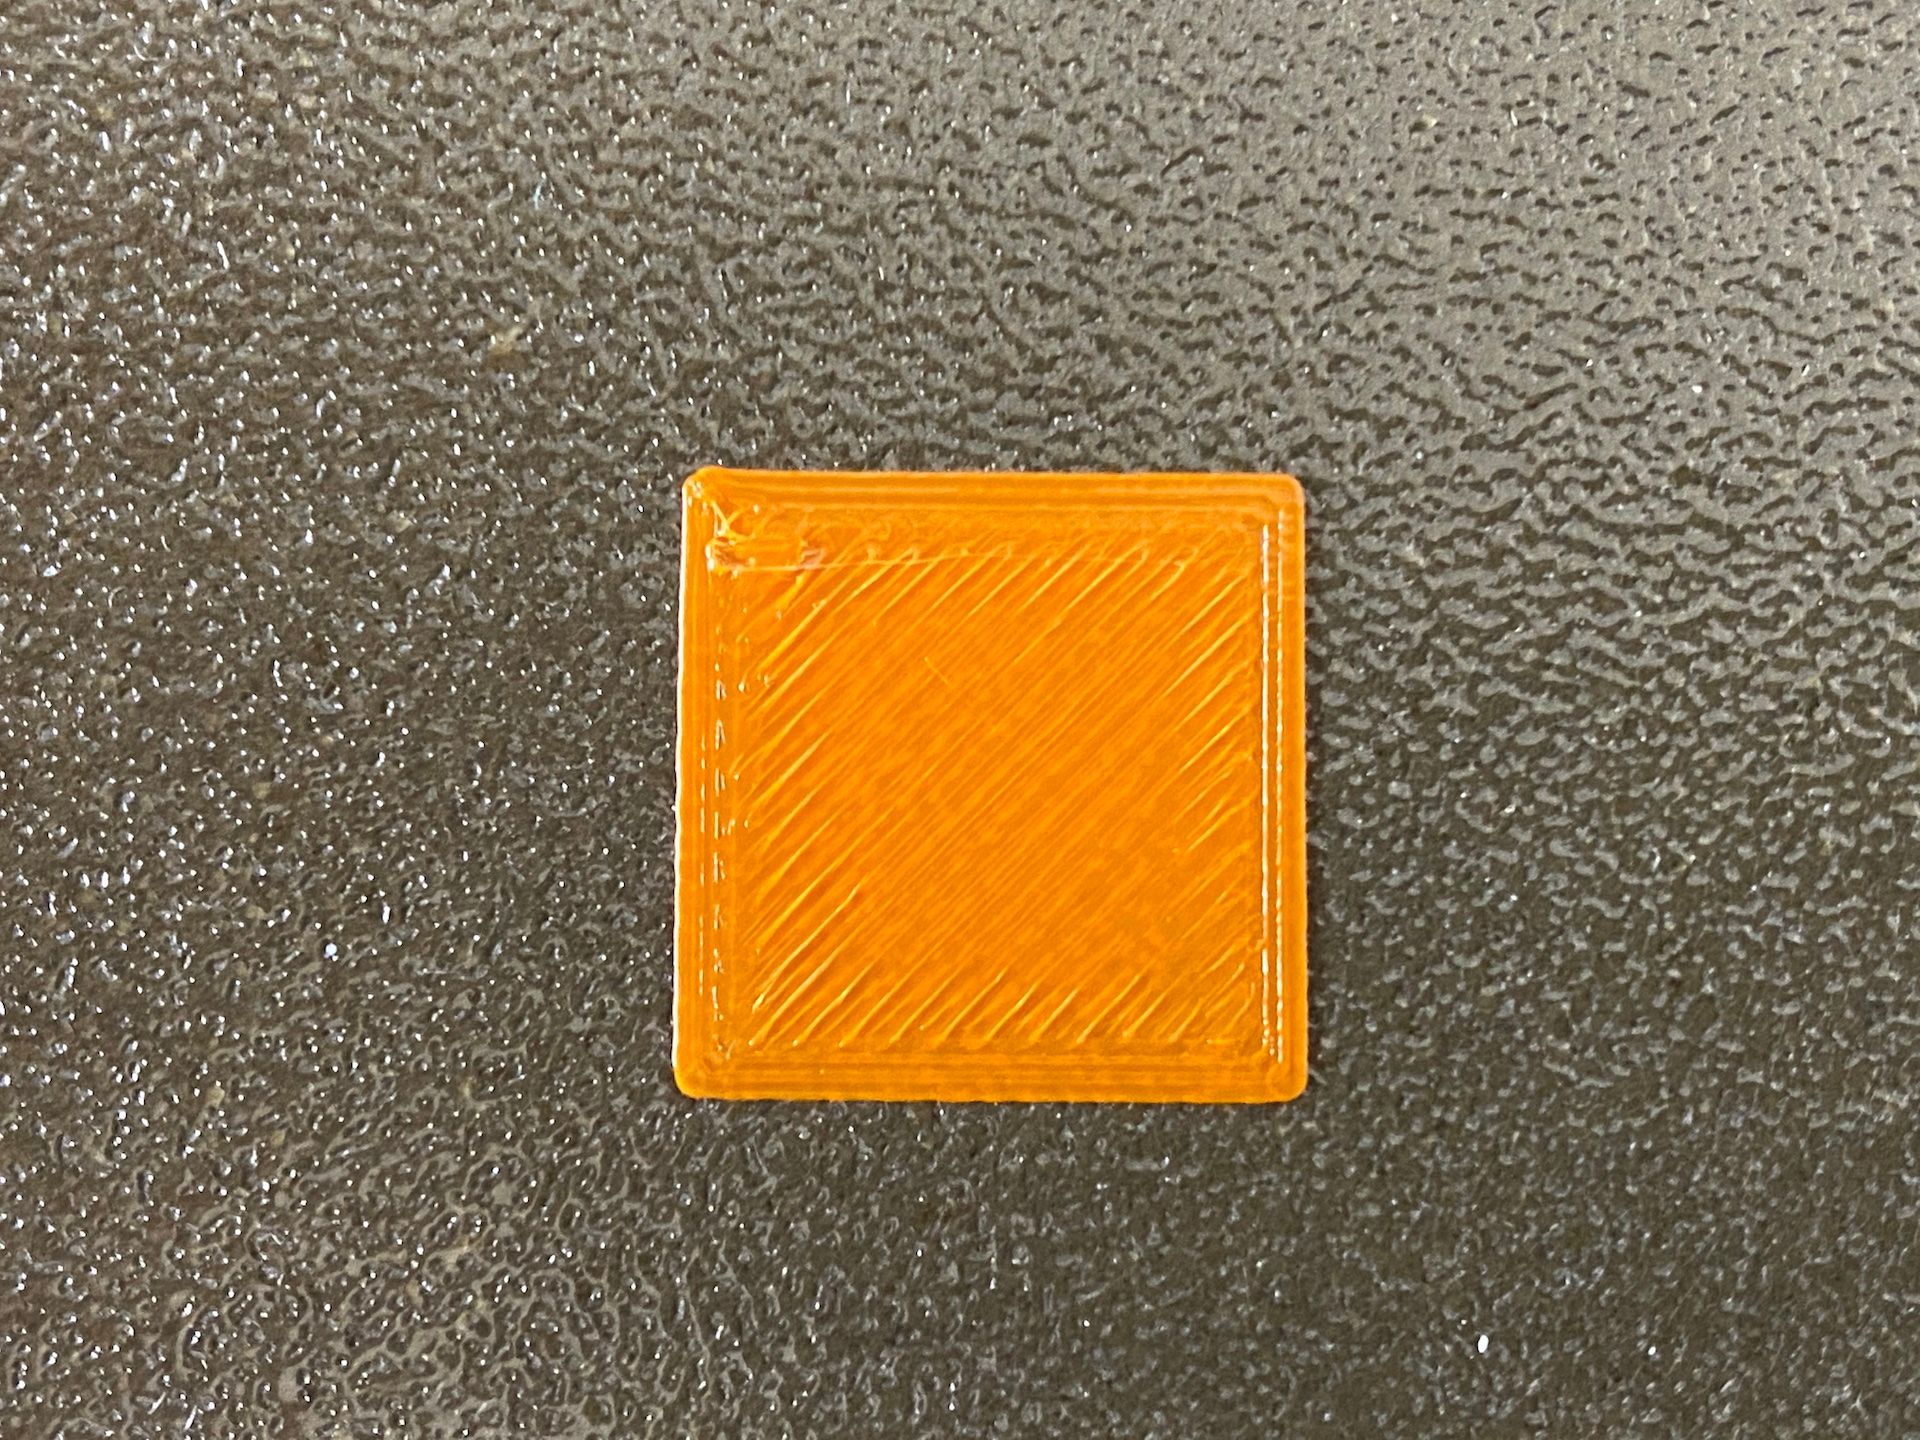
The highest square (some under extrusion is present):

I could nitpick but I think you see the technique works.
How?
The process goes like this:
- Probe the bed and log the probed points to the SD card
- Use execonmcode to invoke mesh-level.py with the log file and bed shape
- mesh-level.py uses Python/SciPy to processes the probe data with some cool math and produce a heightmap.csv file
- Profit!

Step 1 - Probing
You will need to work out what X/Y points you want to probe your bed at. I used a CAD model of my bed to measure X/Y probing locations from machine 0,0. Then I used a Python script to generate the GCode for probing each point. This takes the sensor offset and sensor travel speed into account. My bed.g file contains all the probe points that were generated. This is the truncated version:
; delete any previous log file so previously probed points don't get sampled
M30 "/sys/meshbedprobe.log"
; start INFO logging to the SD card
M929 S2 P"/sys/meshbedprobe.log"

; probe bed points by moving to each X/Y coordinate and then calling the point probe script
; Probing row #1, Direction: ->
G1 X{32.353 - sensors.probes[0].offsets[0]} Y{-11.0 - sensors.probes[0].offsets[1]} F{sensors.probes[0].travelSpeed * 60}
M98 P"/sys/probe-point.g"

; ... many, many more points get probed

; stop logging
M929 S0
The probe-point.g macro is where the actual probing of individual points happens. It uses a loop and
G30 S-1to probe the location andM118to write the results of each probing to the open log file. You don't have to copy this, any macro that writes the sameMesh Point: Xn Yn Znformat will work with the python script. The resulting log file looks like this:2021-01-24 12:26:58 Mesh Point: X32.355 Y-11.000 Z-0.254 2021-01-24 12:26:59 Mesh Point: X32.355 Y-11.000 Z-0.254 2021-01-24 12:26:59 Mesh Point: X67.030 Y-11.000 Z-0.313 2021-01-24 12:27:00 Mesh Point: X67.030 Y-11.000 Z-0.314Step 2: Calling Python with execonmcode
Using the excellent execonmcode utility we invoke the mesh-level.py script using a custom MCode
M7029from insidebed.g:; call the custom MCode to create the heightmap.csv file, all params must be passed as strings M7029 X"0:300" Y"0:200"The parameters here are the same as
X,Yfrom M557
The script supports a lot more parameters besides these, the file names, point spacing etc. can be customized if desired.Building the heightmap.csv
mesh-level.py uses something called Radial Basis Functions (RBF) to compute an interpolated surface from your probe point data. The surface is a high quality representation of the bed shape where the surface passes through all of your probe points (no smoothing is performed). The more points your probe, the better that representation is going to be.
RBF has some characteristics that make it very useful in this application:
- It can work with scattered X/Y input points, they don't need to be in anything like a regular pattern
- It can extrapolate beyond the bounds (convex hull) of the probed points. This solves the problem of not being able to probe right at the edge of the bed and allows the final heightmap to cover the entire printable area
- It can be up-sampled. The final heightmap point density can be higher than the sample density! This leaves the liner interpolation code in RRF with less guessing to do and better encodes curves in the bed surface. The script automatically tries to use up as much of the 441 points that RRF allows.
-
great work.
maybe its possible to realize this as a plugin in the new 3.2 DWC?
-
This was meant to be a G29 replacement so there isn't much of a UI. If anything a way to install custom GCodes and scripts via execonmcode is what we need in the UI to make this easy to set up.
But I certainly want a plugin like what we have for Filaments that allows for a customizable Z-offset per build plate. I think that would really benefit from having a GUI. Not to mention having a tuning print and a way to capture and store the sheet's offset from the baby stepping value. Similar to: https://help.prusa3d.com/en/article/steel-sheet-profiles_1955
I have a lot of things I'm working on for this printer so it might have to wait a while.
-
@garethky said in rrf-mesh-level: Custom Mesh Bed Probing with Python:
This was meant to be a G29 replacement so there isn't much of a UI.
the plugin does not need be be a ui. it could just be a button that generates the heightmap.csv and saves it to the duet.
-
@Veti Ahh, sure you could do that. I just put it in bed.g, you can run that from the GUI already via the calibration menu under G32 True Bed Leveling