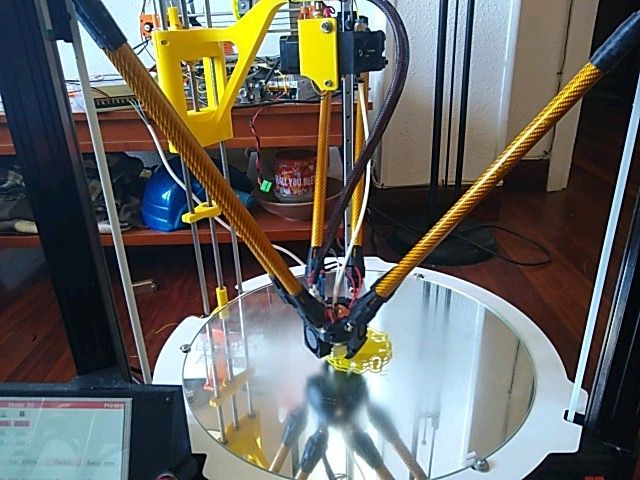
Flying extruder with 4th axis
-
Hi there, i don´t really know what you mean by flavour, the prusa slicer just has a button that gives you the g file and that´s it. i kind a feel like i´ve tried every setting now, dunno what happens
-
@ander said in Flying extruder with 4th axis:
Hi there, i don´t really know what you mean by flavour, the prusa slicer just has a button that gives you the g file and that´s it. i kind a feel like i´ve tried every setting now, dunno what happens
On PE Slic3R go to the "Printer Settings" tab, then click "General" which you will find at the top of the list on the left hand side. The on the right hand pane you'll find a section entitled "Firmware" and under that is "G-code flavour" with a drop down box. Select "RepRap/Sprinter" from the list. Then save the change.
-
Which version of slicer PE specifically?
In the print settings tab under speed, there is an acceleration control. I believe it's hidden now by default in the latest 1.42 beta and only visible when set to advanced/expert view.
Perhaps you can post the gcode file that has this problem?
-
Hi there!!
you guys were right, i´m used to program in Marlin for arduino, and i put marlin instead of reprap, thanks for helping. i couldn´t post earlier because for some reason the forum was blocking my messages again, it looks that works fine now. -
Hi there!!!
a bit late but here goes my setup:
https://www.youtube.com/watch?v=ToBLN7YHWt4 -
I found the section about "additional towers to carry flying extruders" in the wiki, when I define the 4th like this does that in include the behavior that the 4axis moves up and down depending on where the x/y position of the effector is? or does this need to be added as an extra command?
-
@sungod3k said in Flying extruder with 4th axis:
I found the section about "additional towers to carry flying extruders" in the wiki, when I define the 4th like this does that in include the behavior that the 4axis moves up and down depending on where the x/y position of the effector is? or does this need to be added as an extra command?
That's automatic, you just need to define the XY position of the extruder outlet and the distance you want to maintain between the extruder output and the hot end input.
-
Hi there!
i had an issue with the duet wifi...i don´t know how happened but i tried to update it to 3.0 firmware and died.
So i´m installing from 0 the 3.0 now in a new board, and seems like i have some issues with endstops, i tried to copy all the 4th axis comands in the config file from the old version but doesnt seem to work
i manually push the effectors endstop switch and the 4th axis endstop swicth and neither of them show any change in the duet web interface, but in the board i clearly see the led switching off in both . pushing x,y, and z works fine
, here i leave the config file so you can have a look and hopefully find a solution.
config.g -
@ander You haven't defined where the U axis endstop switch connects. What does it connect to? RRF3 doesn't have default assignments for anything, so you need to define everything.
Also, you have default thermistors set, T100000 B4138. Best to find what thermistors you are actually using and set values correctly, for temperatures to be accurate.
Ian
-
Hi there!
Thanks for the quick response, can you tell me where exactly and how should i put the endstop info?
i´m using E1 endstop conector for the effector switch and E0 conector for the 4th axis´s endstop -
@ander said in Flying extruder with 4th axis:
Thanks for the quick response, can you tell me where exactly and how should i put the endstop info?
If you are running RepRapFirmware 2, and in your M584 command you have created a U axis for the 4th tower, then you need:
M574 U2 S1
The S1 parameter assumes the endstop is a normally-closed switch. Use S0 if it is normally-open.
Edit: from your config.g file and your earlier post, I see that you are using RepRapFirmware 3. You currently have this line in config.g:
M574 U2 S1
Change it to:
M574 U2 S1 P"e0stop"
-
Hi there,
i made the change you sugested and now the 4th axis moves well when homing, but doesn´t compensate when i move manually to the left or right and if i go down on z the 4th axis doesnt move either. another thing to point out is that the web interface is recognizing 5 endstops(0,1,2,3 and 4) i guess the number 4 is the efectors endstop but manually triggerring doesn´t change at all. -
By the way, i realized that suddenly another file was created with a name of config.g.bak, should i delete it or just leave?
-
@ander said in Flying extruder with 4th axis:
Hi there,
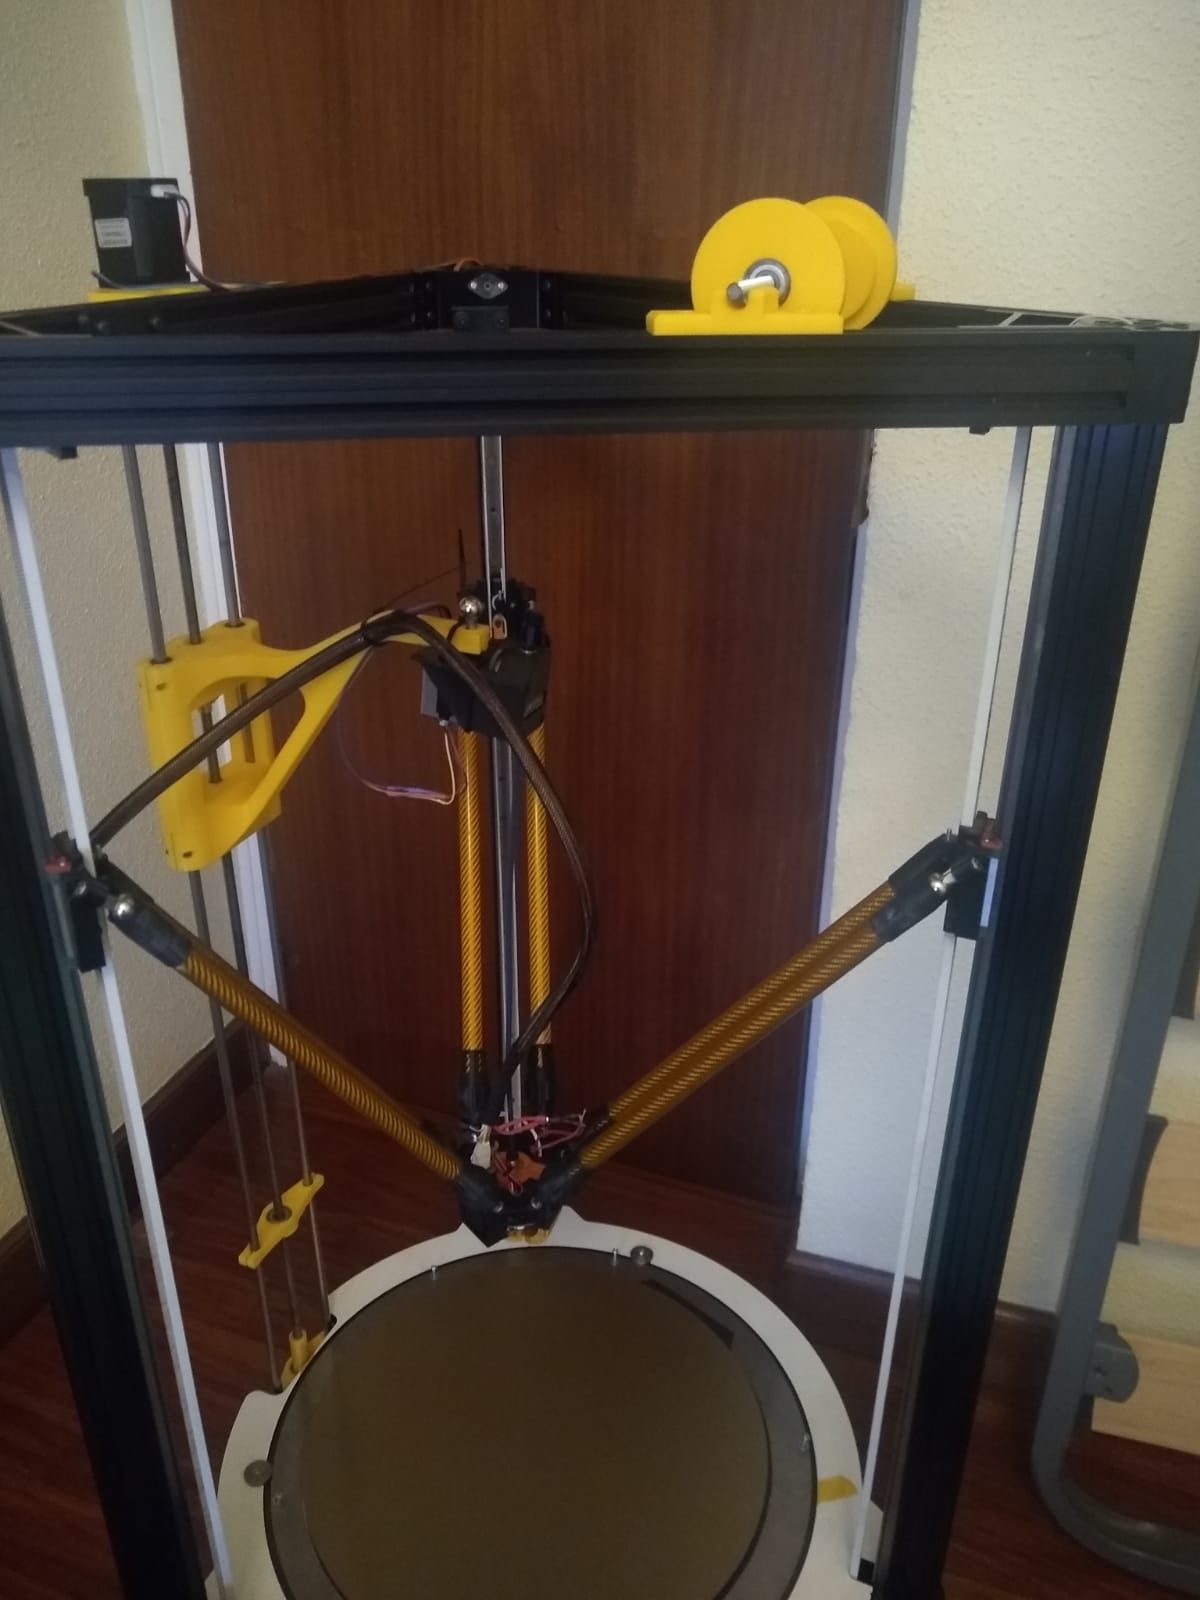
i made the change you sugested and now the 4th axis moves well when homing, but doesn´t compensate when i move manually to the left or right and if i go down on z the 4th axis doesnt move either. another thing to point out is that the web interface is recognizing 5 endstops(0,1,2,3 and 4) i guess the number 4 is the efectors endstop but manually triggerring doesn´t change at all.Please post your current config.g file. A photo of your printer showing where the 4th tower is in relation to the others would also help.
-
Hi
the setting is this one:
https://www.youtube.com/watch?v=ToBLN7YHWt4
this is when used to work fine
this is the config file:
config(1).gconfig.g.bak can´t be posted here
Thanks -
here i have a picture of the setup

-
Can anyone help me out?
My printer is still with the same problem, i´m going to sumarize a bit:
I have a delta running on a duet wifi and i installed a 4th axis to my delta printer for the tipical hanging extruder motor sistem (shown in the picture), it was running fine until i tried to update to firmware 3.0 (it was running in a previous version). i tried to apply all the changes made to the old firmware version to make the 4th axis run ( U axis) but it didn´t work very well.
Now the 4th axis moves well when homing but if i move down manually, the axis X Y and Z move well but not the U axis. Also, by moving manually to the left or right the U axis should compensate automaticaly the hight and it doesn´t.
The effector has a switch on it for autolevel pourposes, i think it is not well defined because i see no changes in the web interface by clicking manually , and the other axis do, including the U axis.
I leave my last config file here so you can have a look and if someone can see an error can give me a hand.
thanks in advance. 1582918282938-config-1(1).g
 -
See https://duet3d.dozuki.com/Wiki/ConfiguringRepRapFirmwareDeltaPrinter#Section_Adding_additional_towers_to_carry_flying_extruders. Your config.g command doesn't have the M669 command.
-
Hi there
Thanks for the help, i saw i had some errors so i changed them and the new axis seems to work fine even with lateral compensations, But i still have to fix one last thing so the printer can start printing, and this is the Z probe situation. I feel a bit confused with this thing in the firmware 3.0.
Being a delta printer has 3 axis ( X,Y,Z) and then it has an effector with a mecanical switch on it similar to the atom delta 3d printer.
The new axis(U) endstop is conected to E0 endstop pin, and the effector´s Z probe is conected to E1 endstop pin.
Here i put my config file and bed file.config(2).g bed.gAfter finishing the entire configuration i will post the finished config file so others can use it
thanks -
As you are running RRF3 I suggest you change your M558 command to this:
M558 P5 C"e1stop" H5 F1200 T6000 ; set Z probe type to effector and the dive height + speeds
Use either P5 (filtered) or P8 (unfiltered). The command as shown is for a normally-close switch. If your switch is normally open (not recommended) then use C"!e1stop" instead.