N7JTI Duet3 CNC Build
-
I just saw someone ask about a BOM. I do know what I ordered, but I don't really have it in a spreadsheet or other useable form. If you have a question about a specific part then I can go find my online order and pass along the information. Here's what I remember off the top of my head:
- The Din Rails and din terminals for the high-voltage side I got on e-bay.
- The Case is an 18" x 12" x 6" Hammond enclosure I got for like $40 including shipping from Wistix: https://www.wistexllc.com/enclosures/chko18126-18-x-12-x-6-hinged-cover-enclosure-with-knockouts.html
- The Solid State Relays were around $30 each from Automation Direct.
- The small power supply and the low-voltage din rail components I got from Avid CNC. They are actually local here (I'm in the Seattle Area).
- The RPI I got from Amazon.
- I've got two different kinds of hookup wire (18g and 24g) From BNTECHGO (via Amazon). This stuff is fabulous. Real silicon sheath and very fine stranded. I bought boxes with 5 colors and 30' per color from Amazon. After stripping and crimping and routing this stuff, I'll never go back to cheap hookup wire.
- The PVC wire channels are from e-bay.
- I bought a metric drill bit set and a box of M6x4mm screws for the din-rail from McMaster-Carr along with the 3-tap sets for M3 and M6.
If you have questions about something specific I haven't covered the just ask and I'll share what I can find/remember.
-
Oh and of course I got the Duet3 from MatterHackers. Man, I can't believe I didn't include that one! Ha!
-
And the steppers came from stepperonline.com and got the 23HS45-3504S.
-
I am now waiting on some more parts to continue the CNC build, but just to keep things moving along I posted information about my CNC Pendant build in a separate topic.
-
@N7JTI Great! Thank you. I will be starting the electronics build soon, so this is helpful. It's my second custom machine. The first one used a PlanetCNC controller. But I like the look of the Duet3 so here we go
-
Well, the M12 connectors for the end-stops came in so I wired them into the controller. The mechanical parts are due next week so that is still coming. Meanwhile, here are pictures of wiring in the endstops.
The M12 endstop connectors are on the left. I'm still waiting for the last connector for the CNC Pendant. I used aircraft connectors for the 4 motor connectors on the right.
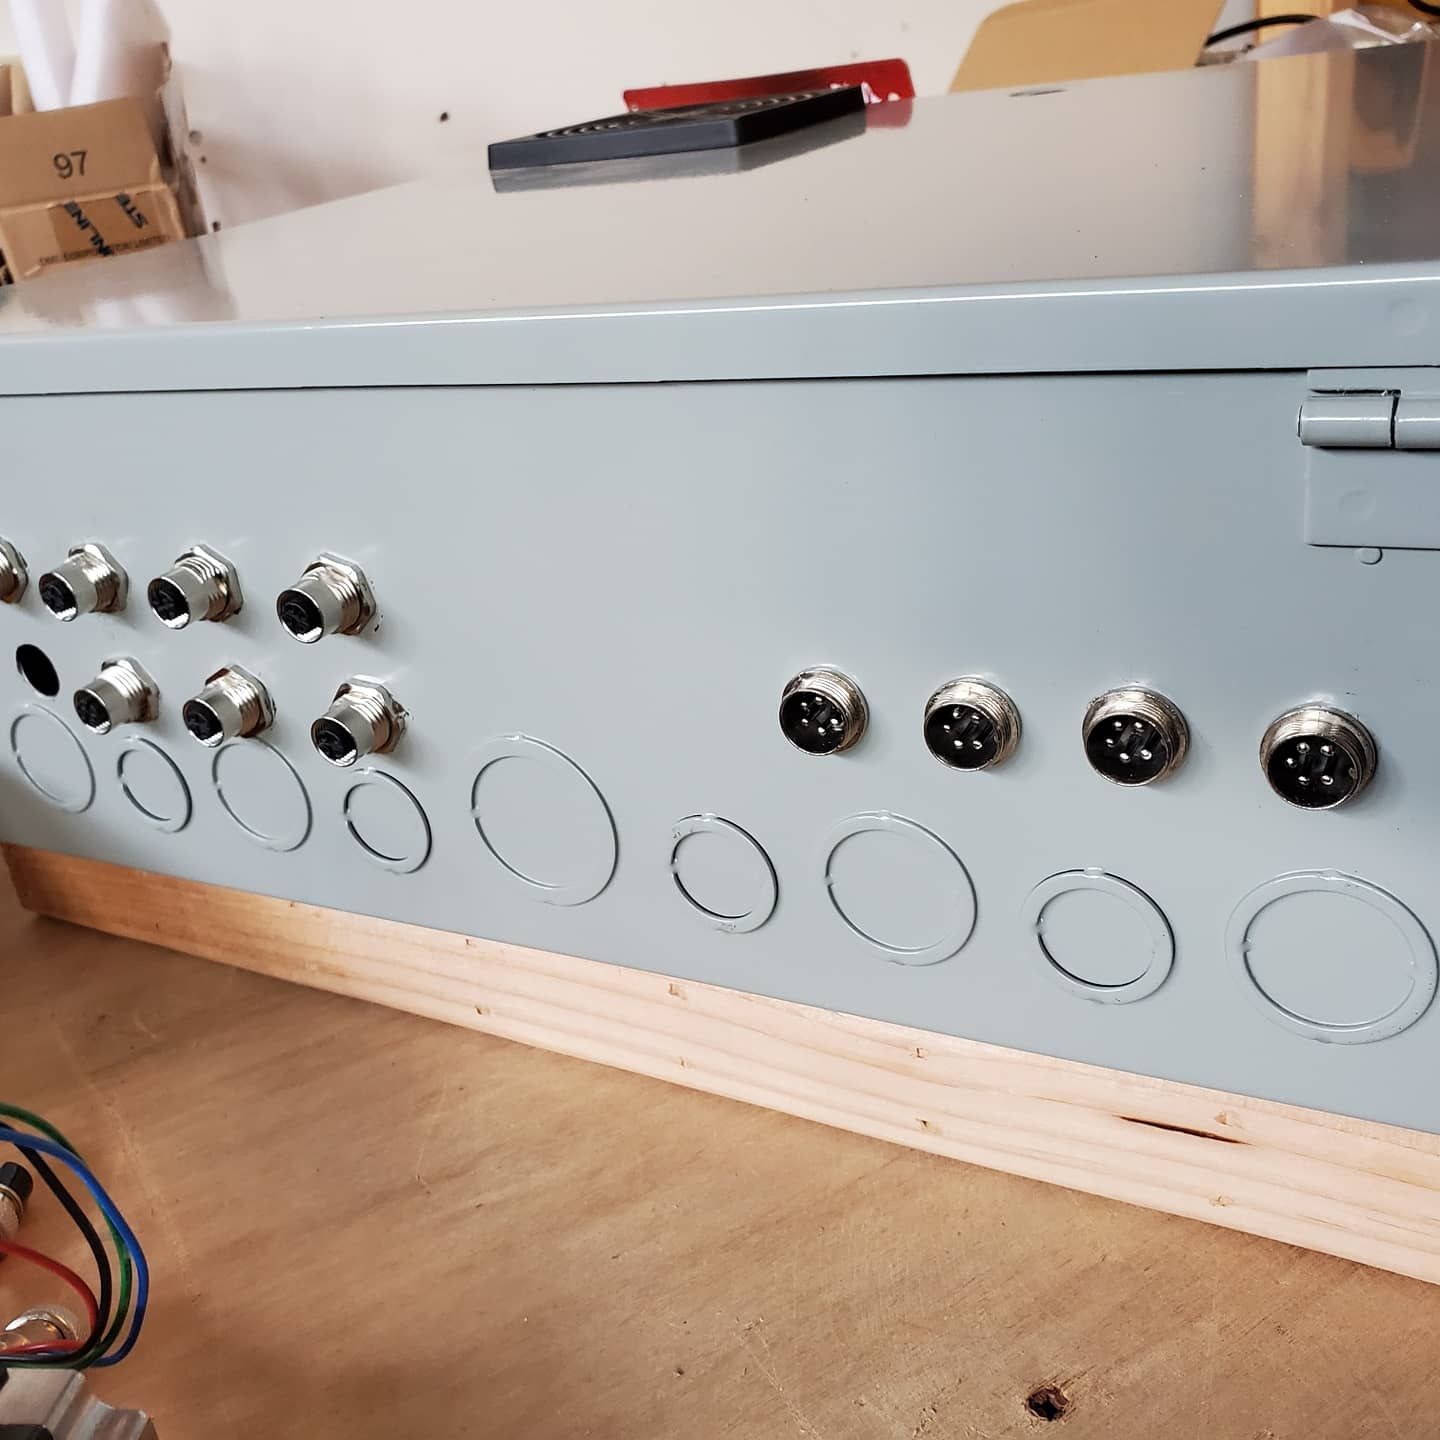
One of the parts aviailable from Avid CNC was a DIN rail mounted kit to connect the endstops. The blue wires into the grey DIN rail is my ground, and the brown wires into the blue DIN connectors are my 12v rail. The off yellow one is my 5v rail, my common earth ground are the smaller grey DIN rail above. I don't know if there are standards for these. If so, I'm probably not following them. But I did want my box to be "finger safe" so everything is crimped and in connectors with no exposed voltage wires.
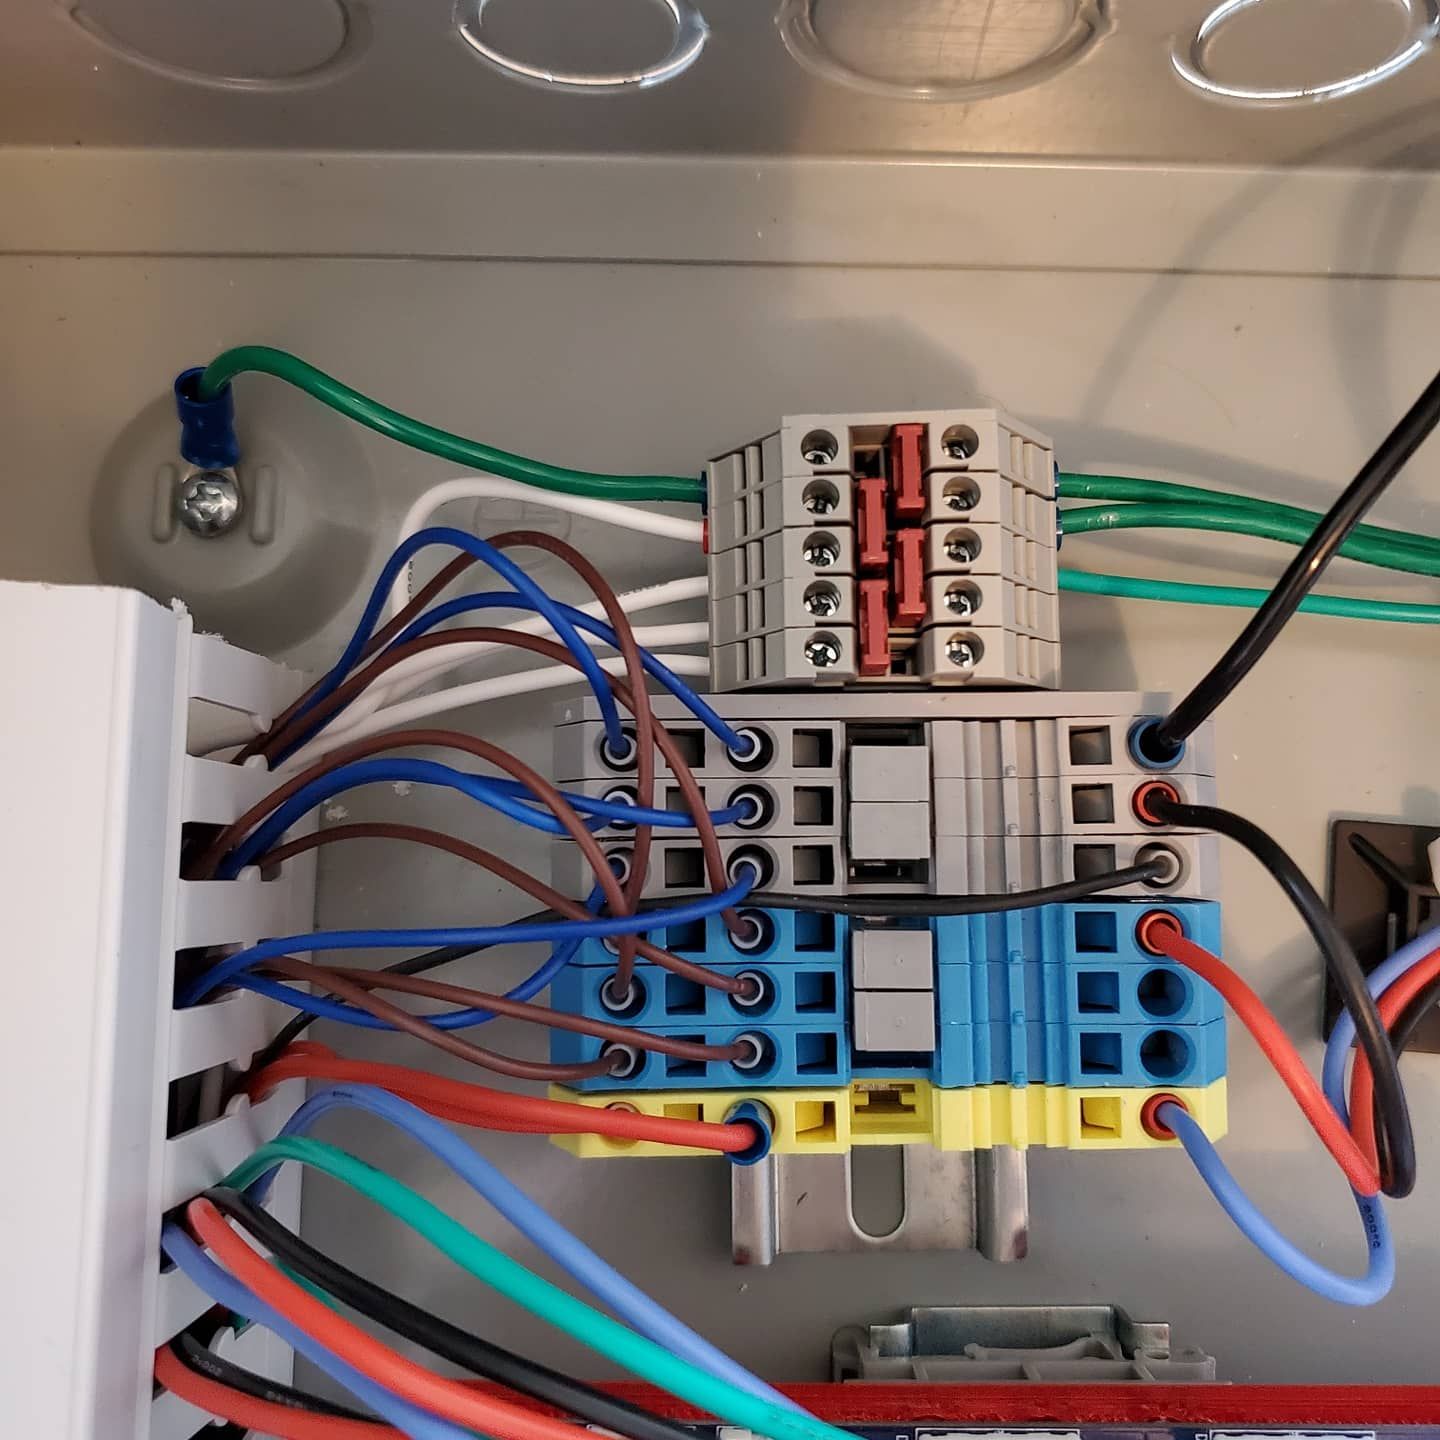
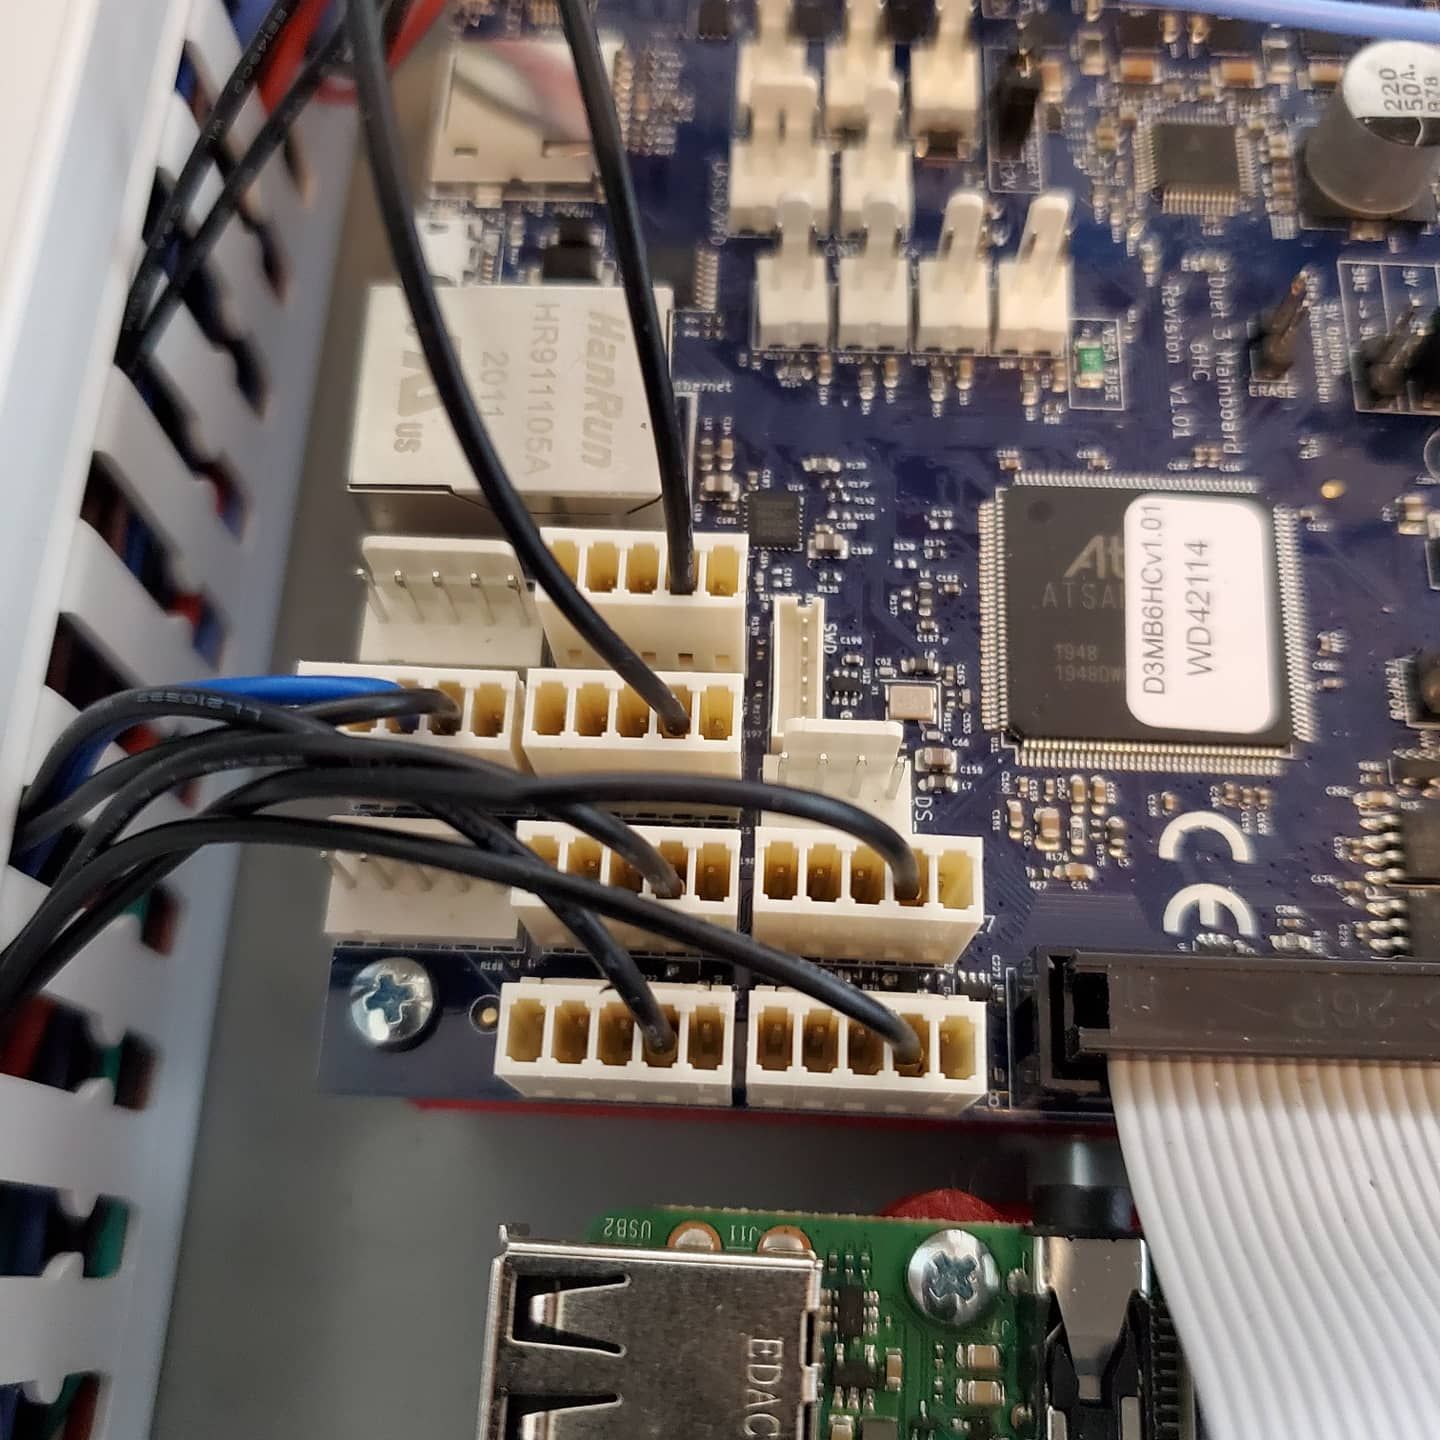
The signal wires are black, and I've put them into the "IN" lines for IO3-IO8. I'll update the config.g on my github with the new configuration soon.
The CNC machine has both high and low enstsops on the x and y axes, but the DUET seems to treat endstops as being only part of the homing. I'll probably set up some kind of "stop if the endstops ever get triggerd" trigger when not homing, but I'll set that up later.
-
Nice update, cheers!
I think I'll probably use a single switch for each axis which is triggered at both ends of it's axis. Less wires to worry about. I'll then just determine which direction to travel for the homing trigger. -
Amazing job at the build. It looks so clean!
I was looking at your configuration on github. If you are using a SBC, do you still need M552 and M586 commands?
-
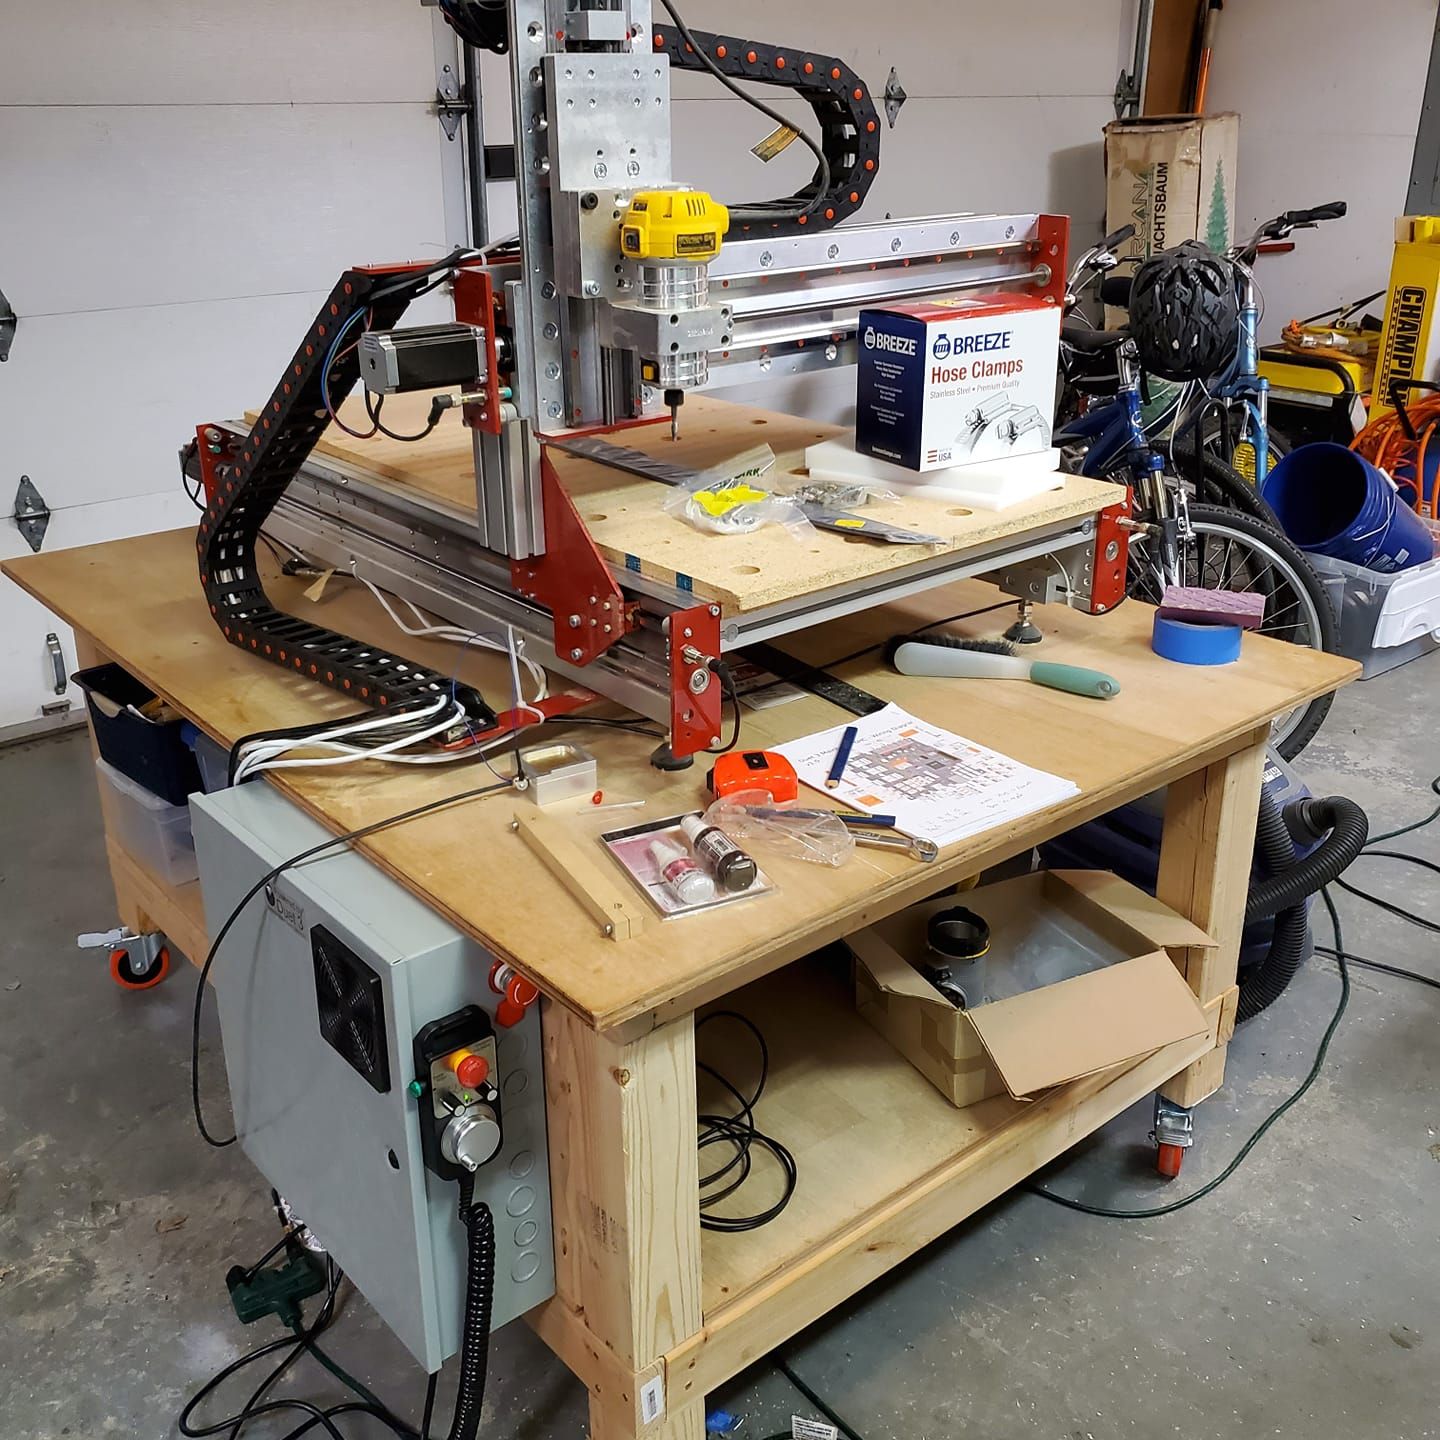
The mechanical parts came from Avid CNC on Tuesday and I spent a few nights putting them together.

The kit had a lot of screws and bolts but it was all there and seems to be fairly well machined and square right out of the box.

It isn't their "top of the line" machine but I think it will more than meet my needs as I learn how to use it.

And of course, I figure I saved more than $1K by doing my own cables, motors, and control hardware (which is based on the Duet 3).

I got the axes going in the right direction. I got the endstops configured. I have the homing macro's well written so that the global machine coordinates are repeatable.

Now I'm here trying to figure out how to program the macro's to use the fancy "corner-finding" z-touch plate that I bought with the system. But I'll post my questions on that in another thread!
Still now sawdust/chips yet. But I'm hoping to do that tomorrow!
-
@mtcl said in N7JTI Duet3 CNC Build:
Amazing job at the build. It looks so clean!
I was looking at your configuration on github. If you are using a SBC, do you still need M552 and M586 commands?
You know what? It seems I do not need them. They were in there from the configuration I got from the web that I started with. But I just removed them and everything seems to work. I'll probably update github again tomorrow after I get the touch-plate macro's working so I can machine my spoil-board.
-
I got the parts in to connect the pendant, and I got the box mounted. I also got the endstops programed to halt if the machine hits the endstops, but it stills homes. The parts on the deck are to mill the dust shoe.
The updates for the config have been uploaded to github: https://github.com/n7jti/duet3-avid-cnc
-
Great work! Compliments!
I just started to modernize my cnc mill with a duet3 board, too.
Basically it is running, but some configuration is still to be done.May I ask you a few questions?
I use Fusion360. What postprocessor do you use?
How do you manage to start/stop the spindle (just a high voltage relais)?
Does the postprocessor create the M3 M5 commands?
How do you z-probe?Some help would be great!
Martin
-
@alpenprinter So sorry it has taken me so long to get back to this.
- Yes, I'm a Fusion360 user.
- I use a version of the DIY CNC Fusion 360 CAM post processor: https://github.com/guffy1234/mpcnc_posts_processor
- The software DOES create the M3 and M5 commands.
- I do 3D probing using a probe block that I bought from Avid.
If you are looking for the code or configuration that I use for my z-probe then you can have a look at my github repo where I store my configuration: https://github.com/n7jti/duet3-avid-cnc
Sorry I'm so late in getting this info back to you. I hope you find it at least interesting if not actually helpful.