Cartesian Geometry Question (Solved)
-
I had been printing items quite happily on my AM8 until I realised (printing raised letters) that the orientation shown by Simplify 3D was a mirror of what was actually happening on the printer.
I have checked that Y is at maximum when the bed is homed to the back of the machine as per Dave's recommendations and that requires a setting of M569 P1 S0 on the Y axis.
I would appreciate it if anyone could advise what changes I need to make to the attached Config.G file to get this printer in sync with my slicer.
Cheers
Peter; General preferences
G90 ; Send absolute coordinates...
M83 ; ...but relative extruder moves
; Drives
M569 P0 S0 ; Drive 0 goes backwards
M569 P1 S0 ; Drive 1 goes backwards
M569 P2 S1 ; Drive 2 goes forwards
M569 P3 S1 ; Drive 3 goes forwardsM350 X16 Y16 Z16 E16 I1 ; Configure microstepping with interpolation
M92 X100 Y100 Z400 E398.57 ; Set steps per mm
M566 X900 Y900 Z12 E120 ; Set maximum instantaneous speed changes (mm/min)
M203 X6000 Y6000 Z180 E1200 ; Set maximum speeds (mm/min)
M201 X500 Y500 Z250 E250 ; Set accelerations (mm/s^2)
M906 X800 Y800 Z800 E800 I30 ; Set motor currents (mA) and motor idle factor in per cent
M84 S30 ; Set idle timeout
; Axis Limits
M208 X0 Y0 Z0 S1 ; Set axis minima
M208 X210 Y210 Z240 S0 ; Set axis maxima
; End stops
M574 X1 Y2 Z0 S1 ; Set active high end stops; Z-Probe
M558 P1 ; Enable Z probe but set dive height, probe speed and travel speed
G31 P500 Z1.04 ;Trigger ThresholdM557 X27:200 Y15:190 S20 ; Define mesh grid
; Heaters
; BL Touch
;M307 H7 A-1 C-1 D-1 ; Disable the 7th Heater to free up PWM channel 5 on the Duex board.M307 H0 B0 S1.00 ; Disable bang-bang mode for the bed heater and set PWM limit
M305 P0 T100000 B4138 C0 R4700 ; Set thermistor + ADC parameters for heater 0
M143 H0 S120 ; Set temperature limit for heater 0 to 120C
M305 P1 T100000 B4138 C0 R4700 ; Set thermistor + ADC parameters for heater 1
M143 H1 S280 ; Set temperature limit for heater 1 to 280C
; Fans
M106 P0 S1 I0 F500 H-1 ; Set fan 0 value, PWM signal inversion and frequency. Thermostatic control is turned off
M106 P1 S0.1 I0 F500 H-1 ; Set fan 1 value, PWM signal inversion and frequency. Thermostatic control is turned off
M106 P2 S1 I0 F500 H1 T45 ; Set fan 2 value, PWM signal inversion and frequency. Thermostatic control is turned on
; Tools
M563 P0 D0 H1 ; Define tool 0
G10 P0 X-30 Y11 Z0 ; Set tool 0 axis offsets
G10 P0 R0 S0 ; Set initial tool 0 active and standby temperatures to 0C
; Automatic saving after power loss is not enabled
; Custom settings are not configured
-
Is the nozzle at the back of the bed when Y=MAX or is the bed all the way back? The coordinate system relates to the nozzle, not the bed, position.
I have set up an Anet A8 that I'm converting to AM8. I can't access the configs right now but I'm sure @wilriker has posted his config.g on this forum. From memory your M569s look slightly wrong to me but try and find Wil's post to compare.
adavidm
-
@adavidm When Y=Max Nozzle is at the front of the bed. I will try to find the post you mentioned. Thanks
-
Most Cartesian machines use the front left of the bed as the origin. I had my original I3 configured so that the endstops were at the minimums (Back right) which worked, though my prints came out 180 degree rotated from what Pronterface was showing me. (Never bothered me enough to reconfigure Marlin to use the Max endstops instead of the Min ones though.)
Mirror image prints would be a problem, and I'd probably recommend that you swap one of the axes around. It would be best if you did it so that the print appears on your print bed the way that it looks on your slicer. like I said, my first printer had it the other way around.
Using the Duet electronics, it's not hard to do at all, it can all be done in software.
change:
M569 P2 S1 ; drive 2 goes forwards
to
M569 P2 S0 ; drive 2 goes backwards
Then change homey.g and homeall.g to move in the opposite direction, since the Duet doesn't differentiate between and endstop being a maximum or a minimum.
If it works better to reverse the X axis instead, it's pretty much the same change, just change drive 1 instead. Change one or the other, so that you get the results on the print bed the correct orientation.
Hmmm. You said mirror image, so it might actually be the X axis that you want to reverse...
-
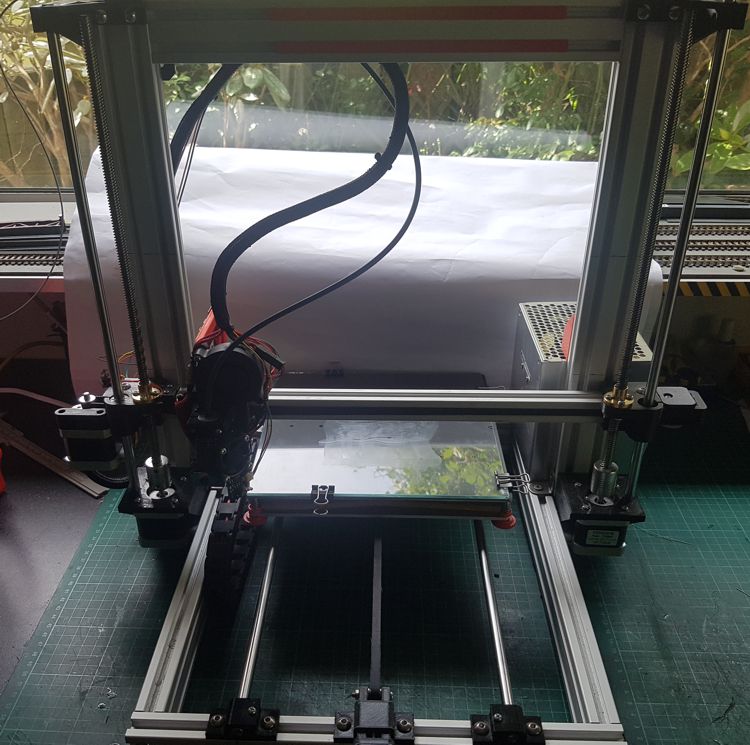
@supraguy Thanks for the advice. That makes sense but just need to clarify which axis belongs to what as it appears to me that you are suggesting reversing the z axis on my setup. Just to clarify, on my printer I have set up as per the Duet Wifi connections:
Drive 0 = X Axis I presume this equates to M569 P0
Drive 1 = Y axis I presume this equates to M569 P1
Drive 2 = Z axis I presume this equates to M569 P2I have attached a photo to show the normal home position.
-
The home position can be wherever you like. What matters is that +X moves the head to the right and +Y moves the bed towards you.
-
I made the following changes:
Home Y: G1 S1 Y -255 F1800
Config.G: M569 P1 S1Now when I press Home Y all I get is a big graunching sound from the Y stepper and the bed doesn't move.
-
Just in case of doubt, I had the bed sitting at the mid point when I attempted the move.
-
@pierre52 Here is the @wilriker post I mentioned:
https://forum.duet3d.com/post/53021
Don't just blindly copy the config.g, there were two different motors used on the A8 that require different settings for some things. Assuming you have plugged the motors into sensible ports (i.e. x motor into the port marked "x") then the same drive configuration should work for you, however:
M569 P0 S1 ; Drive X goes forwards M569 P1 S1 ; Drive Y goes forwards M569 P2 S0 ; Drive Z goes backwards M569 P3 S1 ; Drive E0 goes forwards and the maxima, minima and endstops:
; Axis Limits M208 X-32.5 Y-1.5 Z0 S1 ; Set axis minima M208 X220 Y216 Z220 S0 ; Set axis maxima ; Endstops M574 X1 Y1 Z1 S0 ; Set active low endstop at low end on X, Y and Z adavidm
-
@pierre52 said in Cartesian Geometry Question:
I made the following changes:
Home Y: G1 S1 Y -255 F1800
Config.G: M569 P1 S1Now when I press Home Y all I get is a big graunching sound from the Y stepper and the bed doesn't move.
You will also need to make the following changes:
- change Y2 to Y1 in your M574 command
- that G1 S1 Y command was probably followed by another G1 command and another G1 S1 command. You will need to reverse the Y direction in those lines too.
- when Y homes correctly by itself, make the same changes to homeall.g.
-
@pierre52 on MY printer, your picture would be my X and Y positions being at minimum. (It would have been both at maximum on my first I3, but it's probably better if that's both at minimum.)
So I'd go with reversing the direction of the Y drive.
It appears that you have a space between the Y and the -255 on your homey.g file. there should not be.
My homey.g file is as follows:
; homey.g
; called to home the Y axis
;
G91 ; relative positioning
G1 Z5 F6000 S2 ; lift Z relative to current position
G1 S1 Y270 F1800 ; move quickly to Y axis endstop and stop there (first pass)
G1 Y-5 F6000 ; go back a few mm
G1 S1 Y10 F360 ; move slowly to Y axis endstop once more (second pass)
G1 Z-5 F6000 S2 ; lower Z again
G90 ; absolute positioningbut then my switch is at the maximum position. To edit for your situation (And bed size, you probably don't need 280mm of movement)
; homey.g
; called to home the Y axis
;
G91 ; relative positioning
G1 Z5 F6000 S2 ; lift Z relative to current position
G1 S1 Y-255 F1800 ; move quickly to Y axis endstop and stop there (first pass)
G1 Y5 F6000 ; go back a few mm
G1 S1 Y-10 F360 ; move slowly to Y axis endstop once more (second pass)
G1 Z-5 F6000 S2 ; lower Z again
G90 ; absolute positioningThe change as I suggested should be all that's needed for your config.g
-
@dc42 Dave I changed those settings as you suggested but I am still having issues. When I give the Home Y command, the bed moves towards the front of the machines by about 10mm but then stops and the stepper makes that awful grinding sound.
I then tried reverting HomeY and Config.G back to my original working (but mirrored) code. On Home Y the bed now moves towards the rear of the printer by about 10mm and then again stops and the stepper starts graunching again.
Here is a copy of the relevant files as they stand at the moment:
Config.G
; DrivesM569 P0 S0 ; Drive 0 goes backwards
M569 P1 S0 ; Drive 1 not sure yet
M569 P2 S1 ; Drive 2 goes forwards
M569 P3 S1 ; Drive 3 goes forwards
M350 X16 Y16 Z16 E16 I1 ; Configure microstepping with interpolation
M92 X100 Y100 Z400 E398.57 ; Set steps per mm
M566 X900 Y900 Z12 E120 ; Set maximum instantaneous speed changes (mm/min)
M203 X6000 Y6000 Z180 E1200 ; Set maximum speeds (mm/min)
M201 X500 Y500 Z250 E250 ; Set accelerations (mm/s^2)
M906 X800 Y800 Z800 E800 I30 ; Set motor currents (mA) and motor idle factor in per cent
M84 S30 ; Set idle timeout
; Axis Limits
M208 X0 Y0 Z0 S1 ; Set axis minima
M208 X210 Y210 Z240 S0 ; Set axis maxima
; End stops
M574 X1 Y0 Z0 S1 ; Set active Low end stops; Z-Probe
M558 P1 ; Enable Z probe but set dive height, probe speed and travel speed
G31 P500 Z1.04 ;Trigger ThresholdM557 X27:200 Y15:190 S20 ; Define mesh grid
HomeY
G91 ; relative positioning
G1 Z5 F6000 S2 ; lift Z relative to current position
G1 S1 Y225 F1800 ; move quickly to Y axis endstop and stop there (first pass)
G1 Y-5 F6000 ; go back a few mm
G1 S1 Y225 F360 ; move slowly to Y axis endstop once more (second pass)
G1 Z-5 F6000 S2 ; lower Z again
G90 ; absolute positioning -
The motor grinding like that sounds like a physical binding issue. If it doesn't work with the original configuration (You do back up before you make changes, right?) and it worked before, then something else has changed.
I'd start by checking that the Y axis moves reasonably smoothly through the expected range of motion with the printer powered down. Any binding or resistance in this motion needs to be investigated for cause. I've found that it's usually not difficult to move a belt-driven axis with the motors powered off.
Those look to be the default motor currents set. Are you sure that those are optimal for your motors? I had to increase my extruder motor current a little to get it to run smoothly.
-
@supraguy First up, I really appreciate all your input.
However, yes I did back up the original file and yes I have checked that nothing has changed in the mechanical environment. Also don't forget that the printer was working perfectly before all of this, apart from the fact that the prints were a mirror image of the slicer.The only changes that have made have been to software. My current thinking is that there is a piece of code in there somewhere that is sending competing commands to the Y stepper.
In the interests of complete troubleshooting later today I will probably try swapping the Y stepper motor with an identical fully serviceable one..
-
You can of course also send the contents of the homey.g file to the Duet in the gcode console, where there should be no way for there to be any competing commands.
You can also send the M569 command to set or reverse the direction of the Y drive. (Note please ignore the P2 that I put in before, brain fart, it should have been P1, but I see that you already identified that you don't want to reverse Z direction.)
I did see that it was working before, but I don't see anything in the code that could reverse it.
I think "just to see" I'm going to see if I can reverse the action of my printer, and change it 180 degrees.
-
I think I might have finally resolved this.

Having a careful think about SupraGuy's comments, I resolved to head back to square one and test everything. First up, I swapped the Y stepper with a known serviceable item. I then went back through the Dozuki set up guide and checked that the end stops were all working.
I then disconnected the belt drive on the bed to see if the stepper would move as it should and if so in what direction.
Bingo the Y stepper was doing exactly what it should. I then reconnected the bed with a lot less tension on the belt and Home Y worked again.
Thanks to all for your help.
I have now done the changes to resolve the mirror image problem and again everything appears to be working in the correct sense.
I will now try a print of the offending item that started all this and let you know if everything is still happy happy joy joy.