I am using reprap 2.02
Posts made by scottypres
-
M591 Simple Filament Sensor Troubleposted in Filament Monitor
Hello all,
I have 2 duet wifi boards. A filament sensor works fine on one of them, but the other is not triggering. I have everything wired correctly and when the switch is toggled, the e0step LED light illuminates on the board, so I know the wiring is correct. Switching from M591 P1 to P2 does invert the logic, but the firmware is not detecting when the filament is not present. Its either always on or always off depending on P1 vs P2. Any ideas?
I'm using M591 D0 P1 C3 E0
Here is my config code:
Axis and motor configuration
M669 K1 ; CoreXY modeM584 X0 Y1 Z5:6:7 E3:4:8:9 ; Map Z to drivers 5, 6, 7. Define unused drivers 3,4,8 and 9 as extruders
M569 P0 S0 ; Drive 0 goes forwards (change to S0 to reverse it) X stepper (Rear)
M569 P1 S1 ; Drive 1 goes backwards Y Stepper (Front)
M569 P2 S1 ; Drive 2 goes forwards Unused
M569 P3 S0 ; Drive 3 goes forwards Extruder
M569 P4 S1 ; Drive 4 goes forwards Extruder (unused)
M569 P5 S0 ; Drive 5 goes backwards Front Left Z
M569 P6 S0 ; Drive 6 goes backwards Rear Left Z
M569 P7 S0 ; Drive 7 goes backwards Right Z;Leadscrew locations
M671 X-10:-10:333 Y22.5:277.5:150 S7.5 ;Front left, Rear Left, Right S7.5 is the max correction - measure your own offsets, to the bolt for the yoke of each leadscrewM350 X64 Y64 Z32 E16 I1 ; set 16x microstepping for axes& extruder, with interpolation
M574 X1 Y1 Z0 S1 ; set homing switch configuration (x,y at min, z at max) IF YOU NEED TO REVERSE YOUR HOMING SWITCHES CHANGE S1 to S0
M906 X1400 Y1400 Z1000 E800 I60 ; Set motor currents (mA)
M566 X600 Y600 Z200 E3600 ; Set maximum instantaneous (jerk) speed changes (mm/min)
M201 X1750 Y1750 Z250 E1500 ; Set accelerations (mm/s^2)
M203 X24000 Y24000 Z900 E3600
M208 X-20:268 Y-25:266 Z-5:600 ; set axis maxima and high homing switch positions (adjust to suit your machine)
; set axis minima and low homing switch positions (adjust to make X=0 and Y=0 the edges of the bed)
M92 X800 Y800 Z3200 E837 ; steps/mm; Thermistors
M305 P0 T100000 B3950 R4700 H0 L0 ; Put your own H and/or L values here to set the bed thermistor ADC correction
;If you have a Slice Engineering thermistor, comment out the next line
M305 P1 T100000 B4725 R4700 H0 L0 C7.06e-8 ; Put your own H and/or L values here to set the first nozzle thermistor ADC correction
;If you have a Slice Engineering thermistor, uncomment the next lines. KITS DO NOT SHIP WITH A SLICE THERMISTOR - ONLY UNCOMMENT IF YOU ORDERED ONE
;M305 P1 T500000 B4723 C1.196220e-7 ; Set thermistor + ADC parameters for slice thermistorM307 H0 A274.2 C879.5 D11.0 V24.1 B0 S0.7 ; Bed Heaters
M307 H1 A415.3 C140.1 D3.4 V24.0 B0 ;Heater 1 model
M570 S360 ; Hot end may be a little slow to heat up so allow it 180 seconds
M143 S285; Fans
M106 P0 H-1 ; disable thermostatic mode for fan 0
M106 P1 T45 H1 X255 F25000 ; thermostatically controlled FAN 1 (Hotend)
M106 P2 H-1
M106 P0 S0 ; turn off fans
M106 P1 S0
M106 P2 S0; Tool definitions
M563 P0 D0 H1 ; Define tool 0
G10 P0 S0 R0 ; Set tool 0 operating and standby temperatures
;*** If you have a single-nozzle build, comment the next 2 lines
;M563 P1 D1 H2 ; Define tool 1
;G10 P1 S0 R0 X0 Y17 ; Set tool 1 operating and standby temperatures; Z probe and compensation definition
;*** If you have a switch instead of an IR probe, change P1 to P4 in the following M558 command
; IR PRobe - uncomment the following 2 lines if you have a and IR Probe, and comment out the BLTouch section below
;M558 P1 X0 Y0 Z1 ; Z probe is an IR probe and is not used for homing any axes
;G31 X0 Y30 Z3.7 P500 ; Set the zprobe height and threshold (put your own values here);BLTouch - comment out the following 3 lines if using a IR Probe
M307 H3 A-1 C-1 D-1
M558 P9 X0 Y0 Z1 H5 F200 T6000 A5 S0.02
G31 X2 Y42 Z3.74 P25 ; Customize your offsets appropriately - do a paper test, and put the probed value in the Z value here;Filament Sensor Sunhockey
;M591 D0 P2 C3 S0 E1
;Filament Sensor Duet Laser (CONFIGURE for each filament!)
;M591 D0 P5 C3 R40:350 E3.0 S1 ;(LASER Filament Sensor)
M591 D0 P1 C3 S1;Power Save
M911 S23 R25 P"M913 X0 Y0 G91 M83 G1 Z3 E-5 F1000"
;
T0 ; select first hot e -
Duet Laser Monitor Troubleshooting - M591posted in Filament Monitor
Hi all,
This is my first post, so hello!
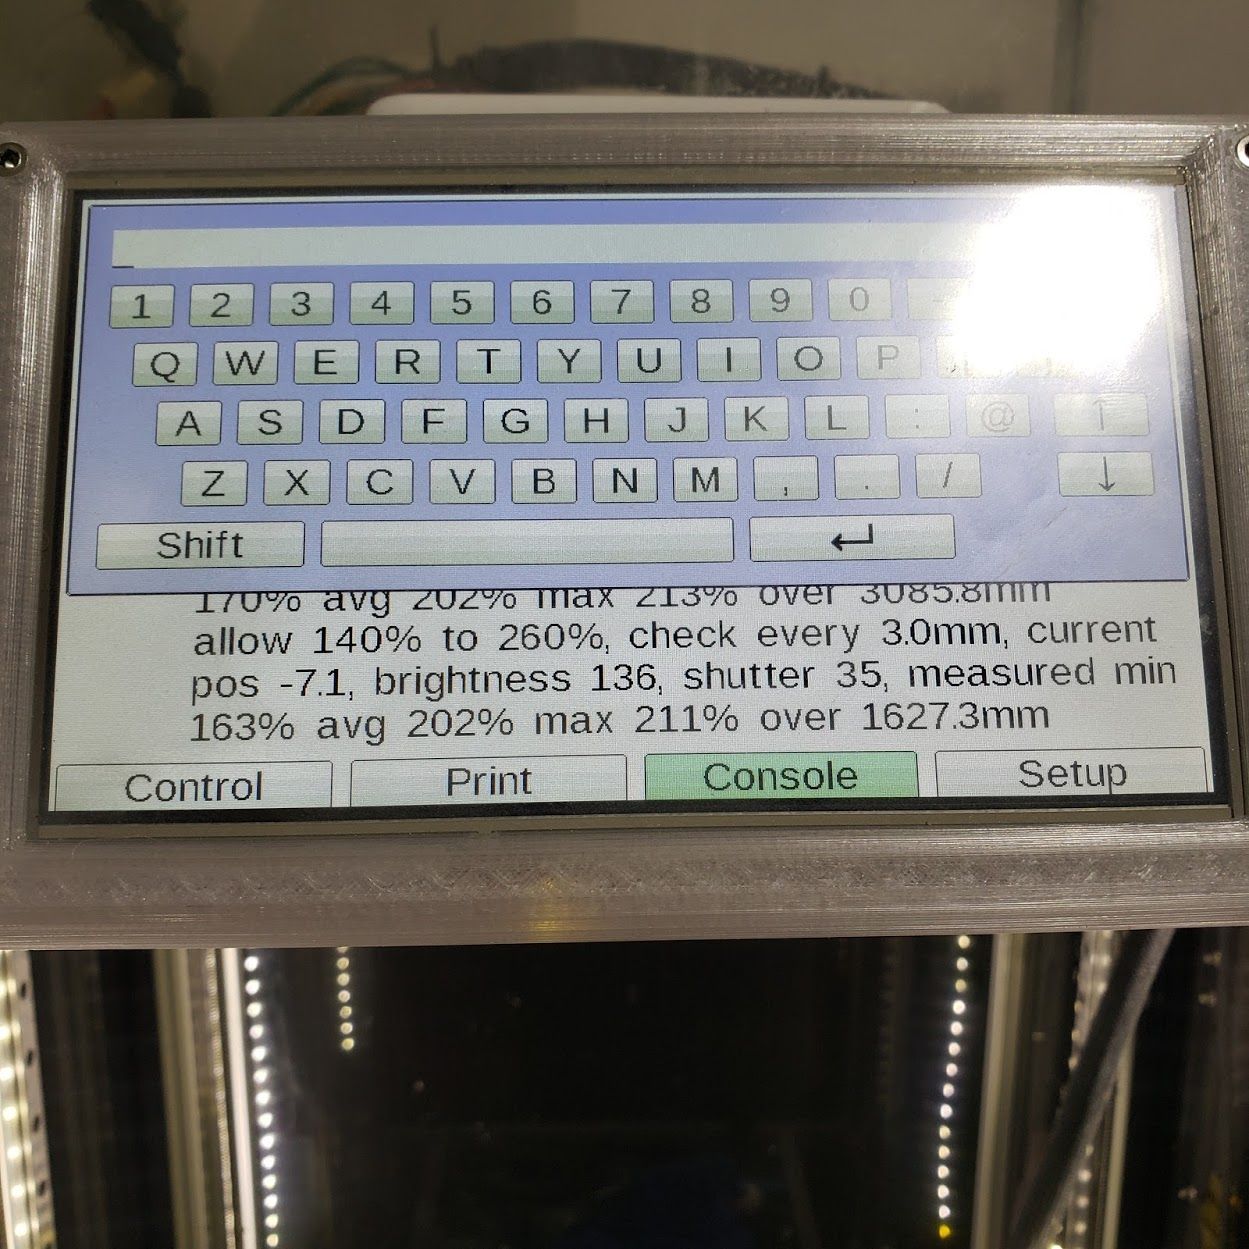
I just installed a duet laser filament monitor on my Railcore 2 and I'm having trouble with the calibration. I am using 1.75mm Carbon fiber Polycarbonate that has no gloss to it. The printed sensor enclosure parts are also made from this material. My min and max % values are approximately double what they should be.
M591 D0 P5 C3 R140:260 E3.0 S1
This is the widest min:max range I've used so far too complete prints without it giving an error that not enough movement is detected. Does anyone have any idea what the issue could be?
