Suggestions for Z-axis on 2 axis (X+Y) kit? Servo? Stepper
-
Hello,
I am working on making a drawbot style machine with an OpenBuilds XY kit and a duet 2. The kit I'm using uses standard NEMA 17s for the X and Y axis, but because it's designed for lasers and other minimal z-axis usage it has nothing to move the pen up and down.
Here's a pic of the kit for reference:

I do have a spare NEMA kicking around I could mount to the carriage, but one of the goals of this machine is to write as fast as possible. I'd prefer to just use a servo since I just need to move a small carriage up / down to control drawing and that would keep the weight of the stuff on the gantry down.
I'm planning on using this awesome design for a 1 axis pen holder, my thought is whether I use a servo or stepper it should be pretty easy to get one of these to "push down" the pen and have the rubber band in the design keep it up off the page while traveling.
I found a threads on here with suggestions and info:
- https://forum.duet3d.com/topic/4853/servos-as-axes - No servo Z-Axis support
- https://forum.duet3d.com/topic/132/servo-support-eventually/5 - Use a servo control board
The most promising one was suggesting using a sparkfun stepper controller board. This should let me move the servo to two distinct positions by turning a GPIO Pin on the duet on/off. Just wanted to get a second opinion that this sounds like a reasonable plan... I assume this means I'll have to have some custom "slicing" that uses different commands instead of G1 Z1, G1 Z1.0 etc. I have worked on some code that turns SVGs into GCODE so it shouldn't be too difficult as long as I understand the GCODE I'm replacing.
Please let me know if you have any suggestions or have done anything like this.
If you want to know what I'm drawing with the robot check out www.robotdrawsyou.com
-
I tested the corexy stage of my 3D printer as a plotter before I finished building the printer. I didn't have a pen lifting mechanism on it, but I did use a short linear guide to let the pen move up and down to follow the surface of the paper even if it wasn't parallel to the XY plane of the mechanism. The linear guide prevented any unwanted lateral motion completely. The weight of the linear guide acted to keep the pen down on the paper. It wouldn't be too hard to make a servo or even solenoid operated lift to pick up the pen when needed.
One thing I found was that it was very easy to plot too fast. I went through several different ball point pens before I found one that would let the ink flow fast enough to keep up with the mechanism without any skips. I didn't want to use felt tip pens because they inevitable squash flat and the line keeps getting thicker and thicker unless you keep the downward pressure very light. They also tend to blob if the pen stops moving even briefly (if you're plotting on paper).
The mechanism you linked has all the motors on the moving parts of the structure. That means you have to run cables to motors that are moving, and you're moving around a lot of extra weight, and that will limit plotting speed and acceleration. Have you looked at corexy mechanisms? The motors that position the pen are fixed, so moving mass is lower which translates to faster plotting speeds, and simpler construction because you don't have to connect cables to moving motors. You'll still have to run a cable to the carriage to lift the pen, but that should be pretty easy. I built a corexy sand table that's about 750 x 1650 mm plotting area using a corexy mechanism and I run it at 500 mm/sec. I have to limit the speed and acceleration because the magnetic coupling between the ball that draws in the sand and the magnet being moved is not very strong. In a plotter there would be no such limitations and you could make it fly. The sand table mechanism uses a 45 mm square t-slot frame and uses printed parts to hold bearings, motors, and pulleys. It uses the slots in the frame as the Y axis guides. It's extremely easy to build. Here's one of the early versions of the mechanism. There have been a few refinements since that video was made, but it's largely the same.
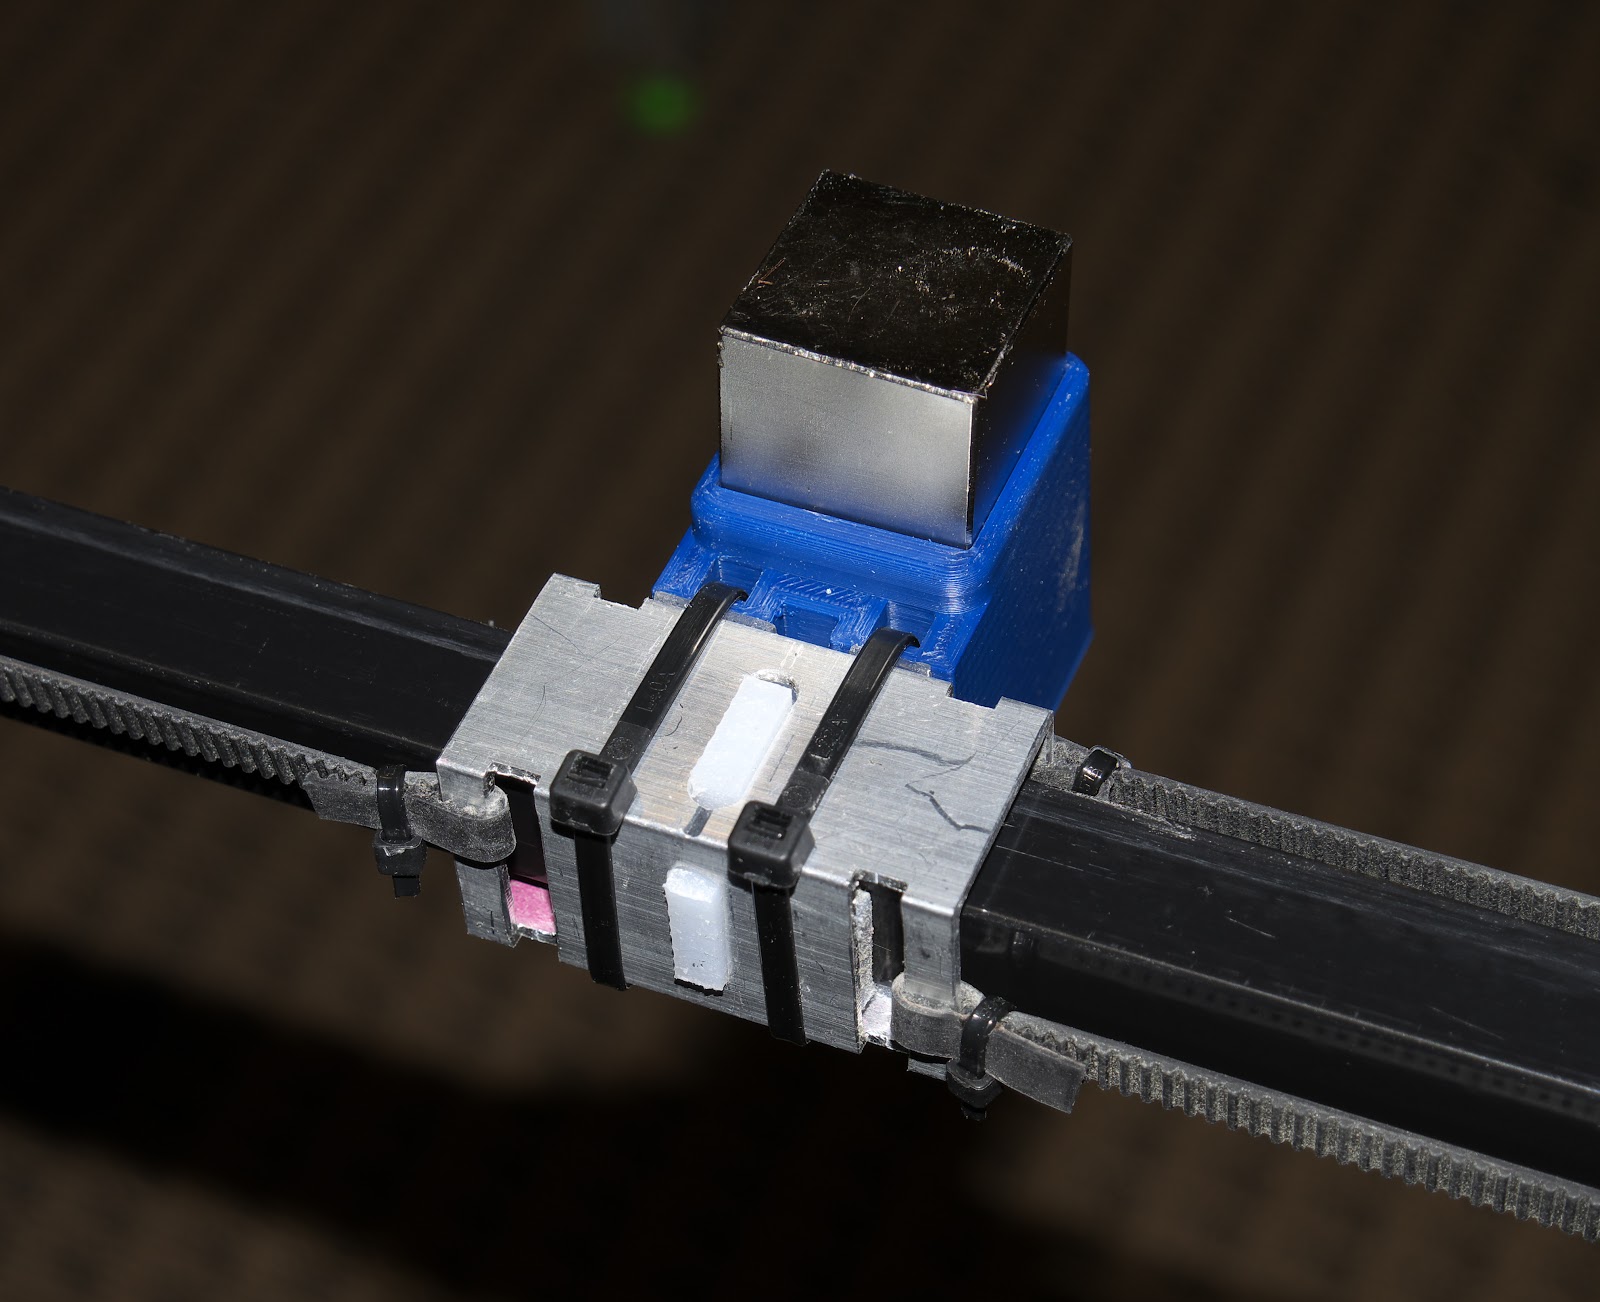
This is the final design of the magnet carriage- it uses a printed piece (blue) to hold the magnet and a spring. The printed part could easily be replaced with a pen holder.

The X axis of the mechanism uses a square aluminum tube as a guide and has a larger square tube that fits over it for the magnet carriage. I used UHMW bearings inside the carriage tube to ensure low friction on the X axis guide tube. The Y axis also uses UHMW bearings that fit into the t-slots in the mechanism's frame. The original design used some NEMA-23 steppers that I had on-hand, but I have since converted to NEMA-17 motors. I used 2 A motors, but operate them at only 600 mA, so you could actually use much smaller motors if you were so inclined.