Making an epoxy granite machine base
-
@Nxt-1 Saw this and thought of you... https://hackaday.com/2020/02/12/concrete-solder-squid-is-a-solid-solution/
In the video, he uses a sander to provide some 'jiggle' to settle the mix. I'd also follow @smece advice https://forum.duet3d.com/post/131047 about getting some vacuum (even partial is good) by putting it in a bin bag and connecting up a vacuum cleaner; have you ever used those vacuum bags for clothes storage? Even with a vacuum cleaner, they draw out a huge amount of air. Though you may have problems with the mix being sucked into voids that you actually want to keep clear, so you may have to get creative. Both shaking and vacuum will improve the surface finish more than any other technique, and give you a flatter surface. Covering the mold and filling up to the top won't, because air bubbles get trapped, and as the mix dries it will shrink away from the top surface. If the top surface is the most important to get flat and nice (sharp corners), turn the mold upside down.
I've only done a small amount of concrete casting (some crazy-shaped flower pots), and a long time ago, but that's what helped get a reasonable finish with a pretty rough mix!
Ian
-
Ideal is to degas resin in vacuum and cure it under pressure; I wouldn't want to cure it under vacuum unless you go all the way to vacuum infusion.
-
@bearer I suppose I was thinking more of concrete casting than epoxy/granite.
Ian
-
Last Sunday was finally the big day. Oh and warning, picture heavy post
")
Prep
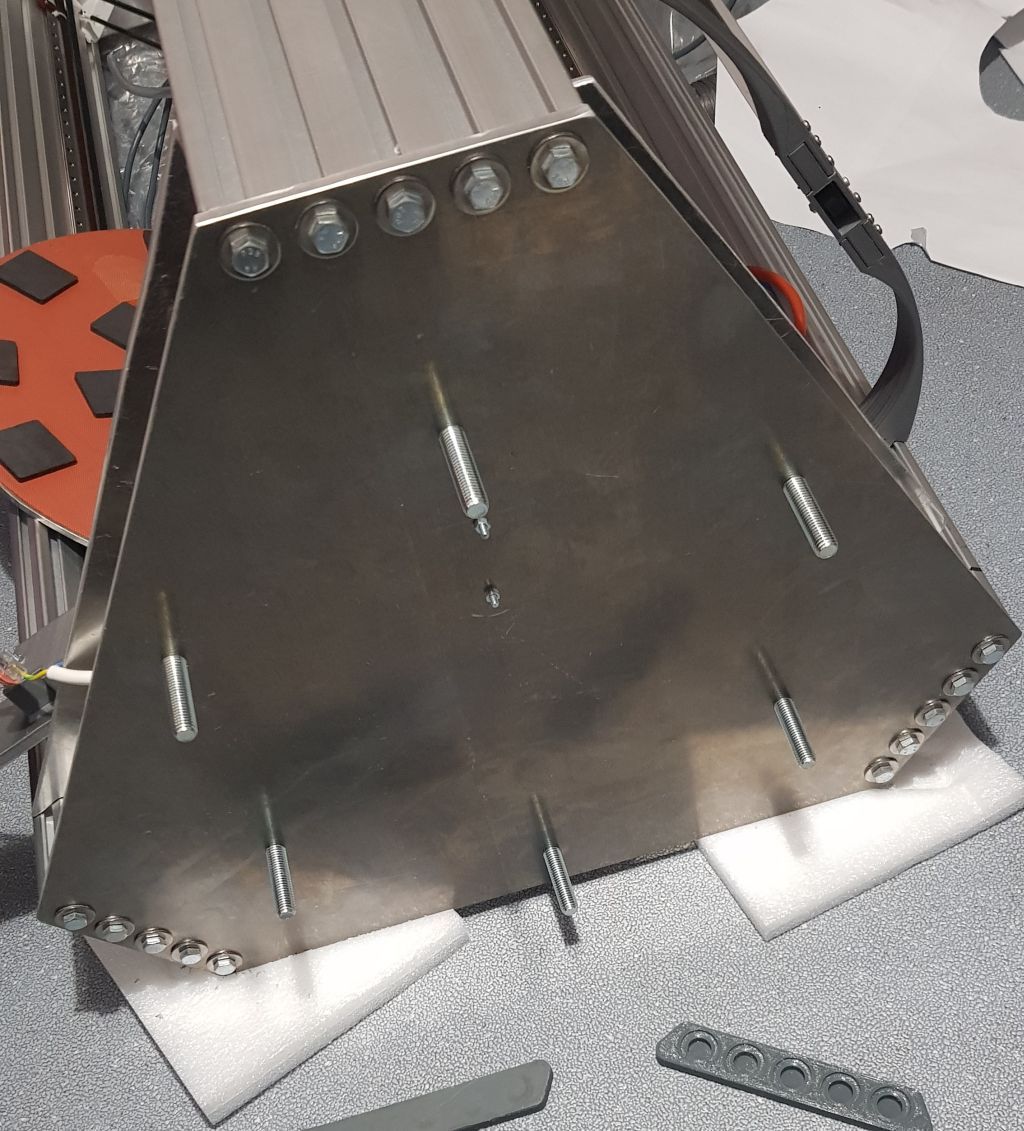
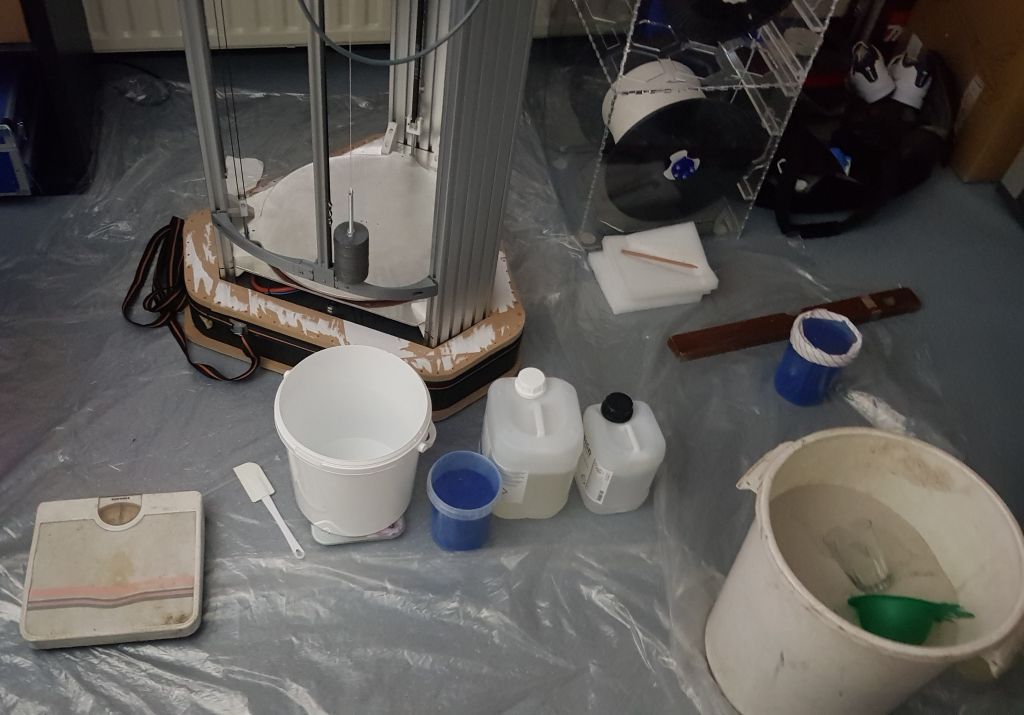
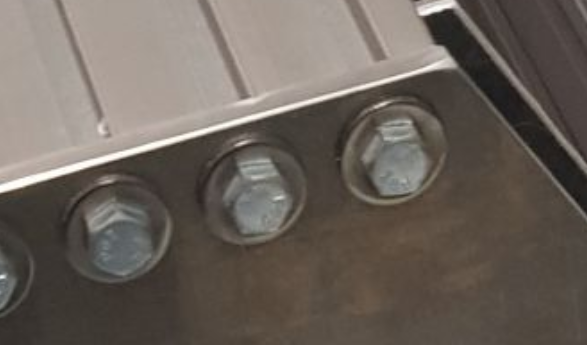
I started by drilling some d10mm holes in the bottom plate of the printer to allow M12 threads to be tapped. Six bolts were screwed in downwards, purely to have some extra surfaces where the epoxy can adhere to. (picture 1) Then followed a quick test fit with the empty mold and prepping my work area. All materials and tools, check. (picture 2)
Epoxy mixing
Time to start mixing. I ended up using a 15%w epoxy 85%w white sand mix. It might be interesting to note that the epoxy I used is, according to the seller, optimized for large pours. This means slow cure (180-240min working time and 3-7 days for a full cure) and low viscosity when mixed. I chose this epoxy because it gave me enough time to mix all the material I needed and I believe in this application low viscosity is preferable.
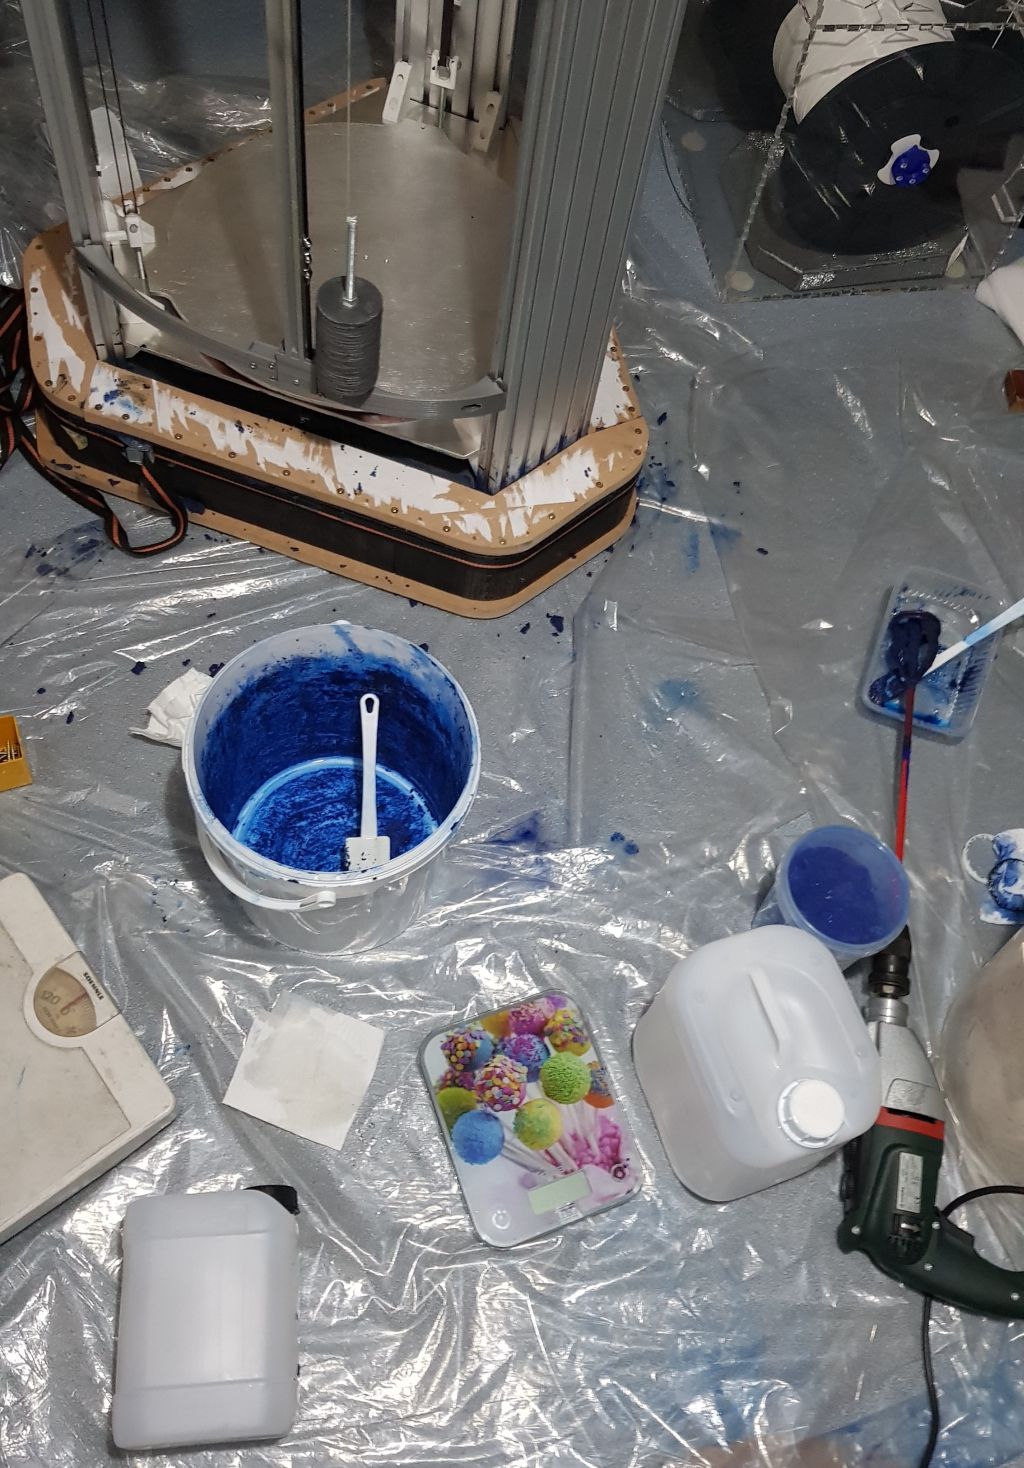
Seeing what mixing bucket I had available and the expected weight of the mixture I planned split up the mix into five batches of about 7,5kg each. Each batch started with measuring epoxy part B, then part A gets added to that and both get mixed thoroughly. Next up the sand gets added and the batch is mixed thoroughly again. Finally, about 50g of blue pigment is added and the mixture is mixed thoroughly one last time. Mixing each time ensure the previous step is always extra well mixed. Also, adding the pigment last and mixing it again makes for a good indicator of how well you mix. If the batch is nice a equally blue, you're
goldenblue.Casting
The mixture has a wet-ish sand texture with a good hint of sticky. If you want can more or less pour it, but it in all practicality it's to viscous to pour. Therefore, I just scooped a handful at a time and dropped it in the mold. As the printer was already in place (way to heavy to mess with lifting it on the mold during the casting) and the gap between the printer and the side of the mold is only about 35mm, using my hands to push the epoxy around seemed a decent way of working.
Due to the limited space around the mold and tiredness setting in at the moment I did not really compact the mixture when inside of the mold, except for that which I could to with my hand. Once the mold was completely filled, I added some extra mix on top before closing the mold up with the top wood pieces. I did this so that hopefully the clamping force did a small part in compacting the mixture.
Sadly, due to the potency of the pigment used it did not risk taking out my phone to snap some pictures while casting. Picture 3 is from when the mold was closed up.
Misc
In the previous post you can see the round center piece of the mold. This part was added one, to have somewhere the printer can rest on while casting and two, to save epoxy. Going in, I knew I would be a little short on mixture with the quantity of epoxy that I had bought. Therefore, I dimensioned the inner piece so that I would end up with roughly 2kg of spare EG mix. Picture 4 shows what was left over after casting, I have not weighed it yet but I believe it's between one and two kg of EG.
I made around 46kg of EG mix in total and it took me just about four hours to do the job. As I am writing this I also realize I did not coat the mold sides with oil, as I had planned. I guess opening the mold will be interesting.
Now the long wait for the EG to cure hase begun. I certainly hope it gives a decent result, just being pretty to look at if nothing else.
1
2
3
4

-
Looks like the demise of a smurf or two, but fingers crossed for the end result. Good call on the slow cure epoxy, keeping the exothermic reaction under control is much more manageable.
-
@bearer said in Making an epoxy granite machine base:
Looks like the demise of a smurf or two, but fingers crossed for the end result. Good call on the slow cure epoxy, keeping the exothermic reaction under control is much more manageable.
I will not disclose what the exact type of dye I used, nor where I got it from
-
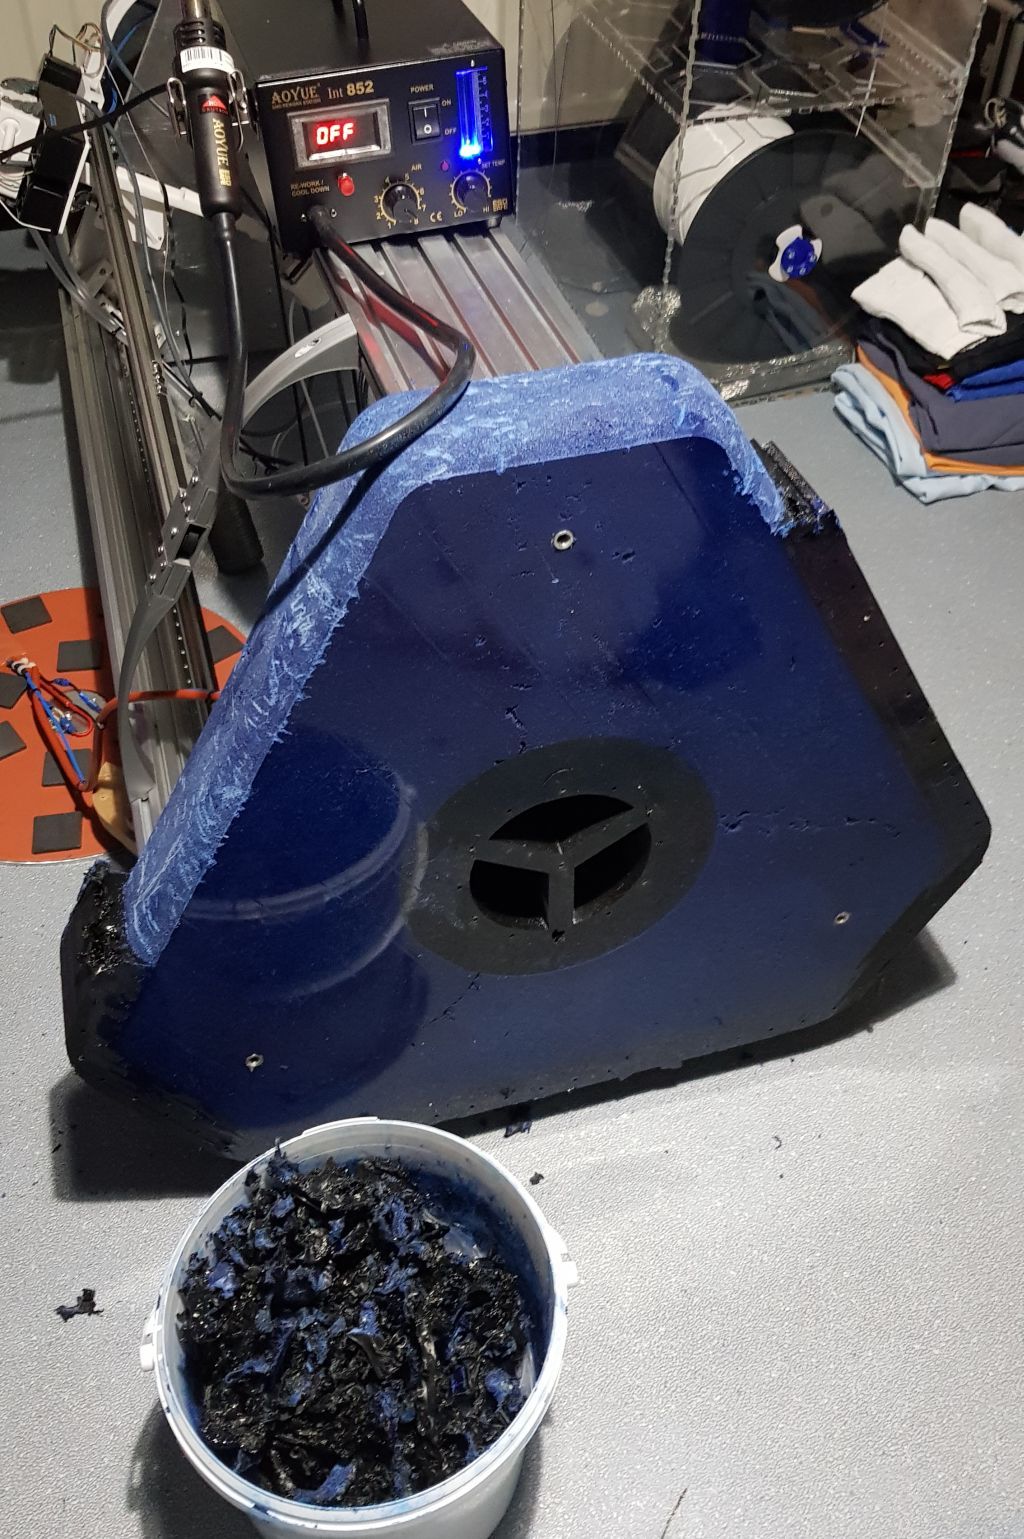
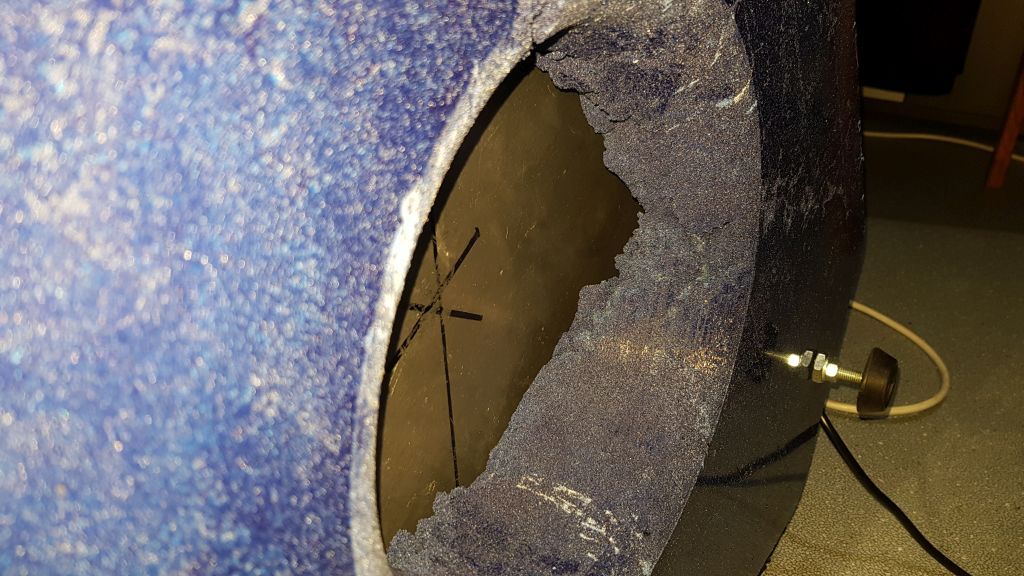
Time for a quick update. I started opening the mold on Wednesday evening by removing the top mold pieces and continued on Thursday with the removal of the bottom wood plate. Removing the wood was not to hard once all the screws were out and some light percussive maintenance was applied
Removing the printed walls of the mold is another story though.
@Nxt-1 said in Making an epoxy granite machine base:As I am writing this I also realize I did not coat the mold sides with oil, as I had planned. I guess opening the mold will be interesting.
Long story short, I am now removing the mold slowly by heating it with my hot-air rework station and pulling piece by piece off with a set of pliers. The process is painstakingly slow, but in the end I do end up with a clean and intact molded base, so you won't see me complaining to much hehe.
-
nothing that you can't rub out with a smurf dipped in some lapping compound;)
looking forward to seeing how it handles, thanks for sharing

-
In the end things never work out exactly as planned. It never has, and it never will. Just live with it. But it sure looks nice with the chopped smurf in it! Must have been royal smurfs too, those have blue blood.
For the next epoxy granite or composite project: get some mold release wax and PVA. I use these:
https://www.carbonwinkel.nl/los-oplosmiddelen/pva-film?hoeveelheid=250_ml_fles
Can be found cheaper also.
-
@Nxt-1 said in Making an epoxy granite machine base:
This means slow cure (180-240min working time and 3-7 days for a full cure)
That also spreads the exotherm out over time. I've seen very hot epoxy ruin molds many times...
Anyway, looks MASSIVE. I love it!!!
-
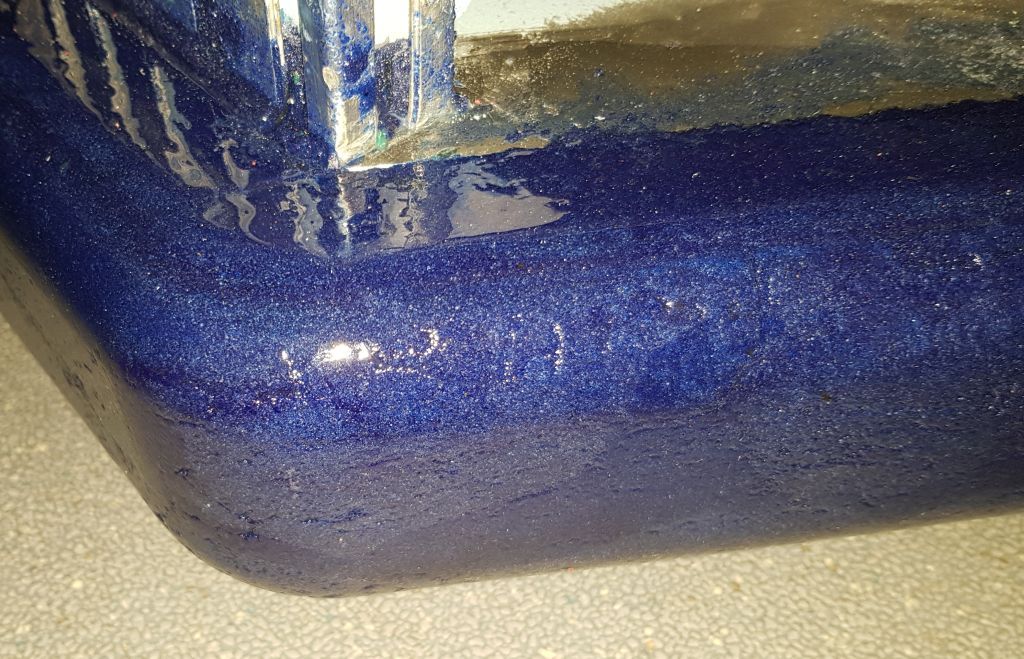
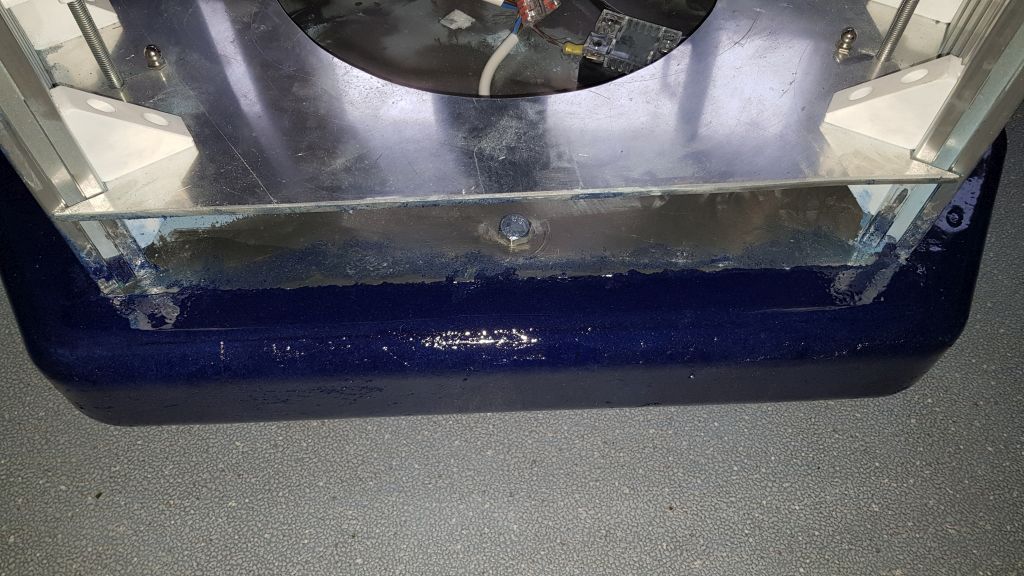
After 4,5 days of heating plastic, tearing it of and burning my hands, the mold is finally entirely removed. Some results/remarks can be made already, so it is time for an update again.
First, the center of the cast is not looking great, even though you one hopes for the best, this does not come as a surprise. While making the cast, the machine was placed on top of the empty mold and then the mold was filled from the sides. Therefore, the EG mix will not reach the upper-inner most edge of the mold without a large vibration insert or heavy duty compacting. Physics I guess
This part of the mold is never visible to could be worse I guess.The DIY threaded inserts I made work a treat and the rubber machine leveling feet screw in nicely.
The machine is now standing up again and looking solid. Before I stud it upright, I grabbed some scales to get a measurement on my craziness. On scale sat at the very top end a measured 13kg, the other one was placed at the other side about 20cm from the bottom plane of the printer, showing 95kg. Quick mafs leads to 98kg at this moment (this will still increase later on, keep reading
).Up next is mainly cleanup and finishing work. At the edges of the mold and where different mold pieces interfaced, there were some epoxy ridges that I already removed with a rotary hammer (that was overkill for the job tbh). I still plan to further smooth rough edges with a flap wheel on an angle grinder, as sand paper on this material seems to be not exactly my definition of 'fun'. I am still debating whether I am going to buy and apply some kind of clear epoxy top coat to seal the whole deal (mainly the sides) and give it some more of that glossy finish.
I mentioned that the 98kg is still going to increase and that is because what got this party started in the 1st place is the cavities in the three main extrusions. At the moment, these are still hollow but will get filled with the same white sand that I used in the EG mix. I expect this will add an extra 5-10kg of fun to the machine.
Last, I think I might need to get rid of smurf evidences on my floor. If that's even possible, because it seems pretty well pigmented on there.


-
Holy Moly!
-
if you can't get the pigment out just to a chalk outline of a smurf..?
are you planning on having some thermal insulation between the bed, or will it stay at temps well below where the epoxy start getting softer?
-
@bearer said in Making an epoxy granite machine base:
are you planning on having some thermal insulation between the bed, or will it stay at temps well below where the epoxy start getting softer?
It might not be very clear in the previous pictures, but in order for the heat to creep from the bed all the way to the epoxy, I would need to be rocking some pretty serious bed temps
. In fact the bed only makes contact with the three ball joints it rests on. (the balls from that came with the smart effector actually)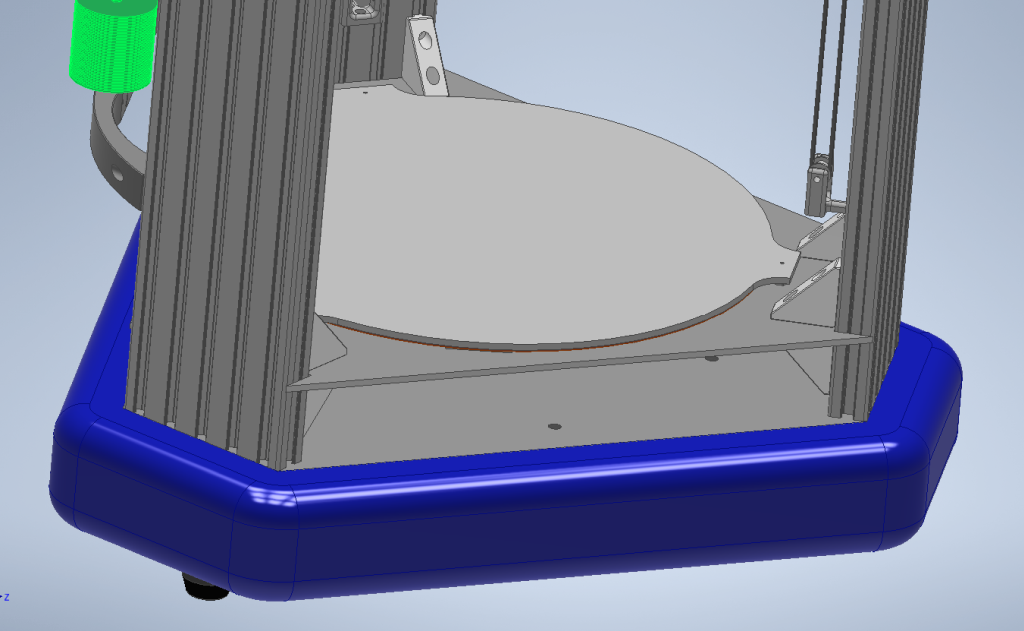
-
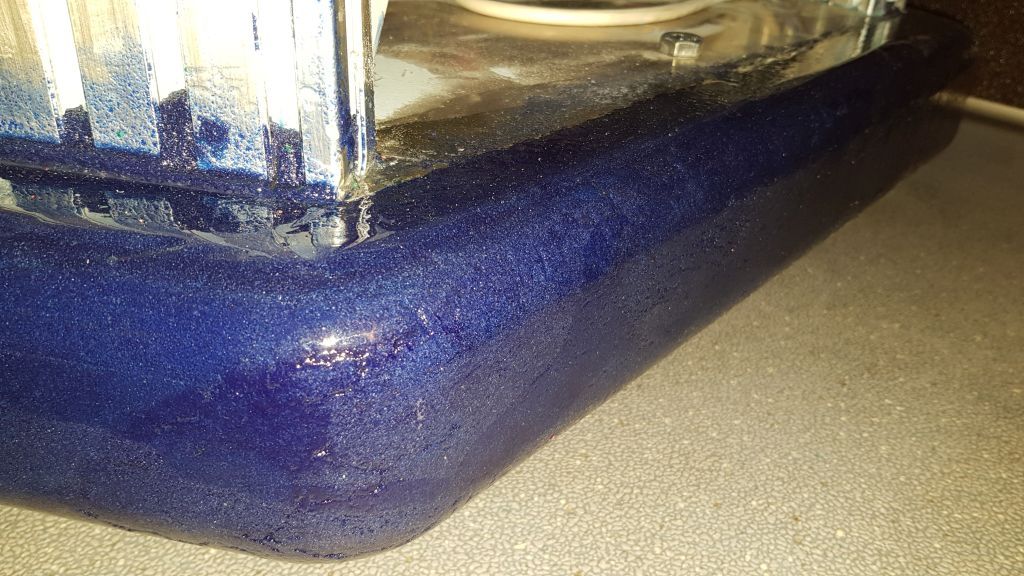
Finally a next progress report
I got some transparent high gloss top coat on polyester base. This is what was recommended by the same place that I got my epoxy from. I applied four coats with progressively finer sanding in between the layers. I am quite happy with the result, the EG base is now more or less smooth to the touch on the sides and perfectly glossy on top.
The next step is to fill the towers with sand. And I also have some materials on the way to replace the white printed corner brackets with some more rigid 3060 metal brackets.
-
@Nxt-1 said in Making an epoxy granite machine base:
drilling some d10mm holes in the bottom plate of the printer to allow M12 threads to be tapped. Six bolts were screwed in downwards, purely to have some extra surfaces where the epoxy can adhere to. (picture 1) Then followed a quick test fit with the empty mold and pr
How did you fixed the bolts in the vertical rail ? Or what type of profile was it?
-
@c310 said in Making an epoxy granite machine base:
@Nxt-1 said in Making an epoxy granite machine base:
drilling some d10mm holes in the bottom plate of the printer to allow M12 threads to be tapped. Six bolts were screwed in downwards, purely to have some extra surfaces where the epoxy can adhere to. (picture 1) Then followed a quick test fit with the empty mold and pr
How did you fixed the bolts in the vertical rail ? Or what type of profile was it?
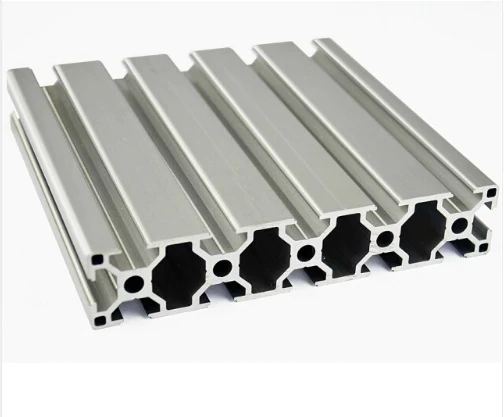
The towers are 30150 aluminium extrusion, with the center holes tapped to M10. The M12 bolts you quoted actually sit the other way around in the frame. The pike trough the bottom and sit in the epoxy base.
-
I never thought I would see a Delta that would approach the weight of my corexy. 104KG. Never even considered filling the extrusions with sand though. That would add another 15KG for me. And you'll never catch up once I add the drawers.
-
@macguyver said in Making an epoxy granite machine base:
I never thought I would see a Delta that would approach the weight of my corexy. 104KG. Never even considered filling the extrusions with sand though. That would add another 15KG for me. And you'll never catch up once I add the drawers.
There are plans in the making for a V2 of the printer that would add, guesstimating, another 30kg to the printer
-
@Nxt-1 Have you considered putting the aluminum base at the bottom of the casting and encapsulating the extrusions in the casting? Would probably add a tremendous amount of rigidity and dampening.