Just connected
-
Hi guys hope I’m posting in the right area?
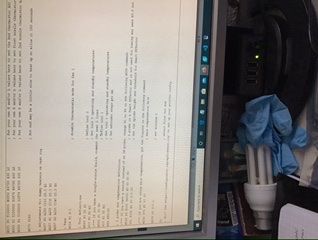
 complete Newby to duet 2 WiFi, I’ve managed to configure the WiFi and then connected to DWC and it immediately shows this fault see photo, The board is connected to my computer via the usb lead with no connections at all to the printer (TronxyX5SA) is this normal or is something wrong?![alt text]
 -
@Saroleve Your temperatures are all at 2000C, which is triggering the fault when you try to enable T0. Most likely an error in the configuration. Post your config.g, and send M115 to the Duet (which will show your firmware version) and post the response to that, too.
Ian
-
Thanks for reply, the only thing I have done is setup the WiFi ,altered nothing.
-
Oops might quite sorted upload
-
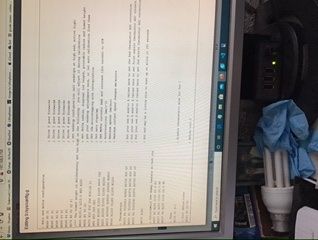
@Saroleve Those are low resolution, and impossible to read! Please post the text, not images of text. You should be able to cut and paste the text into your reply. If you then highlight the test and use the 'code' tags (the ones that look like </>) from the edit bar at the top of the message window, it will look like
thiswhich is much more readable for us, to help you.
Ian
-
@Saroleve Also, 2000C means the temperature input is short circuited (or config.g is incorrect), while -273C means open circuit (nothing connected to pins).
Ian
-
Sorry for the mess about a bit new to all this so please bear with me, as i said above only thing i have done is setup the wifi connection and gone to duet test and shows the faults. thanks
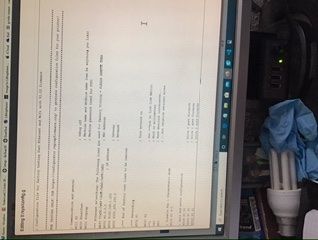
; Configuration file for factory testing Duet Ethernet and Wifi with V2.03 firmware
FOR TESTING ONLY! USE https://configurator.reprapfirmware.org/ to generate configuration files for your printer!
; Communication and general
M111 S0 ; Debug off
M550 PDuetTest ; Machine name and Netbios name (can be anything you like)
M551 Preprap ; Machine password (used for FTP)*** Ethernet networking: The following lines are used for factory testing - PLEASE REMOVE THEM
M540 P0xBE:0xEF:0xDE:0xAD:0xFE:0xED ; MAC Address
M552 P0.0.0.0 ; IP address
M554 P192.168.1.255 ; Gateway
M553 P255.255.255.0 ; Netmask;*** End of factory test lines to be removed
;*** Networking
M552 S1 ; Turn network onM555 P2 ; Set output to look like Marlin
G21 ; Work in millimetres
G90 ; Send absolute coordinates...
M83 ; ...but relative extruder moves; Disable Fan 1 thermostatic mode
M106 P1 H-1; Axis and motor configuration
M569 P0 S1 ; Drive 0 goes forwards
M569 P1 S1 ; Drive 1 goes forwards
M569 P2 S1 ; Drive 2 goes forwards
M569 P3 S1 ; Drive 3 goes forwards
M569 P4 S1 ; Drive 4 goes forwards
M574 X2 Y2 Z2 S1 ; set endstop configuration (all endstops at high end, active high)
;*** The homed height is deliberately set too high in the following - you will adjust it during calibration
M665 R105.6 L215.0 B85 H250 ; set delta radius, diagonal rod length, printable radius and homed height
M666 X0 Y0 Z0 ; put your endstop adjustments here, or let auto calibration find them
M350 X16 Y16 Z16 E16:16 I1 ; Set 16x microstepping with interpolation
M92 X80 Y80 Z80 ; Set axis steps/mm
M906 X1000 Y1000 Z1000 E800 I60 ; Set motor currents (mA) and increase idle current to 60%
M201 X1000 Y1000 Z1000 E1000 ; Accelerations (mm/s^2)
M203 X20000 Y20000 Z20000 E3600 ; Maximum speeds (mm/min)
M566 X1200 Y1200 Z1200 E1200 ; Maximum instant speed changes mm/minute; Thermistors
M305 P0 T100000 B3950 R4700 H30 L0 ; Put your own H and/or L values here to set the bed thermistor ADC correction
M305 P1 T100000 B3974 R4700 H30 L0 ; Put your own H and/or L values here to set first nozzle thermistor ADC correction
M305 P2 T100000 B3974 R4700 H30 L0 ; Put your own H and/or L values here to set 2nd nozzle thermistor ADC correctionM570 S180 ; Hot end may be a little slow to heat up so allow it 180 seconds
; Adjustments for dummy heaters on test rig
M307 H0 A250 C140 D5.5 B1
M307 H1 A250 C140 D5.5 B0
M307 H2 A250 C140 D5.5 B0; Fans
M106 P1 S-1 ; disable thermostatic mode for fan 1; Tool definitions
M563 P0 D0 H1 ; Define tool 0
G10 P0 S0 R0 ; Set tool 0 operating and standby temperatures
;*** If you have a single-nozzle build, comment the next 2 lines
M563 P1 D1 H2 ; Define tool 1
G10 P1 S0 R0 ; Set tool 1 operating and standby temperatures
M92 E80:80 ; Set extruder steps per mm; Z probe and compensation definition
;*** If you have a switch instead of an IR probe, change P1 to P4 in the following M558 command.
M558 P5 F100 T6000 X0 Y0 Z0 H3 ; Z probe is a Smart Effector and is not used for homing any axes R0.4 not used. Reduced F300 to 100
G31 P100 X0 Y0 Z-0.25 ; Set the zprobe height and threshold for Smart Effector;*** If you are using axis compensation, put the figures in the following command
M556 S78 X0 Y0 Z0 ; Axis compensation hereM208 S1 Z-0.2 ; set minimum Z
T0 ; select first hot end
; M117 Use https://configurator.reprapfirmware.org/ to set up your printer config -
@Saroleve said in Just connected:
FOR TESTING ONLY! USE https://configurator.reprapfirmware.org/ to generate configuration files for your printer!
You need to visit the configurator website to create the config for your printer.
Regards
Paul -
@Saroleve Now please send M115 to your Duet, and post the reply.
Ian
-
@Saroleve said in Just connected:
FIRMWARE_NAME: RepRapFirmware for Duet 2 WiFi/Ethernet FIRMWARE_VERSION: 2.05.1 ELECTRONICS: Duet WiFi 1.02 or later FIRMWARE_DATE: 2020-02-09b1
Thanks