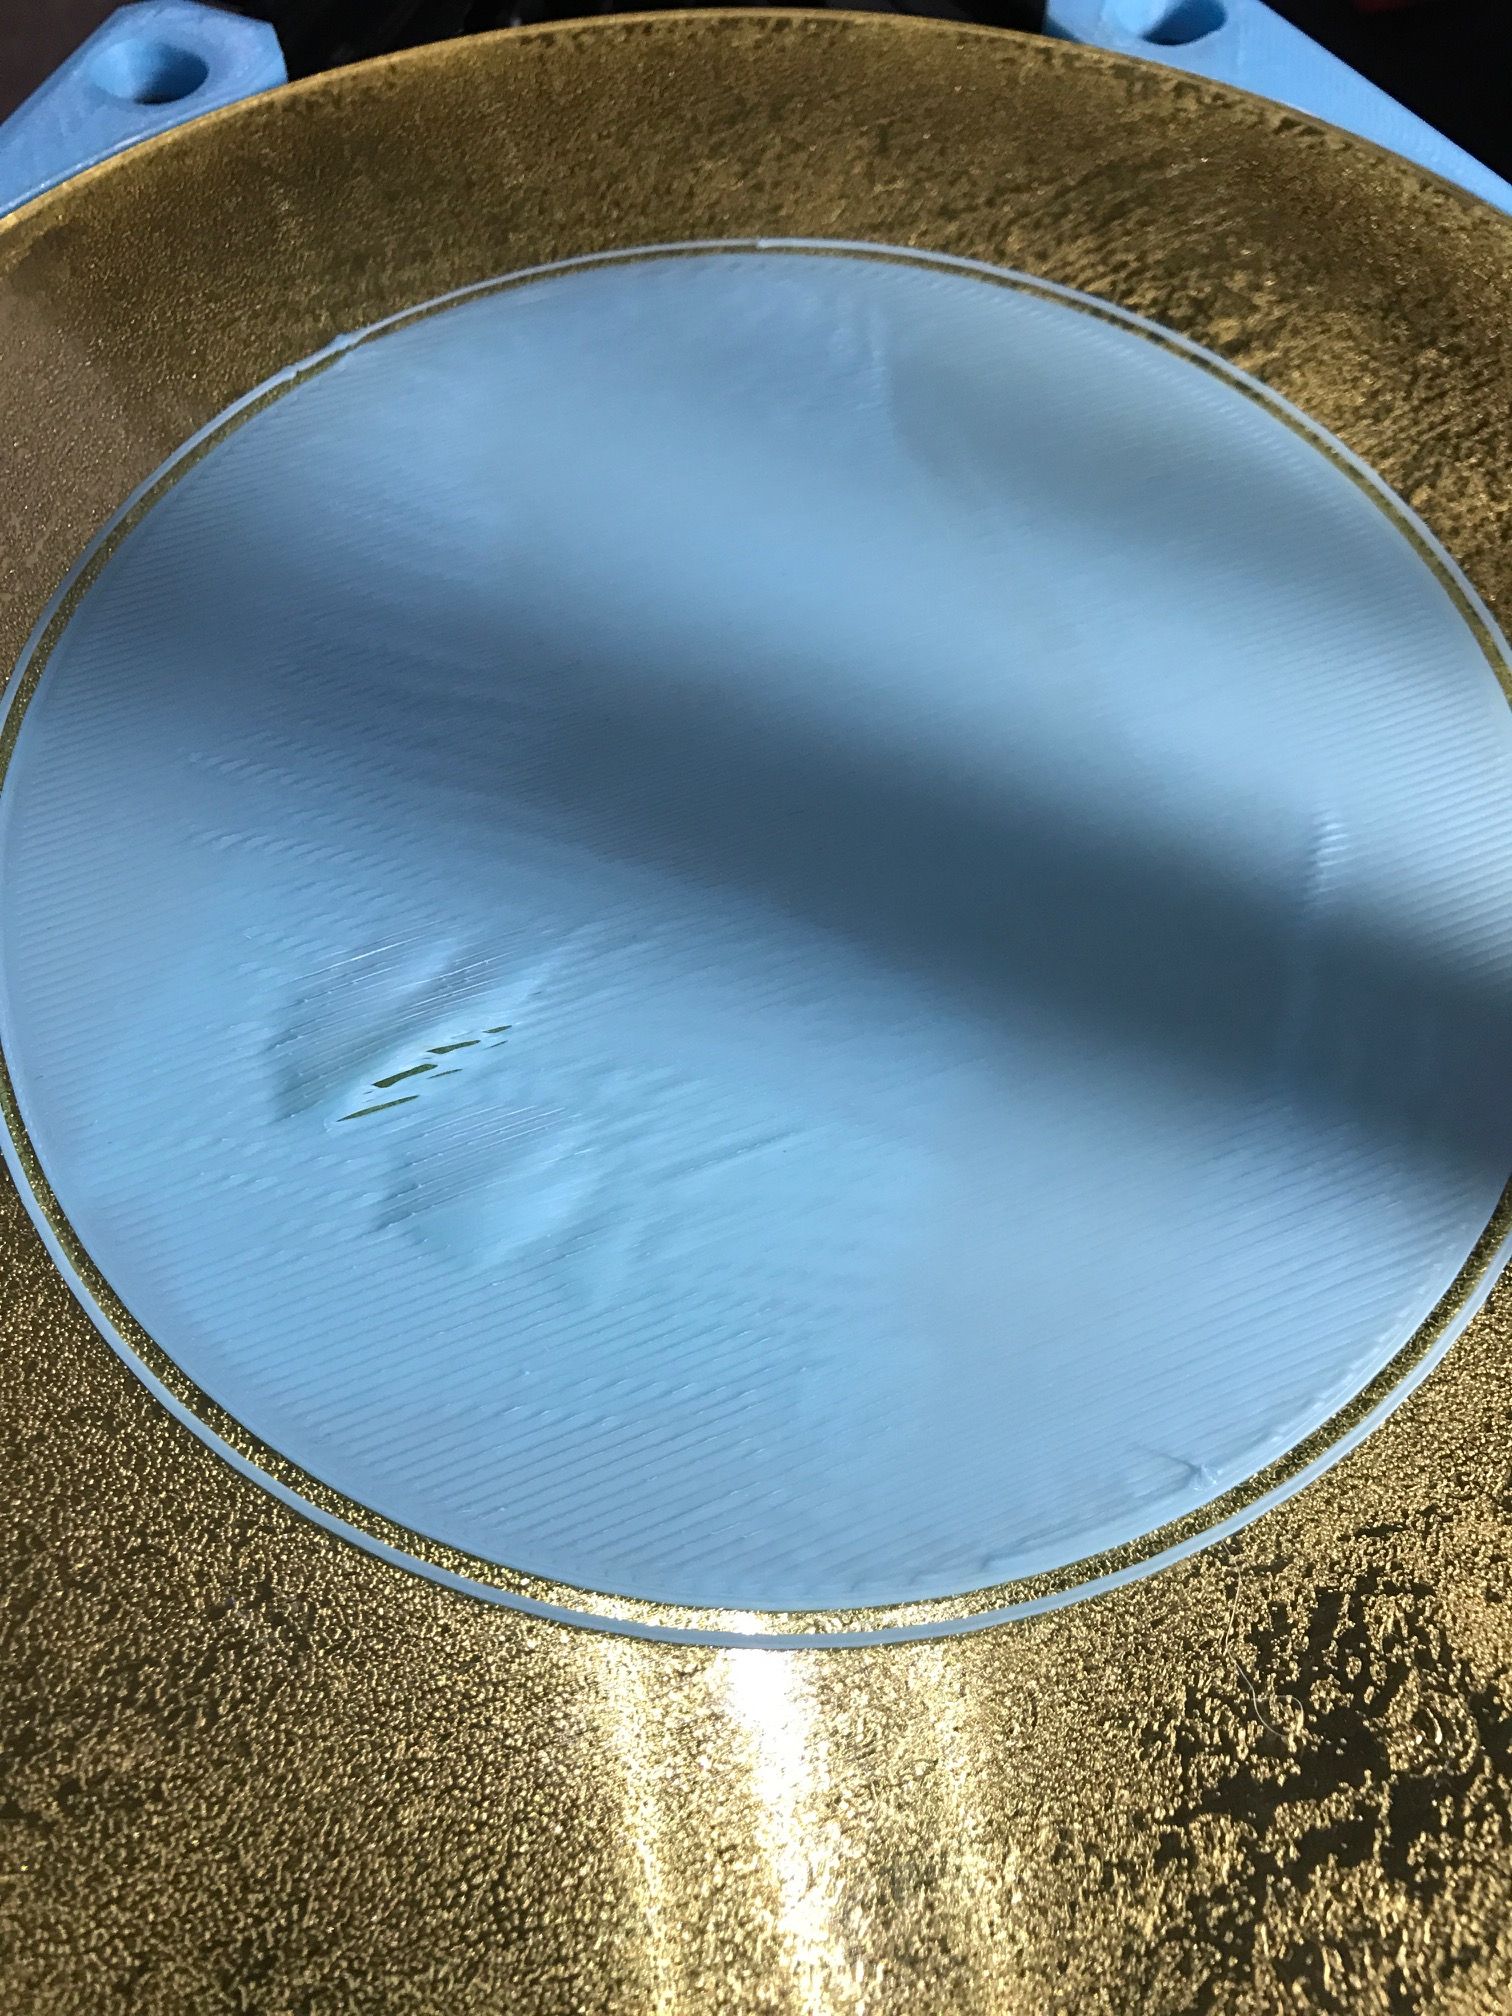
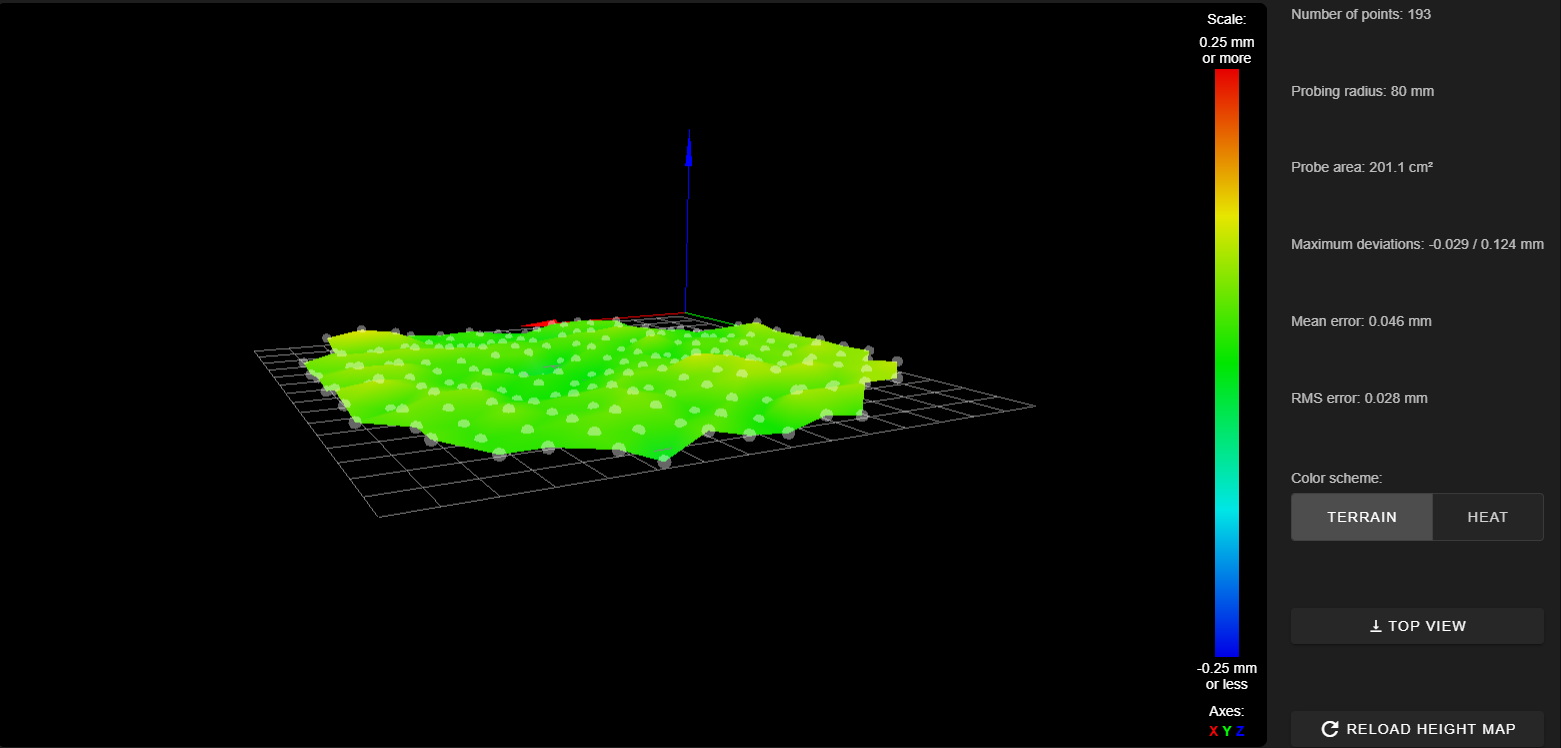
Delta - First layer issues
-
Hi,
This is my first time building a delta printer, and I've been having issues laying down an even first layer. The print appears to have some sort of pattern to it. I feel I might have something wrong with my configuration. I've been trying to solve it for a few days without any luck, any help would be greatly appreciated!
Specs:
Duet WiFi 2 - Firmware: 2.05.1
Duet Delta Smart Effector
Hyden delta arms (215.80)
8MM MIC6 Heated bed.config.g
; Configuration file for Duet WiFi (firmware version 2.03) ; executed by the firmware on start-up ; ; generated by RepRapFirmware Configuration Tool v2.1.8 on Fri Apr 17 2020 16:24:02 GMT-0700 (Pacific Daylight Time) ; General preferences G90 ; send absolute coordinates... M83 ; ...but relative extruder moves M550 P"MiniKossel" ; set printer name M665 R105.6 L215.8 B85 H340 ; Set delta radius, diagonal rod length, printable radius and homed height M666 X0 Y0 Z0 ; put your endstop adjustments here, or let auto calibration find them ; Network M552 S1 ; enable network M586 P0 S1 ; enable HTTP M586 P1 S0 ; disable FTP M586 P2 S0 ; disable Telnet ; Drives M569 P0 S0 ; physical drive 0 goes backwards M569 P1 S0 ; physical drive 1 goes backwards M569 P2 S0 ; physical drive 2 goes backwards M569 P3 S1 ; physical drive 3 goes forwards M584 X0 Y1 Z2 E3 ; set drive mapping M350 X16 Y16 Z16 E16 I1 ; configure microstepping with interpolation M92 X80.00 Y80.00 Z80.00 E548.29 ; set steps per mm M566 X1200.00 Y1200.00 Z1200.00 E1200.00 ; set maximum instantaneous speed changes (mm/min) M203 X18000.00 Y18000.00 Z18000.00 E1200.00 ; set maximum speeds (mm/min) M201 X1000.00 Y1000.00 Z1000.00 E1000.00 ; set accelerations (mm/s^2) M906 X1000 Y1000 Z1000 E1000 I30 ; set motor currents (mA) and motor idle factor in per cent M84 S30 ; Set idle timeout ; Axis Limits M208 Z-0.1 S1 ; set minimum Z ; Endstops M574 X2 Y2 Z2 S1 ; set active high endstops ; Z-Probe M558 P5 R0.4 H10 F1200 T2400 ; set Z probe type to effector and the dive height + speeds G31 P100 X0 Y0 Z-0.368 ; set Z probe trigger value, offset and trigger height M557 R80 S10 ; define mesh grid ; Heaters M307 H0 B0 S1.00 ; disable bang-bang mode for the bed heater and set PWM limit M305 P0 T100000 B3950 R4700 ; set thermistor + ADC parameters for heater 0 M143 H0 S120 ; set temperature limit for heater 0 to 120C M305 P1 T100000 B3950 R4700 ; set thermistor + ADC parameters for heater 1 M143 H1 S280 ; set temperature limit for heater 1 to 280C ; Fans M106 P0 S0 I0 F500 H-1 ; set fan 0 value, PWM signal inversion and frequency. Thermostatic control is turned off M106 P1 S1 I0 F500 H-1 ; set fan 1 value, PWM signal inversion and frequency. Thermostatic control is turned off ; Tools M563 P0 D0 H1 F0 ; define tool 0 G10 P0 X0 Y0 Z0 ; set tool 0 axis offsets G10 P0 R0 S0 ; set initial tool 0 active and standby temperatures to 0C ; Custom settings are not defined ; Miscellaneous M501 ; load saved parameters from non-volatile memory T0 ; select first tool -
Have you gone through this document closely?
https://duet3d.dozuki.com/Wiki/Calibrating_a_delta_printer
The bubbling could be due to some residue on the build plate. GIve it a good cleaning with some Isopropanol.
-
@Phaedrux said in Delta - First layer issues:
Have you gone through this document closely?
https://duet3d.dozuki.com/Wiki/Calibrating_a_delta_printer
The bubbling could be due to some residue on the build plate. GIve it a good cleaning with some Isopropanol.
Yup. I've read through that document. I've cleaned the bed again, brushed it with a steel wool, cleaned it with acetone and alcohol. Sadly it's the same problem.
The printer is using the metal corners and linear rails if that's important to know. Does the belt tension have to be fairly close to each other, I think they are but I'm going off feel.
-
Belt tension should be reasonably close... but I've never done anything special to get it even and I've never had what you show.
Now, some "thinking out loud":
Hayden arms, that's good. You said 215.80 after that... is that the stickers that Hayden sent on each arm? I see the M665 in config.g also matches that (good!).
But... I ask because your M665 readout seems to have 268.742 and that is WAY off... ? I see your G32 calibrated 9 factors. Letting it do 9 means it is setting (resetting) the diagonal length.
In general, Hayden does a SUPERB job of measuring those arms, and you should plug his numbers in and NOT allow any auto-calibration to change them. Specifically, the last G30 command in bed.g should have a S6 or S8, and never a S7 or S9 (with Hayden arms).
"Were it me:"
I would change bed.g to S8, reset the printer (to get the M665 in config.g active once more), and run the G32 several times in a row. Keep running it, and keep looking at the results. It should "converge" and get to the point where it is not changing anything much. At that point, you could update M665 in config.g if you wish.
AND... I'd still do a G32 in my start g-code. Every print job. S8.
Note: The other option to save the parms is M500, M501, and config-override.g. I'm not going to cover that in any detail. If you already use it, that's great and you know how. If not, I wouldn't open that can of worms for just M665.
-
Figured it out! You guys are gonna laugh but I thought I used 16T pulleys but they were 20T so my steps/mm were off (lol), which I guess caused some weird stuff with the G32?
I updated the steps/mm and ran a G32 S6 and everything without a hitch.
I do get a weird error about Z datum = 0 which I've never encountered before and after a quick search one thread suggested to add a G30 before the G29 S1, is that common practice?
-
Hey, fantastic that you found it!! I can't tell you how many times I've "known" those pulleys, spacings, whatever, and then....!
I do a G28 as first thing in bed.g.
-
You can also run G32 before the G29 to set the z=0. Just what ever method you chose, make sure you do it the same way each time. It was a change some time after 2.02 they added that warning.
From my understanding the idea is that before the mesh starts Z=0 needs to be established by some method. The three that I understand are:
G28 (sets the high by homing and then the firmware pulls the height from your printer config) - This may be the least accurate depending on what type of end stops you use.
G30 (sets the Z=0 by doing a single probe) - The guides for Cartesian printers tend to talk about doing it this way and it will work but most Delta printers back off their endstops and that play can make this less accurate. If you use this please make sure you disable this while probing per https://duet3d.dozuki.com/Wiki/Calibrating_a_delta_printer#Section_Homing_the_machine
G32 (Delta Auto Cal sets many values but one of them is the Z=0) - This is what I prefer and seems to be most common among people using Deltas. If you are using S6 and have 9 to 16 points the accuracy is high and it doesn't take long. At the end of the bed.g you can either probe your mesh or load it and the error shouldn't occur.
One way to see if it is the order you are doing things is if you post your bed.g file as I presume you are getting the error after running a G32?


