Need help with Y axis re-design
-
I picked up this printer knowing it needed some work. The prints are decent but I'd like to redo the rear part of this Y axis design. Looking for some ideas. I'm thinking about putting a dual shaft stepper inline of that rod and getting rid of the extra mini belt. I have a CNC and I'm planning on making the mounting plates out of aluminum. Thanks in advance


-
Hi,
Yes a dual shaft would work. Do you have a source?
The other approach that is fairly common would be to install two steppers - I have two printers which do that.
Do you think those 20x80 extrusions are big enough?
")
Frederick
-
@fcwilt thanks, Frederick. I normally buy everything from openbuilds.com but I don't think they offer the dual shaft. What are pros/cons to two Y steppers? It would actually be easier to do that setup now that you mention it. Yes, those 80's are pretty beefy!
-
@resh said in Need help with Y axis re-design:
@fcwilt thanks, Frederick. I normally buy everything from openbuilds.com but I don't think they offer the dual shaft. What are pros/cons to two Y steppers? It would actually be easier to do that setup now that you mention it. Yes, those 80's are pretty beefy!
The only issue with dual steppers is keeping them in sync.
For those using firmware v3 you can install a endstop sensor for each one. If the endstop sensors are carefully adjusted homing that axis will sync the steppers.
I don't do that as I have found that once in sync they stay in sync. To put them in sync I turn off power and very slowly and carefully push them to the limit of the rails.
Frederick
-
Thoughts on needing a plate on the other (both) side of these idlers? The MDF is just a template but I'm thinking even when I cut it out of aluminum the weak point will be the long M5 bolts and the force of the tensioned belt putting everything in a bind. I can sandwich the idlers but it just means extending that 20x40. The back side is another story.


-
Hi,
Whenever I can I support idlers on both sides.
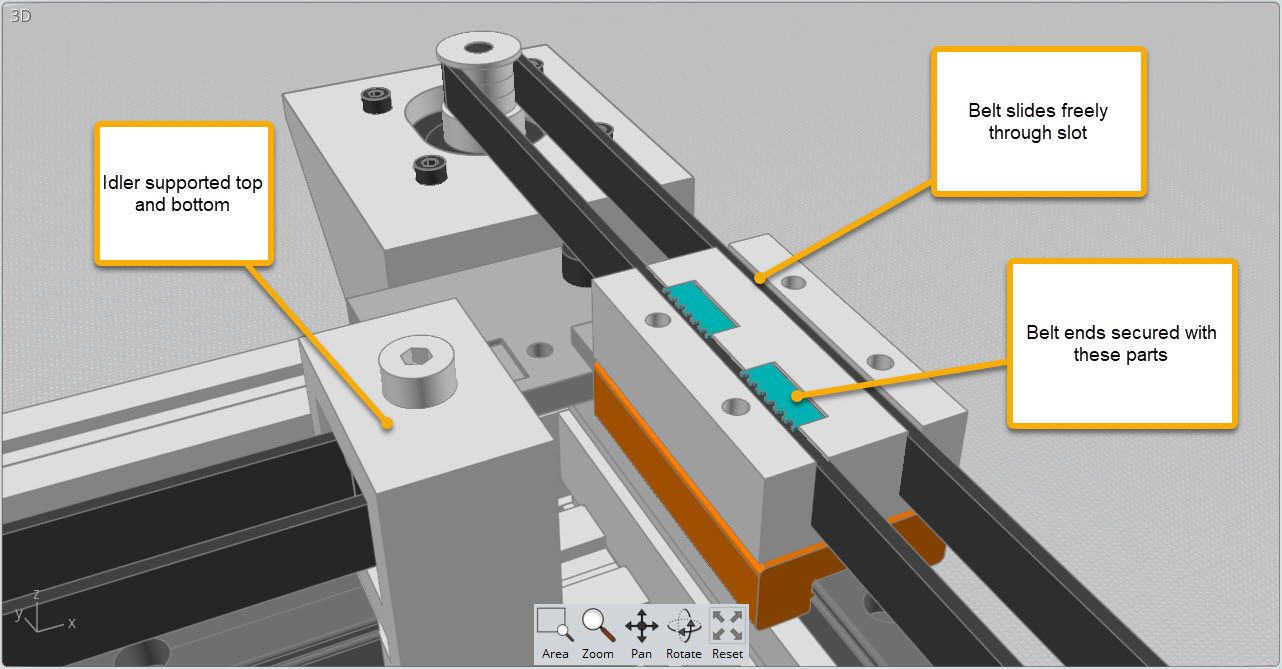
Here is a closeup of my MarkForged style printer showing one end of the right Y axis and the end of the X Axis belt where the idler is supported.
Notice that I run the belt perpendicular to the rail which means I only need the 20 tooth pulley on the stepper and a 20 tooth idler at the other end.
The holes in the "belt block" allow fastening whatever needs to be moved to the tapped holes in the rail carriage block.
Frederick
-
@resh I second the idea of supporting both ends of the pulley axles. I used rectangular aluminum tubing in my printer to hold the pulleys. All you need is a hack saw and a drill press to cut and drill the aluminum.
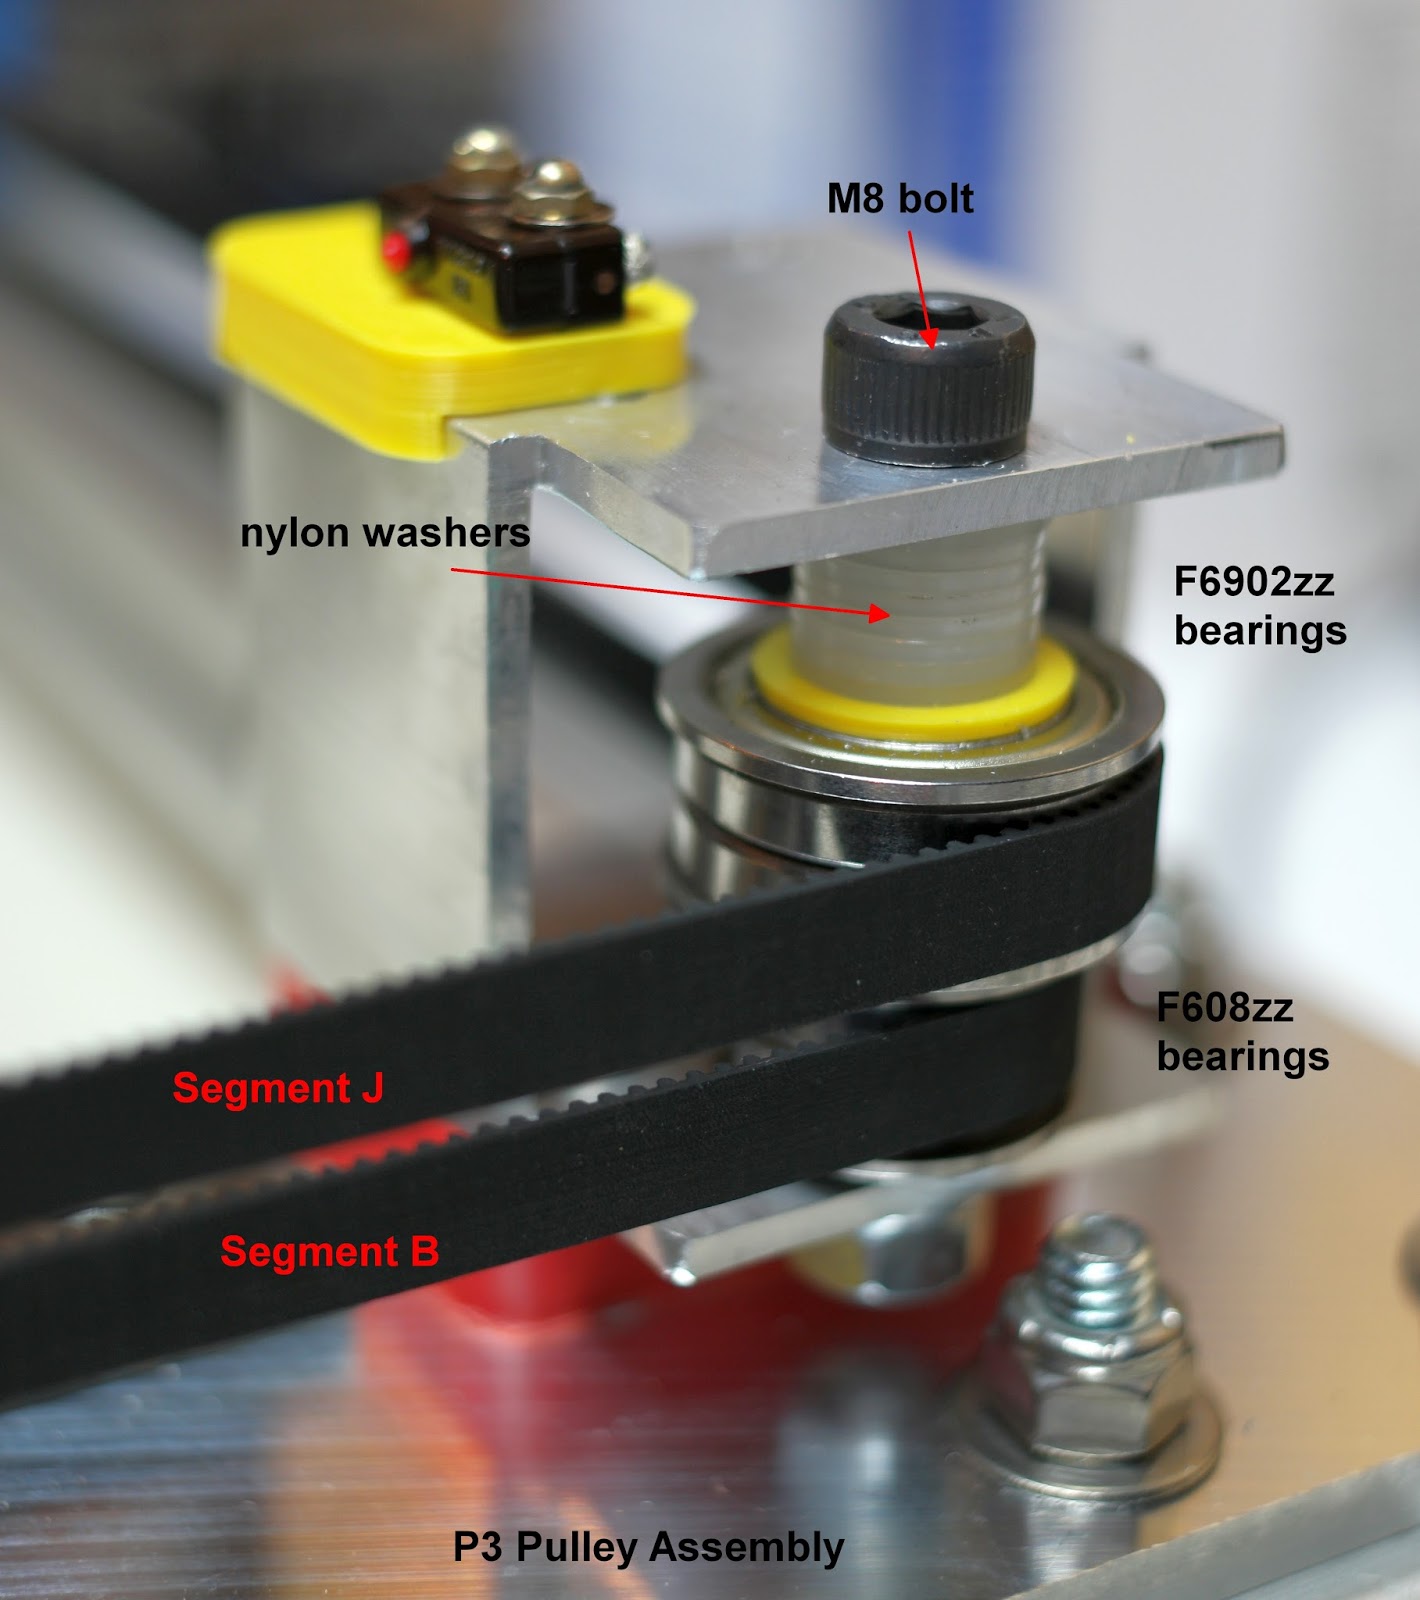
I also suggest you reconsider using those crappy little 3D printer idler pulleys. The bearings in them are almost microscopic and will not last. I suggest using stacked ball bearings for the pulleys. You can use much larger bearings that will last a long time. I used stacked F625 bearings in my sand table with 6mm belts. I used stacked F608 bearings for the 9mm wide belt in my corexy printer. You can put a twist in the belt to put the smooth side of it against the smooth pulley surface if you feel you must.
-
Thank you for these responses. I really like the idea of putting the belt perpendicular! @fcwilt did you fabricate that "belt block" or purchase? I have some 608 bearings on hand, didn't even think to use those.
-
@resh said in Need help with Y axis re-design:
Thank you for these responses. I really like the idea of putting the belt perpendicular! @fcwilt did you fabricate that "belt block" or purchase? I have some 608 bearings on hand, didn't even think to use those.
I designed and printed everything. The "belt block" is sized to fit the rail carriage block and the width of the belt.
In the picture the belts are 9mm.
I can send the files if you would like but I am traveling for the next couple of weeks.
-
@fcwilt When you get time I would appreciate it. Safe travels