to far from Bed
-
Hi i need to do a "quick and dirty" print on my self made printer. quick and dirty because the toolchanger isnt working jet because of hydraulic problems and therfore i need to print a quick cube for a video with only one tool installt (manual). Z hight is set manual for this one tool, bed is leveled manual and everything works like it should. my problem is that as soon as i start the cura gcode, the Z distance is to far (looks like 5-8mm) of and i cant find the problem.
i disabled for this quick print every true bed leveling code, offset etc. the cura start gcode only use the G28 and does a quick purge after that. no tool offset is set and only one tool is enabled. has anyone had the same problem like my or did i miss something ? btw this is my first self made printer and i do only know the basics from setting up this thing.
tell me if you need to see some gcode so i don't spam to much unnecessary stuff in the first post")
-
@chris94 When you just run G28, is then the z height correct?
When not, you have to adjust your z endstop (EDIT: or the bed with screws) -
@cosmowave yes if i just run the G28 in DWC then everything is fine
-
@chris94 What is the first z-height in your gcode? It should be your defined layerheight (e.g. 0.2)
-
@cosmowave dont mind the extra Z steps
T2
M190 S90
M104 S240
M109 S240
M82 ;absolute extrusion mode
G28 ;Home
G1 Z30 F3000 ;Move the platform down 30mm
;Prime the extruder
G92 E0
G1 F200 E3
G92 E0
M141 S50
M83 ;relative extrusion mode
G1 F1800 E-1.5
;LAYER_COUNT:100
;LAYER:0
M107
G1 X0 Y250 F600
G1 F600 Z5
echo"pause"
G4 S20 ; Pause
G1 F100 Z0.8 -
@chris94 said in to far from Bed:
G1 F600 Z5
echo"pause"
G4 S20 ; Pause
G1 F100 Z0.8After your printhead moves to Z+5 you have a pause of 20 seconds!
I think you know that you have to wait 20s ? -
@cosmowave yes it is there to eyeball the initial distance so i can check where the coordinates are
-
@chris94 And this inital z height of 5mm is also too high? (at 10-13mm)
-
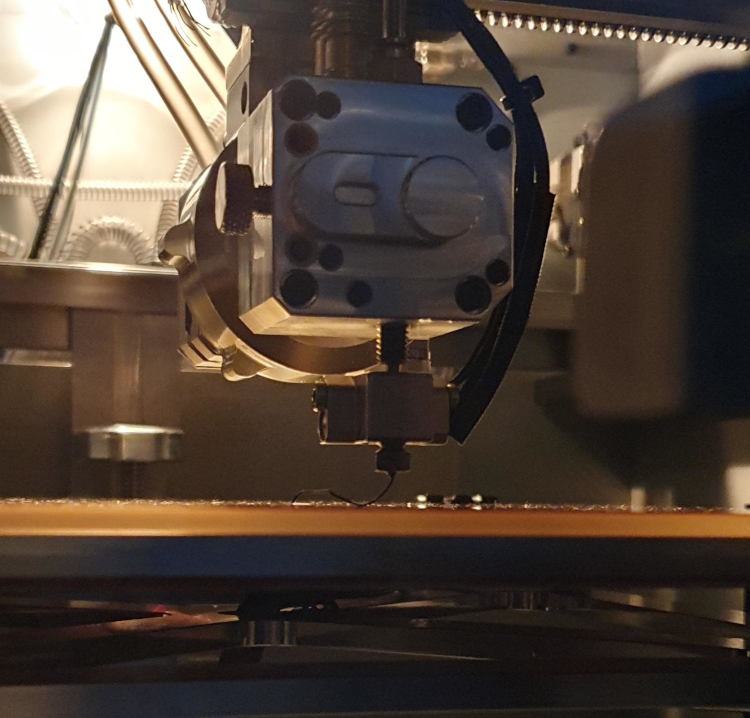
@cosmowave more or less yes. i can't really measure it. the picture was taken at a theoretical height of 0,3
-
@chris94 Do you have set a additional "bed surface"?
Can you post your config.g and if exists relevant macros please. -
@cosmowave i don't know what an additional bed surface would be so i don't think so.
; Configuration file for Duet 3 (firmware version 3) ; executed by the firmware on start-up ; ; General preferences G90 ; send absolute coordinates... M83 ; ...but relative extruder moves M550 P"HTPX3" ; set printer name M575 P1 S1 B57600 ; enable support for PanelDue ; Network ; M551 P"passwort" ; set password M552 P0.0.0.0 S1 ; enable network and acquire dynamic address via DHCP M586 P0 S1 ; enable HTTP M586 P1 S0 ; disable FTP M586 P2 S0 ; disable Telnet ; Drives M569 P0.5 S1 ; physical drive 0.5 goes forwards X-Achse = X M569 P0.1 S0 ; physical drive 0.1 goes forwards Y-R-Achse = Y M569 P0.0 S0 ; physical drive 0.1 goes forwards Y-L-Achse = A M569 P1.0 S0 ; physical drive 1.0 goes backwards Z-L-Achse = Z M569 P1.1 S0 ; physical drive 1.0 goes backwards Z-M-Achse = (B) M569 P1.2 S0 ; physical drive 1.0 goes backwards Z-R-Achse = (C) M569 P0.4 S0 ; physical drive 0.4 goes forwards Extruder = E M569 P0.2 S0 ; physical drive 0.2 goes forwards Hydraulik Pumpe = U M584 X0.5 Y0.1:0.0 Z1.0:1.1:1.2 E0.4 U0.2 ; set drive mapping MOTOR BELEGUNG: X, Y-R, Y-L, Z-L, Z-M, Z-R, Extruder, Hydraulik Pumpe M671 X-35:335:150 Y43:43:364 S1 ; Spindel position Links:Rechts:Mitte bezogen auf Nullpunkt (Bett linke Ecke vorne) S = max ausgleich in mm M350 X16 Y16 A16 Z16 B16 C16 E16 U16 I1 ; configure microstepping with interpolation M92 X533.33 Y533.33 A533.33 Z1600.00 B1600.00 C1600.00 E420.00 U1009.46 ; set steps per mm M566 X200.00 Y200.00 A200.00 Z200.00 B200.00 C200.00 E400.00 U100 ; set maximum instantaneous speed changes (mm/min) (jerk) M203 X1800.00 Y1800.00 A1800.00 Z600.00 B600.00 C600.00 E4000.00 U600 ; set maximum speeds (mm/min) M201 X500.00 Y500.00 A500.00 Z500.00 B500.00 C500.00 E500.00 U1000 ; set accelerations (mm/s^2) M906 X1200 Y1200 A1200 Z1200 B1200 C1200 E700 U1400 I30 ; set motor currents (mA) and motor idle factor in per cent M84 S30 ; Set idle timeout ; Axis Limits ; Nullpunkt auf vorder linke Tischecke bezogen, 10mm abstand zum Tischrand M208 X-12.6 Y-96.5 A-96.5 Z0 B0 C0 U0 S1 ; set axis minima M208 X312.4 Y296.1 A296.1 Z250 B250 C250 U1.75 S0 ; set axis maxima ; Endstops M574 X1 S1 P"!io5.in" ; configure active-high endstop for low end on X via pin io5.in = X M574 Y2 S1 P"!io6.in+!io8.in" ; configure active-high endstop for high end on Y-R via pin io8.in = YL YR M574 Z2 S1 P"!1.io5.in+!1.io2.in+!1.io1.in" ; configure active-high endstop for high end on Z-L via pin 1.io5.in = ZL ZM ZR M574 E1 S1 P"!io2.in" ; NOTAUS M574 U1 S3 ; Hydraulik Pumpe 3 = motor load detection = U ; Motor stall detection für Hydraulik Pumpe M915 U R0 F0 ; F = unfiltered (default, 1 reading per full step) ; Z-Probe ;M558 P5 C"!io7.in" H50 F100 T500 ; set Z probe P= Switch C= Input H= vorpositionieren F= probing speed T= Travel speed von Punkt zu Punkt ;G31 P1000 X25.25 Y67 Z10 B0 C0 ; Z probe trigger value, offset and trigger height C= Temperature coefficient P= Trigger value ;M557 X20:280 Y20:280 S20 ; define mesh grid S= Probe point spacing ; Heaters M308 S0 A"Druckbett" P"temp3" Y"thermistor" T100000 B3950 ; configure sensor 0 as thermistor on pin temp3 M950 H0 C"out0" T0 ; create bed heater output on out0 and map it to sensor 0 M307 H0 R0.382 C650.1 D2.15 S1.00 V23.9 ; disable bang-bang mode for the bed heater and set PWM limit M140 H0 ; map heated bed to heater 0 M143 H0 S120 ; set temperature limit for heater 0 to 120C M308 S1 A"Tool-L" P"temp0" Y"thermistor" T500000 B3800 ; configure sensor 1 as thermistor on pin temp0 M950 H1 C"out1" T1 ; create nozzle heater output on out1 and map it to sensor 1 M307 H1 B0 S1.00 ; disable bang-bang mode for heater and set PWM limit M143 H1 S400 ; set temperature limit for heater 1 to 450C M308 S2 A"Tool-M" P"temp1" Y"thermistor" T500000 B3800 ; configure sensor 2 as thermistor on pin temp1 M950 H2 C"out2" T2 ; create nozzle heater output on out2 and map it to sensor 2 M307 H2 B0 S1.00 R3.002 C191.7 D12.39 S1.00 ; disable bang-bang mode for heater and set PWM limit M143 H2 S400 ; set temperature limit for heater 2 to 450C M308 S3 A"Tool-R" P"temp2" Y"thermistor" T500000 B3800 ; configure sensor 3 as thermistor on pin temp2 M950 H3 C"out3" T3 ; create nozzle heater output on out3 and map it to sensor 3 M307 H3 B0 S1.00 ; disable bang-bang mode for heater and set PWM limit M143 H3 S400 ; set temperature limit for heater 3 to 450C M308 S4 A"KammerL" P"1.temp0" Y"thermistor" T100000 B3950 ; configure sensor 4 as thermistor on pin 1.temp0 M950 H4 C"1.out0" T4 Q10 ; create chamber heater output on 1.out0 and map it to sensor 4 Q10 = 10Hz M307 H4 B0 R1.177 C209.6 D5.06 S1.00 V24.2 ; disable bang-bang mode for the chamber heater M141 H4 ; map chamber to heater 4 M143 H4 S100 ; set temperature limit for heater 4 to 100C M308 S5 A"Kammer" P"1.temp2" Y"thermistor" T100000 B3950 ;Kammer Temperatur M308 S6 A"KammerR" P"1.temp1" Y"thermistor" T100000 B3950 ;Heizelement Rechts Temperatur ; Tools M563 P1 S"Links" D0 H1 F0 ; define tool 1 G10 P1 X0 Y0 Z0 ; set tool 1 axis offsets G10 P1 R0 S0 ; set initial tool 1 active and standby temperatures to 0C M563 P2 S"Mitte" D0 H2 F0 ; define tool 2 G10 P2 X0 Y0 Z0 ; set tool 2 axis offsets G10 P2 R0 S0 ; set initial tool 2 active and standby temperatures to 0C M563 P3 S"Rechts" D0 H3 F0 ; define tool 3 G10 P3 X0 Y0 Z0 ; set tool 3 axis offsets G10 P3 R0 S0 ; set initial tool 3 active and standby temperatures to 0C ; Custom settings M581 E1 S1 T2 C0 ;NOTAUS M581 => T1= Trigger 1, S1= rising edge of input; C0= trigger at any time ; Miscellaneous M575 P1 S1 B57600 ; enable support for PanelDue M912 P0 S-16,5 ; MCU Calibrating ; homeall.g ; called to home all axes ; G91 ; relative positioning ;G1 H2 Z5 F600 ; lift Z relative to current position ;HOME Z G1 H1 Z255 F3100 G1 H2 Z-10 F300 ; lift Z relative to current position G1 H1 Z255 F100 ; move Z up until the endstop is triggered G92 Z218.1 ; set Z position to axis maximum (you may want to adjust this) G90 G1 Z200 F400 ;Z Freifahren G91 echo "Z-Homed Z218.1" ;HOME Y G1 H1 Y398 F600 ; move quickly to Y axis endstops and stop there (first pass) G1 H2 Y-5 F300 ; go back a few mm G1 H1 Y398 F100 ; move slowly to Y axis endstops once more (second pass) ;G90 ;G1 Y390 F600 ; Y-Achse auf Position für X-Achse G91 echo "Y-Homed" ;HOME X G1 H1 X-341 F600 ; move quickly to X axis endstops and stop there (first pass) G1 H2 X5 F300 ; go back a few mm G1 H1 X-341 F100 ; move slowly to X axis endstops once more (second pass) G90 G1 X30 F600 echo "X-Homed" -
@chris94 With additional "bed surface" i mean: in the slicer you can define a bed surface thickness (like an additional plate e.g. mirror on your bed). This thickness will be added to your z0
You are sure that your z endstop is 218.1mm above z0?
-
@cosmowave the z endstop is at the low end of my printer and this is the exact distance to the nozzle so yes, i am sure for now. like i said it's just for a quick and dirty print to make a video. there is no build surface set as far as i know (i am totally new to cura). btw thanks for taking your time
-
@chris94 When it's only for a quick and dirty, you can eventually set the G92 Z218.1 a bit lower?
-
@cosmowave i probably could but i'm a little bit scared that this could result in a crash as long as i dont know where the problem is coming from
-
@chris94 Yeah sure...
Can it be, that the z move in you gcode (G1 F100 Z0.8) is done relative instead of absolute.
But if this is the case, i don't know why...
But eventually you can hear/feel/see the little 0.8mm move? -
@cosmowave I don't understand this step either. its straight out of cura. i am currently setting up my simplify to see if it is a cura export wonder problem or something somewhere in the config
-
@chris94 What happens if you put a G90 in slicer startcode?
-
@cosmowave good question. i will try that when i am back at home
-
ok as far as i can see it isn't the slicer gcode. tried it with G90 but that did nothing. i cant see anything in the config, home or somewhere else where this "offset is coming from. If I use a macro with a G1 to go to Z0 it's not a problem, but as soon as I start a print ...