G29 on CoreXY does not move correctly
-
@fcwilt Oh I'm sure it was my mistake. Let me fix that and try again...
-
@fcwilt That was it! Thanks so much! I need to be more mindful of my M's and G's I guess!
So while we're here - can you tell me the difference between the bed.g and mesh.g, and how I should use them correctly?
-
@fcwilt I tried to run G29, but there's something wrong with my heater settings - I think I'm just addressing the tools incorrectly. It looks to me like I'm supposed to set the active and standby temps for each tool with the M568 command, and then set those tools to active with the A2 attribute. And if I want them to wait before proceeding, I have to put an M116 command. That is essentially what I'm trying to do with this section of my mesh.g but it's not working right. Can you tell me what's wrong with these commands?
;set temps M568 P0 S60 R60 ;set bed temp M568 P1 S200 R160 ;set extruder temps M568 P0 A2 ;set bed temp to active M568 P1 A2 ;set extruder to active M116 H0 S5 ;wait for bed to reach temp +-5 M116 H1 S10 ;wait for extruder to reach temp +-10 -
Hmm. It looks like I'm supposed to just use a regular old M140 for the bed temp part of it.
-
 undefined TechButterfly has marked this topic as solved
-
@techbutterfly said in G29 on CoreXY does not move correctly:
Hmm. It looks like I'm supposed to just use a regular old M140 for the bed temp part of it.
Correct. M568 is only for tools.
Frederick
-
@techbutterfly said in G29 on CoreXY does not move correctly:
So while we're here - can you tell me the difference between the bed.g and mesh.g, and how I should use them correctly?
G32 is associated with Bed Leveling (Auto or Manual). G32 runs bed.g which is intended to contain all the commands needed to level the bed.
G29 is associated with Mesh Bed Compensation. In current firmware G29 runs mesh.g which is intended to contain all the commands needed to create the heightmap which is required for using Mesh Bed Compensation.
They are very different things.
Bed Leveling, as the name implies, is for leveling the bed. This is done before printing. In my case it is part of homing Z.
Mesh Bed Compensation is a feature which is used to try and compensate for bed irregularities during printing.
If you printer is well made and stable you can usually create the heightmap once and use it for all subsequent prints. I have a macro which I run manually to create the heightmap. In my "print start" I load the pre-existing heightmap.
Once a month or so I re-create the heightmap just to be sure it reflects the current state of the bed.
Generally you create the heightmap with the hotend and bed at printing temps. Some folks create multiple heightmaps for different bed temps.
Frederick
-
@fcwilt Okay, I think I get it. Bed leveling is physically leveling or tramming the bed - like a voron 2.4 would do with its 4 z motors - or I guess if doing it manually, it might have commands that move the head to different points for adjustment. Mesh compensation moves z up and down as printing happens.
I do not have a self leveling bed, so I want to use G29. I ran G29 S0 already so I should have a heightmap.csv in my sys folder. And I need to add G29 S1 P"heightmap.g" in the code that runs before the print starts. Is that correct? Do I need to create a print start file or is there already a way to include this code?
-
@techbutterfly said in G29 on CoreXY does not move correctly:
@fcwilt Okay, I think I get it. Bed leveling is physically leveling or tramming the bed - like a voron 2.4 would do with its 4 z motors - or I guess if doing it manually, it might have commands that move the head to different points for adjustment. Mesh compensation moves z up and down as printing happens.
I think you've got it. You can certainly use both. Any printer with a Z probe can use Mesh Bed Compensation. Most any printer with multiple Z steppers or bed leveling thumb screws can use Bed Leveling. I use both as all of my printers have Z probes and all have some way to level the bed.
I do not have a self leveling bed, so I want to use G29. I ran G29 S0 already so I should have a heightmap.csv in my sys folder. And I need to add G29 S1 P"heightmap.g" in the code that runs before the print starts. Is that correct?
If G29 S0 worked you should have seen the probe moving from point to point of the grid you specified and not report any errors.
You should have a heightmap.csv file in the SYS folder.
G29 S1 will load the existing heightmap file if it is named heightmap.csv
You can view the height map with the built-in Height Map viewer.
Do I need to create a print start file or is there already a way to include this code?
Generally you need batch of commands to start the print and another batch of commands to execute when printing is complete.
Slicers have a place for you to enter these two batches of code - and some folks do that.
I don't.
What I do is enter into those two places in the slicer just the commands M98 P"print_begin.g" and M98 P"print_end.g"
You can use any names you want but it makes sense to have the names reflect what the files do.
In those files I put the commands I want to execute when printing starts and when printing is done.
The slicer will add a few commands on its own at the beginning of the file and at the end of the actual file you print from. If you configure the slicer correctly these commands will not interfere with the commands that you put into your own two files.
The reason I do it this way is that I use different slicers from time to time but they all can be configured to run my two files. Thus I don't have to maintain multiple batches of code in the various slicers.
Also my approach relies on using the DWC Filament handling feature.
It's moderately advanced stuff and you may not want to use it. But I will be glad to do my best to explain it to you if desired.
Frederick
-
@fcwilt Thanks! Makes sense the way you do it with the start and end files. I have mostly used prusaslicer for the last several years, but I do have a simplify3d license and also have Cura installed, so making the printer as slicer-agnostic as possible makes sense.
I am not afraid of more advanced stuff - could you explain more about the filament handling?
-
@techbutterfly said in G29 on CoreXY does not move correctly:
@fcwilt Thanks! Makes sense the way you do it with the start and end files. I have mostly used prusaslicer for the last several years, but I do have a simplify3d license and also have Cura installed, so making the printer as slicer-agnostic as possible makes sense.
I am not afraid of more advanced stuff - could you explain more about the filament handling?
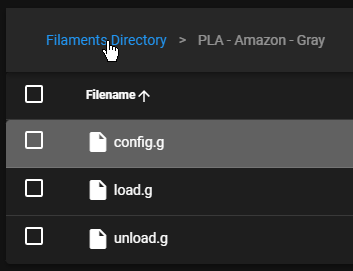
The DWC implements a basic filament handling system for dealing with different types of filaments. Each filament you add to the system creates three files specific to that filament:
- load.g
- unload.g
- config.g
Here is an entry on my printer for Amazon Gray PLA. I make entries for different colors because I have found that sometimes they needed different settings.
Here is an example of one of the filament specific config.g files:
M221 S100 D0                       ; set extrusion multiplier
M568 P0 S190 R60 A2                ; set extruder temps
M140 S60 30                        ; set bed temps

set global.print_beg_prime   =  10 ;
set global.print_beg_retract = 0.5 ;
set global.print_end_retract = 0.5 ;
Here is an example of one of the filament specific unload.g files:
M221 D0 S100	; reset extrusion multiplier
M568 P0 A0      ; turn off extruder
M140 S-299      ; turn off bed heater
If you load a filament from the DWC both the filament specific load.g and config.g are executed.
There is a also a command M703 which executes the filament specific config.g file.
In my print start code there is a T0 to select the starting tool and a M703 to invoke the filament specific config.g file.
You with me so far?
Frederick
-
Yes, I follow. I was also just reading about filaments on the dozuki wiki. Does the selected filament remain loaded even when the machine is rebooted?
-
@techbutterfly said in G29 on CoreXY does not move correctly:
Yes, I follow. I was also just reading about filaments on the dozuki wiki. Does the selected filament remain loaded even when the machine is rebooted?
Physically yes but after a re-boot everything returns to the default states which means no filament is loaded.
Frederick
-
@fcwilt If I set up to use the DWC filament handling, I’m guessing I will need to turn off some stuff in prusaslicer? For instance, I know it has setting for things like extrusion multiplier. How do you deal with that stuff?
-
@techbutterfly said in G29 on CoreXY does not move correctly:
@fcwilt If I set up to use the DWC filament handling, I’m guessing I will need to turn off some stuff in prusaslicer? For instance, I know it has setting for things like extrusion multiplier. How do you deal with that stuff?
I have that slicer installed but I don't use it.
Let me look at it's settings tomorrow (May 19) and see what needs to be done.
Frederick
-
OK I installed the most recent version of Prusa Slicer - 3.4.2
I selected the default item for print settings, filament settings, printer settings.
In the filament settings I set extruder temps to 0 (bed temps were already 0).
In the printer settings I added M98 P"print_begin.g" to the Start G-Code section
Here is the generated code at the beginning of the print file:
M107   ; fan off

;TYPE:Custom
;;;G28         ; home all axes (this was from the printer "Start G-Code" section - I commented it out)
;;;G1 Z5 F5000 ; lift nozzle   (this was from the printer "Start G-Code" section - I commented it out)

M98 P"print_begin.g" ; this I added to the printer "Start G-Code" section

G21    ; set units to millimeters
G90    ; use absolute coordinates
M82    ; use absolute distances for extrusion
G92 E0 ; set extruder logical position to 0

;;; Filament gcode (this was from the filament "Start G-Code" section - I commented it out)

M107   ; fan off
The two lines of code that proceeded the M98 were not needed so I commented them out but left them so you could see what the defaults did.
The four lines of code the follow the M98 are just fine and should not be a problem.
The two M107 command are just fine and should not be a problem.
So you should have no problem using my approach with Prusa.
Frederick
-
@fcwilt Thanks for looking into that. I have a couple more questions:
-
You mentioned that everything resets - including the “loaded” filament - when the machine is restarted. The examples I saw in the docs showed the gcode for physically loading the filament is in the load macro. When you restart and the filament is already loaded, how do you set the “loaded” filament without physically loading a filament? Please let me know if I didn’t describe that clearly enough.
-
What are the advantages of using this system over say, just having a collection of macros like LoadPLA.g, LoadPETG.g, Unload.g? Or perhaps HeatPLA, HeatPETG, Load.g, Unload.g?
Thanks!
-
-
@techbutterfly said in G29 on CoreXY does not move correctly:
- You mentioned that everything resets - including the “loaded” filament - when the machine is restarted. The examples I saw in the docs showed the gcode for physically loading the filament is in the load macro. When you restart and the filament is already loaded, how do you set the “loaded” filament without physically loading a filament?
I have no code in any of my filament specific load.g files. When I select the new filament to use in the DWC it will execute the associated load.g file and the config.g file. But since the load.g file does nothing there is no problem. The heaters are activated which is good since I need to install the new filament.
If the old filament needs a significantly higher extruder temperature so it can be easily purged from the extruder I simply increase the temperature from the DWC. Once it is purged the temperature can be reduced if desired.
I physically load the filament by:
- moving to Z=100
- cutting the old filament just above the extruder
- dismount the old filament spool
- mount the new filament spool
- when the required extruder temp has been reached push the remaining bit of old filament down until it is even or a bit below the top of the extruder
- routing the new filament as needed place the end of the new filament so it can push down on the top of the remaining bit of old filament
- push the new filament by hand until it is far enough in so that the hob gear (or whatever) can engage it
- use the DWC command to feed the new filament as many times as needed to purge all the old filament from the extruder
- What are the advantages of using this system over say, just having a collection of macros like LoadPLA.g, LoadPETG.g, Unload.g? Or perhaps HeatPLA, HeatPETG, Load.g,
Unload.g?
To me it means I simply select the desired filament from the DWC and all the settings I desire to be specific to that filament are set in the filament specific config.g file. Some settings are achieved by commands in the file such as setting bed and extruder temp. Others are achieved by setting global variables which are used in other places, such as my print start code, as parameters to commands.
The existing folder structure as created by the filament handling feature of the DWC keeps things nicely organized.
I have no idea if the filament handling feature is popular or not. I know that slicers usually have their own filament handling feature but, as I mentioned, from time to time I use different slicers and I want to keep as much code and settings as possible in the Duet and minimize having to duplicate stuff in each slicer.
I've used the system for a few years now and have found no reason to change. I have added to my system such as using global variables to change the behavior of commands in other code.
On person was asking about the slicer feature that allows one temperature for the first layer and another for the remaining layers. That sort of thing can easily be done within my system by the user of global variables and adding a bit of code to be executed on layer changes. Most slicers have a place for doing this and I put there M98 P"print_layer_change.g".
Frederick
-
@fcwilt Thanks again for the detailed explanations!
One more thing - do you use a filament runout sensor? I purchased the BTT one and I’m looking for how to set it up. I know that in standalone mode, I could just hook it up to an IO pin and there’s a setting specifically for this kind of pulsing sensor. But I’m set up in SBC mode, so I don’t know if the setup is the same. Do you have any insight on that?
-
@techbutterfly said in G29 on CoreXY does not move correctly:
@fcwilt Thanks again for the detailed explanations!
I certainly hope I don't end up confusing you.
One more thing - do you use a filament runout sensor? I purchased the BTT one and I’m looking for how to set it up. I know that in standalone mode, I could just hook it up to an IO pin and there’s a setting specifically for this kind of pulsing sensor. But I’m set up in SBC mode, so I don’t know if the setup is the same. Do you have any insight on that?
I have the E3D magnetic sensor but had some initial problems and put it on the back burner for now.
Currently I use a TriangleLads sensor which simply provides a go/no-go indication that filament is present or not.
I don't think using the SBC would change how you connect and configure a filament sensor.
I tried the SBC setup and it was interesting but development seemed to always be a step or two behind the standalone stuff so I put the SBC on the back burner as well.
I'm not a really good source for SBC advice so take anything I might post as possibly wrong.
Frederick
-