Identify the connected Smart Effector
-
I have a couple of Deltas and a few Smart Effector with different hotends, all of them have some magballs so technically speaking it is very easy to swap them.
I was wondering if there is a way to identify which Smart Effector is currently installed on the printer and then select the configuration to use (M665, M666, z-offset, hotend heater PID values, max temp...).
I would like to avoid using the slicer start script, I feel it will be prone to error.I know RRF allows to load different configurations but if it could be selected based on the Smart Effector installed (using a serial #, internal ID...) and some conditional gcode that would be ideal.
As an alternative option, is it possible to query the sensitivity of the Smart Effector? This could be an (unperfect) workaround.
I'm pretty sure it's not possible but somehow I'm hoping to be wrong.
-
See the example here by @fšk
I remember seeing some images of the tools but can't find them right now.
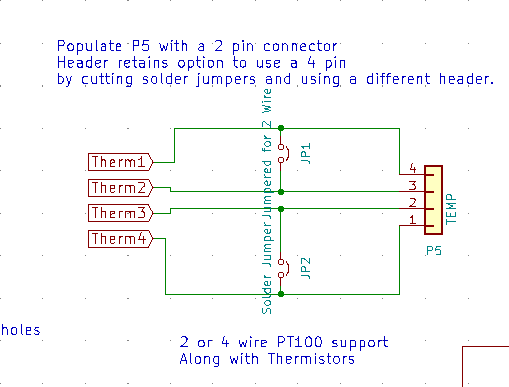
In this case, assuming you are not using the 4 wire PT100 option (only using the inner two wires that is the default for thermistors on the smart effector)m you have two spare wires on the connector going back to the duet. If you have a free temperature input on the Duet then you ccan use a fixed resistor of different values on each tool and sense that on the Duet.
-
@t3p3tony That's smart, I like it - Thanks for the prompt response!
This sounds pretty easy to do.I have only one doubt: Can I physically connect (solder) the resistance on the Smart Effector pins T1 and T4 or it needs to be a separated circuit?
If it has to be separated, I will design a resistance holder with a connector and mount it on the Smart Effector.
-
@fred-y there are two jumpers that connect 1-2 and 3-4 of the 4 wire circuit. Those can be "opened" carefully with a small (2mm) drill bit:
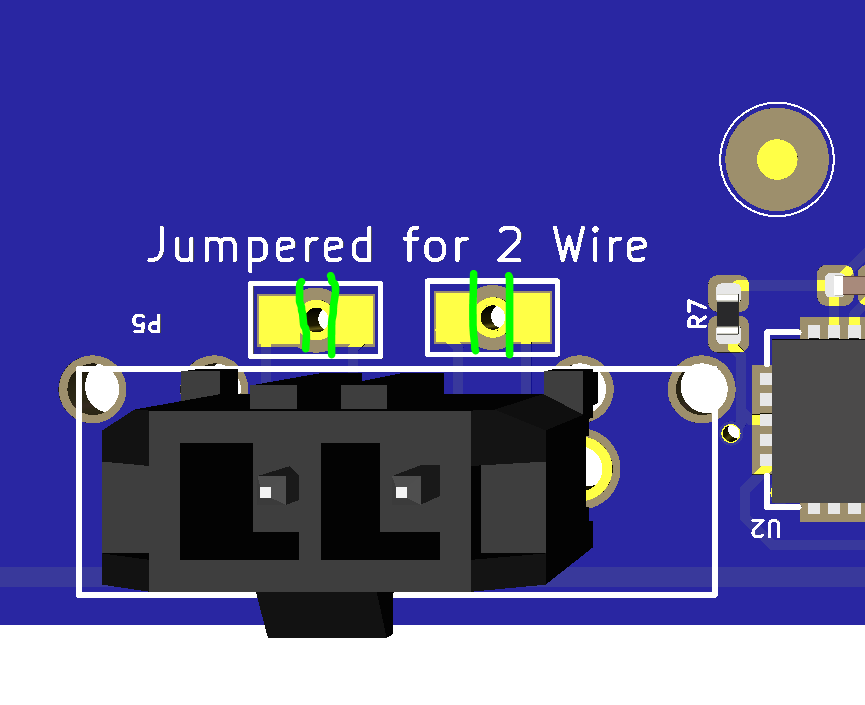
they do not need to be drilled all the way through, just enough to break the connection (as indicated with the green lines. Test that with a multimeter.
At that point you can connect a resistor between T1 and T4. if you solder it directly that should be fine but make sure it has some form of strain relief and cannot short on other pins (you could hot glue it down).
-
@Fred-Y also more information to help is here with the source files
https://github.com/Duet3D/SmartEffector/tree/master/SmartEffector/
-
@t3p3tony Excellent, thank you so much for these detailed instructions!
I will try first on an old damaged Smart Effector v2 to make sure I can do it")