Cannot get triggers to work with buttons
-
I have recently moved across from a duet 2 to a duet 3 mini 5+.
I am trying to setup my hardware buttons to trigger home etc. All were working on the duet 2, but I can't get them to work on the mini 5.
I know it must be me doing something wrong but I can't work out what. I have tried different pins and even just hooking up a end switch to grnd and in pin.
I am currently trying to use io6 but could use other. I have the reset working. So makes me think I am doing something wrong in the Config.g
Any help would be much appreciated.
Thanks Matt.
Revised with the correct config.Down the bottom ;buttons
; Configuration file for Duet 3 Mini 5+ (firmware version 3.3) ; executed by the firmware on start-up ; ; generated by RepRapFirmware Configuration Tool v3.3.10 on Wed Jun 01 2022 15:23:52 GMT+1000 (Australian Eastern Standard Time) ; General preferences M575 P1 S1 B57600 ; enable support for PanelDue G90 ; send absolute coordinates... M83 ; ...but relative extruder moves M550 P"BLV Rev" ; set printer name M669 K1 ; select CoreXY mode M918 P1 E4 F2000000 ; configure direct-connect display G4 S2 ; wait for expansion boards to start M575 P2 S0 B57600 ;BLV Neopixels M150 X1 Q3000000 ; set LED type to NeoPixel and set SPI frequency to 3MHz M150 R255 P128 S5 F1 ; set first 20 LEDs to red, half brightness, more commands for the strip follow M150 U255 B255 P255 S20 ; set next 20 LEDs to cyan, full brightness, finished programming strip ; Network ;M551 P"" ; set password M552 P0.0.0.0 S1 ; enable network and acquire dynamic address via DHCP M586 P0 S1 ; enable HTTP M586 P1 S0 ; disable FTP M586 P2 S0 ; disable Telnet ; Drives M569 P0.0 S1 ; physical drive 0.0 goes forwards M569 P0.1 S1 ; physical drive 0.1 goes forwards M569 P0.2 S1 ; physical drive 0.2 goes forwards M569 P0.3 S1 ; physical drive 0.3 goes forwards M569 P121.0 S1 ; physical drive 0.4 goes forwards M584 X0.0 Y0.1 Z0.2:0.4 E121.0 ; set drive mapping M671 X-40:385 Y0:0 S4 ; leadscrews at left (connected to Z) and right (connected to E1) of X axis M208 X0:345 Y345:0 ; X carriage moves from -5 to 205, Y bed goes from 0 to 200 M350 X16 Y16 Z16 E16 I1 ; configure microstepping with interpolation M92 X200.00 Y200.00 Z400.00 E397 ; set steps per mm M566 X900.00 Y900.00 Z25.00 E300.00 ; set maximum instantaneous speed changes (mm/min) M203 X20000.00 Y20000.00 Z600.00 E2000.00 ; set maximum speeds (mm/min) M201 X5000.00 Y5000.00 Z100.00 E5000.00 ; set accelerations (mm/s^2) M906 X1600 Y1600 Z1600 E1000 I30 ; set motor currents (mA) and motor idle factor in per cent M84 S30 ; Set idle timeout ; Axis Limits M208 X-13 Y-15 Z0 S1 ; set axis minima M208 X333 Y332 Z435 S0 ; set axis maxima ; Endstops M574 X1 S1 P"121.io2.in" ; configure switch-type (e.g. microswitch) endstop for low end on X via pin 121.io2.in M574 Y2 S1 P"io5.in" ; configure switch-type (e.g. microswitch) endstop for low end on Y via pin io5.in ; Filament Runout M591 D0 P3 C"121.io_1" S1 ; simple sensor (high signal when filament present) connected to IO_4 for drive 0, enabled ; Z-Probe M950 S0 C"121.io0.out" ; create servo pin 0 for BLTouch M558 P9 C"121.io0.in" H5 F120 T6000 ; set Z probe type to bltouch and the dive height + speeds G31 P500 X-14.00 Y54 Z1.55 ; set Z probe trigger value, offset and trigger height M557 X40:340 Y30:320 S80 ; define mesh grid ; Heaters M308 S0 P"temp2" Y"thermistor" T100000 B3950 M950 H0 C"out0" T0 ; create bed heater output on out0 and map it to sensor 0 M307 H1 R5.072 K1.366:0.119 D2.65 E1.35 S1.00 B0 V23.9 ; enable bang-bang mode for the bed heater and set PWM limit M140 H0 ; map heated bed to heater 0 M143 H0 S120 ; set temperature limit for heater 0 to 120C M308 S1 P"121.temp0" Y"thermistor" T100000 B4725 C7.060000e-8 ; configure sensor 1 as thermistor on pin temp0 M950 H1 C"121.out0" T1 ; create nozzle heater output on out1 and map it to sensor 1 M307 H1 B0 S1.00 ; disable bang-bang mode for heater and set PWM limit M143 H1 S300 ; set temperature limit for heater 1 to 280C ; Fans M950 F0 C"121.out1" Q500 ; create fan 0 on pin 121.out1 and set its frequency M106 P0 C"Hotend" S1 H1 T45 ; set fan 0 name and value. Thermostatic control is turned off M950 F1 C"121.out2" Q500 ; create fan 1 on pin 121.out2 and set its frequency M106 P1 C"PartFan" S1 H-1 ; set fan 1 name and value. Thermostatic control is turned off ; Buttons M950 J1 C"!io6.in" ; io6.in pin, inverted M581 E1 S0 T3 R0 ; Home All - trigger3.g ; Tools M563 P0 D0 H1 F0 ; define tool 0 G10 P0 X0 Y0 Z0 ; set tool 0 axis offsets G10 P0 R0 S0 ; set initial tool 0 active and standby temperatures to 0C ; Custom settings are not defined 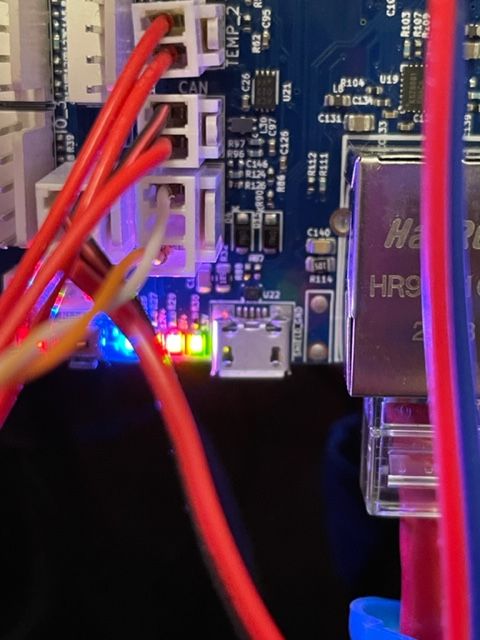
-
This post is deleted! -
This post is deleted! -
@mattyo your Endstop and Zprobe sections still refer to Duet 2 pin names. See https://docs.duet3d.com/User_manual/Machine_configuration/Configuration_cartesian#endstops
Can’t see anywhere you have defined a pin as I/O with M950, or set up triggers with M581. But maybe you don’t quite mean that? See https://docs.duet3d.com/en/User_manual/Tuning/Triggers
Ian
-
@droftarts
Sorry I am an idiot I posted the old config from my duet2. That I had on the desktop. I will update. What a fool. -
@fcwilt @droftarts
Revised. Sorry for the cconfusion. -
M581 E1 S0 T3 R0E1 is the RRF2 assignment for the E1 endstop connection for Duet 2. Change it to P1, to refer to the trigger you created with M950.
Ian
-
@droftarts
Ok I thought I tried that. But will try again.
I got that from the example code on the wiki.; Input/Output M950 J1 C"!io1.in" ; Input 1 uses io1.in pin, inverted M581 P1 S0 T1 R1 ; Pause - built-in, no trigger.g needed M950 J2 C"!io1.out" ; Input 2 uses io1.out pin, inverted M581 E3 S0 T2 R0 ; ATX On - trigger2.g M950 J3 C"!io2.in" ; Input 3 uses io2.in pin, inverted M581 E4 S0 T3 R0 ; Home All - trigger3.g M950 J4 C"!io2.out" ; Input 4 uses io2.out pin, inverted M581 E5 S0 T4 R0 ; Disable Steppers - trigger4.g -
@mattyo Oh! That code is wrong! I’ll update it when I get the chance. The first one is right, but the others are RRF2 format. Thanks for pointing this out.
Edit: documentation updated.
Ian
-
@droftarts Thanks very much. That sorted it.
-
undefined mattyo has marked this topic as solved 27 Jun 2022, 00:39