BlTouch not responding to commands?
-
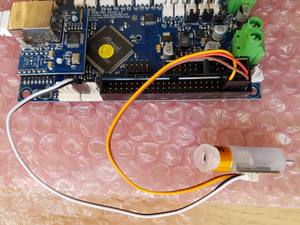
Duet 2 Wifi sorry for not clearing that up before.
-
-
- In your software config.g file input the following G-Code commands to allow the setup to work:
M307 H3 A-1 C-1 D-1
M558 P9 H5 F100 T2000
G31 X0 Y0 Z0 P25
Important: mode 9 is supported in firmware 1.21 and later only. If you are using earlier firmware, replace P9 in the M558 command by P5.
In the G31 command the X and Y are the offset of the sensor in relation to the nozzle (so input your own) the number for Z is the trigger height (read on for this). This is the height that is obtained from reading the height the nozzle is from the bed when the sensor pin contacts the bed and retracts, P is the signal threshold.
Ensure in your config-override.g file (in the /sys folder of the SD card) does not contain an M307 H3 command that overrides the above configuration.
In the M280 commands (see below), you must invert the servo signal using “I1” in the M280 commands if you connect the BLTouch servo input to the expansion header pins, but not if you connect the BLTouch servo input to a Duex.
2. Create a deployprobe.g file (in the /sys folder of the SD card) it should contain the following single command:M280 P3 S10 I1
See the important note earlier about including the I1 parameter or not.
- Create a retractprobe.g file (in the /sys folder of the SD card) it should contain the following single command:
M280 P3 S90 I1
-
@benny He's using heater pin 7, instead of 3, which should be fine.
@siblues Have you tested with pin 3? Making sure to change 7 to 3 where needed.
You've got a Zmin endstop defined as well. Are you intending to use both?
Try changing your endstop configuration to be
; Endstops
M574 Y1 S0 ; Set active low endstops
M574 X1 S1 ; Set active high endstops
M574 Z1 S2 ; Use zprobe for zmin
The commands in your deploy and retract macros need to be inverted because you're connected to the expansion header. So add i1 to the end.
M280 P7 S10 i1andM280 P7 S90 i1Your homing files will need a slight adjustment since you will need to manually place the print head somewhere on the bed before sending the G30 command. This may also be causing problems because your probe is offset from the nozzle and when it's at the homed XY position it may be hanging off the edge of the bed. So before your G30 command in homeall and homez add something like
G90 ; Absolute position mode
 G1 X100 Y100 ; Or whatever gets the probe to be close to the center of your bed
G30 ; probe the z height
G1 X0 Y0 ; return to homed position
You should also remove
G92 Z0 ;from the end of your homing files, since it's not needed with a z probe to tell the printer where Z0 is, because that's the probes job.To make sure that the probe is ready to go before you start homing you can add the servo commands to clear any error state and retract the probe, just in case it's deployed before homing begins. (I've managed to destroy the pin on a BLTouch because the pin was deployed and got caught on the edge of the bed when it moved the print head to the center of the bed.
 )
)So add
M280 P7 S160 I1 ; clear error stateandM402 ; retract probeto the very start of each of your homing files. You can add it to the end of config.g as well just as a precaution.Since it's showing as already triggered in the DWC (1000) that would explain the already triggered error message you received in your other thread. Hopefully the changed listed above will clear that up. If not, Try adding i1 to the end of your M558 command.
Hopefully this gets you sorted.
Once you have the probe responding to your deploy and retract commands you'll be able to do a dynamic test as described here: https://duet3d.dozuki.com/Wiki/Connecting_a_Z_probe#Section_Commissioning_Testing
-
Ok I will try all of that but just to make sure I understand is the sensor supposed to display 0 when not triggered I have read that you will not be able to tell when the probe triggers due to short duration of the trigger.
I am using a zmin endstop with the z probe but I can get rid of it easily if that will make things easier.I won't mind eliminating some the wiring and the endstop if it is not necessary.
-
@siblues normally the trigger time of the BLTouch is very short so you may or may not see if switch from 0 to 1000. But it shouldn't be always 1000.
You can keep the endstop in place but for the time being let's test without it configured or connected just to eliminate any variables. Ultimately you can use both or either depending on how you want to have it configured. And since you can change the configuration at any time it's as easy as having a macro that sets it how you want. A useful option is to have a z max endstop so that you can still home z after a power loss. But that's a problem for another day.
-
Phaedrux you are a miracle worker.I am playing around with the sensor now and everything seems to be working fine.I am going to eliminate the z min endstop entirely.I now have to try to learn the proper way to use it and maybe set up some macro's to test the probe and a few spots on the bed.
I now have to make sure that the extruder is working as it should and that I have the steps/mm set correctly.I also have to wire up the opto-isolated relay I have here to use the PS on trigger to turn everything on and off.
Ok when I home now how does it figure out where z0 is?I am very new to this so what would be the proper steps to take to set everything up and what I mean by that is do I have to center the extruder on the bed and issue a g30 command for that or what would be the proper steps and code to set everything up to use the bltouch to home?
-
Glad it's working out for you now.
Don't forget to measure the trigger height.
https://duet3d.dozuki.com/Wiki/Test_and_calibrate_the_Z_probe
-
The mount for my probe is horrible so I am trying to get the printer running so can design and print a few items to finally button everything up.
-
What would be the right way to probe the bed simply center the extruder and issue a G30 command then a G32 of course this is after getting the offsets and heaight of the probe dialed in?
-
To home z all you need to do is center the probe and do a G30. If the probe x y and z offsets are all correct you'll get a good representation of z=0 for that point.
There are a few options beyond simple z homing though, and it will depend on your setup what you want to do.
If the bed is flat and already mechanically leveled you can call it a day and print away.
If you have multiple independent lead screws and want to do some leveling of the bed with them that can be setup. You can also have the duet probe close to your adjustment screws and it will tell you how much to adjust them to level the bed. It can also create a simple 5 point tilt plane to adjust for. This would be setup in bed.g and it would be called by G32.
If your bed isn't perfectly flat you can use mesh grid compensation to adjust for it using G29. This probes the bed in multiple points and creates a height map that is saved and can enjoy reloaded so you don't have to probe the bed every time.
So there are a lot of options. Depends what your bed is actually like.
-
Well I would like to use compensation since my bed isn't perfectly flat or at the very least it isn't totally flat. I would think being able to level the bed manually to be almost perfectly flat then issuing a G29 would give me the best results.I have 2 leadscrews but they are working together to raise and lower the z axis .
-
Yes it would be ideal to get the bed as level as you can with the adjustment screws and then use G29.
It is possible to run each Z motor on its own driver and perform tilt correction between the two, but that's not really needed if the bed is stable and the motors stay in sync as they are.
https://duet3d.dozuki.com/Wiki/Bed_levelling_using_multiple_independent_Z_motors
-
I started setting everything up but I have a small problem.I set the offsets for the Z Probe following the instructions on the guide.I have two problems I believe when I home the z axias it homes to the back right corner of the bed which is the max x and y axis points of the bed as I understand.I tried the G29 with the extruder and probe centered over the bed but when it tried to probe the first probe point the probe misses the bed and it tells me the probe was not triggered.
-
@siblues you have to adjust the grid setup in M557.
-
This is what is in my config.g
M557 X15:205 Y15:205 S20 ; Define mesh grid
I have a 220 x 220 bed.
-
And what is your probe offset in X and Y?
-
To get accurate probe results, the Duet needs to know how far the BLTouch is from the nozzle in X and Y. To measure this, place a piece of paper on the bed and use tape to hold it in place. Move the nozzle down until the it touches the paper and leaves a small imprint. Make note of the current X and Y coordinate. Use a marker to make the spot clearly visible. Now jog the print head in X and Y until the BLTouch pin is on the exact spot you marked. Make note of the new X and Y coordinates. The difference between the two will be your X Y offset in the G31 command.
-
X -20 y -45
I am also having some issues with my mk8 extruder
.I have a Bondtech BMG on the way and I am going to start looking around for some settings for that.i would like to be able to print some minor parts before installing the Bondtech though. I don't like taking on too many problems at once. -
Try this as your grid size
M557 X50:200 Y50:200 S20 ; Define mesh gridDo you have your XY offset entered into your G31 command in config.g? In your post above with your config in it it's blank.