Infill Too Fast? Over Extrusion on Short Vectors
-
Do you definitely have the correct B value for the hot end thermistor in your M3056 P1 command? The default value changed several versions ago, so if you were relying on the default then it will be wrong now.
-
I don't think you can build a 5x5mm PLA pillar without massive layer cooling.
Doing a sacrificial tower just removes the layer cooling from the just deposited melted PLA.
Print slow (5-10mm/sec) and make yourself a present in form of a Berd-Air like thing. I've got a pump (Aliexpress, search for "555 pump"), some hose and a 4mm thin wall tube. Squish the tube at the end and make sure that the stream is hitting the top of the nozzle (and below, it is fine).
Also add a sock on the heater block.This way you have much less radiated heat from the heater block and massive pointed layer cooling. Filament will almost freeze right after the extrusion.
I can easily make thin features now, even in PLA.
To understand how important is the layer cooling, especially for PLA and small features, picture that in my setup air comes from the right. You can easily see the difference between directly cooled part (right side) and indirectly cooled one (left side). Both are fine, but right one is "finer"")
PS. Do not bother with the "official" method of doing a holed ring around the extruder. The tube is so hot that the "cooling" air is hot too. My 12V printer with 24V pump has more cooling power than my "official" implementation with holed ring that runs 24V pump on 24V. And it is also more silent, of course.
-
@dc42 said in Infill Too Fast? Over Extrusion on Short Vectors:
Do you definitely have the correct B value for the hot end thermistor in your M3056 P1 command? The default value changed several versions ago, so if you were relying on the default then it will be wrong now.
Think I've caught those changes: (Standard reprappro thermistors ~2014 Ormerod2)
M305 P0 T10000 B3988 C0 R4700 ; Set thermistor + ADC parameters for heater 0
M143 H0 S120 ; Set temperature limit for heater 0 to 120C
M305 P1 T100000 B4138 C0 R4700 ; Set thermistor + ADC parameters for heater 1
M143 H1 S250 ; Set temperature limit for heater 1 to 280CeI've considered the Berg style pumps in the past but this would explain why shorter vectors on a 30*30mm square behind corner holes where over extruded in comparison to the large central vectors?
-
Post some pics, but I bet there is also some over-extrusion going, which adds to the pressure build-up (btw, did you try pressure advance?).
Some time ago, I've attended a machining exhibition and noticed something at Stratasys stand: in all their demo prints you can clearly see the infill lines in top/bottom. They are not squashed trying to generate a smooth top layer. Then is when I've realised that I was overextruding all the time, trying to get rid of that small spacing between the tops of the oval beads of the infill.
Since then, I've adjusted my extrusion factor to always see the top spacing, but they still touch in the middle and the quality of my prints improved a lot.
-
@sigxcpu it's interesting you mention the over extrusion and underextrusion scenarios. One of the things I've been experimenting with is varying extrusion multiplier for different parts of the model. I kind of wish that slicers could do this a little more intelligently. Change at Z height isn't quite fine grained enough. But between that and extrusion width you can get some nice results.
-
@sigxcpu said in Infill Too Fast? Over Extrusion on Short Vectors:
Post some pics, but I bet there is also some over-extrusion going, which adds to the pressure build-up (btw, did you try pressure advance?).
Some time ago, I've attended a machining exhibition and noticed something at Stratasys stand: in all their demo prints you can clearly see the infill lines in top/bottom. They are not squashed trying to generate a smooth top layer. Then is when I've realised that I was overextruding all the time, trying to get rid of that small spacing between the tops of the oval beads of the infill.
Since then, I've adjusted my extrusion factor to always see the top spacing, but they still touch in the middle and the quality of my prints improved a lot.
@doctrucker said in Infill Too Fast? Over Extrusion on Short Vectors:
...I have tried:[clip]
- Disabling pressure advance (was set to 0.1).
[clip]
...but I hadn't tried increasing it. Doubled it to 0.2 and it had no real effect on the problem.
My extrusion multiplier is set with a single wall test and adjusting it so that the thickness with a digital micrometer averaged over the four walls. As the Micrometer has a large flat area on the foot and I was only going to one click I was assuming that my reading was going to be slightly over the true reading anyway. Perhaps not.
Even so what sort of extrusion multiplier are you running? I've dropped mine from 0.98 to 0.9 and it had little effect. Dropping lower than that seems extreme, but doesn't really address the inconsistency between the long and short vectors as it will have an effect on both?
- Disabling pressure advance (was set to 0.1).
-
I'll add some pictures soon.
Mean time I've looked again at disabling retracts that cross perimeters and it seems to have had a positive effect. It seems that the extruder dumps an excess of material on unretract which causes more of a probem on a series of short infill vectors than larger infill or perimeters.
My retract settings:
M207 S4.0 R0.0 F2700 T2700 Z0.1
Slower retract perhaps?
-
M207 S4 R0 F3600 T3600These are my settings with a ~45cm bowden tube. I see some very fine strings with PET-G but I'm ok with that. Nothing that can't be solved by a lighter.
I am pretty sure that the retraction, blobbing, pressure advance and all other stuff that tries to compensate for the springiness of the extrusion is highly filament, temperature and nozzle dependent. Maybe the extruder itself a bit. I've noticed that filament type, vendor, batch, age have a noticeable impact, up to being really bad (some 3 years old DD ABS that was simply cooking, moving from transparent green to white brown and becoming very brittle). Also noticed on old filament that it is bubbling when extruder is idling at temperature or right when putting the layers on the bed. I can only assume it can be water or air. But that means that it can expand a lot in the melt chamber and can affect small segments infill.That is why anyone else settings do not matter. I have a Titan extruder with 418 steps/mm in config and I slice with 0.9 factor in Slic3r.
I've never bothered to adjust the steps/mm, non-linear extrusion, I don't run pressure advance because I need to choose between slow printing and noisy extruder. Eve the bed is not perfectly parallel with the XY plane.
I just watch the first layer carefully and adjust extrusion factor/baby-stepping on the fly.
I have attached a picture with parts in various tuning stages and filaments. Captured top infills as good as I could. White - PLA, Yellow - ABS, Blue - PET-G. Because of the slight underextrusion you can see the not so perfect infill lines touching circles, just like Slic3r preview shows it.

-
Decided to us a negative additional un-retract distance which appears to be best around:
M207 S4.0 R-.80 F2700 T2700 Z0.1
-
Still making progress but closest yet to having neat, accurate parts. Really is chicken and egg!
I did solid coupons 20 x 20 x 3mm with 100% infill and wound down the extrusion multiplier until I could see gaps that showed tiny bits of the layer below. This was only really visible with an eye inspection glass. This happened at about 0.80 and so I ran initially with 0.9, but wound it down to 0.85. Small areas still suffered so I investigated pressure advance and the retract settings more. Eventually spotted my bowden clip waving like a mad man. Still had accuracy issues so at this point I printed oversize and revisited my linear/non-linear additional advance settings. These weren't great and so I re calibrated.
With the bowden locked down there is only slight 'hair' on the part with 1.0 retract and 0.4 pressure advance. The seam at extrusion start/stop now looked best with 0 additional advance, rather than the negative used previous. The calibration part did however show the negative effect of too much pressure advance - my corners were excessively rounded. I dropped the pressure advance back to 0.2.
I'm now doing a check with the filament diameter corrected (using volumetric extrusion) and slightly lower still extrusion multiplier.
The thing that really foxes me is it looks like there is no need for the xy compensation even with an extrusion multiplier as low as 0.825?!
-
@doctrucker said in Infill Too Fast? Over Extrusion on Short Vectors:
The thing that really foxes me is it looks like there is no need for the xy compensation even with an extrusion multiplier as low as 0.825?!
Hi Wes,
Yes it's quite remarkable how tolerant printed parts are to under extrusion. Take a look at the work that Michael Hackney has done on this http://www.sublimelayers.com/2017/12/musing-on-under-extrusion-prepare-to.html
-
@deckingman Thanks, I'll have a read.
-
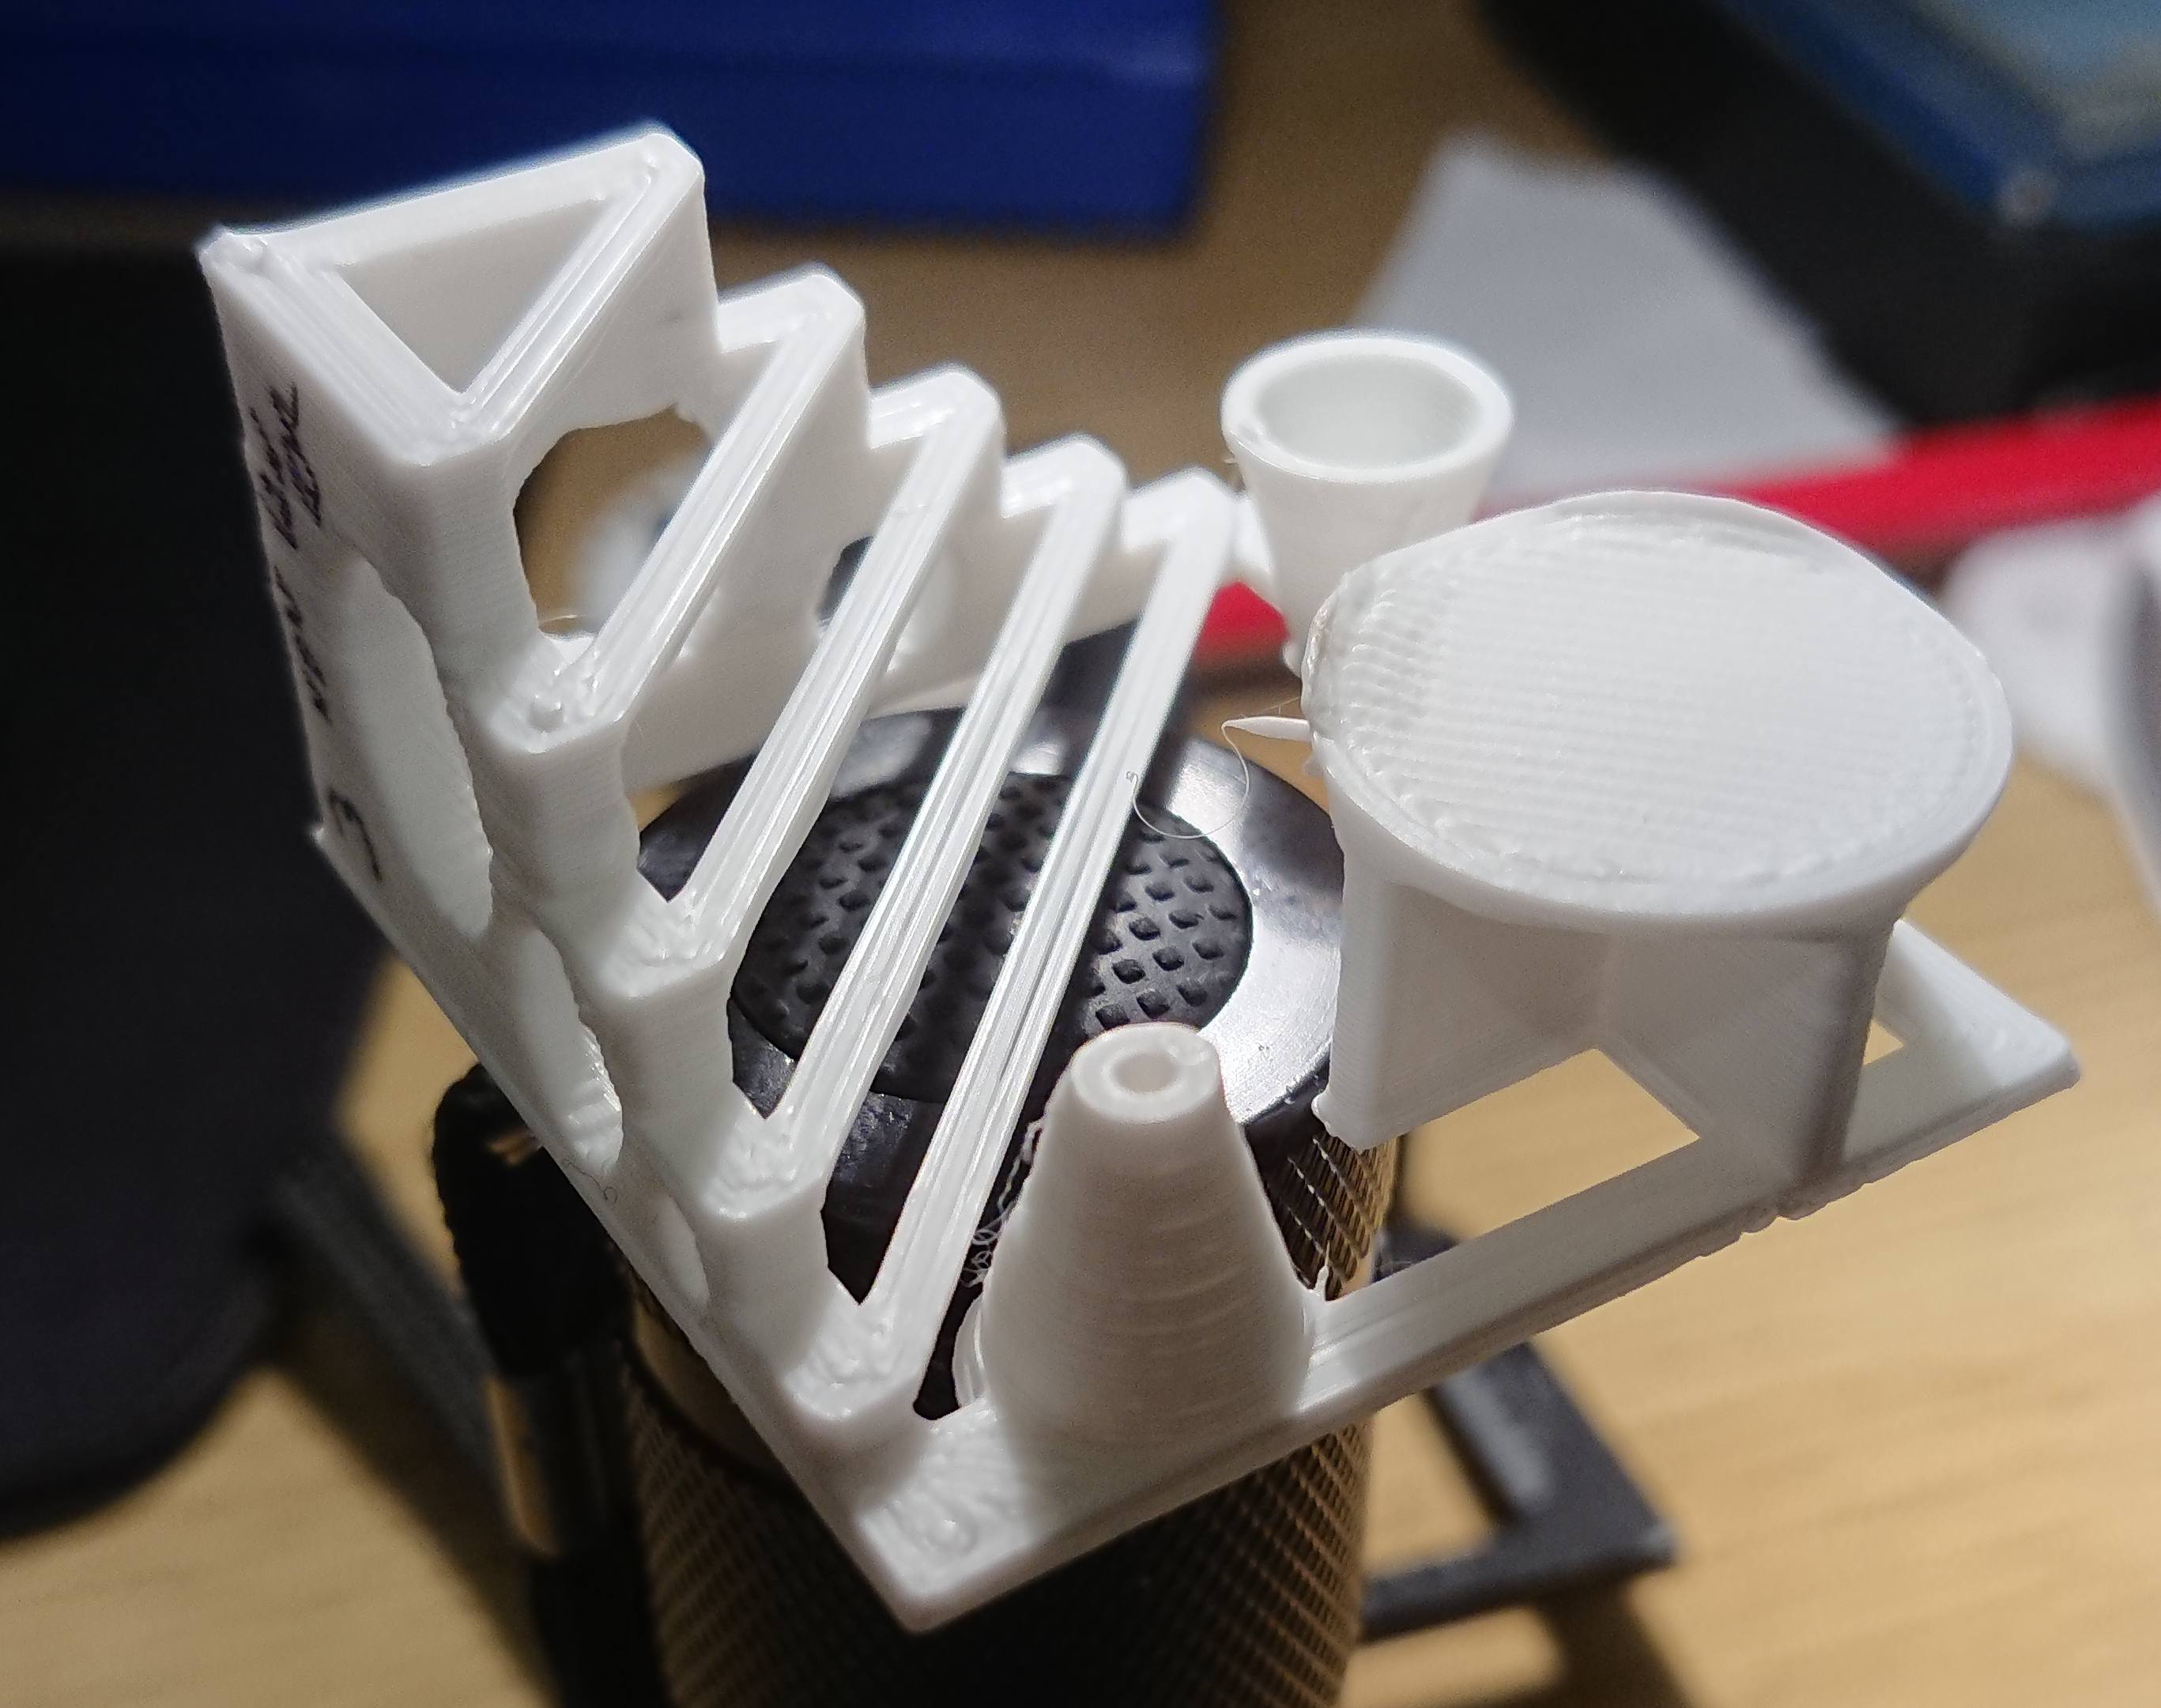
Here's a picture of a recent test. Much improved. Dropping 0.025 on the extrusion multiplier leaves gaps on the large circular flat (away from the curl) but the flats near the bridges are still over stuffed.

Edit: Part is approximately 40 x 40 x 20mm. Extrusion width is 0.5mm. Layer thickness is 0.3mm. Nozzle is still 0.5mm. Volumetric extrusion rates are currently around 5mm3/sec. Accelerations are 1000 for infill, 800 for perimeter. I've a little ghosting on the perimeter so may drop the perimeter acceleration or jerk a little.
-
To me those "gaps" are still overextruded.
-
There are no gaps on that one, the clear and complete gaps appear when I drop a further 0.025 on the extrusion multiplier. It's better but there is still clearly a difference in the density of the short vector fills and long.
I understand that air in the part is acceptable but i think the model should still be water tight?
-
The vertical walls are all over the place but thats the low angle surfaces of the circular holes curling up and causing issues on those layers. The part fan is much improved over standard, but not perfect. Good enough to make the parts for my second machine which has a V6 Lite, which will in turn rebuild this machine with a V6 lite so not wanting to work on fan for the reprap hot end further!