Bed levelling with 3 points
-
Hi
I have a cartesian printer
As z-probe i have the piezo orion with e3d v6.
I use 2 independet motors.Whats The best way to level my bed with 3 bed levelling points ?
-
If you mean probe points, don't! Use four. Three points can't detect and correct for twist in an axis very well. Used mesh grid, but just set the spacing in x and y to the full size of the grid.
-
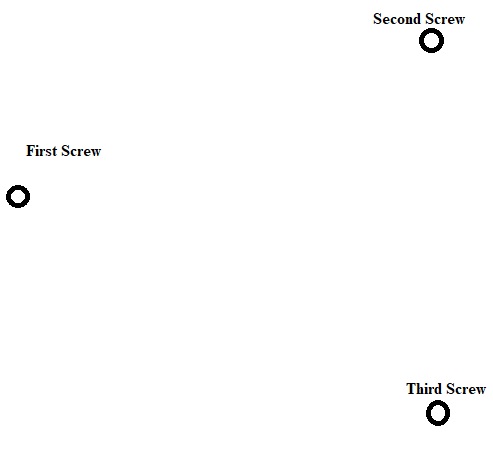
i mean i have 3 srews to make bed flat
and i want to know whats the method to make my bed flat
-
@lui2004 You can't flatten the bed with the screws. They are for leveling (actually tramming) the bed which means making the flat top surface parallel to the plane defined by the X and Y axis guide rails.
The adjustment sequence will depend on how the screws are positioned around the bed. Usually, two screws will be aligned parallel to the X or Y axis. One of those screws will be the "reference" and the other the "pitch" adjuster. The third screw will be a "roll" adjuster. Use the reference screw to set the desired height of the bed. You will only have to adjust it one time, ever. Put a piece of paper on the bed, move the extruder near the reference screw and adjust the screw until the nozzle just touches the paper. Move the bed or extruder near the pitch adjuster and adjust that screw until the nozzle just touches the paper, finally move the the nozzle near the roll adjuster and adjust that screw until the nozzle just touches the paper. That should do the job. Always adjust the pitch first, then the roll. The roll adjustment will not affect the pitch after it has been set.
I find that the manual bed leveling assistant in RRF works very well. You need to set up the config file for that- you'll need the coordinates and pitch of the leveling screws.
-
which is:
reference
pitch
roll ? -
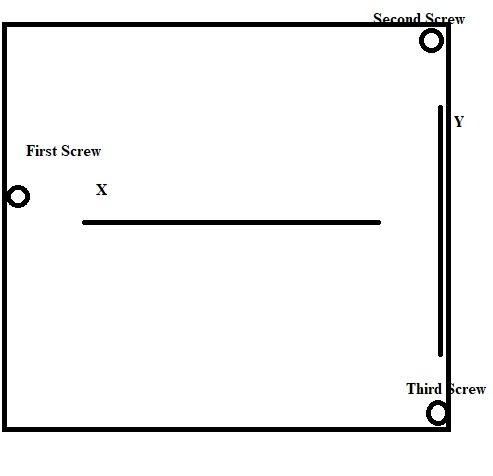
@lui2004 draw in the bed outline and indicate the X and Y directions on it and I will be able to tell you.
-
i forgot it sorry
-
OK, the "second" and "third" screws are the reference and pitch adjusters. It doesn't matter which is which but always use the same one as the reference. The one labeled "first screw" is the roll adjuster.
When you adjust one screw, the bed plate pivots on a line drawn between the other two screws. That's why you adjust the pitch of the bed first, then the roll. The roll adjustment won't affect the pitch adjustment.
-
I will try
-
I try and get the x axis square to the z rods first by adjusting the bed screws in the x axis. I run a g32 with 2 points on the x axis then adjust the bed screws till I can measure up from both sides equally to the x axis, from the frame to the x axis. So I am using the bed to square the x axis. Then when that is all square I run a mesh grid to make it green in the x axis, which will break the the last steps but that was to get it close. it will probably be a strip of green in the x directions at this point. Then I start running mesh bed till I get it all green by adjusting the bed screws. You want you're x axis as square to you're z axis as possible.
-
@ozzzzzzy Your procedure doesn't square the X axis with the Z axis because the bed doesn't define the X axis.
The X, Y , and Z axes in a printer are defined by the guide rails, not the bed. The bed is adjusted to put its top surface parallel to the XY plane of the machine, defined by the X and Y axis guide rails, because the X and Y axis guide rails define the path of the extruder in the XY plane. The X, Y, and Z guide rails should all be orthogonal. If they aren't, prints will be skewed.
In machines with two Z motors that lift the X axis, if the motors get out of sync, the X axis tilts relative to the Z axis. You don't fix that by adjusting the bed. You fix it by repositioning the X axis so it is square with the Z axis. Tweaking the bed may keep the machine printing even though the X axis is tilted (as will mesh leveling), but sooner or later it will tilt so far that the Z axis will bind. It's best to keep the axes square and the bed parallel to the axes.
-
If its independent the x axis adjust itself after it does a g32 and it adjust itself to the bed plane. if it is not independent according to Tony Akens you are going to have a hard time adjusting you're screws to a .009 or better. the way i described lets the machine do the adjustments. Its different for core xy
-
@ozzzzzzy said in Bed levelling with 3 points:
I try and get the x axis square to the z rods first by adjusting the bed screws in the x axis. I run a g32 with 2 points on the x axis then adjust the bed screws till I can measure up from both sides equally to the x axis, from the frame to the x axis. So I am using the bed to square the x axis. Then when that is all square I run a mesh grid to make it green in the x axis, which will break the the last steps but that was to get it close. it will probably be a strip of green in the x directions at this point. Then I start running mesh bed till I get it all green by adjusting the bed screws. You want you're x axis as square to you're z axis as possible.
I suggest you look at the link posted by @mrehorstdmd first, this one https://duet3d.dozuki.com/Wiki/Using_the_manual_bed_levelling_assistant. That will help you to adjust the screws to get the bed level before you run mesh bed probing.
Duet WiFi hardware designer and firmware engineer
Please do not ask me for Duet support via PM or email, use the forum
http://www.escher3d.com, https://miscsolutions.wordpress.com -
@dc42 I am running a chimera and I think my main concern is having the x axis the closest. I set my nozzle heights after I get dialed in. Its been working really good. It also seems like if I had a single nozzle it would be better if I could get it super close in 1 axes and close in the other. Rather then really close in all axes.