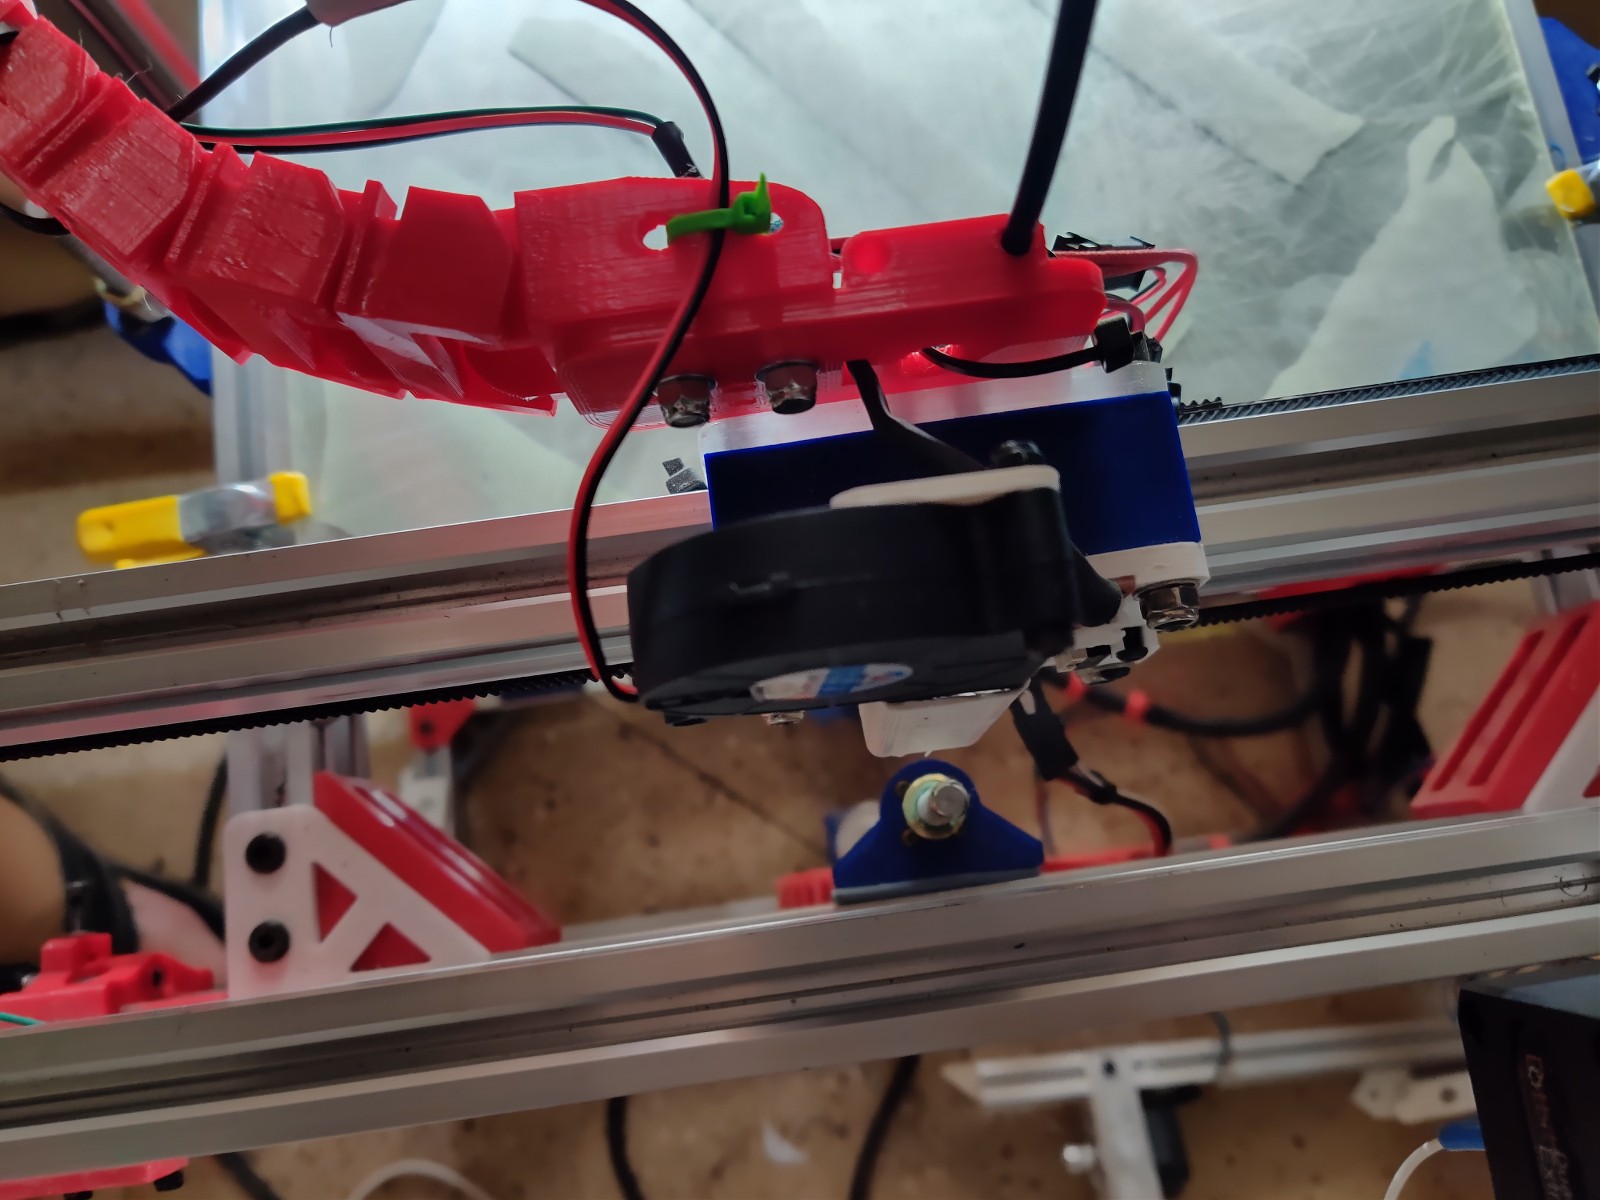
integrated D-Bot print carriage/cooler fan duct
-
Hi all. I'm curious whether any other D-Bot users (or anyone else using 20x40 rail for their print carriage) would be interested in a very compact solution for making their print carriage as small and light as possible while still having a cooling fan. When I converted my D-Bot to a 3-leadscrew solution from its stock 2-leadscrew configuration, the 3rd leadscrew caused me problems with my previous cooling fan, since the middle leadscrew is close enough to the build plate that the fan actually collided with it, and I was forced to ensure that none of my prints went too far up the Y axis to avoid it. Made a mistake once and the fan actually collided with the middle leadscrew and broke off. Also, I'm in the midst of a project to upgrade my 200x300mm build plate to a thick aluminum plate that's around 230x350mm. I'd like to be able to use as much of that increased area as possible, and what's constraining me at the moment was the extent of the print carriage, and making sure that it takes up as little space in the X and Y directions as possible so it doesn't interfere with the frame or the leadscrews.
Anyhow, I designed this rear carriage plate for the D-Bot that allows a blower fan to be mounted vertically at the top of the print carriage, rather than a conventional radial fan being mount behind the print carriage. The duct for this fan is part of the structure of the print carriage plate, sunk partway down into the plate so that the duct only sticks out 17mm from the surface of the plate. This is going to give me as much room in the Y direction as I think is possible while still having an effective cooling fan.
Here are a couple of pics of it. I've installed the carriage plate itself on my printer. Today I'll design the duct end that actually directs the air directly onto the print below the heater block. I'm using an original E3D Chimera hotend, and right now the duct opening on the carriage plate exhausts directly onto the heater block, about 30mm behind and 15mm above the nozzle end. The cooling fan is so effective through this duct that in a test print I experienced a heater block temperature drop in excess of 15 C which caused the Duet Wifi to abort the print.
Tonight I'll design the little duct end that will direct the air down below the heater block onto the printed object at the nozzle for the Chimera hotend, and then upload the two parts to Thingiverse. I think the beauty of this integrated cooling duct carriage rear plate is twofold:
- minimizing size in the Y direction of the print carriage for minimal constraints on my printable area of an oversized print bed (or a stock print bed with a 3-leadscrew conversion, which IMHO is an absolute must for a good D-Bot printer).
- Adaptability. I'll put up the end ducting for directly airflow from the carriage plate to an E3D Chimera hotend's nozzles, but it would be trivial for anyone to design the end duct that will fit any hotend I can think of and simply bolt that onto the duct end of the print carriage.
Anyhow, here are the pics.
-
Here's another pic from above, with the print carriage centered on the X axis and homed on the Y axis. There is less than 10mm of clearance between the back of this integrated cooling duct and the middle leadscrew, and that's with the Y axis homed with the nozzle around 10mm in from the edge of my print surface. With a conventional fan and duct hung behind the hotend nozzles it wouldn't be possible to get this close. With this solution not only do I not collide with that leadscrew, I could adjust my Y-axis endstop for a few mm closer to the rear edge of the build plate.

-
Nice work. I had a similar issue with clearance around the lead screws so I used shorter lead screws.
-
@phaedrux said in integrated D-Bot print carriage/cooler fan duct:
Nice work. I had a similar issue with clearance around the lead screws so I used shorter lead screws.
Yeah, that was the obvious solution, but I was hesitant to saw off the tops of my lead screws, and at least from the source I used they had good round numbers that were either too long or not long enough, so cutting would have been required. Anyhow, I really like this solution because the print carriage is very compact and will allow me to use as much of my new expanded build surface (when I get it installed) as I can. I also like how the integrated duct, being integrated, is right along the centerline of the carriage and not hanging off for other reasons, like fast accelerations of the carriage not having as much inertial influence of stuff hanging off the side. I think this is a very clean solution. Thanks for your comment!