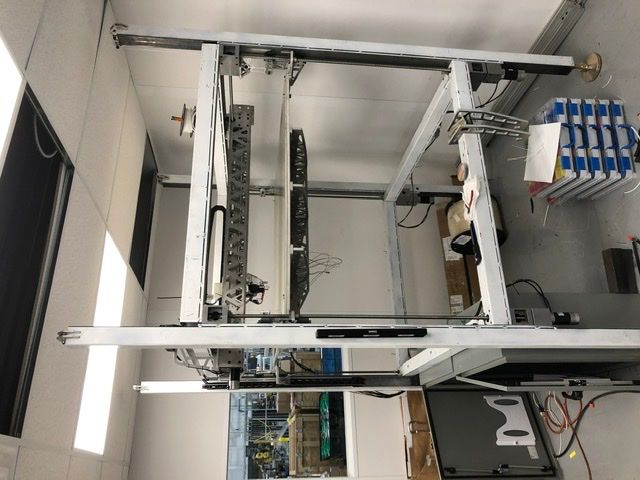
Large Volume Printer - The Beast
-
So far so good...finally got my large volume printer up and running.
-Duet Control board
-4 independent z-axis screws
-THK style linear rails
-matched axis...all 7 use the same BLDC servo and actuator components
-Heated bed-1m^3 total print volume
We still need some additional thermal controls before we can start the long prints.
-
Why BLDCs on the Z?
-
@JRDM I built all axis identical. Same screw, same bearing blocks, same rail and same motor.
This was partially out of economy of scale and simplicity.
I wanted to keep all the motor mounts/bearing blocks identical. These same machined blocks set the frame rails...everything is machined and pinned.
The beefy motors paid off in the end...the table weight really swelled as the build progressed. It was stiff enough to start and the stiffening structure got heavy on accident.
We eventually added counter-balance weights...you can see the strings and pulley assemblies at the corners.
Anyway, the table needs to be re-imagined to cut weight.
My only other regret was building it so tall. We wanted to fit the control cabinets underneath. But now it’s too tall to see the bed at the start of the print.
All of the linear motion components and servos were sourced from Amazon...approx. $800 per actuator.
-
Very cool project. Glad to see somebody using true servo control.
Keep us posted!
-
@ajlapp What servos did you choose?
-
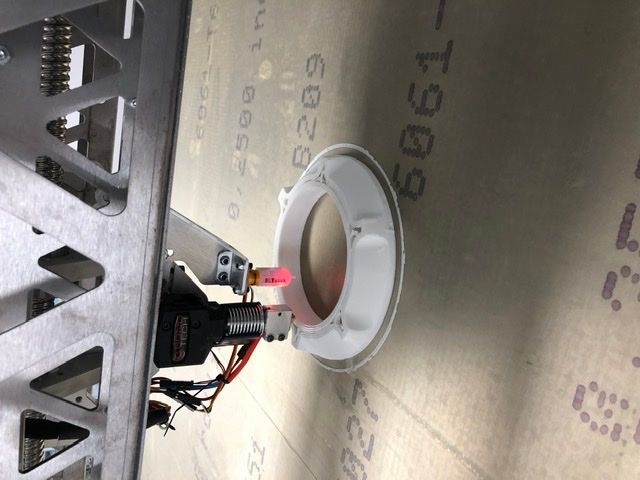
Very nice design, and choosing direct drive rather than Bowden is a good move from my experience.
What did you use for the frame? Doesn't look like standard aluminum extrusions.
Why so large? What object sizes do you plan to print?
Also, what nozzle size do you plan to use for large prints?
-
Linear Rails
https://www.amazon.com/gp/aw/d/B06VVXT19J?psc=1&ref=ppx_pop_mob_b_asin_titleBall Screw
https://www.amazon.com/gp/aw/d/B01LXZTNRY?psc=1&ref=ppx_pop_mob_b_asin_titleThe frame is thick wall steel square tubing with a pad welded to one face. That face was machined flat with the bearing blocks mounts and other features all in one shot.
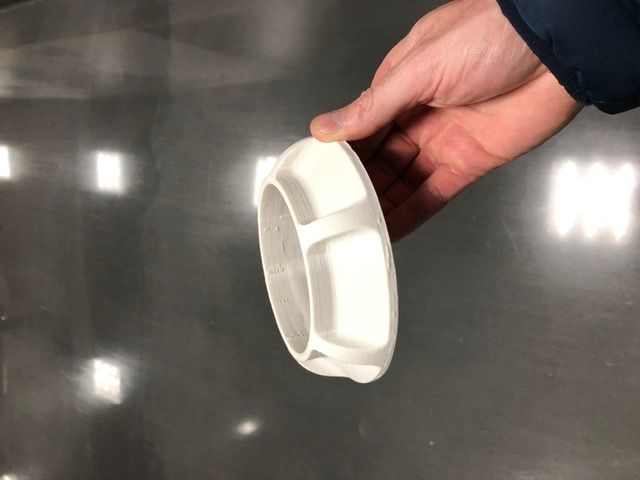
I’m using a E3D Volcan with a 1.2mm nozzle and 3mm PLA for now.
We had a project planned for this that has since dried up so for now we’ll just be using it as a general printer.