Z Setup - getting ridiculous !!
-
I'm really struggling with some of the safety 'features' and some of the erratic behaviour that I am seeing in Reprap. Between an inconsistent Z height, motor stall that doesn't work as expected, service crashes in the Pi, machine failures to obey Gcode commands because of some 'perceived' need to protect me from myself I'm really getting frustrated.
I need somebody to get me back on the path or the Duet's going on Ebay ... this is not turning out to be the experience I anticipated.
Trying to set a consistent Z in RRF RC3 is almost impossible - set M564 S0 H0, jog nozzle to 0, M92 Z0 ... and then you can't move away - and no amount of button pressing does anything.
Well it does - it adjusts the Z position on the dashboard - but all that happens is the steppers whistle a little - the only recovery is a hard reset / emergency stop, following M564 you can again move the steppers so this is not end stop related. It doesn't matter how often you send M92 Z0 once in this condition the Z height remains whatever it thinks it is - well it is flat out WRONG - can the system not tell from the current that the steppers haven't moved !!
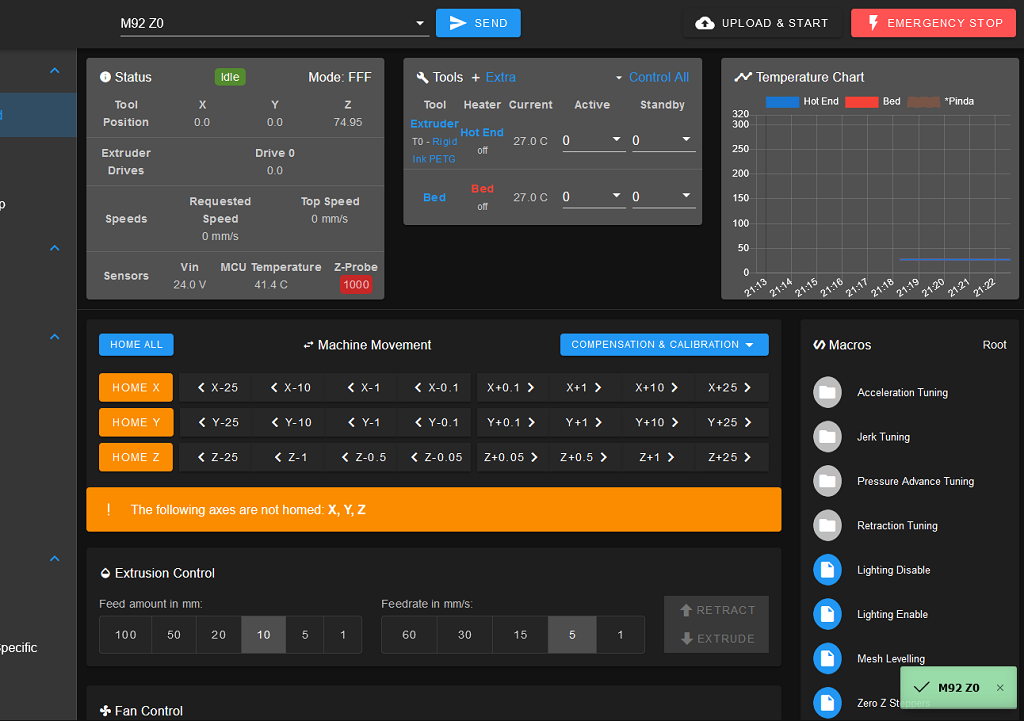
Note the Z probe is triggered - I've issued M92 Z0 and yet the Z value is garbage, it is therefore not possible to run G30 S-1 any more - used to be able to
I've also had three more head crashes because the system doesn't drive the Z axis the correct direction - if I drive to +350 on a core XY machine that does NOT mean drive closer to the nozzle - and yes my rotations are correct because normal Z operations work correctly including homing, this worked fine in earlier versions - but I can't imagine anything in RC3 has interfered with such basic behaviours - something sure has.
This code that is supposed to drive the bed to the bottom of the frame - part removal and mechanical levelling - now has the steppers driving into the nozzle, it used to work fine so I essentially ignored it on selecting - so now my build surface is definitely scrap with a nice dent right in the middle to match the scar at the front and a nozzle is barfed now.
G91                ; relative positioning
M400
M913 Z50 	       ; reduce motor current to 50%
G1 H1 Z320 F1800   ; move Z down until the endstop is triggered
G1 H2 Z-5 F100
M400
M913 Z100 	       ; restore motor current
G90              ; absolute positioning
Frustration levels are off the chart right now
-
@Garfield said in Z Setup - getting ridiculous !!:
M92 Z0
I hope you're not using M92 Z0. This sets the steps per mm for the Z axis! See https://duet3d.dozuki.com/Wiki/Gcode?revisionid=HEAD#Section_M92_Set_axis_steps_per_unit
You want
G92 Z0. https://duet3d.dozuki.com/Wiki/Gcode?revisionid=HEAD#Section_G92_Set_PositionYou can't really blame Duet for this, it would have caused problems whatever electronics you used.
As for the comments about moving Z up or down, I agree this is confusing. It's because it is generally assumed the printer is a Cartesian bed-slinger, so positive Z moves move the nozzle up, as the X axis gantry is mounted on Z. Obviously this isn't correct for printer's whose bed moves in Z, but 'increase distance between bed and nozzle' is a bit long winded. I think I've raised this for changing in the Config tool.
Ian
-
Don't know how to add a 'face / palm' emoji but damn - I was using M92 - shows how blinkered you can get when frustration kicks in.
This all started because every print I've done so far requires me to babystep to get the layer correct - I really don't want to do this for every print - the layer is already bad before you get the height sorted.
On one print I told the system to do a prime line similar to the Prusa but it left a nice notch in the bed instead ...
-
You mention a probe, but your Z homing is using an endstop move. Which is it?
-
Also, you've really jumped into the deep end with RRF3 release candidates and a Pi. It's only a few months old. There's going to be some growing pains.
If you're using a Duet 2 Wifi/ethernet, perhaps 2.05.1 would be a better way to cut your teeth?
-
I like challenges ... just finding some things a tad frustrating.
So I have an endstop move - that is to put the bed at the bottom of the frame - the end stop being based on motor stall (this is the S4 parameter that's not working as expected as one motor stalling stops all). The initial goal was to drop the bed for print removal which I still do but I can also have a mechanically level bed (within 0.3mm) when all Z axis steppers are on the bottom stops. The bed is kinematically located.
The homing is done using a Pinda probe, typical trigger height is 1.153 to 1.157, the printer still gets the first layer wrong in majority of cases requiring manual intervention - the Z height reported is correct but I can tell from the filament lay down that it isn't. Typically an additional 0.05 or 0.1 less Z height are needed though on one occasion I had to increase.
Steppers are well within their capabilities, even slowed down acceleration etc in case it was missed steps - it isn't.
-
Are you using the probe to establish the bed Z0 before printing? or is it going by the zmax endstop?
-
It's using the pinda probe, I only used the end stop as an idea to mechanically level before using the final G30 probing - and to stop the Z steppers if it went rogue at the bottom, I don't do any 'levelling' at all before prints.
Number of points: 182 Probe area: 624.0 cm² Maximum deviations: -0.106 / 0.165 mm Mean error: 0.012 mm RMS error: 0.047 mm
I've used a DTI also for mechanical set up - that's how I know the mechanical level at the bottom is within 0.3mm.
I have the code to drive the bed down as a separate macro - the code above - it drives the bed the wrong way now but it used to be fine.
-
If you have 3 z motors and a probe, why not use automatic bed tramming?
https://duet3d.dozuki.com/Wiki/Bed_levelling_using_multiple_independent_Z_motors
-
I do - this is the code I use - a bit OTT on probe points but I'm experimenting ... just struggling to decide whether the problems are in the firmware or the chair. Not new to motion control but I am new to Reprap.
M561 ; clear any bed transform G90 G30 P0 X29 Y31 Z-99999 ; probe near left front leadscrew G30 P1 X29 Y305 Z-99999 ; probe rear left G30 P2 X173 Y305 Z-99999 ; probe near rear leadscrew G30 P3 X285 Y305 Z-99999 ; probe rear right G30 P4 X285 Y31 Z-99999 ; probe near right front leadscrew G30 P5 X157.5 Y152.5 Z-99999 ; probe Centre G30 P6 X157.5 Y31 Z-99999 S3 ; Probe front centre and calibrate 3 motors G91 G29 -
Try adding another G30 at the center of the bed after the 3 motors are done leveling to reset the Z0 before doing the G29 for the bed surface. That could explain the Z offset you're seeing.
-
I shall try that and report. Going to have another run at this both with things both hot and cold to see how much variation there is (the old G31 error is back for the Pinda - can't define a co-efficient without a valid heater number - this disappeared in RC2).
Should have added I also put M375 at the end of my config to load the height map when I start the machine.
-
@Garfield said in Z Setup - getting ridiculous !!:
Should have added I also put M375 at the end of my config to load the height map when I start the machine.
Also a bad idea and it will likely complain about that because you're trying to load a heightmap before you've established the Z0 using a probe. Load the heightmap either at the end of homeall if you want it active at all times, or load it separately in your start gcode to have it active only during the print.
The number of points in your bed.g are too many. 3 points define a plane. so Probe closest to the lead screws and that's it.
-
Seems to behave better reducing the probe points, also set the trigger point hot, loading the height map in the model vs the firmware and so far it looks OK. G31 still complains about no heater even using a delay before its definition (fix given by @DC42 last time this was happening)
Not sure what I've done that's so different.
The macro to drop the bed (i.e. +Z) still drives it the wrong way and I can see no reason why it should - but that's not a major priority yet so I just don't use it.
Is there any way to modify the default value on the babystepping - I can do this on the dashboard but not the status window which is 0.05 and seemingly can't be changed. I can use M290 and that works but it doesn't change the defaults on the DWC.
-
@Garfield said in Z Setup - getting ridiculous !!:
The macro to drop the bed (i.e. +Z) still drives it the wrong way and I can see no reason why it should
Would need to see the rest of your config files to get an idea.
For changing the default amount of babystepping in the DWC you can either right click on the button and choose a new value or set it in the settings pane.
-
Didn't think to look on that page - sorted that one - right click on the value on the status page doesn't work (DWC 2.0.7)
Done a whole bunch of testing today both hot and cold, the trigger distance isn't consistent although it is fairly tight. I suppose it is too much to expect for it to be micron accurate at every move ... the higher the temperature oddly enough the greater the trigger distance - thought it would be the other way around -
Results of trigger between 45 Deg and 31 (not aligned - just as quickly as I could get done driving Z to a mixture of +25 and +50)
1.104
1.090
1.089
1.084
1.08
1.075
1.076
1.071
1.069
1.073
1.068
1.071
1.062
1.060
1.056
1.057
1.056
1.053
1.056
1.053
1.050
1.051
1.051
1.054
1.053
1.053
1.048
1.049
1.061
1.051
1.059
1.059
1.058
1.056
1.052
1.051
Config G
; Configuration file for Duet 3 (firmware version 3)
; executed by the firmware on start-up

; General preferences
G21													  ; Units are mm
G90                                                   ; send absolute coordinates...
M83                                                   ; ...but relative extruder moves
M550 P"Duet 3"                                        ; set printer name
M669 K1                                               ; select CoreXY mode
G92 E0.0

; Drives
M569 P0.0 S0                                          ; physical drive 0.0 goes forwards X
M569 P0.1 S0                                          ; physical drive 0.1 goes forwards Y
M569 P0.2 S1                                          ; physical drive 0.2 goes forwards E
M569 P0.3 S1                                          ; physical drive 0.3 goes Forwards Z1
M569 P0.4 S1                                          ; physical drive 0.4 goes Forwards Z2
M569 P0.5 S1                                          ; physical drive 0.5 goes Forwards Z3
M584 X0 Y1 Z3:4:5 E2 				                  ; set drive mapping
M350 X16 Y16 Z16 E16 I1                               ; configure microstepping with interpolation

M92 X160.00 Y160.00 Z1600.00 E404.00    	; set steps per mm
M207 S1.4 R0.0 F3000 T3000 Z0.2 		; firmware retraction settings for PETG
M204 P200 T400							; Set printing and travel accelerations
M566 X200.00 Y200.00 Z60.00 E50.00      ; set maximum instantaneous speed changes (mm/min) (Jerk)
M203 X6000.00 Y6000.00 Z750.00 E1200   ; set maximum speeds (mm/min)
M201 X3000.00 Y3000.00 Z750.00 E2500   ; set accelerations (mm/s^2)
M906 X1680 Y1680 Z1330 E1330 I30            ; set motor currents (mA) and motor idle factor in per cent
M84 S30                                               ; Set idle timeout


; Axis Limits
M208 X0:315 Y0:305 Z0:310				; set axis Min / Max
M671 X-23.7:167.5:358.7 Y31:362.5:31 S10		; Set Bed Pivot Locations

; Extruder /  Hot end
; Heater 0 model: gain 456.9, time constant 268.0, dead time 4.1, max PWM 0.70, calibration voltage 24.0, mode PID
; Computed PID parameters for setpoint change: P25.4, I0.762, D73.3
; Computed PID parameters for load change: P25.4, I1.897, D73.3
M308 S0 P"spi.cs0" Y" rtd-max31865" A"Hot End" 		  ; configure sensor 0 as a PT100 on Port 1 of temperature daughter board
M950 H0 C"out1" T0                                    ; create nozzle heater output on out2 and map it to sensor 1
M143 H0 S320                                          ; set temperature limit for heater 1 to 320C
M307 H0 A850 C268 D3.7 V24 S0.7 B0
M563 P0 S"Extruder" D0 H0 F1                          ; define tool 0
G10 P0 X0 Y0 Z0                                       ; set tool 0 axis offsets
G10 P0 R0 S0                                          ; set initial tool 0 active and standby temperatures to 0C
M950 F0 C"out7"	Q500 A"Part Cool"		      		  ; set part cooling fan output
M106 P0 H-1                  			      		  ; Thermostatic control is turned off
M950 F1 C"out8" Q500 A"Extruder" 		      		  ; set hot end cooling fan output
M106 P1 H0 T50              			      		  ; Thermostatic control is turned on, enables at 45C

Heater 1 model: gain 111.9, time constant 111.2, dead time 3.3, max PWM 1.00, calibration voltage 24.0, mode PID
Computed PID parameters for setpoint change: P54.3, I2.850, D124.1
Computed PID parameters for load change: P54.3, I6.039, D124.1
; Bed
M308 S1 P"temp0" Y"thermistor" A"Bed" T100000 B4725 C7.06e-8 	; configure sensor 1 as thermistor on pin temp0
M950 H1 C"out2" T1 Q1                               			; create bed heater output on out1 and map it to sensor 1
M143 H1 S120                                          			; set temperature limit for heater 0 to 120C
M307 H1 A111.9 C111.2 D3.4 V24 S1 B0                   			; disable bang-bang mode for the bed heater and set PWM limit
M140 H1                                               			; map heated bed to heater 0

; MCU
M308 S2 Y"mcu-temp" A"CPU"
M950 F2 C"!out4" A"MCU" Q25000 L.07
M106 P2 T40:44 H2      ; set Duet cooling fan

; Pinda Probe
M308 S3 P"temp1" Y"thermistor" T100000 A"Pinda" B4725 C7.06e-8 	; configure sensor 3 as thermistor on pin temp1
M558 P5 C"io6.in" H2 A3 F120 T2000          ; set Z probe type to filtered switch


; Spare Sensor
; M308 S4 P"spi.cs1" Y" rtd-max31865" A"Spare" 				  	; configure sensor 4 as a PT100 on Port 2 of temperature daughter board

; Filament Detection
M591 D0 P3 C"io5.in" S1 R60:140 L24.8 E3.0 				;Duet3D rotating magnet sensor for extruder drive 0 is connected to I/O 5 input,
														; enabled, sensitivity 24.8mm.rev, 70% to 130% tolerance, 3mm detection length
; Endstops
M574 X1 S1 P"!io0.in"                                   ; configure active-hi endstop for low end on X via pin io0.in
M574 Y1 S1 P"!io1.in"                                   ; configure active-hi endstop for low end on Y via pin io1.in
M574 Z1:2:3 S4

M915 P3:4:5 S10 F1 R1

; define mesh grid

; LED Enable Relay
M950 F3 C"out9" A"Led Relay" 		      ; set its name

; PINDA - Z-Probe
G31 P1 X-21 Y0 Z1.153 C0.002 S29 H3     ; set Z probe trigger, offset, trigger height, temperature compensation

; Miscellaneous
M557 X21:270 Y0:270 S20
M501                                                  ; load saved parameters from non-volatile memory
M911 S10 R11 P"M913 X0 Y0 G91 M83 G1 Z3 E-5 F1000"    ; set voltage thresholds and actions to run on power loss
bed.g
M561 				; clear any bed transform
G28 				; home
G90
G30 P0 X29 Y31 Z-99999 	; probe near left front leadscrew
G30 P2 X152 Y305  Z-99999	; probe near rear leadscrew
G30 P4 X315 Y31 Z-99999 	; probe near right front leadscrew
G30 P5 X157.5 Y31 Z-99999 S3 ; Probe front centre and calibrate 3 motors
G30 P5 X157.5 Y152.5 Z-99999 ; probe Centre
G91
homeall.g
G91                     ; relative positioning
G1 H1 X-320 F1500 ; coarse home X
G1 X4 F360 ; move away from the X endstop
G1 H1 X-10 F250 ; fine home X
G92 X0

G1 H1 Y-320 F1500 ; coarse home Y
G1 Y4 F360 ; move away from the Yendstop
G1 H1 Y-10 F250 ; fine home Y
G92 Y0

G1 H2 Z4 F200 ; raise head 4mm to ensure it is above the Z probe trigger height
G90                     ; absolute positioning
G1 X152 Y152 F2500 ; put head over the centre of the bed, or wherever you want to probe
G30 ; lower head, stop when probe triggered and set Z to trigger height
Home Z
G91 ; relative mode
G1 H2 Z4 F200 ; raise head 4mm to ensure it is above the Z probe trigger height
G90 ; back to absolute mode
G1 X152 Y152 F3000 ; put head over the centre of the bed, or wherever you want to probe
G30 ; lower head, stop when probe triggered and set Z to trigger height
And the macro that drives the wrong way ....
G91                ; relative positioning
M400
M913 Z50 	       ; reduce motor current to 50%
G1 Z320 F1800   ; move Z down until the endstop is triggered
G1 Z-5 F100
M400
M913 Z100 	       ; restore motor current
G90              ; absolute positioning
If any more are required just holler ...
-
@Garfield said in Z Setup - getting ridiculous !!:
Heater 1 model: gain 111.9, time constant 111.2, dead time 3.3, max PWM 1.00, calibration voltage 24.0, mode PID
Computed PID parameters for setpoint change: P54.3, I2.850, D124.1
Computed PID parameters for load change: P54.3, I6.039, D124.1Are those lines actually in config.g without being commented out with a ; ?
G92 X0
G92 Y0Best not to use G92 in your homing files. When the endstop is hit, the axis position will be set to the M208 max or min already, so it's redundant, and if the move didn't actually make contact with the switch for some reason the G92 would still flag the axis as homed even though it might not be. So best not used.
And your bed.g
M561 ; clear any bed transform
G28 ; home
G90
G30 P0 X29 Y31 Z-99999 ; probe near left front leadscrew
G30 P2 X152 Y305 Z-99999 ; probe near rear leadscrew
G30 P4 X315 Y31 Z-99999 ; probe near right front leadscrew
G30 P5 X157.5 Y31 Z-99999 S3 ; Probe front centre and calibrate 3 motors
G30 P5 X157.5 Y152.5 Z-99999 ; probe Centre
G91You've still got 5 probe points rather than 3 and your number ordering is odd. 0, 2, 4, 5, 5.
I would think it should be
M561 				; clear any bed transform
G28 				; home
G90
G30 P0 X29 Y31 Z-99999 	; probe near left front leadscrew
G30 P1 X152 Y305  Z-99999	; probe near rear leadscrew
G30 P2 X315 Y31 Z-99999 S3	; probe near right front leadscrew
G1 X157 Y152 ; move to bed center
G30 ; probe Centre of bed
G91
And the macro that drives the wrong way ....
M913 Z50 ; reduce motor current to 50%Does it still drive the wrong way if you leave the motor current at full?
In config.g your z max endstop config...
M574 Z1:2:3 S4
This is not a correct formulation of M574. Z1:2:3 makes no sense. The Z# sets the position of the endstop. Z0 none, Z1 low end, Z2 high end.
https://duet3d.dozuki.com/Wiki/Gcode#Section_M574_RepRapFirmware_Num_3
So if you're wanting to use a Zmax endstop with stall detection on all motors, you want M574 Z2 S4.
-
Thanks - all good to know - and yes that text is in there with no ; - and no complaints -
Deleted lines and failed to redo the P# ....
I shall try your adjustments - been pre-occupied trying to get a consistent and predictable first layer - some of the issues are in the slicer (tried Prusa and Simplfy3d - both are over extruding on the Hemera - may be similar to what another poster is seeing - first layer extrusion width > 0.42 is resulting in a rough surface and nozzle pickup layer height .07 over height) - topic for another day.
Not sure where I got these things from such as G92 - fairly sure it was documents / examples - I'll need to backtrack and see if I can figure that out - I shall dump the G92's.
I'll check the stepper direction vs current shortly - just doing another layer test ...
