HELP! Duet 2 WiFi Configuration and DWC Upload???
-
@phaedrux
I'll include a better picture of the board.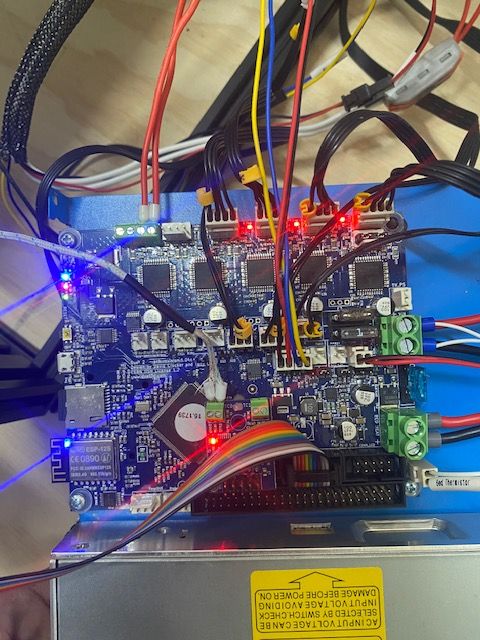
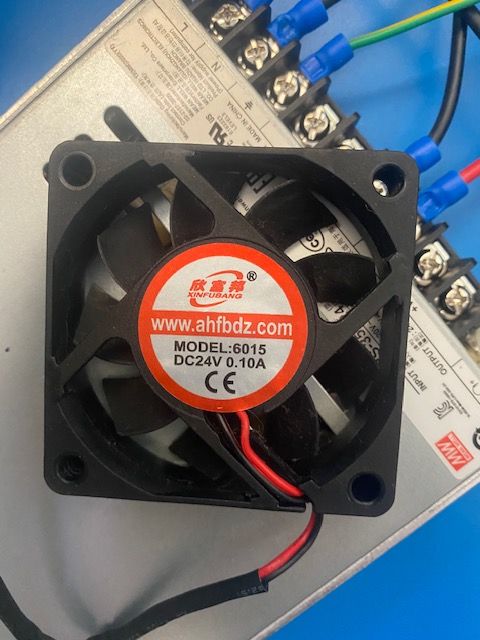
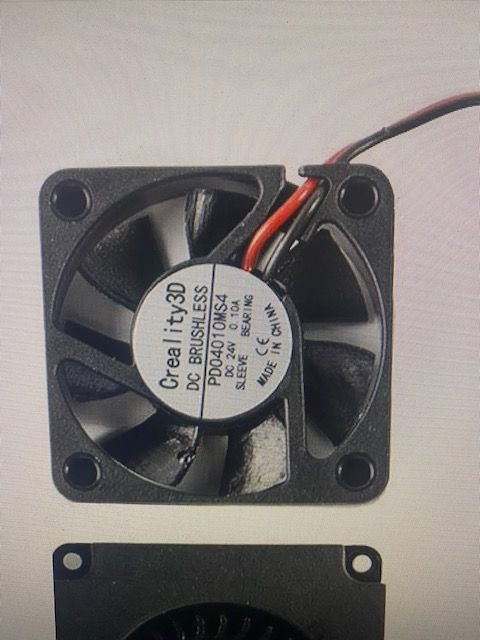
I'll include pictures of my fans. the first two pictures are my hardware cooling fans. the larger black one I repurposed from another PSU. and then the small clear one was an upgraded hardware cooling fan I swapped with the stock fan. the small one is plugged into the Always on ports and the larger one is wired directly into the board with power from the VIN. (two white wires with blue ferrules)
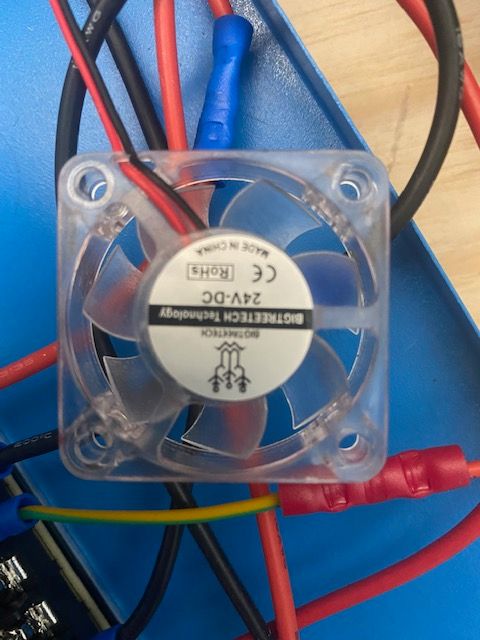
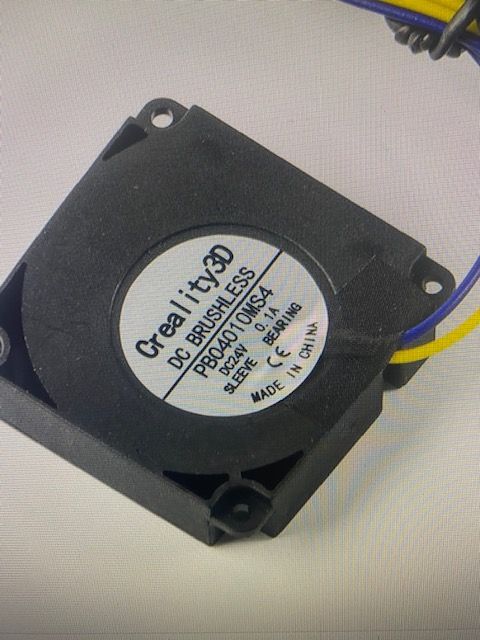
As for my part cooling fans, I have the 2 that came stock with the printer, and those are plugged into the PMW ports
-Yellow and blue into Fan 1 port- Black and Red into Fan2 port
"What setting is the voltage selection jumper set to?"...not sure what that is or what you mean? I don't have a buck converter or booster on this board in case that's what you were referring to.
Here's the daughterboard
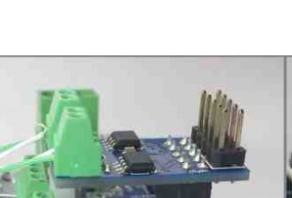
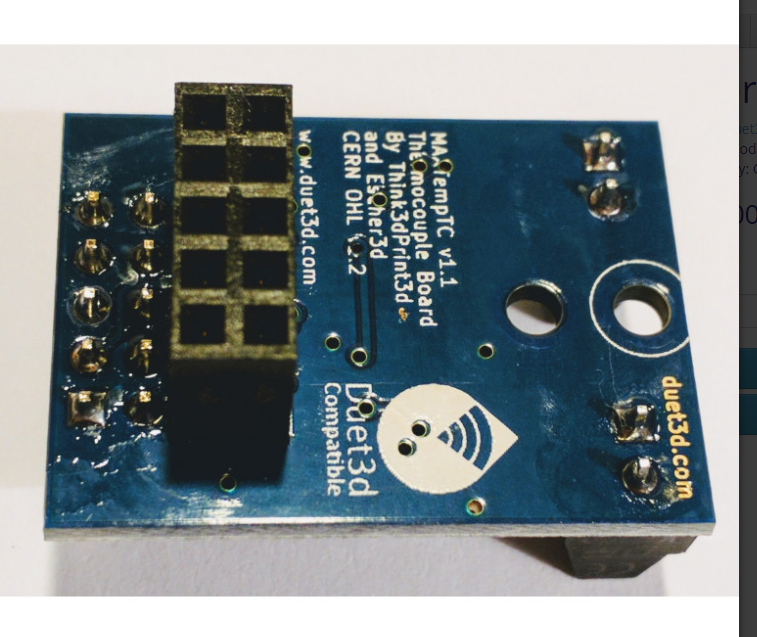
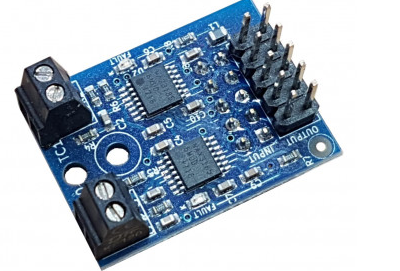
-Thermistor/Thermocouple: Type K Thermocouple (I think MAX31856 on CS1 or CS2, not sure which)
-The wire is not extended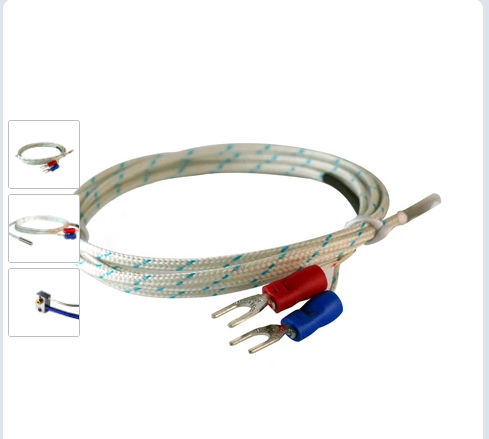
As for the Hotend, I commanded it to max out at 350c, I'm trying to test for 210 just to see if everything was working
I'll delete that line when I get home from work
*What's PID tuning?
Thanks
-Carson
- Black and Red into Fan2 port
-
For the fan you've got connected directly to VIN, why not connect it to the second always on fan port? Then you have the benefit of the fuse protection at least.
For the PWM fan ports, you have them connected to fan1 and fan2, but fan0 is empty. It's recommended to use fan0 as the part cooling fan, and fan1 as the hotend heatsink fan.
So move the yellow and blue wired blower to fan0 for the part cooling, and the red and black wire 40mm fan to fan1 for the hotend heatsink. That seems to be the way it's configured in your config.g anyway.
The fan voltage selection jumper is the little jumper block right in front of the fan ports. I can see in your new photo that it is set to use VIN, so 24v, which matches your fans. That's all good.
For the thermocouple it looks like it's configured correctly and seems to be reading room temp ok. We're you able to pull the wiring and re-check it?
-
How do I PID Tune? So like set the temp to 350c wait until it gets there and then let it turn off and then back on again at its minimum temp., and then save that somehow??
I deleted the M918 line.
Ok. So.
-The fans are all connected and in the right ports. They work and are reacting to being adjusted
-The Fault LED went off on the daughterboard after I readjusted them
-I tested the bed and the Hotend and both are working and reaching the desired temps*Now as for the Homing, how do I even do that from scratch? i just tried to home X and the motors were running in the wrong direction. What do I change in the code to make the motors go in the right direction. I had to E Stop it.
Here are the Errors I got when I tried to home X
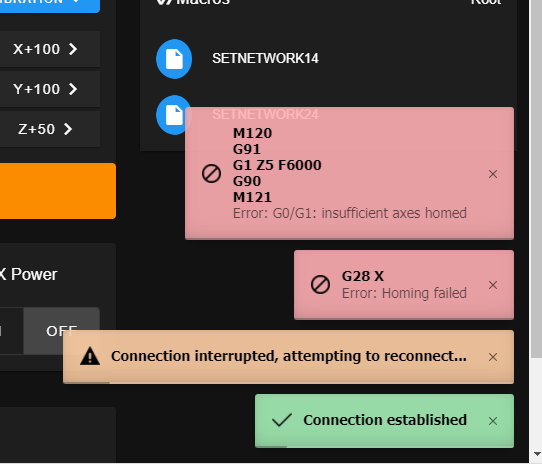
Thanks,
-Carson
-
https://duet3d.dozuki.com/Wiki/Tuning_the_heater_temperature_control
In short though, you send
M303 T0 S250for the hotend and wait while it works. For the bed, sendM303 H0 S70and wait. Where S is the temp you will be printing at. Then after it's done tuning send M500 to save the results.Good to see we're making some progress.
For the motor directions I'll link you do a test sequence that ill help walk you through figuring out the correct motor directions etc.
Basically though, you manually move the print head and bed to their center positions and then send G92 X100 Y100 to tell the firmware it's homed and at that location so you can jog the axis around.
When looking at the printer from the front, the 0,0 position would be in the front left corner of the bed. +x should move to the right, -x should move to the left, +y should move back, -y should move to the front.
If the axis aren't moving in those directions the direction of rotation of that motor would need to be changed in M569.
With that in mind, where are your endstops located? X would be either left (-) or right (+), y would be front (-) or back (+).
Will need to know that detail to make sure the M574 command reflects the correct location of the endstops. Then in your homing files the homing moves would need to move towards the endstop, so either in the positive or negative direction.
https://duet3d.dozuki.com/Guide/Ender+3+Pro+and+Duet+Maestro+Guide+Part+3:+Commissioning/39
-
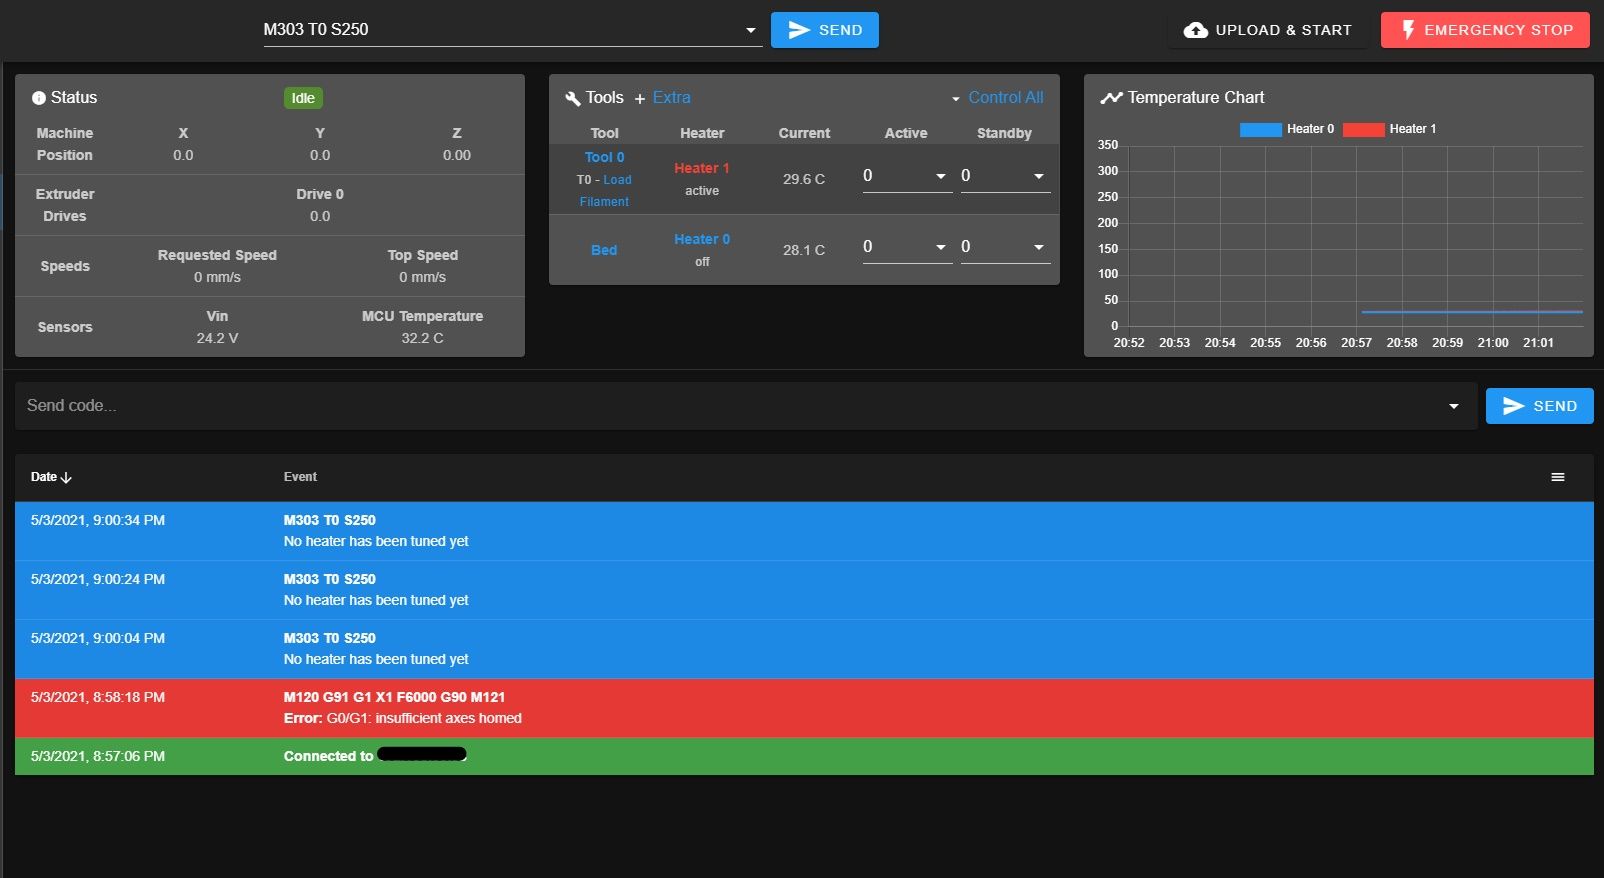
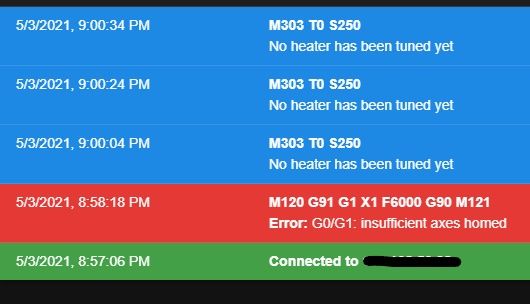
This is what happened when I ran M303 T0 S250
*Also should I use those exact parameters for the test?
So do I move the print head and bed literally to the center, or to 0,0 (front and to the left)? What if I want the homed location to be in the back right, is that possible? That's how it was before I got the duet board.
So it wont let me test the +/- directions until it's been homed, so how do I know if the are going in the right direction or not? When I move the printer head manually the DWC doesn't reflect the movements being made.
So I hit X Home and it goes left for example.
-X endstop is on the right
-Y endstop is on the back rightThanks,
-Carson
-
Sorry, I forgot you are still on RRF 2.05. You'll need to use M303 H1 S250 for the hotend. And M303 H0 S70 for the bed.
@pcnoobneedsmajorhelp said in HELP! Duet 2 WiFi Configuration and DWC Upload???:
So do I move the print head and bed literally to the center, or to 0,0 (front and to the left)? What if I want the homed location to be in the back right, is that possible? That's how it was before I got the duet board.
Move it there by hand and send the M92 command just to allow the test to see what directions they move. It's just for the test, nothing permanent.
-
Once you have confirmed the movement direction you'll need to make these changes to get homing working correctly.
@pcnoobneedsmajorhelp said in HELP! Duet 2 WiFi Configuration and DWC Upload???:
So I hit X Home and it goes left for example.
-X endstop is on the right
-Y endstop is on the back rightYou'll need to change a line in config.g to setup the endstops.
M574 X1 Y1 Z1 S1would becomeM574 X2 Y2 Z1 S1your homing files would change to become:
; homeall.g
; called to home all axes
;
; generated by RepRapFirmware Configuration Tool v3.2.3 on Sat May 01 2021 17:31:12 GMT-0700 (Pacific Daylight Time)
G91                     ; relative positioning
G1 H2 Z5 F6000          ; lift Z relative to current position
G1 H1 X240 Y240 F3000 ; move quickly to X and Y axis endstops and stop there (first pass)
G1 H2 X-5 Y-5 F6000       ; go back a few mm
G1 H1 X240 Y240 F240  ; move slowly to X and Y axis endstops once more (second pass)
G1 H1 Z-315 F240        ; move Z down stopping at the endstop
G90                     ; absolute positioning
; homex.g ; called to home the X axis ; ; generated by RepRapFirmware Configuration Tool v3.2.3 on Sat May 01 2021 17:31:12 GMT-0700 (Pacific Daylight Time) G91 ; relative positioning G1 H2 Z5 F6000 ; lift Z relative to current position G1 H1 X240 F3000 ; move quickly to X axis endstop and stop there (first pass) G1 H2 X-5 F6000 ; go back a few mm G1 H1 X240 F240 ; move slowly to X axis endstop once more (second pass) G1 H2 Z-5 F6000 ; lower Z again G90 ; absolute positioning; homey.g ; called to home the Y axis ; ; generated by RepRapFirmware Configuration Tool v3.2.3 on Sat May 01 2021 17:31:12 GMT-0700 (Pacific Daylight Time) G91 ; relative positioning G1 H2 Z5 F6000 ; lift Z relative to current position G1 H1 Y240 F3000 ; move quickly to Y axis endstop and stop there (first pass) G1 H2 Y-5 F6000 ; go back a few mm G1 H1 Y240 F240 ; move slowly to Y axis endstop once more (second pass) G1 H2 Z-5 F6000 ; lower Z again G90Basically just flipped the direction of the X and Y moves so that they go towards the endstops.
-
Ok. So.
-M92 Command failed


-The Bed Tuning was a success so I type M500 and hit enter

-In theory the Hotend test worked but I didn't save it because of this warning I got. I thought I'd check with you before I saved it

-I haven't made any changes to config.g just yet
Thanks,
-Carson
-
@phaedrux said in HELP! Duet 2 WiFi Configuration and DWC Upload???:
G92 X100 Y100
Not m92. G92. As above.
The warning is just that. A warning. It's letting you know how hot it could get in a failure situation. Take precautions and understand what that temp is capable of.
-
Ah, my bad. I was looking at the wrong post.
Ok. So.
-Hotend tuned and saved
-G92 X100 Y100 entered and the results came out +X to the right, -X to the left, +Y to the back and -Y to the front. I haven't checked Z yet but if these are correct I'll just assume that is too.
-I did notice though, that 0,0 isn't all the way to the left and all the way to the front, is that normal for the test or is that my new build plate size or something? that's a stupid question probably haha.*Should I still send the new M574 codes for the endstops?
Thanks,
-Carson
-
Motor directions look correct.
The 0,0 point will be correct once the axis are actually homed.
So you'll need to change the M574 and homing files as I indicated above first. Then you should be able to use the homing buttons to home the axis correctly and then jog the printer around and maybe even do an actual print.
-
Ok. So.
-I changed the M574 line in config.g and changed the other values in their respective areas.
-Was able to Home X and Y
-Z is going in the opposite direction of the endstop and will not home.*I assume I'll go into config.g and change Z1 to Z2 and then under homeall.g and homez.g I just change the - to + or vise versa?
So after I am able to home all 3, then can I jog the x, y, and z to where I want them and then home them again...or, how does that work exactly?
Thanks,
-Carson
-
@pcnoobneedsmajorhelp said in HELP! Duet 2 WiFi Configuration and DWC Upload???:
*I assume I'll go into config.g and change Z1 to Z2 and then under homeall.g and homez.g I just change the - to + or vise versa?
No. You need to change the direction of rotation of the Z motor in M569 for the Z driver.
M569 P2 S1 ; physical drive 2 goes forwardsChange that to S2
-
After the S1 to S2 change, I homed Z, and other than it being a little rough, it's homed.
-I had to lift the bed until it was about 1mm below the endstop so when it started to home it would reach it before going the opposite way slowly to the bottom crashing into the shaft coupler leading to a push of the E Stop.
-So as long as it's ok that it did that then we're all set
-The bed is still super far from the nozzle after being homed
*If I lower the screw on the bed, that ultimately hits the endstop would it naturally fix itself later?What's next after homing? Just jog a little or do a test print?
Thanks,
-Carson
-
So after jogging for a little bit I'm noticing that Z thinks its at the bottom of the bed at 6mm and wont go any further down then that.
These are the numbers I got based on maxing out each axis. It looks like x and y are set at 235mm. And since I know its 300mm down the lead screw that's how I came up with that variable.
X=-4
Y=-3
Z=+294 -
I’ll play around with some of the Z values and see what happens and then I’ll try to follow one of the guides, but if I run into more issues I’ll definitely need your help.
Thanks,
-Carson
-
To get the sizing and coordinates of the print area correct you can use the following technique to measure and then change your config to make it permanent.
With the printer off, physically move the print head to the front left corner so that the nozzle is just over the corner of the printable area.
Turn the printer on and send G92 X0 Y0 because that's where we want 0,0 to be.
Now send
G1 H3 X400 F4000
That will move the print head to the right until the endstop is triggered. Check the X position in DWC and make a note of it. This will be your M208 X maxima value.Now send
G1 H3 Y400. That will move Y to the endstop. Check your Y position in DWC That will be the M208 Y maxima value.Put those values into config.g M208 command for X and Y.
M208 X235 Y235 Z310 S0 ; set axis maximaFor Z we can kind of do a similar test. But it sounds like when the endstop is triggering your nozzle is still quite far from the bed surface? If that's the case, you'll need to adjust the endstop position so that it's triggering when the nozzle is just above the bed surface. If the bed mount has spring leveling knobs you can balance the tension there as well to raise and lower the bed slightly. I'm not super familiar with the Ender5, but if it's anything like other creality printers it will have some adjustment knobs. I suggest tightening them all the way down at first and then backing them off one turn each. Then adjust the endstop position so that the nozzle can touch the bed.
See here for some bed leveling guidance. https://duet3d.dozuki.com/Guide/Ender+3+Pro+and+Duet+Maestro+Guide+Part+4:+Calibration/40
Once you have the nozzle just touching the bed, send G92 Z0 to make it homed. Then jog it in the Z+ direction as far as you can. It should get pretty close to what you expect. Maybe not quite 300mm though.
-
Ok. So.
-X and Y are great. homed. boom.
-Z on the other hand is still giving me problems...So I referred to the guide and did exactly what it said and then Z would not move down or up.
Also, did you mean to say Z- instead of Z+
"Once you have the nozzle just touching the bed, send G92 Z0 to make it homed. Then jog it in the Z+ direction as far as you can. It should get pretty close to what you expect. Maybe not quite 300mm though."Because if I get the bed as close to the nozzle as I can and then do G92 Z0, Z+ is like 2mm up.
And that's kind of the problem I'm running into. If I zero Z at the top and home it, it initially works fine but then I try to jog down and it wont go anywhere and will only go up a few mm.(I think it won't go down because it thinks its all the way at the bottom)
I also tried G92 Z0 with the bed at the bottom and tried to home it. It went up a few mm then came down again violently crashing into the bottom. E stop.
-Just for shits and giggles I Zeroed it at the bottom and manually jogged it to the top with the DWC controls until it got to the endstop at the top, and that's how I got my Z axis value of 305.00mm (310.00mm was the old value). so then I plugged that in the M208 in my config.g
-I did try homing it both with the old M208 value and the new one and the same thing happens.
-At one point I zeroed Y and then sent the G92 Z0 command and my Z axis wouldn't go up or down. I'm starting to get frustrated because 3x now I've dialed in the bed to the nozzle and every time it crashes I have to start all over. Plus I hate seeing my printer crash.
So, yeah, now I'm just confused, sorry.
*Here are some pictures of all my files
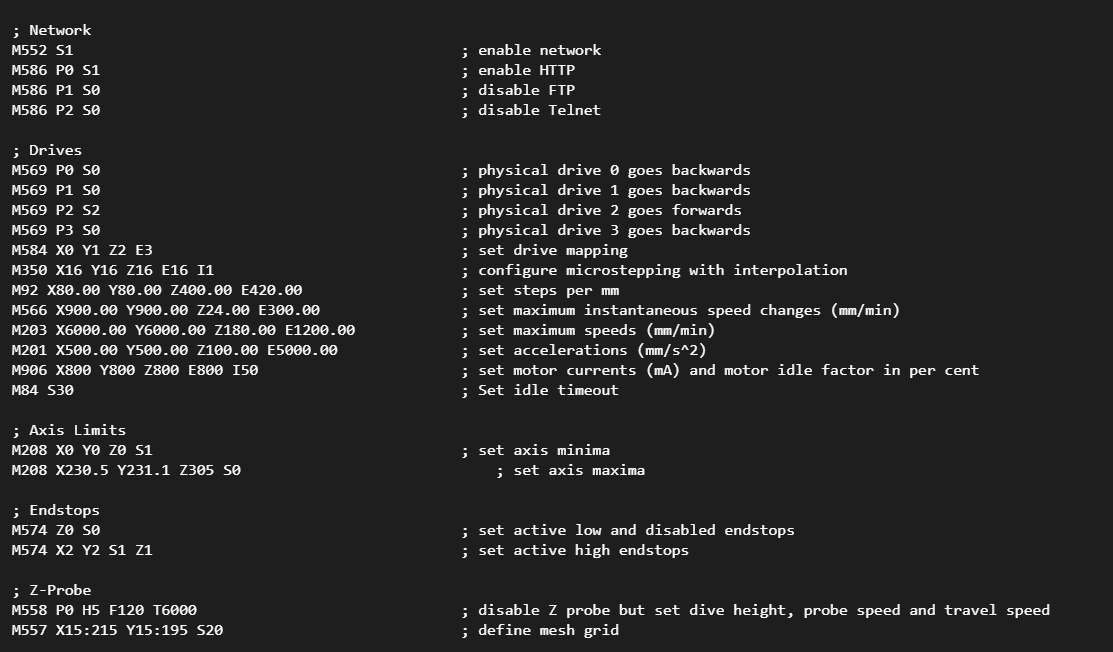
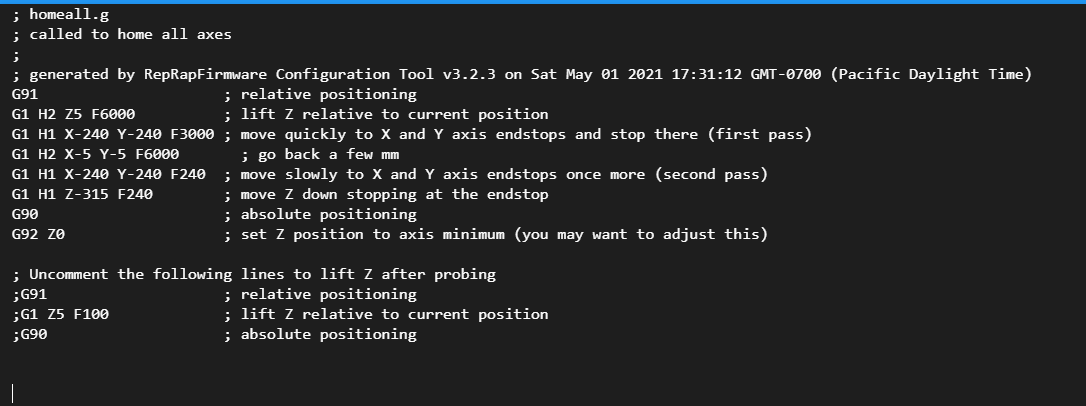



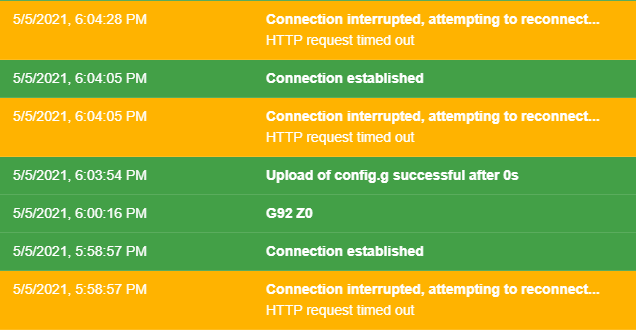
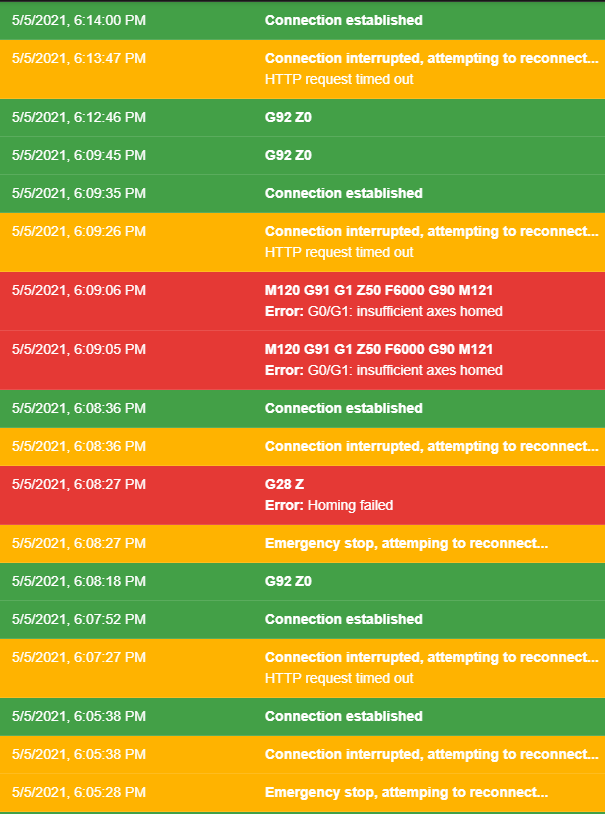
Send G92 Z0, When it's up, like this:
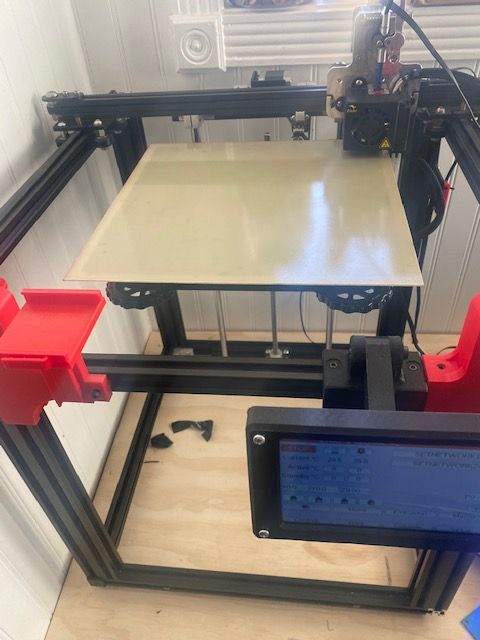
Or down, like this?
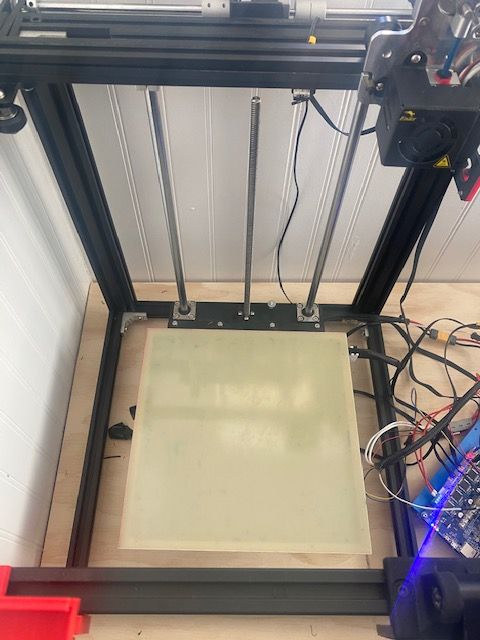
Thanks,
-Carson
-
Z0 should be when the bed is touching the nozzle.
Z+ moves the bed down, away from the nozzle.
When the bed is at the bottom it would be at the ~300mm position.
The Z endstop is at the top side, right?
Send M119 and see what it says about the Z endstop. When nothing is pressing the endstop, it should say, "not triggered". And vice versa.
If you move the bed to the center of travel, so it's half way up and down, send G92 Z150. That will force it to be homed and at 150mm (even if it's not exactly). Now you should be able to use the jog buttons to move the bed up and down.
Does +Z move the bed down? Does -Z move the bed up?
If not, we need to change the Z motor direction.
-
Ok, I'll try that, but to answer your question, it moves up when I hit Z+