Ender 3 RRF v1.1 setting up BLtouch
-
@re_tour Then again my offset is Z4.370 and I think my probe is as close to the bed as it could really be
-
@gixxerfast Stupid question I know, but how will I know that my offset is correct?

-
@re_tour Same way, just lower slowly to zero and see if your paper feels right.
Then when printing you will probably see that you're to close and you will want to lift it a bit. But all do it differently I think. I just go for a lot of paper friction, it's easier to adjust every corner.
Also, on the Ender. Don't put too much work into this cause you will do the bed screws anyway with the paper method I guess. Then when it's fairly flat (ish) you'll do a bed mesh.
-
@gixxerfast Wait, so if I set up the offset correctly, how do I get from here to be able to do the bed mesh?
-
@re_tour
You have something like this in your config.g:;mesh_min: 30, 15 ;mesh_max: 190, 220 ;probe_count: 5 M557 X30:190 Y15:220 P5 ; define mesh gridThen you have a file called mesh.g in your /sys directory with something like this in it:
G29 S2

; move to the center of the mesh with the PROBE (mind affset in Y is 25 above noozle)
G90
var xoffset = 37.1
var yoffset = 9.25
var xpos = {110 - var.xoffset}
var ypos = {117.5 - var.yoffset}

G1 X{var.xpos} Y{var.ypos} Z15 F6000

echo "Setting Probe Offset now"
G30 K0
G1 Z15 F3000

G29 S0
The offsets of course depends on where you have your probe mounted.
-
@re_tour Home all, then mesh.
G28
G29or
G28
G32 ; call bed.gIn bedg.g I have:
; bed.g ; called to perform automatic bed compensation via G32 M561 ; clear any bed transform if !move.axes[0].homed || !move.axes[1].homed || !move.axes[2].homed G28 M290 R0 S0 ; clear baby stepping G29 S1 ; load heightmap.csv if result > 1 ; if no heightmap.csv, make one G29 S0 -
@gixxerfast
Okay, looks like subtraction is the way to go when calibrating offset
Offset is now correct and set to Z3.55.the part you mentioned in config.g looks like this for me:
; Z-Probe
M950 S0 C"servo0"                              ; create servo pin 0 for BLTouch
M558 P9 C"^probe" H5 F300:120 A3 T6000         ; set Z probe type to bltouch and the dive height + speeds,the F300:120 first speed 300 second 120
G31 P500 X117.5 Y117.5 Z3.55                      ; set Z probe trigger value, offset and trigger height
M557 X15:215 Y15:195 S20                       ; define mesh grid
But, I don't have a mesh.g in my sys. Do I have to make that for myself or it will autamatically be generated once I run the process?
-
@stephen6309 I have this in bed.g:
; bed.g ; called to perform automatic bed compensation via G32 ; ; generated by RepRapFirmware Configuration Tool v3.3.1-LPC-STM32+2 on Tue Dec 28 2021 01:07:55 GMT+0100 (közép-európai téli idő) M561 ; clear any bed transform G29 ; probe the bed and enable compensation -
@re_tour Great!! I always get that the other way around.
If you're happy with your mesh grid go for it
You will have to make the file yourself.
-
@re_tour G32 and bed.g is for gantry/bed leveling. G29 and mesh.g is for the bed mesh.
In earlier vesrions of RRF I think mesh-g didn't exist so therefore a lot of people still uses bed.g with the G32.
Anyhow, the Ender can't level gantry or bed automatically since it only has one z-motor
-
@gixxerfast Oh right, so I can only use the bed mesh anyways.
Okay so I modified the config.g a little bit:
M557 X30:190 Y30:190 P5 ; define mesh gridand copied your mesh.g, in which I presume I'll have to measure the distances with a ruler or something?
-
@re_tour That will work fine. I have the if statements make sure it's homed and load the height map. Also, I clear the baby stepping, since I update a macro I call to set the Z offset.
-
@re_tour Yes, if you don't already know them. Usually mounts have a them in the description/documentation. It's not very precise so ruler works.
As said above, it's probably wise to add this to the top of your mesh.g
if !move.axes[0].homed || !move.axes[1].homed || !move.axes[2].homed
 G28
M290 R0 S0    ;  clear baby stepping
But then you should be ready to go

-
@gixxerfast Thank you. Lastly, how do I measure these:
var xoffset = 37.1
var yoffset = 9.25
var xpos = {110 - var.xoffset}
var ypos = {117.5 - var.yoffset}
I mean in relation to what from what?
Also, what kind of bltouch holder do you have? Maybe we have the same which would mean the numbers are mostly correct

-
@re_tour I have the Voron Afterburner, so probably not. But I have my probe to the right and behind the nozzle seen standing in fron of the printer.
Should be the same numbers you have in your G31 command
<-------- 37.1 -------> x ^ | 9.25 | o --- -
@gixxerfast Okay, so measured up I now have the following mesh.g:
if !move.axes[0].homed || !move.axes[1].homed || !move.axes[2].homed
 G28
M290 R0 S0    ;  clear baby stepping

G29 S2

; move to the center of the mesh with the PROBE (mind affset in Y is 25 above noozle)
G90
var xoffset = 44
var yoffset = 18
var xpos = {117.5 - var.xoffset}
var ypos = {117.5 - var.yoffset}

G1 X{var.xpos} Y{var.ypos} Z15 F6000

echo "Setting Probe Offset now"
G30 K0
G1 Z15 F3000
G29 S0
In which the xpos and ypos is the same as this line in the config.g file:
G31 P500 X117.5 Y117.5 Z3.55 ; set Z probe trigger value, offset and trigger heightWhat is the next step from here?
-
@re_tour said in Ender 3 RRF v1.1 setting up BLtouch:
G31 P500 X117.5 Y117.5 Z3.55
No, this must be wrong
Shouldn't it be:
G31 P500 X44 Y18 Z3.55?
-
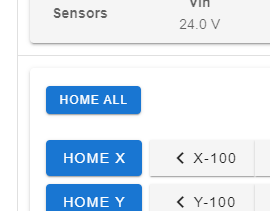
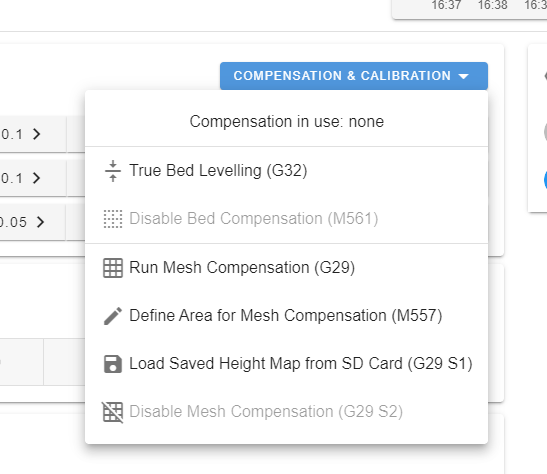
@re_tour When all of this is done. Heat your bed to the standard temp and the home all with

and run mesh compensation:

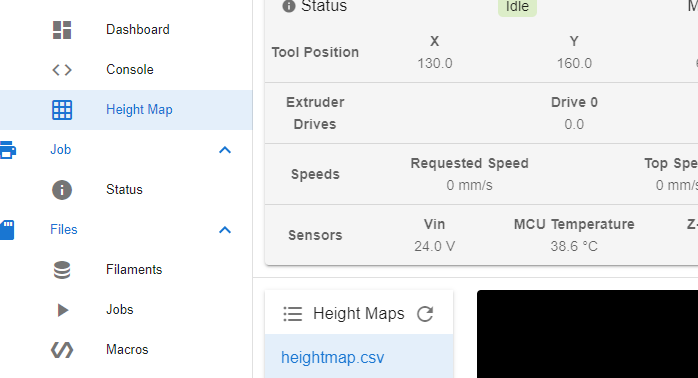
The you should have a mesh file which you can look at with:

-
To be honest for some reason I set that number at the start after browsing through reddit. Since you have the same printer, what is it for you?
Btw just to clarify,
var xoffset = 44

var yoffset = 18
This is measured from the sensor to the nozzle, right?
-
@re_tour said in Ender 3 RRF v1.1 setting up BLtouch:
This is measured from the sensor to the nozzle, right?
Yes, You have my offsets up there but OK:
var xoffset = 37.1
var yoffset = 9.25
As said, I have my probe to the right and behind the nozzle. Most stock Enders usually have it to the left (negative number) and on par y wise (as far as I can remember).