Maximum Y Endstop and Motor Direction trouble...
-
Ok this is another weird thing for me lol.
I just fixed some bunked components of the printer... I had originally been using 8mm linear rods (hardened steel) but they were 200mm and i wanted to make the printer larger. Having watched tons of videos and blogs and the like, I settled on switching everything over to 500mm carbon fiber tubes because "everyone was having such amazing success with them"... well, my experience so far has been nothing but good... so much vibration and warped tubing that prints actually have been coming out worse than my first original design for the printer when the z axis wobbled a good 3-5mm during its moves...
Anyway, I've swapped out those disgusting carbon fiber tubes with linear guides (mgn12h) and things have been 'somewhat' better.
I say somewhat, because I goofed and made the belt area for the X gantry alittle too far out, and so it can't fit the normal way against the boards... SO I just flipped it, and turned the whole printer 180 degrees so the back is now the 'front'. Since normally you'd just go into the firmware and go "well now the Y endstop is the high point instead of low" and things just work, I went into the firmware, set the M574 command to reflect X1 Y2 (to set it high) Z0 S0.
The problem is, it will home just fine. And it lists the homed Y location as being what it should be, 250. BUT when it goes to move to 100 to home the Z axis, it moves the wrong direction............ It tries to continue going towards the 'high' direction instead of the low.... If i flip the motor direction, it obviously begins homing towards what is now the "low" direction...
This doesn't make any sense to me... because if it knows that Y is at the max, and that to get to the max you need to be going the direction that it is moving in, why does it think it needs to continue going that direction to get low?
I mean like... gah my brain doesn't know how to word it properly right now...
Like, it knows that it needs to move in that direction and that when it hits an endstop, then its at the max it can go. So why then would it continue to go in that direction, knowing full well that it CAN'T go any further in that direction? Why does it think that MAX's direction will make it go LOW?
my config for the drives/endstops:
; Endstops
M581 E1 S1 T1 C0
M574 X1 Y2 Z0 S0 ; Define active low and unused microswitches
;M574 Z1 E1 S1 ; Define active high Z axis switch
M558 P4 X0 Y0 Z1 H3 F120 T6000 I1 ; Set Z probe type to switch, the axes for which it is used and the probe + travel speeds
G31 P500 X-44 Y5 Z0.85; Set Z probe trigger value, offset and trigger height
M557 X15:264 Y5:185 S45 ; Define mesh grid; Drives
M569 P0 S0 ; Drive X goes backwards
M569 P1 S0 ; Drive Y goes backwards
M569 P2 S0 ; Drive Z goes backwards
M569 P3 S0 ; Drive 3 goes backwards -
Wht do your homing files look like?
-
@phaedrux You said that, and I went to look, and instantly slammed my head onto the desk... its set up so that the Y goes -500, so even if it is 'homing' to the proper side, its thinking its moving backwards and magically hit a high switch... lemme flip that around and see if that fixes it...
I knew in my head that i should also be flipping the motor direction, but when i did it didn't move the direction it was supposed to, so now I know why it was doing that. One sec!
-
Yup... moving properly now.
This is why this forum is awesome. People always know what to do, even when its something super complicated, just as well when its something stupidly obvious but just slips the mind.
-
Homing direction and endstop position and motor direction are probably the most confusing part of setting up reprap firmware. At least it was for me, and that was on a CoreXY so really hard to visualize.
-
@phaedrux That's my next build. I'm trying to get this one to print 'properly' and square, so that I can print out parts for a CoreXY using aluminum extrusion... Using hand cut pieces of wood for 4 years only gets ya so far... Really want to get some 'precision' going on.. so for now I gotta hope this thing works, print out as good as parts as I can, and 'pray' they all fit with the extrusion... only have this as a printer, so once i start taking it apart, there's no easy way to go back and reprint things that aren't right x-x
-
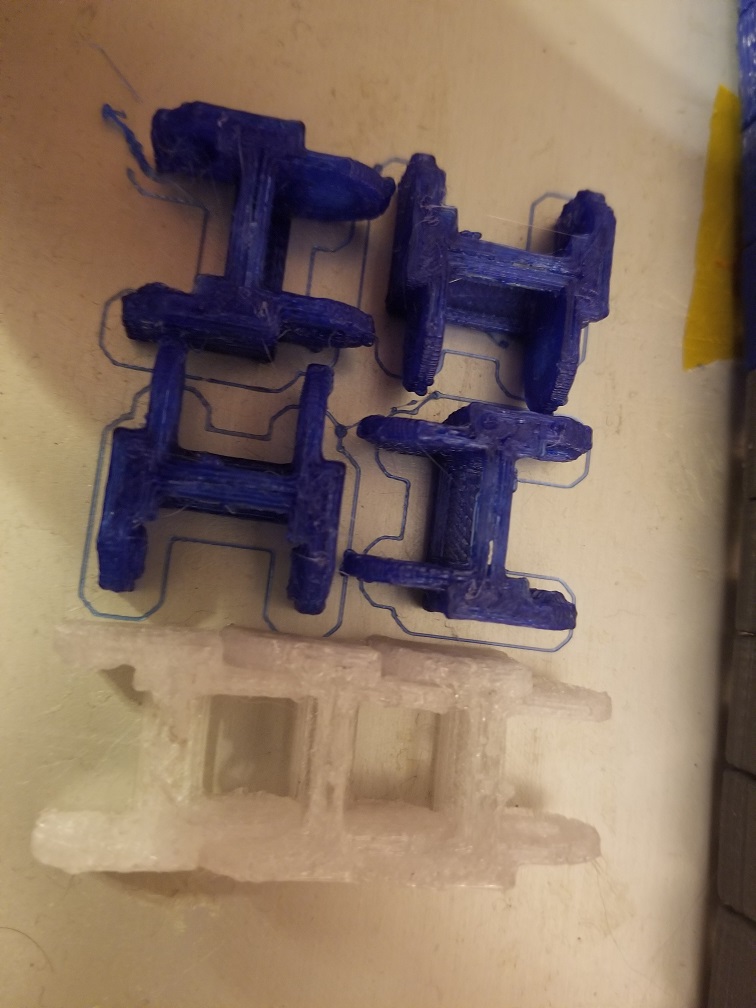
Well here's the results lol.
The blue pieces in a 'square' are made with eSUN PETG as a fast test. First print with both X and Y gantries replaced with linear guides/rails (whatever people wanna call em). So now aka Janky v4
The clear/white is Solutech PETG with the carbon fiber tubes on both X and Y gantries..... noticeable improvement... holy crap... This is basically Janky v3
The gray pieces connected together are made with Hatchbox "Silver" PETG and have been significantly 'post processed' with razors and such. Done on what was Janky v2
And finally the blue pieces connected together were made on the very first version of Janky, which was holy crap terrible... but hey, it worked! Used the completely wrong settings for EVERYTHING... 0.4mm nozzle with 0.4mm layer height, 135% layer width, yadda yadda, complete garbage.
They were printed with Hatchbox ABS, and had the least 'post processing' of anything ironically. They just snapped together, and with alittle silicone lube, work perfectly fine. They have a slight 'uphill' travel to them but hey, they work!
Anyway, this was basically just to showcase that linear guides/rails are hands down just worth the money... 23 bucks for two carbon fiber tubes, or 23 bucks for a linear guide/rail... I'll now take that rail any day... so much easier to model parts for, so much easier to work with, so much easier in actual use....
Also, as a side note:
The test print wasn't entirely successful, hence the terrible look. The extruder kept jamming every couple of minutes, so the gaps/uneven looking shells are attributed to that... Idk why it jams so much now. All I did from v2 to v3/4 was move it from one z post to the other so that the filament was easier to reach lol.


 !
!