Duet3D Logo Duet3D
    • Tags
    • Documentation
    • Order
    • Register
    • Login

    PWM Fans

    Scheduled Pinned Locked Moved
    Duet Web Control
    4
    15
    598
    Loading More Posts
    • Oldest to Newest
    • Newest to Oldest
    • Most Votes
    Reply
    • Reply as topic
    Log in to reply
    This topic has been deleted. Only users with topic management privileges can see it.
    • jdjeff58undefined
      jdjeff58
      last edited by

      I have 2 PWM fans and can only see Fan 0 in DWC. This is a new build so will the fan eventually appear when I load a job? Here are the lines from config.g

      ; Fans
      M106 P0 S0 I0 C"Heatsink" F500 H-1 ; Set fan 0 value, PWM signal inversion and frequency. Thermostatic control is turned off
      M106 P1 S1 I0 C"Nozzle" F500 H1 T45 ; Set fan 1 value, PWM signal inversion and frequency. Thermostatic control is turned on

      Capture.PNG

      1 Reply Last reply Reply Quote 0
      • jens55undefined
        jens55
        last edited by

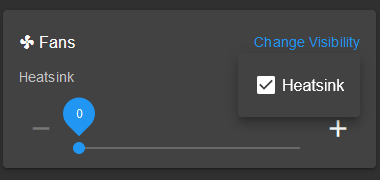
        fans set up to be thermostatically controlled will not show up.

        1 Reply Last reply Reply Quote 0
        • dc42undefined
          dc42 administrators
          last edited by dc42

          Fans that are defined a thermostatically controlled are not shown, because you can't change the speed manually.

          BTW you appear to have the thermostatic control on the wrong fan, or else you have the fan names swapped.

          Duet WiFi hardware designer and firmware engineer
          Please do not ask me for Duet support via PM or email, use the forum
          http://www.escher3d.com, https://miscsolutions.wordpress.com

          jdjeff58undefined 2 Replies Last reply Reply Quote 0
          • jdjeff58undefined
            jdjeff58 @dc42
            last edited by

            @dc42 said in PWM Fans:

            BTW you appear to have the thermostatic control on the wrong fan, or else you have the fan names swapped.

            You're right....thanks for pointing that out.

            1 Reply Last reply Reply Quote 0
            • jdjeff58undefined
              jdjeff58 @dc42
              last edited by

              @dc42 Can a thermostatically controlled fan be turned on at 70% instead of 100%. I'm trying to change the "S" value but it only seems to work when set to 1. This fan is too loud and on a mosquito hotend so I don't think I need all that speed/noise

              Phaedruxundefined 1 Reply Last reply Reply Quote 0
              • Phaedruxundefined
                Phaedrux Moderator @jdjeff58
                last edited by

                @jdjeff58 said in PWM Fans:

                This fan is too loud and on a mosquito hotend

                I seem to recall other posts about this particular fan not responding to PWM control very kindly. You can try adding a blip of 100% at the start up with the B parameter of M106, and you can try experimenting with the PWM frequency. 10hz to 30000hz are viable range.

                Z-Bot CoreXY Build | Thingiverse Profile

                jdjeff58undefined 1 Reply Last reply Reply Quote 0
                • jdjeff58undefined
                  jdjeff58 @Phaedrux
                  last edited by jdjeff58

                  @Phaedrux Yeah I just found one thread about it. Seems like the solution was to get a 12V fan and a buck converter but the fan will still run at full speed? I played around with frequencies/speeds and blip time. The best I could do was erratic cycling with S.6 F10000

                  Phaedruxundefined 1 Reply Last reply Reply Quote 0
                  • Phaedruxundefined
                    Phaedrux Moderator @jdjeff58
                    last edited by

                    @jdjeff58 said in PWM Fans:

                    but the fan will still run at full speed?

                    No, if you get a fan that responds well to PWM control it should work fine at a wide range of speeds.

                    Check out the Sunon 30mm and 40mm fans.

                    Z-Bot CoreXY Build | Thingiverse Profile

                    jdjeff58undefined 1 Reply Last reply Reply Quote 0
                    • jdjeff58undefined
                      jdjeff58 @Phaedrux
                      last edited by

                      @Phaedrux Ok..I see that the buck converter gets connected to the board inputting 12V to the fans. I just need to convert my other fan to 12V too I suppose.

                      Phaedruxundefined 1 Reply Last reply Reply Quote 0
                      • Phaedruxundefined
                        Phaedrux Moderator @jdjeff58
                        last edited by

                        @jdjeff58 You haven't said what board you're using. If it's the Duet wifi or ethernet then yes, you only have one bank of fans to choose from. If it's a maestro board you have 2 fan banks with seperate power options so you could run 1 at 12v and the other at VIN of 24v.

                        Z-Bot CoreXY Build | Thingiverse Profile

                        jdjeff58undefined 1 Reply Last reply Reply Quote 0
                        • jdjeff58undefined
                          jdjeff58 @Phaedrux
                          last edited by

                          @Phaedrux Duet Wifi yes. The only thing I'm not clear on is how to connect this buck converter. I've read the Duet tutorial on this and it points you to a link to show how to connect to a maestro and only connecting the positive output? What about the fan jumper? I've ordered the stuff to do this but could only find the typical vague duet tutorial.

                          Phaedruxundefined 1 Reply Last reply Reply Quote 0
                          • Phaedruxundefined
                            Phaedrux Moderator @jdjeff58
                            last edited by

                            @jdjeff58 There is this guide, which maybe you have seen, for the maestro but it also applies to the wifi. https://duet3d.dozuki.com/Guide/Ender+3+Pro+and+Duet+Maestro+Guide+Part+5:+Upgrades/54#s214

                            The positive output of the buck converter will be connected to the Vfan jumper pin, since it is that pin that provides power to the fan + terminals. Normally it's either jumpered to Vin or 5v. By connecting it directly to the output of the buck converter you're providing power to the fans directly. The negative leg of the buck converter output is not required since the fans will be connected to the fan port negative pins on the duet, and the duet switches the PWM signal on the negative side.

                            Z-Bot CoreXY Build | Thingiverse Profile

                            jdjeff58undefined 1 Reply Last reply Reply Quote 1
                            • jdjeff58undefined
                              jdjeff58 @Phaedrux
                              last edited by

                              @Phaedrux Right....but right now Vin is 24V and the fan jumper is installed for Vin. What changes (if any) do I have to make to the present jumper for this mod? I don't want to let any smoke out.

                              Phaedruxundefined 1 Reply Last reply Reply Quote 0
                              • Phaedruxundefined
                                Phaedrux Moderator @jdjeff58
                                last edited by

                                @jdjeff58 you remove the jumper and connect to the middle vfan pin directly. The jumper just connects that pin to either the 5v or vin pins on either side of it.

                                Z-Bot CoreXY Build | Thingiverse Profile

                                jdjeff58undefined 1 Reply Last reply Reply Quote 0
                                • jdjeff58undefined
                                  jdjeff58 @Phaedrux
                                  last edited by

                                  @Phaedrux Ok now I get it. That makes sense. Thanks!

                                  1 Reply Last reply Reply Quote 0
                                  • First post
                                    Last post
                                  Unless otherwise noted, all forum content is licensed under CC-BY-SA