Bed leveling with 3 independent z screws
-
2 z screws on the left side and one on the right side + BlTouch running Duet3
Anyone want to share settings for this?
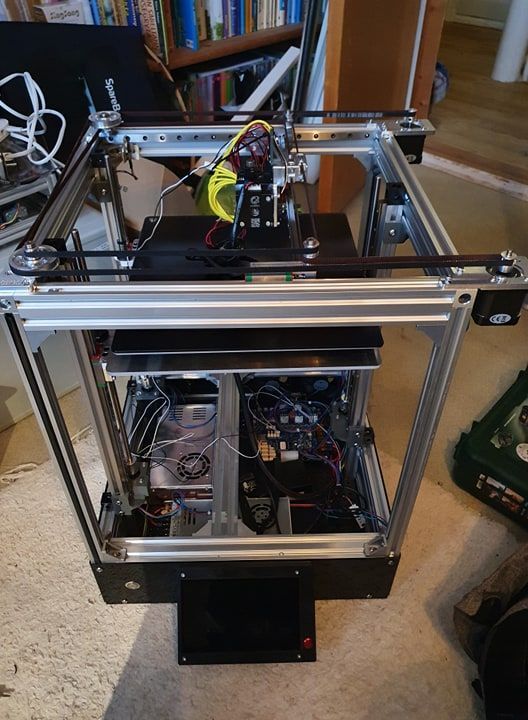
Status today (railcore inspired printer) :
All axis ok
X and y limit switch okWaiting for the tool board for the extruder.. wires
BlTouch ok
-
Hi.
Sounds like this is similar to a RailCore.This what we use for levelling.
M140 S75 ; Raise bed temp to profile requested bed temp
M104 S150 T0 ; Raise hot-end temp to 150C for G32 auto-calibration
M190 S75 ; Wait for bed temp to rise
M109 S150 T0 ; Wait for hot-end temp to rise to 150C
G28 ; home all axes
G32 ; Autocalibrate bed
G32 ; Autocalibrate bed a second time
G32 ; And a third time ( for 4 point probe)HTH
Paul. -
You also need to make sure your leadscrew locations are defined.
P. -
My Bad! Forgot to say we use this in our slicer config!
If you look at https://railcore.org/software/ there are base configs for the Duet2.P.
-
I have a very slightly different setup, two "in front" and one in "Center back". I believe you can update this fairly easily.
Relevant statements extracted from config.g:
; Driver to axis mapping
M584 X0 Y1 U2 Z3:4:5        ; X and Y for CoreXY.  U for toolchanger lock. Z has three drivers for kinematic bed suspension.
M569 P3 S0                  ; Drive 3 direction | Front Left Z
M569 P4 S0                  ; Drive 4 direction | Front Right Z
M569 P5 S0                  ; Drive 5 direction | Back Z
; Leadscrew locations (really, kinematic coupling locations) extracted from CAD model assuming back right build plate corner is (0, 0)
M671 X300:5:152.5 Y316:316:-14 S10 ; Front Left: (300, 316) | Front Right: (5, 316) | Back: (-14, 152.5)
M350 Z16 I1                       ; Set 16x microstepping for axes. Use interpolation.
M906 X2500 Y2500 Z1000 E1250 I30        ; Motor currents (mA) and Idle percentage
M201 X600 Y600 Z10 E1000 U1000          ; Accelerations (mm/s^2)
M203 X25000 Y25000 Z400 E4000 U10000    ; Maximum speeds (mm/min)
M566 X700 Y700 Z2 E3000 U200          ; Maximum jerk speeds mm/minute
M92 Z3200                               ; Steps/mm for Z - TR8*4 / 0.9 deg stepper
And bed.g (note that front left is a little offset in Y because of a temporary thing that blocks that corner of the bed):
G0     X152.5 Y40 H1 F10000
G30 P0 X152.5 Y40 Z-99999       ; probe near back leadscrew
G0     X275   Y260 H1 F10000
G30 P1 X275   Y260 Z-99999      ; probe near front left leadscrew
G0     X25    Y315 H1 F10000
G30 P2 X25    Y315 Z-99999 S3   ; probe near front right leadscrew and calibrate 3 motors
G1     X0     Y0 F10000