Cura: First layer above support
-
When I print an area on top of support, what do I need to configure to print that layer (first layer above the support) as a solid? It would appear that this layer is currently printed at the infill density.
-
Turn on "Interface Layer" under support settings in Cura
-
Thanks for replying.!
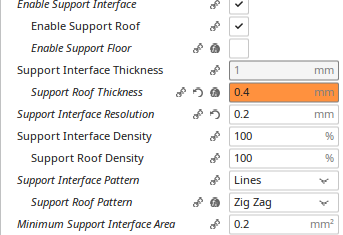
These are my current settings:Screenshot from 2021-02-13 18-56-48.png
I was under the impression that the 'interface layer' is the layer that is generated at the top of the support structure. I am wanting to make the layer 'above' the interface layer solid. Do I misunderstand this ?
-
Support floor perhaps?
-
@Phaedrux, thanks for commenting. The support floor in my understanding is the bottom of support but I will do some tests and see what happens.
-
It's been a while since I've used stock cura. The build I use has special bridging options that you can have full control over and apply those to over infill and support.
-
@Phaedrux , I use that same version.
I played around some more and I am not sure any more what I saw in my print samples because the bottom layer numbers appear to be correctly applied on supported areas. The printer is currently busy for another 8 hrs so I will not be able to print out a sample until then.
I will verify with a test print tomorrow.Thanks !
-
Under the heading of 'weird but makes sense' ....
I actually knew this from a long time ago but had forgotten

I believe what is happening is as follows: Support prints up to and including the roof section (printed at 100% in my case), I then have two layers of a gap to allow separation of support from the print. I then print the first layer of the bottom of the model. This layer, in theory, would be a 100% dense layer if printed in the normal manner of a solid base and then the gap that is 'layer thickness' The nozzle flattens the deposited material to some extent. In my situation though there is a two layer gap in addition to the normal single layer gap the printer has calculated the plastic flow for. Between the support roof and the layer I am currently trying to print there is too big a gap. As a result, there is no flattening, the layer is printed as a round extrusion and loosely lays on the support roof. It can't form a solid surface because there isn't any squashing happening. Not only that, but I find that the next layer is also loosely laid down with maybe a bit of squashing but not sufficient for a 'solid' layer. It looks like the layer is printed at infill density because there are spaces between the round noodles that are laid down and not squashed flat.
The take away of this is that the only way to get a solid layer on top of support is if one uses an actual separation layer of different material that doesn't stick which then results in the model's first layer on top of the separation layer being laid down in a squished manner forming a solid layer.
Whoo, that was difficult to explain. Hopefully it makes sense.