The Mean Machine
-
you could also install a second rail on the underside of the x axis. thast would further reduce any play from just one rail
-
that is actually my Y axis it has an hiwin HGR15 rail with double ball bearing on both side there no play in there
-
Well here a little update ,
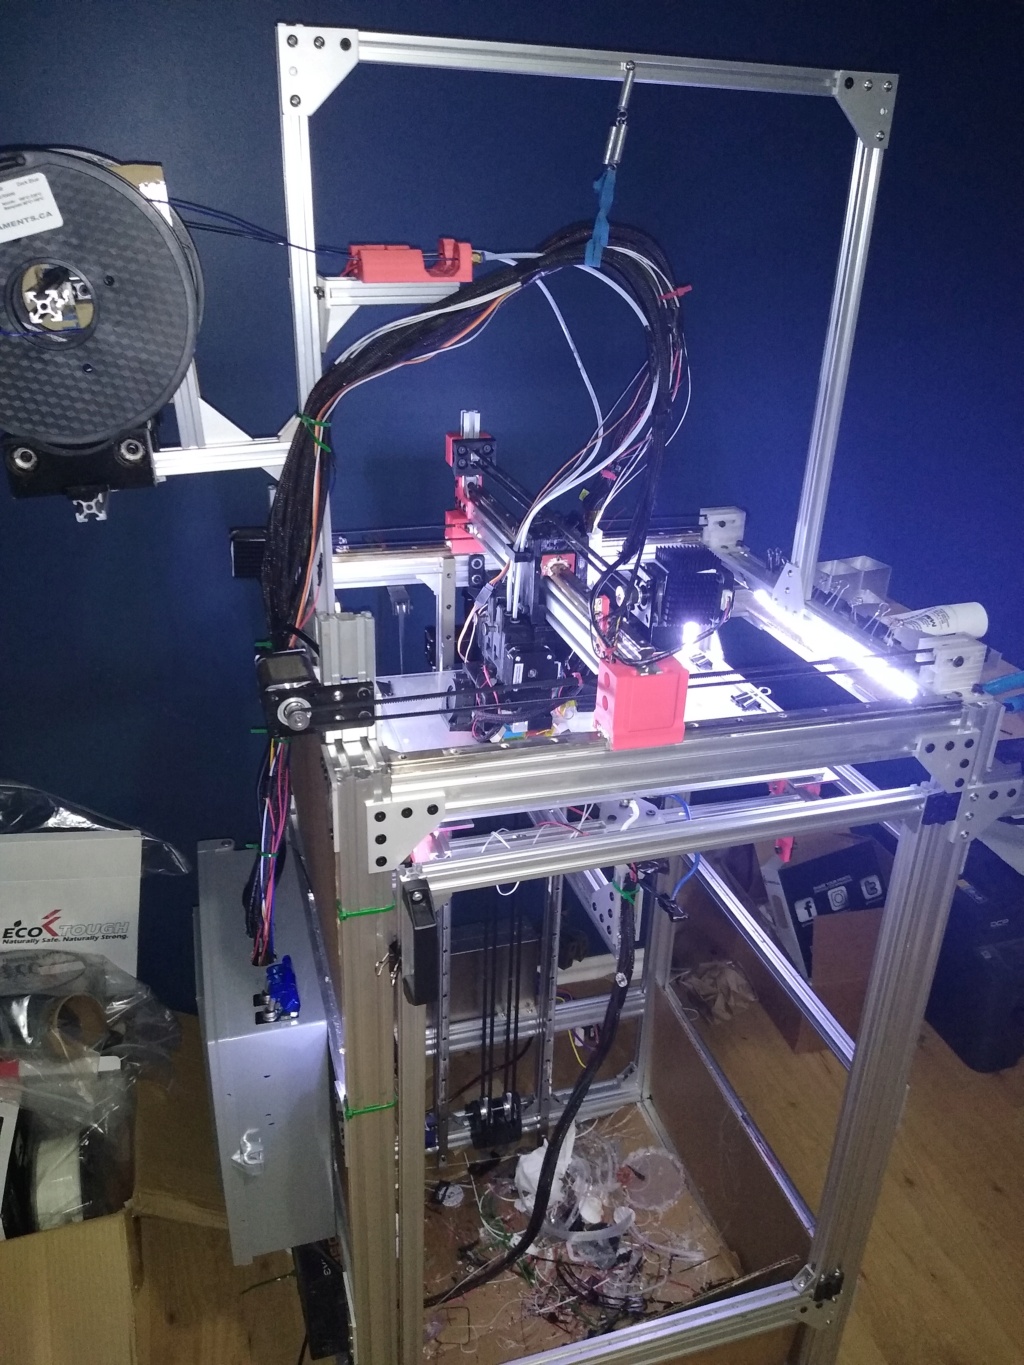
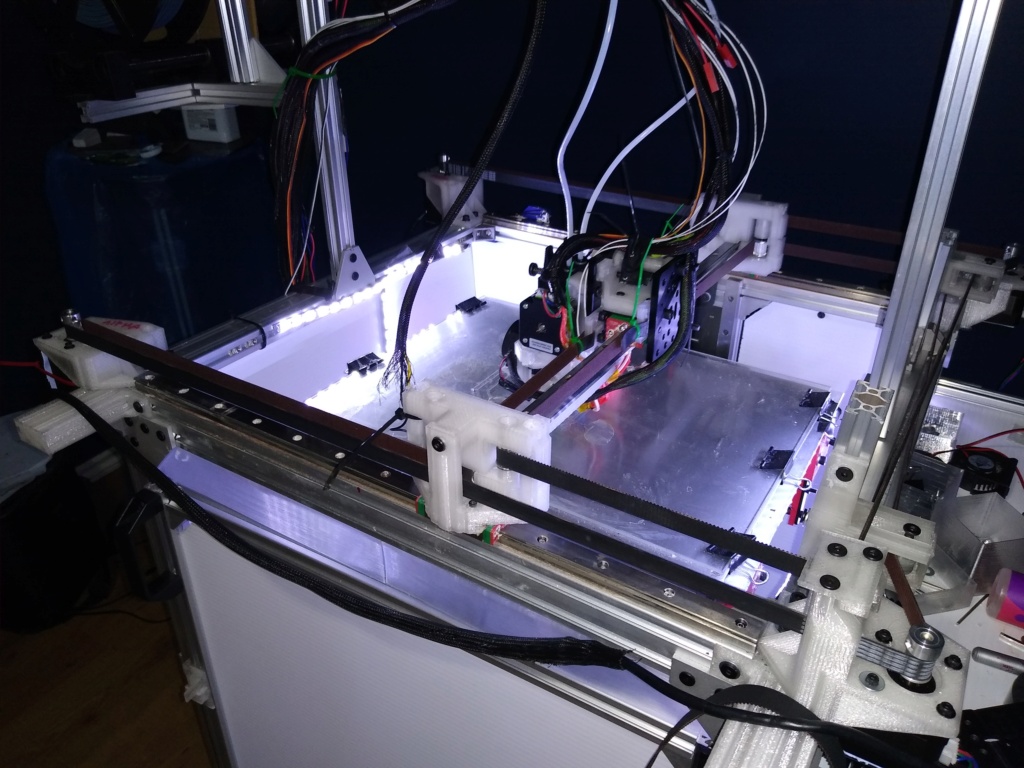
Him about done fixing problem on my printer , the BMGx2 swap seem to have fixed extruder quality issue , i Had a Z pattern on the side , found out my leadscrew was flexing under the weight , Tried some belt like some suggested , added a slight counter weight so the bed doesnt go down and make it easier to go up , it seem so far that the weight is enough that when power is off the torque of the stepper motor is enough to hold it, still have to refine a few things but it work so far , Z pattern is gone . Next step is to move all the electrical into a bigger box for better cable managements and look .
thinking about adding a few more aluminum extrusion on the right side and make some shelf to put some of the roll and add weight to the overall printer
-
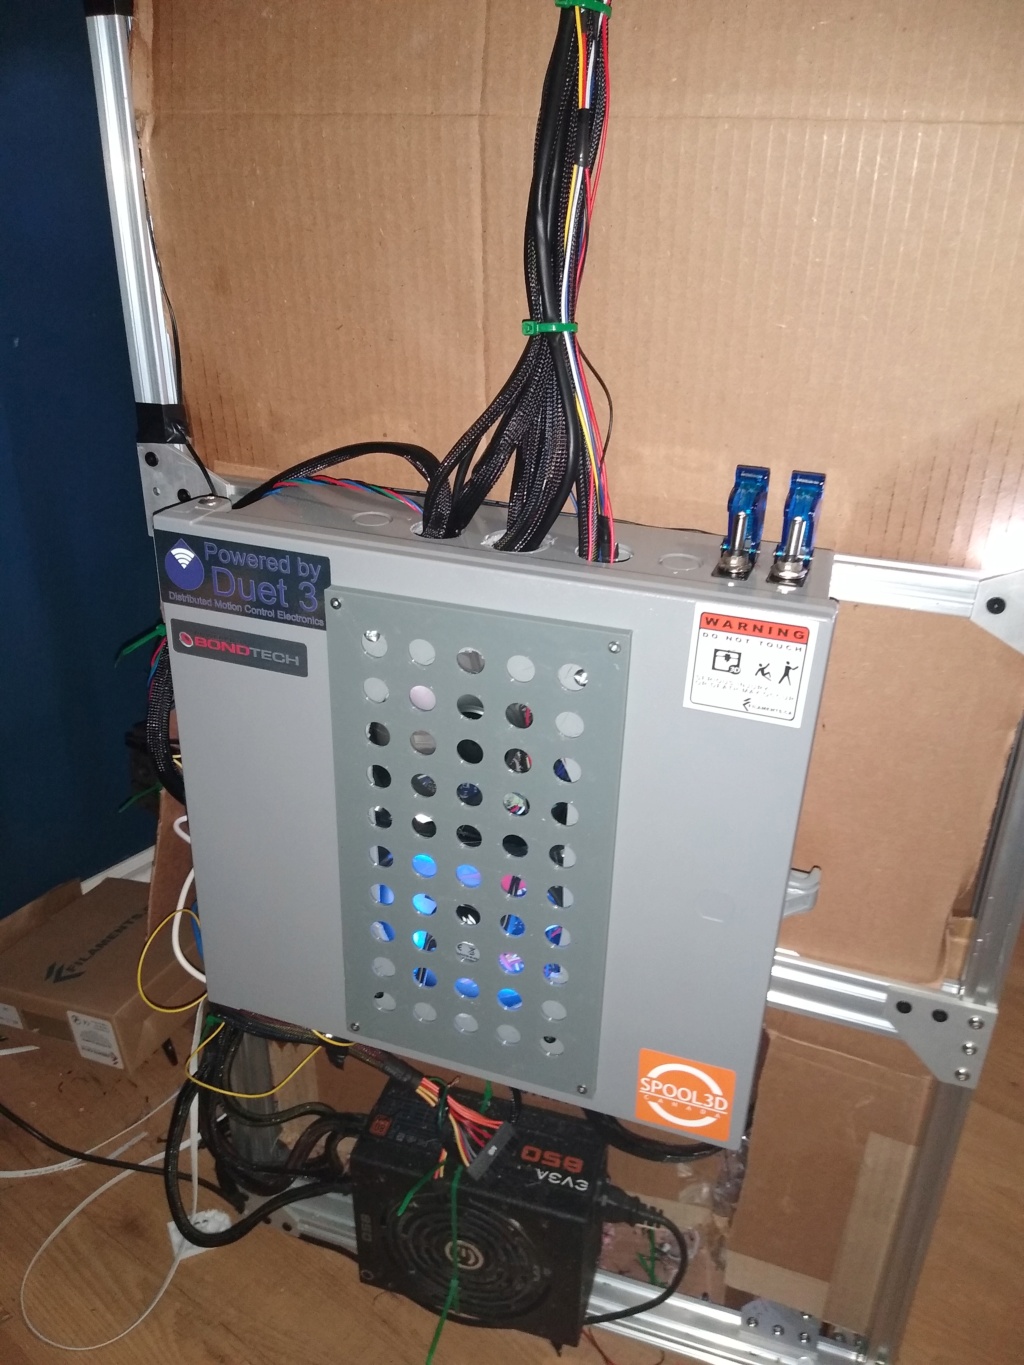
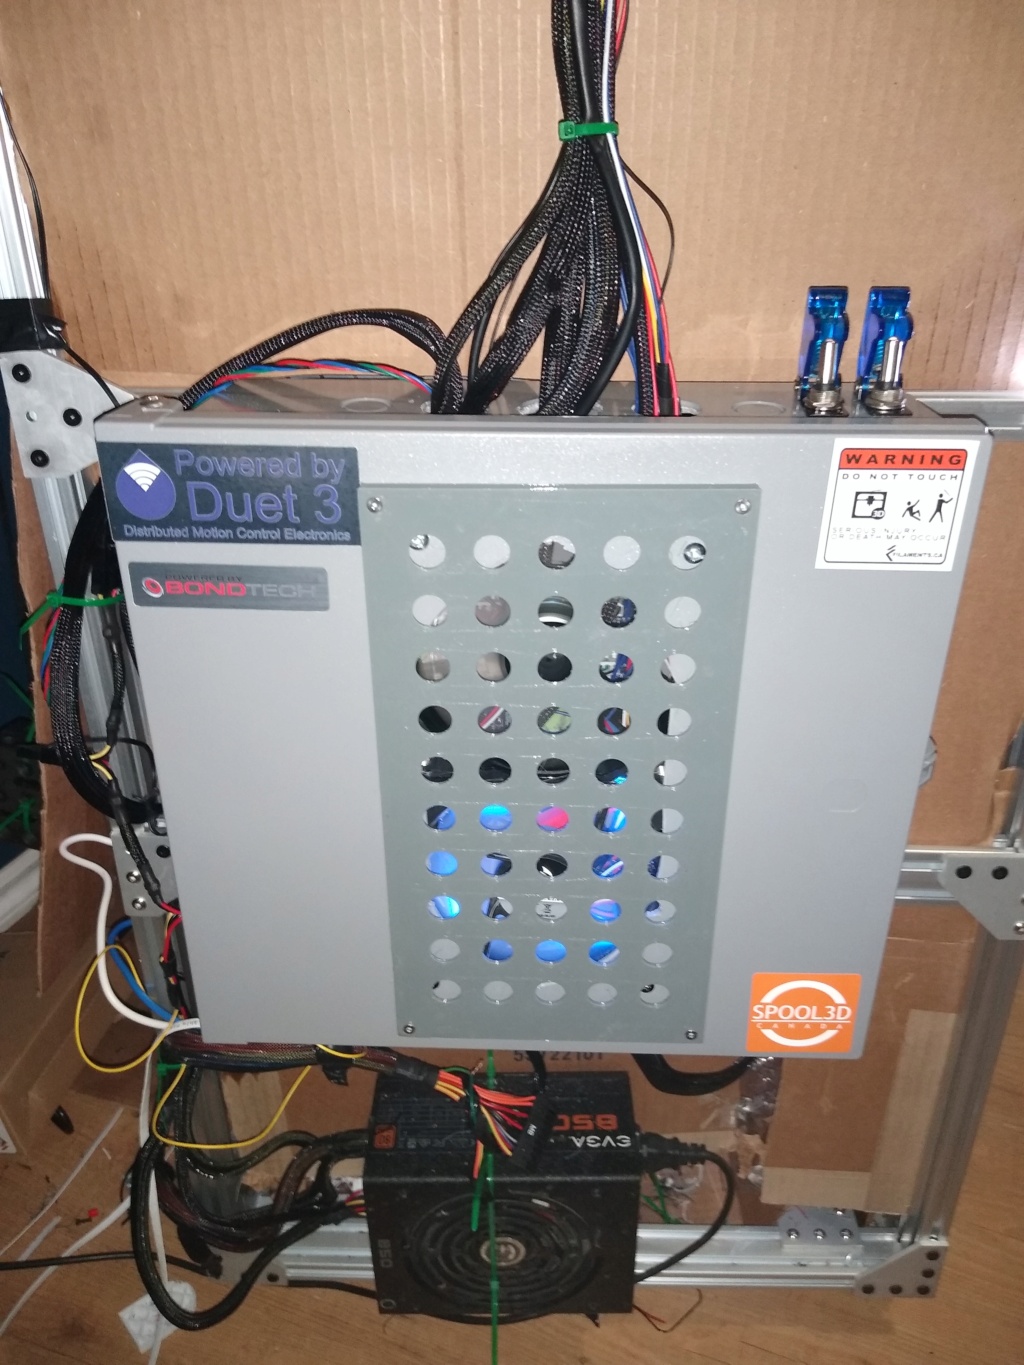
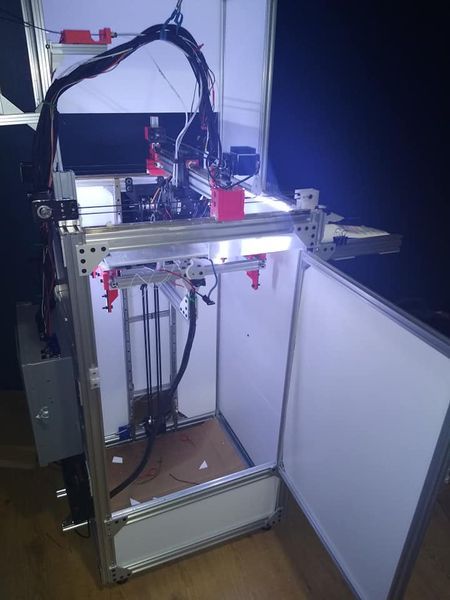
So here another update , ended up swapping the 3d printed elctrical box for an actual box , way bigger , inside it still a mess lol , but at least on the outside it now look cleaner and good , still have ot make my mind on what to use to enclose the printer. still got to tweak 1-2 things , but overall mechanic it working the way i want it or close of it .
was finally able to put some of the sticker i had laying around , gotta love the one from the folk at filaments.ca
-
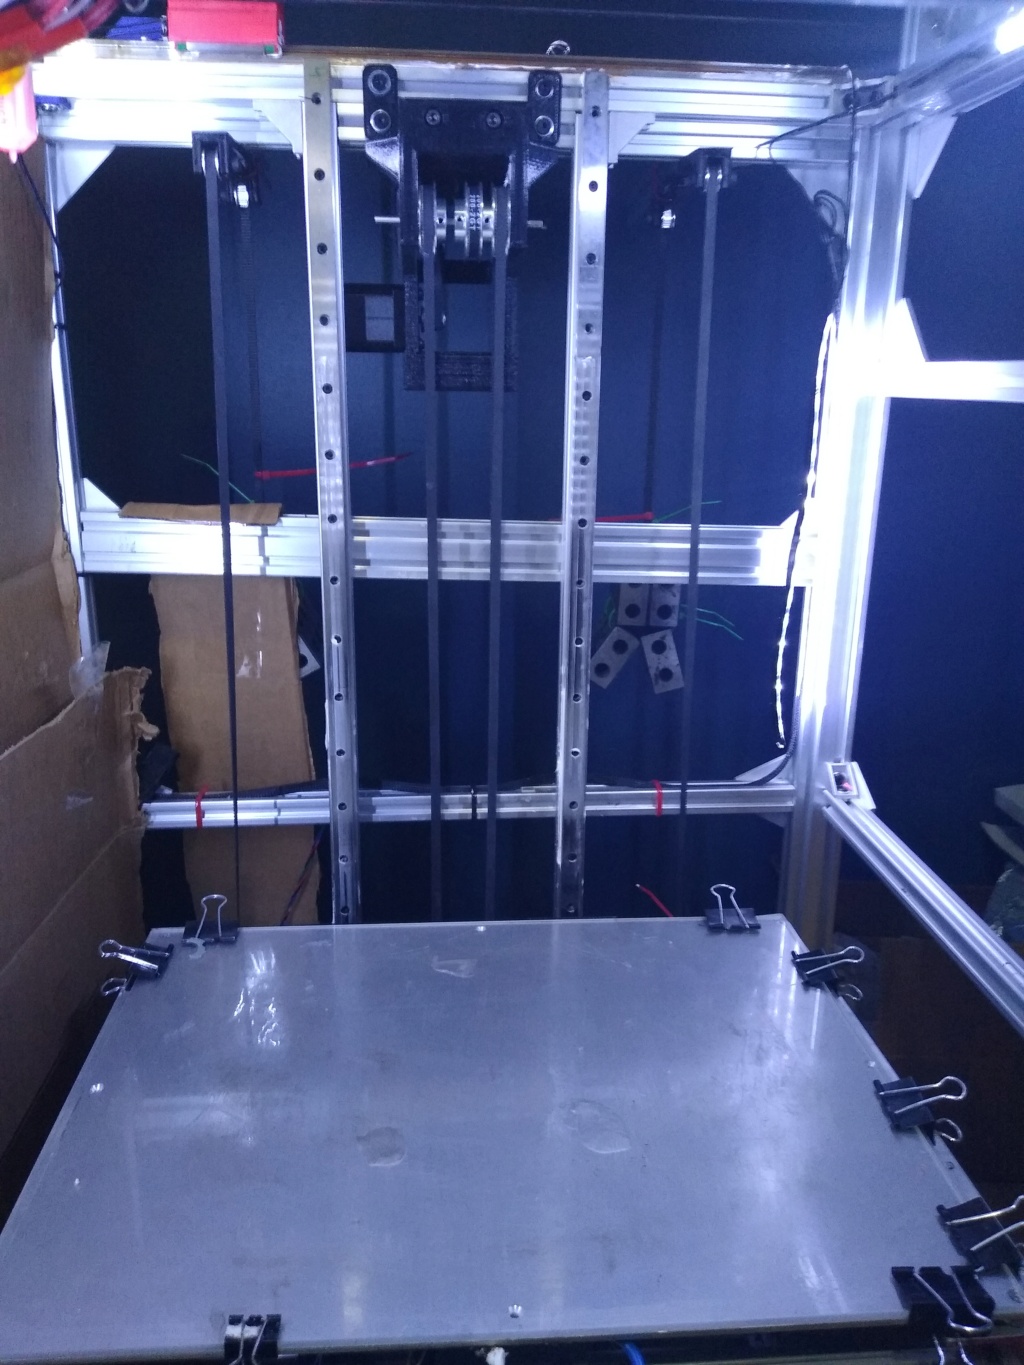
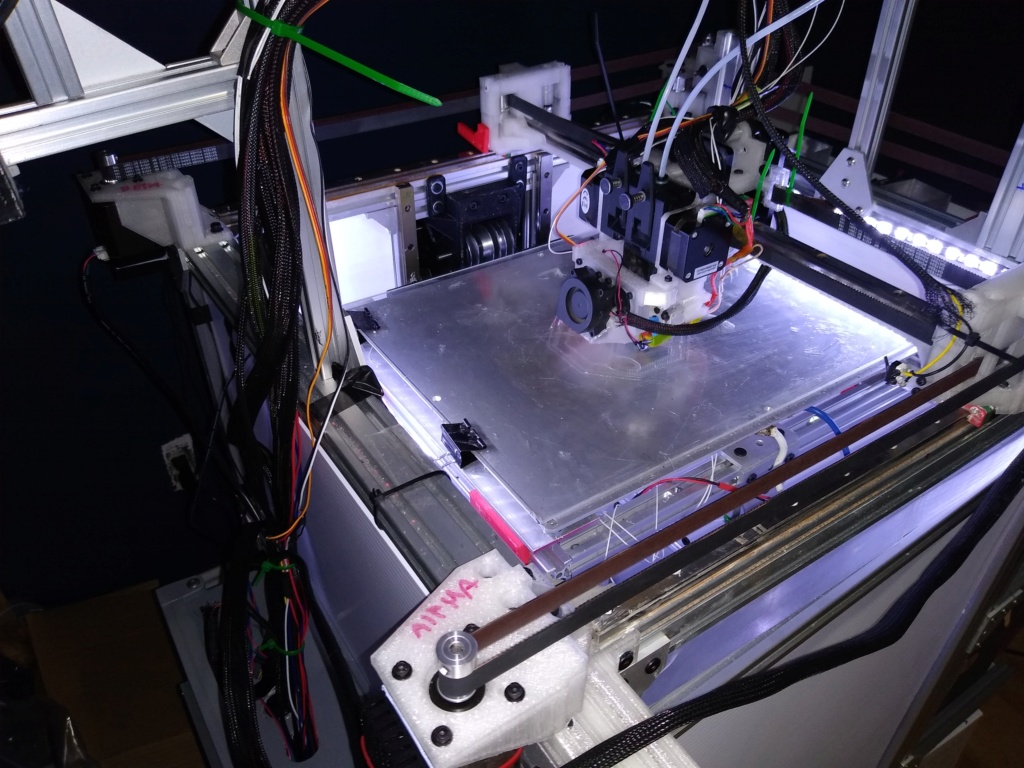
Well here a little update , the Belt system for the Z axis has been working pretty good so far , i swapped my belt tensionner on the X axis as well , the aluminum one would i believe slightly flex when the carriage would change direction putting a finger on then you would feel slight vibration from then so i drawed some and printed them , just need to test to see if it actually changed something , last few print i did were looking decently good compared to before or what my old rostock max v2 could do .
still need a few more tweaking i believe but him not too far to get a perfectly smooth surface without seeing any layer difference while printing a .1mm layer height.
in the future i will get some more aluminum extrusion and had a few shelf on one side so i can put the multiple box of material i have , at the same time it will make the machine a little more heavier and should reduce vibration as well
-
here a quick picture of the new belt tensionner it does look better ! it print better as well, it seem to have got rid of most of the vibration that i could feel before .
-
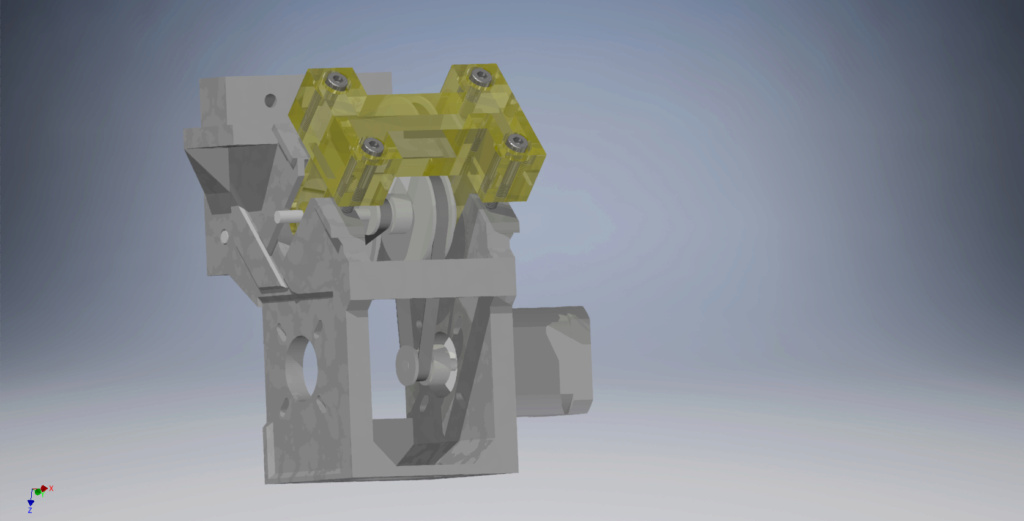
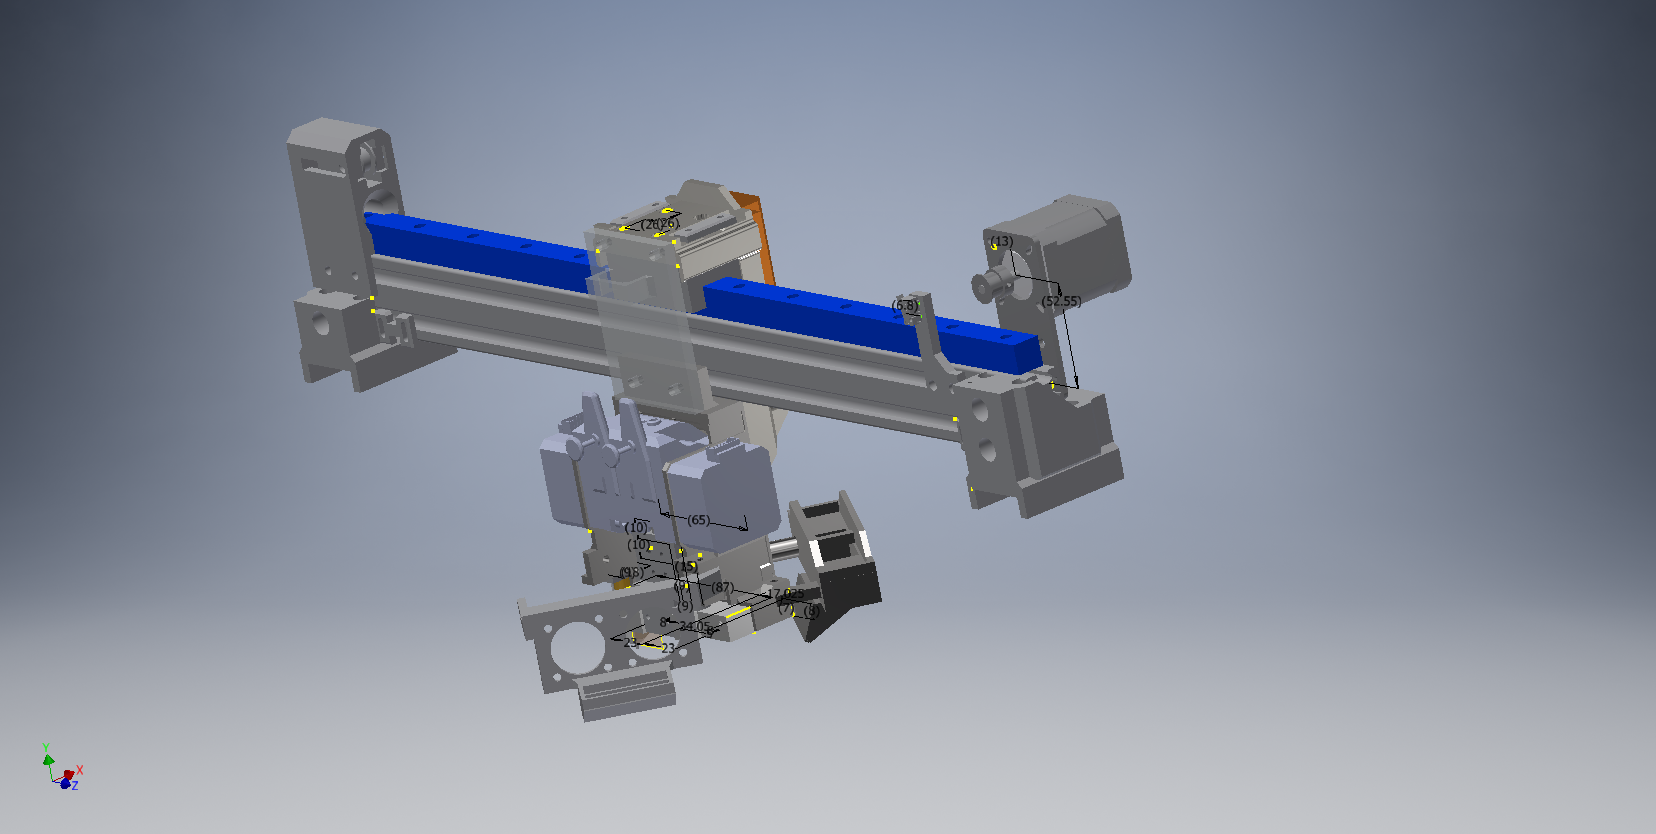
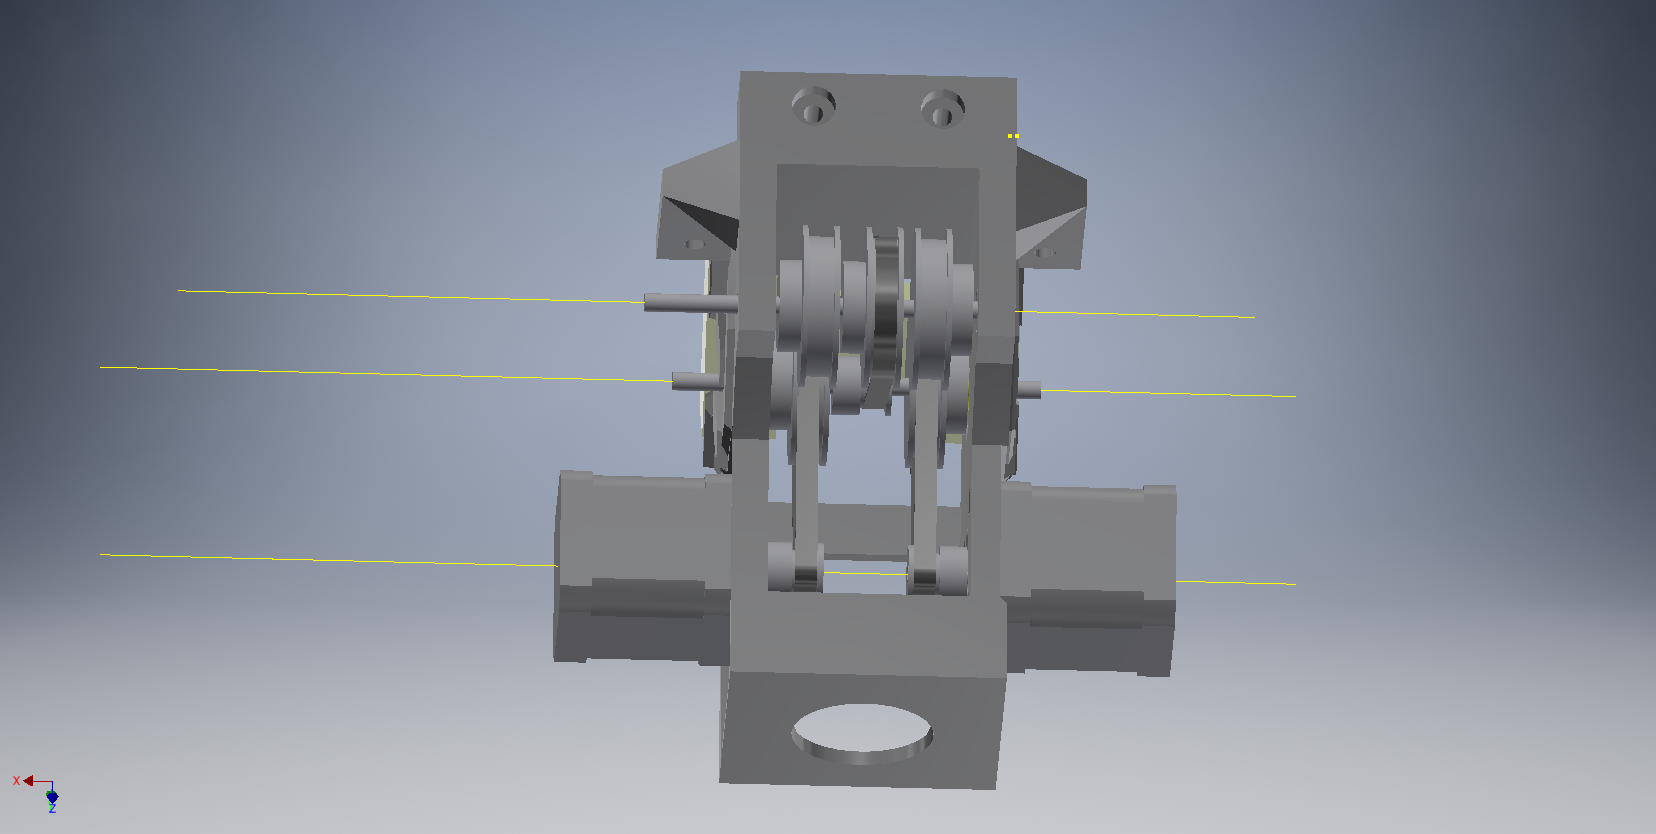
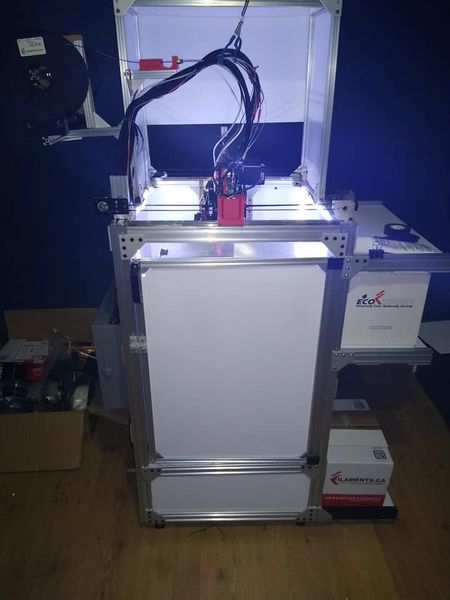
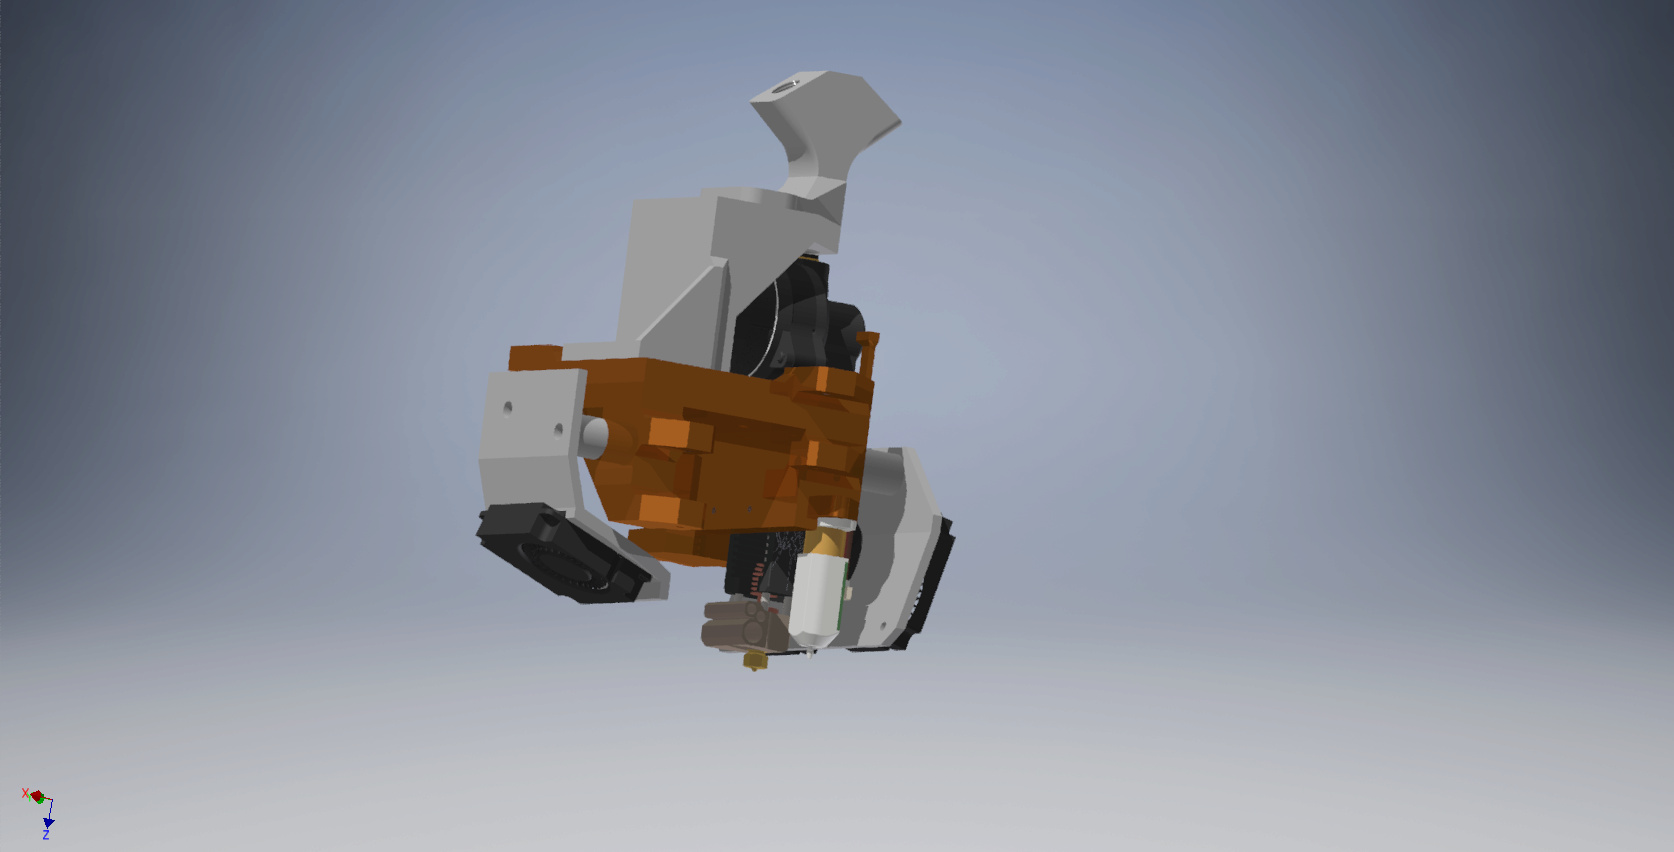
Here another update , i have ordered a duet 3 expansion board so i could mount a second motor facing the other one in the Pulley box for the Z , with the addition of this i will be able to get rid of the temporary counter weight . my Z will be powered by 2x60mm .09 stepper motor now. i as well redesigned a bit the carriage for a more better look and functionality .
Added as well pivot area now for the cooling fan in the front and back just need to remove a screw and they will pivot so that they wont be suspending in the air , less chance of breaking those tiny wire and faster access if i have to.Since my printer is on the big side , i will be adding a few shelf on the right side so i can put the multiple box of material giving me extra weight on the machine so probably less vibration as well.
-
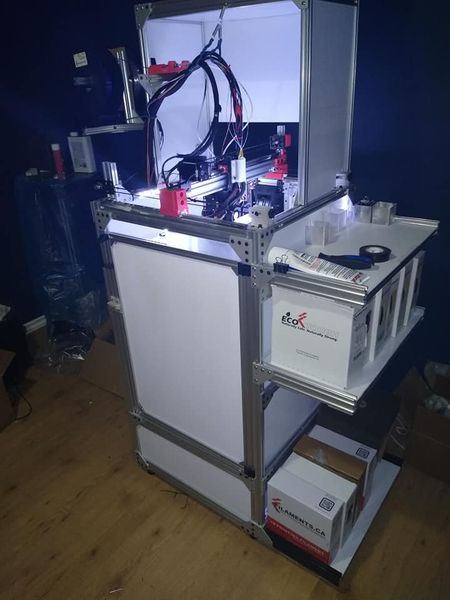
got most of my part today unfortunately i was missing some 2040 for the shelf so him missing one shelf right now , got rid of my counter weight , added the second 60mm nema 17 in the pulley box . the 3hc is wired and installed and everything seem to work good . Only things left now is to reprint the 2 main part for the head , and figure a way to close the front half on top . Getting close of completion on this project which ive started around a year ago now
-
Swaped out many of my part on the Y axis for what i had redesigned , print are coming better it seem so far , added the last shelf as well , that give a lot more weight to the printer , the whiole machine doesnt move as much as it used to now , vibration should be lower as well. still figuring out how i will finish the enclosure as well got a few idea just cant make my mind lol !

-
Looks good! I like the electronics enclosure box.
Machinist / Designer at https://3ddistributed.com/corexy-3d-printer/
Thingiverse: https://www.thingiverse.com/shanehooper/designs -
Well after multiple TEST and print , i wasn't happy with the current speed and result it was still better than my old rostock max v2 but i wanted more. this build has been a good learning experience with multiple challenge for the last year, yep one year of tweaking reprinting piece , changing them , upgrading again lol
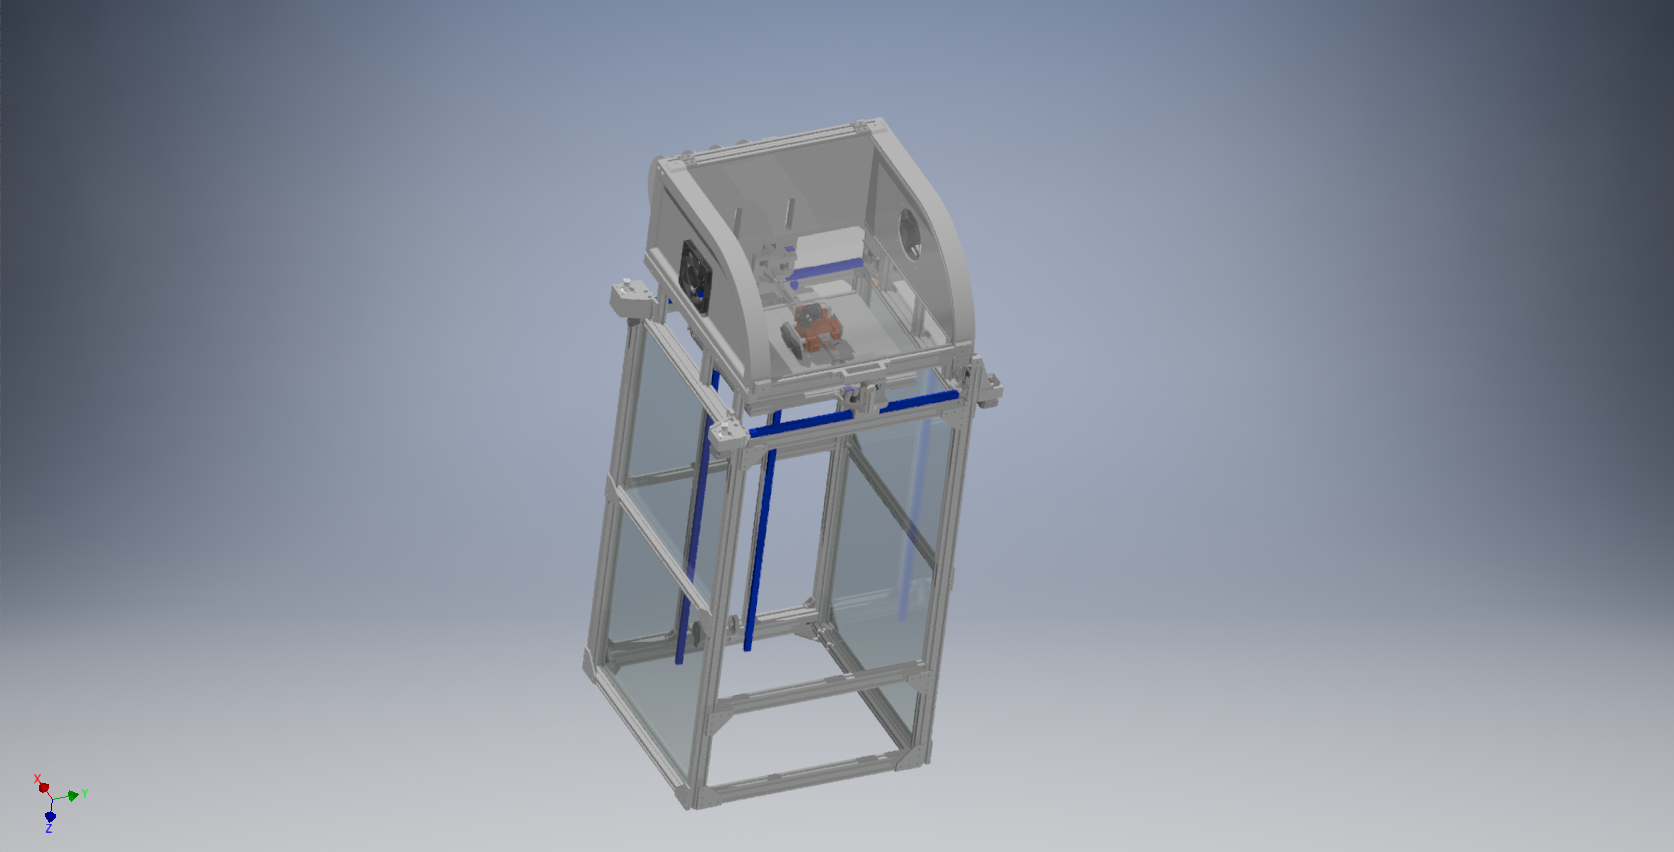
Well from a cartesian style printer i present you the next evolution of my printer . it is now a corexy . Learning from some of my mistake i redesigned the Y axis way lighter and the head as well . eliminated a lot of pieces as well i would say . since i had the hardware and spare motor i went with something a little more complex . 2 motor per axis so total of 4 motor moving the gantry . i figure out that since most people only have a single extruder while i have a dual i would need some more torque so adding a extra motor per axis should help preventing losing step.
I still need to reprint the Y gantry for a few minor tweak . it seem that for once now i will be able to achieve my goal of a constant print speed of 50-60mm/sec minimum . Before the redesign my acceleration for x-y axis were around 400 since the switch i have been able to test up to 1750 and believe the final number will be higher . Switched to 12mm gates belt and pulley as well from 6mm . That 12mm belt was expensive, the printer use around 4.5m of it .
-
Well here another update on my printer , replaced the 6mm belt for the Z axis for some 12mm , and changed the pulley as well to 20 teeth from 60 and had to readjust my e-step seem i gain around 3X the step now , when machine is off my bed doesnt go down anymore with the switch to smaller pulley there enough torque now . next step is to finish the top once i get more extrusion and reprinting my motor mount making them beefier. then it should be fun printing time !

-
 So finally got the aluminum extrusion I was waiting for , next step is to redesign my spool holder and position , than rework my cable to tidy the whole things . Plus a few minor tweak here and there . I think overall no further major change and finishing my enclosure
 -
 !
!Got some time to work on the printer , partially completed my enclosure , moved my spool behind the machine now
-
Well haven't updated this thread in a long time , thinking of finally get rid of the double extruder and go to a single extruder , always seem to have issue with the double extruder lately as well , by getting rid of it i would cut the weight by more than half , seem like the consensus is the orbiter 2.0 is the best extruder for this next step with a mosquito .
ive been working on my top a bit lately still printing a bunch of part .
here a quick look at the next evolution of this project .
-
here a small update , got a few things printed and mounted has well , got more part to print still and waiting for part to come from the mail as well , had to change the spool setup since i decided i was going to install the double extruder in the back as a feeder magazine for the orbiter mosquito combo , just need to make Y filaments guide and a bit of tinkering so i can still have dual material abilities. Spool now sit vertically at the top in the back of the printer , with filaments switch udner it doing a nice curve to the dual extruder than to the orbiter .

-
early mount for orbiter/mosquito
-
 undefined Dad003 referenced this topic
-
Did the swap over , using the bmgx2 has Feeder magazine heading to a y adapter , to the orbiter , only did a few test but everything seem to work as intended . I accidentally burn one of the fan mosfet , error in config , I just moved it to another pin my fault on that one . Just need to tweak and make some duck fory cooling fan.
I think I can call this v3 of my printer


-
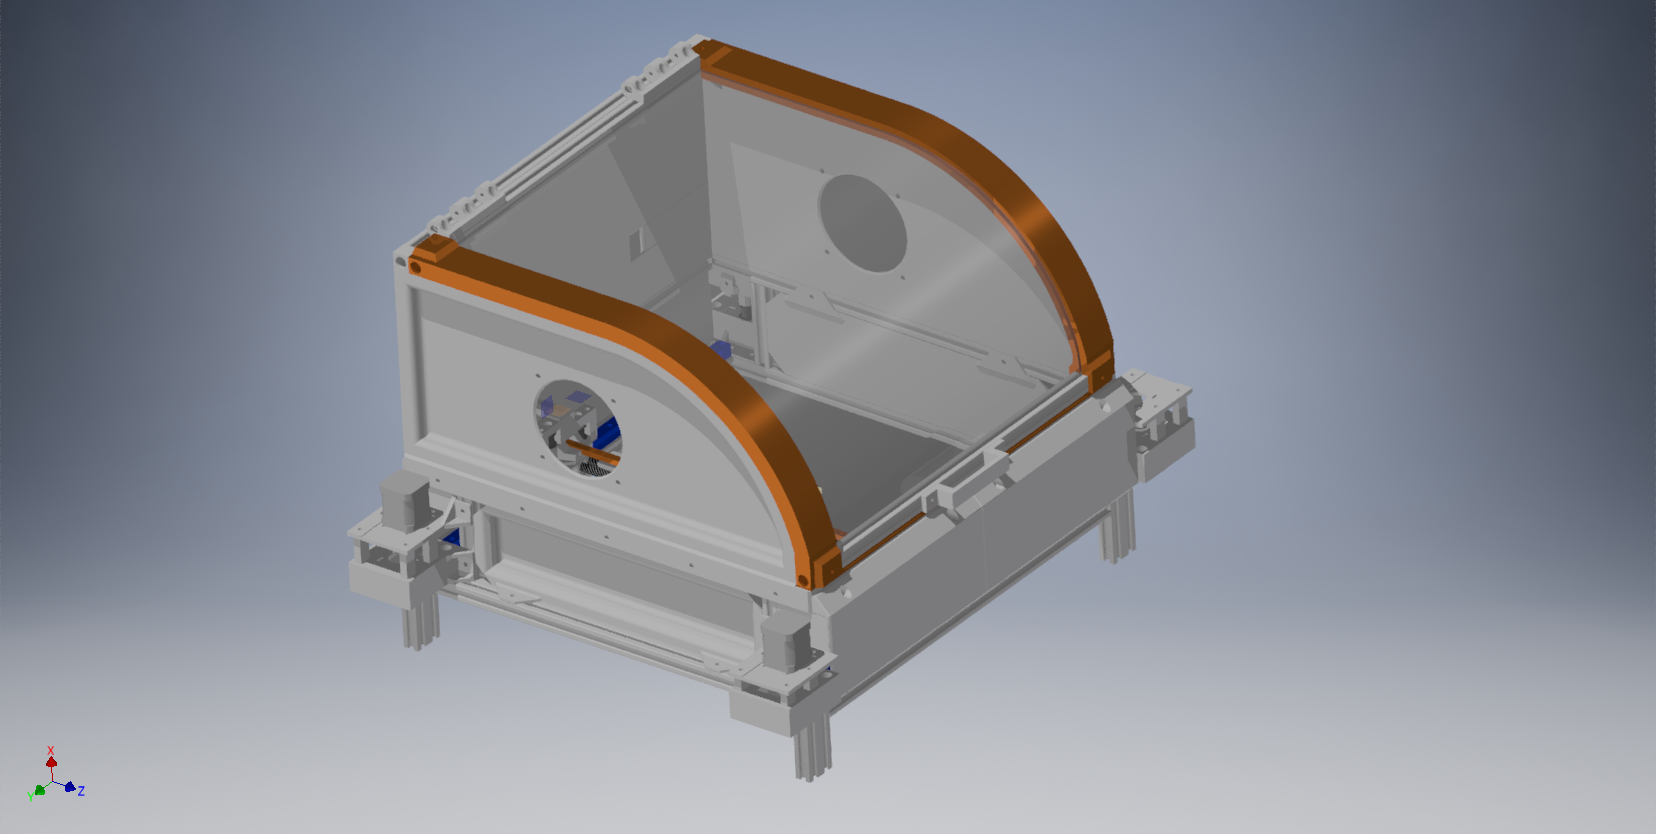
fully enclosed top once i swap the Y gantry for the lighter version . Need to work something better for my fan duct as well , i have an idea .
-
New fan duct and lift support installed for top

