Duet3D Logo Duet3D
    • Tags
    • Documentation
    • Order
    • Register
    • Login

    The printer for duet 3 mini is noisy.

    Scheduled Pinned Locked Moved
    Using Duet Controllers
    4
    18
    734
    Loading More Posts
    • Oldest to Newest
    • Newest to Oldest
    • Most Votes
    Reply
    • Reply as topic
    Log in to reply
    This topic has been deleted. Only users with topic management privileges can see it.
    • Nurgelrotundefined
      Nurgelrot @Vladimir_U
      last edited by

      This post is deleted!
      1 Reply Last reply Reply Quote 0
      • PCRundefined
        PCR @Vladimir_U
        last edited by

        @vladimir_u please post the config.g

        Vladimir_Uundefined 1 Reply Last reply Reply Quote 0
        • Vladimir_Uundefined
          Vladimir_U @PCR
          last edited by

          @pcr Here is my config.g

          ; Configuration file for Duet 3 Mini 5+ (firmware version 3.3)
          ; executed by the firmware on start-up
          ;
          ; generated by RepRapFirmware Configuration Tool v3.3.5 on Sun Oct 31 2021 23:40:16 GMT+0300 (Москва, стандартное время)
          
          ; General preferences
          G90                                          ; send absolute coordinates...
          M83                                          ; ...but relative extruder moves
          M550 P"HBULTI"                               ; set printer name
          M669 K1                                      ; select CoreXY mode
          
          ; Network
          M552 S1                                      ; enable network
          M586 P0 S1                                   ; enable HTTP
          M586 P1 S0                                   ; disable FTP
          M586 P2 S0                                   ; disable Telnet
          
          ; Drives
          M569 P0.0 S1                                 ; physical drive 0.0 goes forwards
          M569 P0.1 S1                                 ; physical drive 0.1 goes forwards
          M569 P0.2 S1                                 ; physical drive 0.2 goes forwards
          M569 P0.3 S1                                 ; physical drive 0.3 goes forwards
          M584 X0.0 Y0.1 Z0.2 E0.3                     ; set drive mapping
          M350 X16 Y16 Z16 E16 I1                      ; configure microstepping with interpolation
          ;M350 X16 Y16 Z16 E16 I0 ; test
          M92 X80.00 Y80.00 Z1600.00 E691.00           ; set steps per mm
          M566 X900.00 Y900.00 Z60.00 E120.00          ; set maximum instantaneous speed changes (mm/min)
          M203 X12000.00 Y12000.00 Z300.00 E4500.00    ; set maximum speeds (mm/min)
          M201 X3000.00 Y3000.00 Z100.00 E1500.00      ; set accelerations (mm/s^2)
          M906 X700 Y700 Z700 E300 I30                 ; set motor currents (mA) and motor idle factor in per cent
          M84 S30                                      ; Set idle timeout


          ; Axis Limits
          M208 X0 Y0 Z0 S1                             ; set axis minima
          M208 X200 Y200 Z200 S0                       ; set axis maxima
          
          ; Endstops
          M574 X1 S3                                   ; configure sensorless endstop for low end on X
          M574 Y1 S3                                   ; configure sensorless endstop for low end on Y
          M574 Z1 S1 P"io5.in"                         ; configure switch-type (e.g. microswitch) endstop for low end on Z via pin io5.in
          M569 P0.0 V2000
          M569 P0.1 V2000
          M569 P0.2 V40 ; Z
          ;M569 P0.0 V20 ; test
          ;M569 P0.1 V20 ; test
          
          
          ; Z-Probe
          M558 P0 H5 F120 T6000                        ; disable Z probe but set dive height, probe speed and travel speed
          M557 X15:190 Y15:195 S20                     ; define mesh grid
          
          ; Heaters
          M308 S0 P"temp0" Y"thermistor" T100000 B4138 ; configure sensor 0 as thermistor on pin temp0
          M950 H0 C"out0" T0                           ; create bed heater output on out0 and map it to sensor 0
          ;M307 H0 B0 S1.00                            ; disable bang-bang mode for the bed heater and set PWM limit
          ;M307 H0 B0 R0.649 C315.8 D2.82 S1.00 ;V12.1   ; my bed settings 80
          M307 H0 B0 R0.645 C295.1 D2.17 S1.00 ;V12.1    ; my bed settings 100
          M140 H0                                      ; map heated bed to heater 0
          M143 H0 S120                                 ; set temperature limit for heater 0 to 120C
          M950 H0 Q10
          M308 S1 P"temp1" Y"thermistor" T100000 B4138 ; configure sensor 1 as thermistor on pin temp1
          M950 H1 C"out1" T1                           ; create nozzle heater output on out1 and map it to sensor 1
          M307 H1 B0 S1.00                             ; disable bang-bang mode for heater  and set PWM limit
          M143 H1 S280                                 ; set temperature limit for heater 1 to 280C
          
          ; Fans
          M950 F0 C"out3" Q500                         ; create fan 0 on pin out3 and set its frequency
          M106 P0 S0 H-1                               ; set fan 0 value. Thermostatic control is turned off
          M950 F1 C"out4" Q500                         ; create fan 1 on pin out4 and set its frequency
          M106 P1 S1 H1 T45                            ; set fan 1 value. Thermostatic control is turned on
          M950 F2 C"out5" Q15000
          M106 P2  T20:31 H100:101:102 ;S200
          
          ; Tools
          M563 P0 D0 H1 F0                             ; define tool 0
          G10 P0 X0 Y0 Z0                              ; set tool 0 axis offsets
          G10 P0 R0 S0                                 ; set initial tool 0 active and standby temperatures to 0C
          
          ; Custom settings are not defined
          M918 P2 E-4 F2000000                    ; Fysetc 12864mini
          M150 X2 R255 U0 B0 P255 S1 F1           ; display led
          M150 X2 R0 U255 B0 P255 S1 F1           ; left encoder led
          M150 X2 R0 U255 B0 P255 S1 F0           ; right encoder led
          M912
          
          
          PCRundefined 2 Replies Last reply Reply Quote 0
          • PCRundefined
            PCR @Vladimir_U
            last edited by

            @Vladimir_U

            Change this

            M569 P0.0 S1 ; physical drive 0.0 goes forwards
            M569 P0.1 S1 ; physical drive 0.1 goes forwards
            M569 P0.2 S1 ; physical drive 0.2 goes forwards
            M569 P0.3 S1

            To

            M569 P0.0 S1 D3 V20 ; physical drive 0.0 goes forwards
            M569 P0.1 S1 D3 V20 ; physical drive 0.1 goes forwards
            M569 P0.2 S1 D3 V20 ; physical drive 0.2 goes forwards
            M569 P0.3 S1 D3 V20

            1 Reply Last reply Reply Quote 0
            • PCRundefined
              PCR @Vladimir_U
              last edited by

              @vladimir_u and delete this

              M569 P0.0 V2000
              M569 P0.1 V2000
              M569 P0.2 V40 ; Z
              ;M569 P0.0 V20 ; test
              ;M569 P0.1 V20 ; test

              Vladimir_Uundefined 1 Reply Last reply Reply Quote 0
              • Vladimir_Uundefined
                Vladimir_U @PCR
                last edited by

                @pcr Hello. There is no difference between these settings and the settings with which I experimented. at V20 it works noisy. When installed, V2000 works just as noisy, but there is a hiss when driving. The overall noise level does not change much the same.
                I read on the forum that many are faced with the problem of stealth chop. Somewhere I saw that at startup some stealth chop tuning is required.
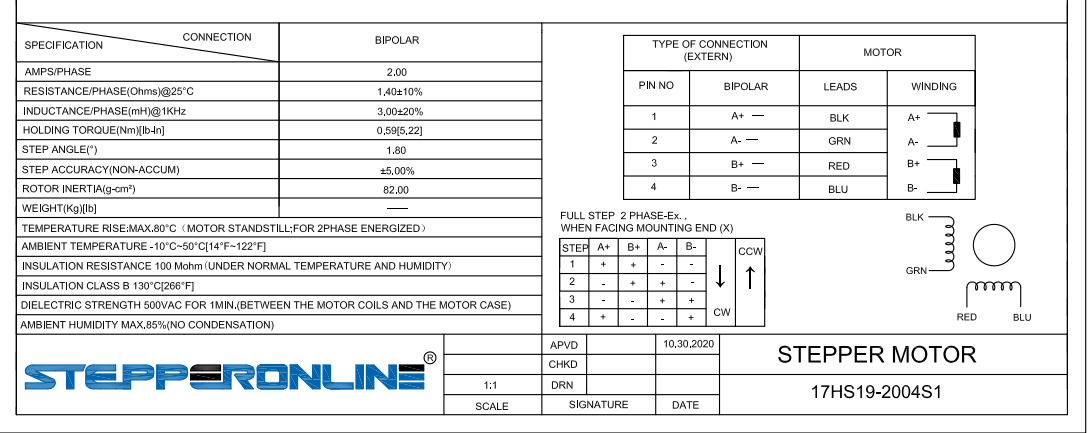
                steppers-stepperonline 17hs19-2004s1-1,8

                1 Reply Last reply Reply Quote 0
                • Vladimir_Uundefined
                  Vladimir_U
                  last edited by

                  When changing the ai parameter I the M350 command from 1 to 0, no changes are made. There is a feeling that interpolation does not work.

                  1 Reply Last reply Reply Quote 0
                  • gloomyandyundefined
                    gloomyandy
                    last edited by

                    What current settings did you have in Marlin? It might help if you post your Marlin configuration file so we can see how you have that set up.

                    Post the output from M569 P0 and from M350 so we can check what settings you are actually using (just in case something in one of the homing files is changing things).

                    Vladimir_Uundefined 2 Replies Last reply Reply Quote 0
                    • Vladimir_Uundefined
                      Vladimir_U @gloomyandy
                      last edited by Vladimir_U

                      @gloomyandy In marlin stealth chop is either on or off. There are no additional settings there. I had it turned on. Current 1A
                      The Klipper has a minimum of stealth settings. And he works there the same way as for marlin.
                      With a Duet3Mini+ this doesn't work as expected.
                      The screenshots of the m350 and m569 z1 commands are below.
                      sh.png

                      gloomyandyundefined 1 Reply Last reply Reply Quote 0
                      • Vladimir_Uundefined
                        Vladimir_U @gloomyandy
                        last edited by

                        @gloomyandy today I turned off homing completely. wrote in the file homeall.g G92 X0 Y0 Z0

                        1 Reply Last reply Reply Quote 0
                        • gloomyandyundefined
                          gloomyandy @Vladimir_U
                          last edited by

                          @vladimir_u Your RRF current settings seem to show that you are only running 700mA rather than the 1A used in Marlin. Is there a reason for that? Oh and RRF uses peak current not RMS (like Marlin and Klipper) so to use the same current in RRF as Marlin you need to multiply your Marlin setting by 1.414 so you might want to try increasing the motor current up to 1400 to be a closer match to your Marlin/Klipper settings.

                          Vladimir_Uundefined 1 Reply Last reply Reply Quote 0
                          • Vladimir_Uundefined
                            Vladimir_U @gloomyandy
                            last edited by

                            @gloomyandy Yes, in my config, which I showed a few messages ago, the current is 700mA. These are already the consequences of experiments. By reducing the amperage, I hoped to reduce the noise level. at 1.4A, the steppers will get very hot, I think so.

                            PCRundefined 1 Reply Last reply Reply Quote 0
                            • PCRundefined
                              PCR @Vladimir_U
                              last edited by

                              @vladimir_u please post the datasheet of the steppers.

                              Vladimir_Uundefined 1 Reply Last reply Reply Quote 0
                              • Vladimir_Uundefined
                                Vladimir_U @PCR
                                last edited by

                                @pcr This is stepperonline 17hs19-2004s1
                                stp.png

                                PCRundefined 1 Reply Last reply Reply Quote 0
                                • PCRundefined
                                  PCR @Vladimir_U
                                  last edited by

                                  @vladimir_u this one is silent at my printer

                                  M906 X1200 Y1200

                                  Vladimir_Uundefined 1 Reply Last reply Reply Quote 0
                                  • Vladimir_Uundefined
                                    Vladimir_U @PCR
                                    last edited by

                                    @pcr Yes, I have tried these settings.
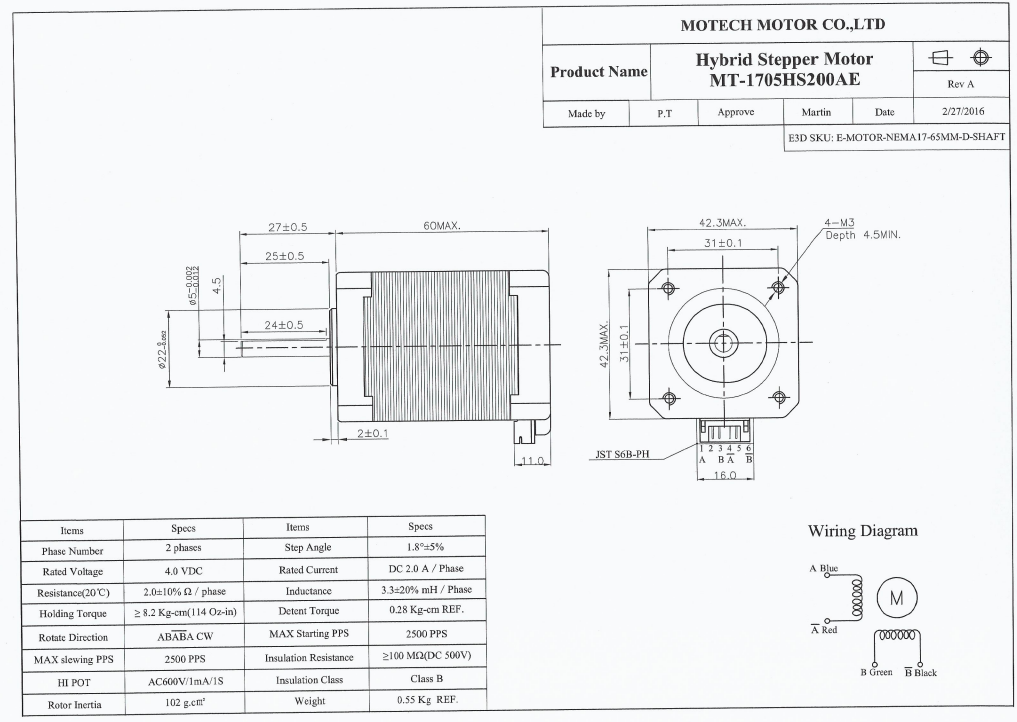
                                    I have steppers from E3D. They are also 2A.
                                    I will experiment with replacement. I also want to try a 24V power supply
                                    d2f22ed0-c28c-493c-9ef0-551241b357f9-image.png

                                    Vladimir_Uundefined 1 Reply Last reply Reply Quote 0
                                    • Vladimir_Uundefined
                                      Vladimir_U @Vladimir_U
                                      last edited by

                                      the problem turned out to be the steppers themselves. they looked identical, but the noise from them was great. replacing the steppers solved my problem.

                                      1 Reply Last reply Reply Quote 1
                                      • First post
                                        Last post
                                      Unless otherwise noted, all forum content is licensed under CC-BY-SA