Idiot's Guide To Upgrading Duet Firmware
-
@gbartsch said in Idiot's Guide To Upgrading Duet Firmware:
The definitions are as follows:
Can you post the full config.g as it is now? Would need to see the tool definition as well. Also ideally know which is connected where.
@gbartsch said in Idiot's Guide To Upgrading Duet Firmware:
The two part cooling fans spin as one.
Are they wired together in parallel to a single header, or one to each?
-
 undefined gbartsch referenced this topic
-
@Phaedrux I'm thinking they are wired together in parallel. I can't look but my friend who set up the machine might be able to take a look at the wiring in a little over a week. Then I could say for sure.
I played with the fan definitions after looking at the old working definitions and came up with this:
M950 F0 C"fan0" Q500                      ; create fan 0 on pin fan0 and set its frequency
M106 P0 S0 H-1                                  ; set fan 0 value. Thermostatic control is turned off
M950 F1 C"fan1" Q500                       ; create fan 1 on pin fan1 and set its frequency / hotend fan
M106 P1 S1 H1 T45                            ; set fan 1 value. Thermostatic control is turned on
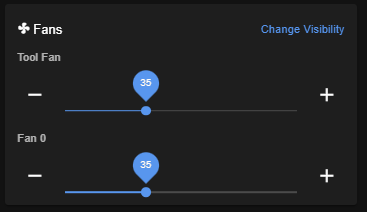
The fans are working now but DWC looks like this ...

Aren't Tool Fan and Fan 0 different things? 35% is the part cooling speed I set in the slicer. The hotend fan is spinning 100%.
Here's my entire config.g ..
; Configuration file for Duet WiFi (firmware version 3.3) ; executed by the firmware on start-up ; ; generated by RepRapFirmware Configuration Tool v3.3.15 on Sun Jan 29 2023 19:52:14 GMT-0700 (Mountain Standard Time) ; General preferences M575 P1 S1 B57600 ; enable support for PanelDue G90 ; send absolute coordinates... M83 ; ...but relative extruder moves M550 P"Brutus" ; set printer name ; Network M552 P0.0.0.0 S1 ; enable network and acquire dynamic address via DHCP M586 P0 S1 ; enable HTTP M586 P1 S1 ; enable FTP M586 P2 S0 ; disable Telnet ; Drives M569 P0 S1 ; physical drive 0 goes forwards M569 P1 S1 ; physical drive 1 goes forwards M569 P2 S1 ; physical drive 2 goes forwards M569 P3 S1 ; physical drive 3 goes forwards M584 X0 Y1 Z2 E3 ; set drive mapping M350 X16 Y16 Z16 E16 I1 ; configure microstepping with interpolation M92 X99.96 Y100.07 Z400.00 E523.52 ; set steps per mm M566 X1000.00 Y1000.00 Z24.00 E3000.00 ; set maximum instantaneous speed changes (mm/min) M203 X30000.00 Y30000.00 Z900.00 E2700.00 ; set maximum speeds (mm/min) M201 X1000.00 Y1000.00 Z200.00 E3000.00 ; set accelerations (mm/s^2) M906 X800 Y800 Z800 E500 I30 ; set motor currents (mA) and motor idle factor in per cent M84 S30 ; Set idle timeout ; Dimensions M208 X-10 Y0 Z0 S1 ; set axis minima M208 X214 Y214 Z218.315 S0 ; set axis maxima ; Endstops M574 X2 S1 P"xstop" ; configure switch-type (e.g. microswitch) endstop for high end on X via pin xstop M574 Y2 S1 P"ystop" ; configure switch-type (e.g. microswitch) endstop for high end on Y via pin ystop M574 Z2 S1 P"zstop" ; configure switch-type (e.g. microswitch) endstop for high end on Z via pin zstop ; Z-Probe M558 P0 H5 F120 T6000 ; disable Z probe but set dive height, probe speed and travel speed M557 X40:195 Y5:195 S20 ; define mesh grid ; Heaters M308 S0 P"bedtemp" Y"thermistor" T100000 B4092 ; configure sensor 0 as thermistor on pin bedtemp M950 H0 C"bedheat" T0 ; create bed heater output on bedheat and map it to sensor 0 M307 H0 B0 S1.00 ; disable bang-bang mode for the bed heater and set PWM limit M140 H0 ; map heated bed to heater 0 M143 H0 S120 ; set temperature limit for heater 0 to 120C M308 S1 P"e0temp" Y"thermistor" T100000 B4267 ; configure sensor 1 as thermistor on pin e0temp M950 H1 C"e0heat" T1 ; create nozzle heater output on e0heat and map it to sensor 1 M307 H1 B0 S1.00 ; disable bang-bang mode for heater and set PWM limit M143 H1 S280 ; set temperature limit for heater 1 to 280C ; Fans M950 F0 C"fan0" Q500 ; create fan 0 on pin fan0 and set its frequency M106 P0 S0 H-1 ; set fan 0 value. Thermostatic control is turned off M950 F1 C"fan1" Q500 ; create fan 1 on pin fan1 and set its frequency / this is the hotend fan M106 P1 S1 H1 T45 ; set fan 1 value. Thermostatic control is turned on ; Tools M563 P0 S"E3D-V6" D0 H1 F0 ; define tool 0 G10 P0 X0 Y0 Z0 ; set tool 0 axis offsets G10 P0 R0 S0 ; set initial tool 0 active and standby temperatures to 0C ; Custom settings M912 P0 S1.6 ; 2020.06.15 - Calibrate the MCU temp ; Miscellaneous M501 ; load saved parameters from non-volatile memory M911 S10 R11 P"M913 X0 Y0 G91 M83 G1 Z3 E-5 F1000" ; set voltage thresholds and actions to run on power loss T0 ; select first tool -
@Phaedrux said in Idiot's Guide To Upgrading Duet Firmware:
Small world.
Wow, that's cool. It's surely is a small world.
-
@gbartsch said in Idiot's Guide To Upgrading Duet Firmware:
Aren't Tool Fan and Fan 0 different things?
Nope. The tool fan slider is the same as your part cooling fan of the currently selected tool, so if you had multiple tools, that slider would work for whichever tool was selected.
@gbartsch said in Idiot's Guide To Upgrading Duet Firmware:
35% is the part cooling speed I set in the slicer. The hotend fan is spinning 100%.
That sounds correct for your config.
-
@Phaedrux said in Idiot's Guide To Upgrading Duet Firmware:
That sounds correct for your config.
Awesome! Thank you for checking that. Then this firmware upgrade is a success!
I'm printing now and can see some differences immediately. Infill is now connecting to perimeters; that was a thorny issue I could not solve for a long time but is much better now.

-
@gbartsch
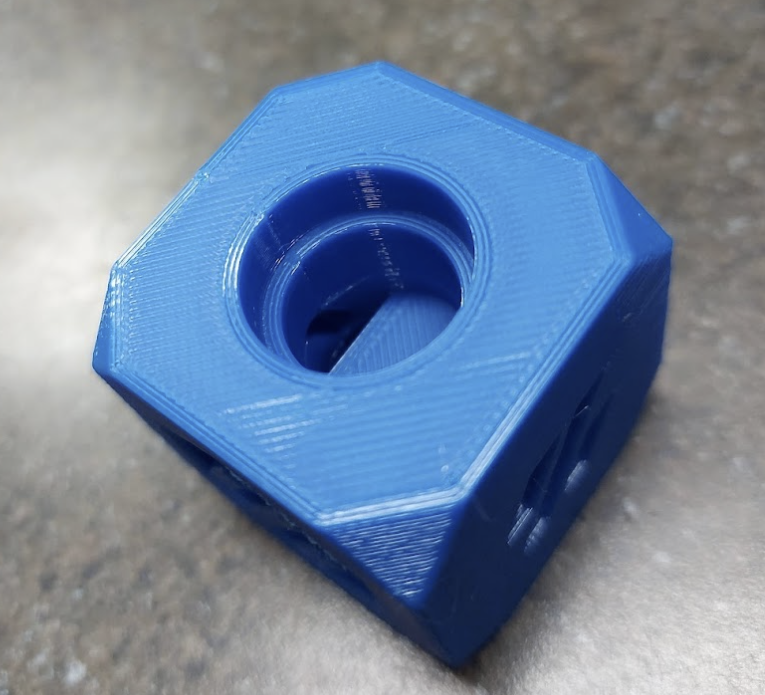
Nice print for a custom cartesian dinosaur machine! -
@tas Thank you! You figure this is OK? It's PET-G at 230C and 40mm/s (dino; ergo slow). I'm pleased for it being one of the first prints after a major firmware update. There's tweaking to do but I feel this is a good start.

-
@gbartsch
I find that to print a really good part you have to print slowly. You also have to print several of the parts and tweak the settings for that specific part.Then, when you finally have your really good part, you will have had enough time to think up some design changes and start all over again.
-
@tas It's a game of iteration and never being satisfied.

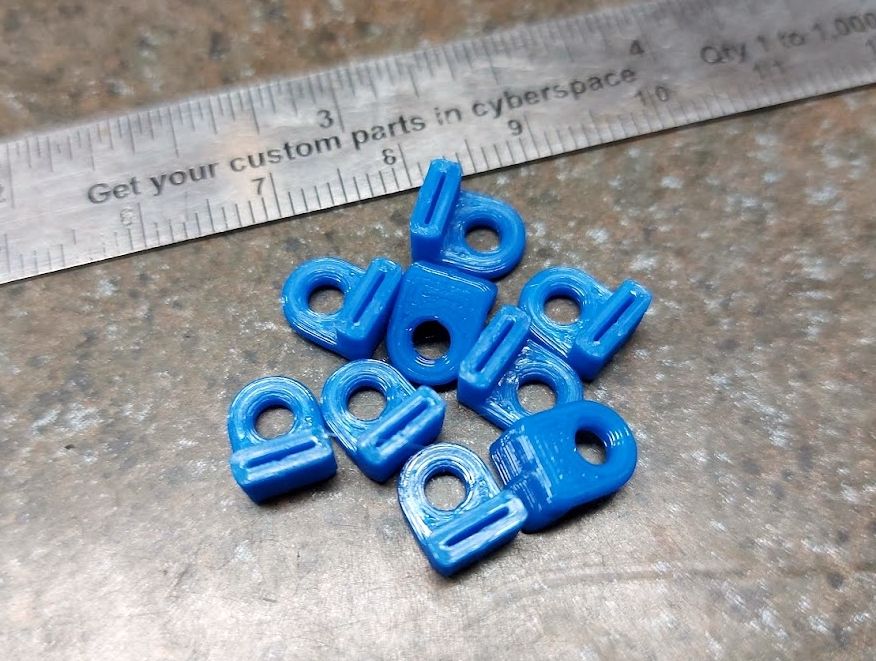
Here's another print that has improved markedly after this firmware upgrade. I'm not sure why but wonder if part of the reason is pressure advance is working and tuned, and my acceleration and speed change settings are higher than before? Regardless, I'm pleased.

-
@gbartsch
I have found that every upgrade brings some improvement to print quality.Of course the slicers have improved too.
-
@gbartsch said in Idiot's Guide To Upgrading Duet Firmware:
I'm not sure why but wonder if part of the reason is pressure advance is working and tuned, and my acceleration and speed change settings are higher than before?
Yes most likely. Pressure advance will be helping for sure, and if you're using the speed values from the config I provided some things are probably a bit faster which can help quality as you don't want the print head hanging around oozing out plastic when it shouldn't be.
-
@tas said in Idiot's Guide To Upgrading Duet Firmware:
I have found that every upgrade brings some improvement to print quality.
Of course the slicers have improved too.For sure; it's exciting to be along for the ride!
-
@Phaedrux said in Idiot's Guide To Upgrading Duet Firmware:
... some things are probably a bit faster which can help quality as you don't want the print head hanging around oozing out plastic when it shouldn't be
The settings are definitely faster. I'll try increasing acceleration and maximum instantaneous speed changes as much as possible before the machine complains.
-
@gbartsch said in Idiot's Guide To Upgrading Duet Firmware:
@Phaedrux said in Idiot's Guide To Upgrading Duet Firmware:
... some things are probably a bit faster which can help quality as you don't want the print head hanging around oozing out plastic when it shouldn't be
The settings are definitely faster. I'll try increasing acceleration and maximum instantaneous speed changes as much as possible before the machine complains.
The maximum instantaneous speed settings are best left alone unless the machine stutters when printing circles.
-
@dc42 said in Idiot's Guide To Upgrading Duet Firmware:
The maximum instantaneous speed settings are best left alone unless the machine stutters when printing circles.
Thank you.
Sorry, I mislead you. After upgrading I reduced some speeds and now want to try increasing them to as close to the defaults as possible.
My machine has heavy axes so bangs hard if the speeds are too high.
These are its current settings:
M566 X1000.00 Y1000.00 Z24.00 E3000.00 ; set maximum instantaneous speed changes (mm/min) M203 X30000.00 Y30000.00 Z900.00 E2700.00 ; set maximum speeds (mm/min) M201 X1000.00 Y1000.00 Z200.00 E3000.00 ; set accelerations (mm/s^2) -
Just a follow up; since the upgrade I've printed steadily and have yet to experience a disconnect from DWC. That appears to be fixed (crossing my fingers).