Duet3D Logo Duet3D
    • Tags
    • Documentation
    • Order
    • Register
    • Login

    Bed leveling mesh calibration not working

    Scheduled Pinned Locked Moved
    Duet Web Control
    bed leveling
    6
    38
    1.7k
    Loading More Posts
    • Oldest to Newest
    • Newest to Oldest
    • Most Votes
    Reply
    • Reply as topic
    Log in to reply
    This topic has been deleted. Only users with topic management privileges can see it.
    • Mythbear74undefined
      Mythbear74 @Mythbear74
      last edited by

      @Mythbear74 https://drive.google.com/drive/folders/1mVh4PYC3evAnAbOAZaH302QmmA_yATmp?usp=sharing

      Mythbear74undefined 1 Reply Last reply Reply Quote 0
      • Mythbear74undefined
        Mythbear74 @Mythbear74
        last edited by

        Here it is

        soare0undefined 1 Reply Last reply Reply Quote 0
        • soare0undefined
          soare0 @Mythbear74
          last edited by soare0

          @Mythbear74 Why not post here, as code?, Unless is for some secret military project, but then... google drive?

          997ec75b-01f2-45e8-a468-a9dd11505093-image.png

          1 Reply Last reply Reply Quote 0
          • Mythbear74undefined
            Mythbear74
            last edited by

            Yeah, like I said before I’m new and this is like my first time using the thing also, I don’t know how to find this tab when signing into this account

            soare0undefined 1 Reply Last reply Reply Quote 0
            • soare0undefined
              soare0 @Mythbear74
              last edited by soare0

              @Mythbear74 I paranoidly may think that on google drive you posted some infected files, if I would judge your answer. This... tab you speak about, will appear when you reply, at least on a normal computer.
              Again, here is the explanation, in included image. If you still cant figure it, maybe you should make your 3d printer a gift for somebody. Dont mean to be ... mean, but just honest.

              2b489c4a-c1f1-406e-8e44-753ab5a05fa8-image.png

              1 Reply Last reply Reply Quote 0
              • Mythbear74undefined
                Mythbear74
                last edited by

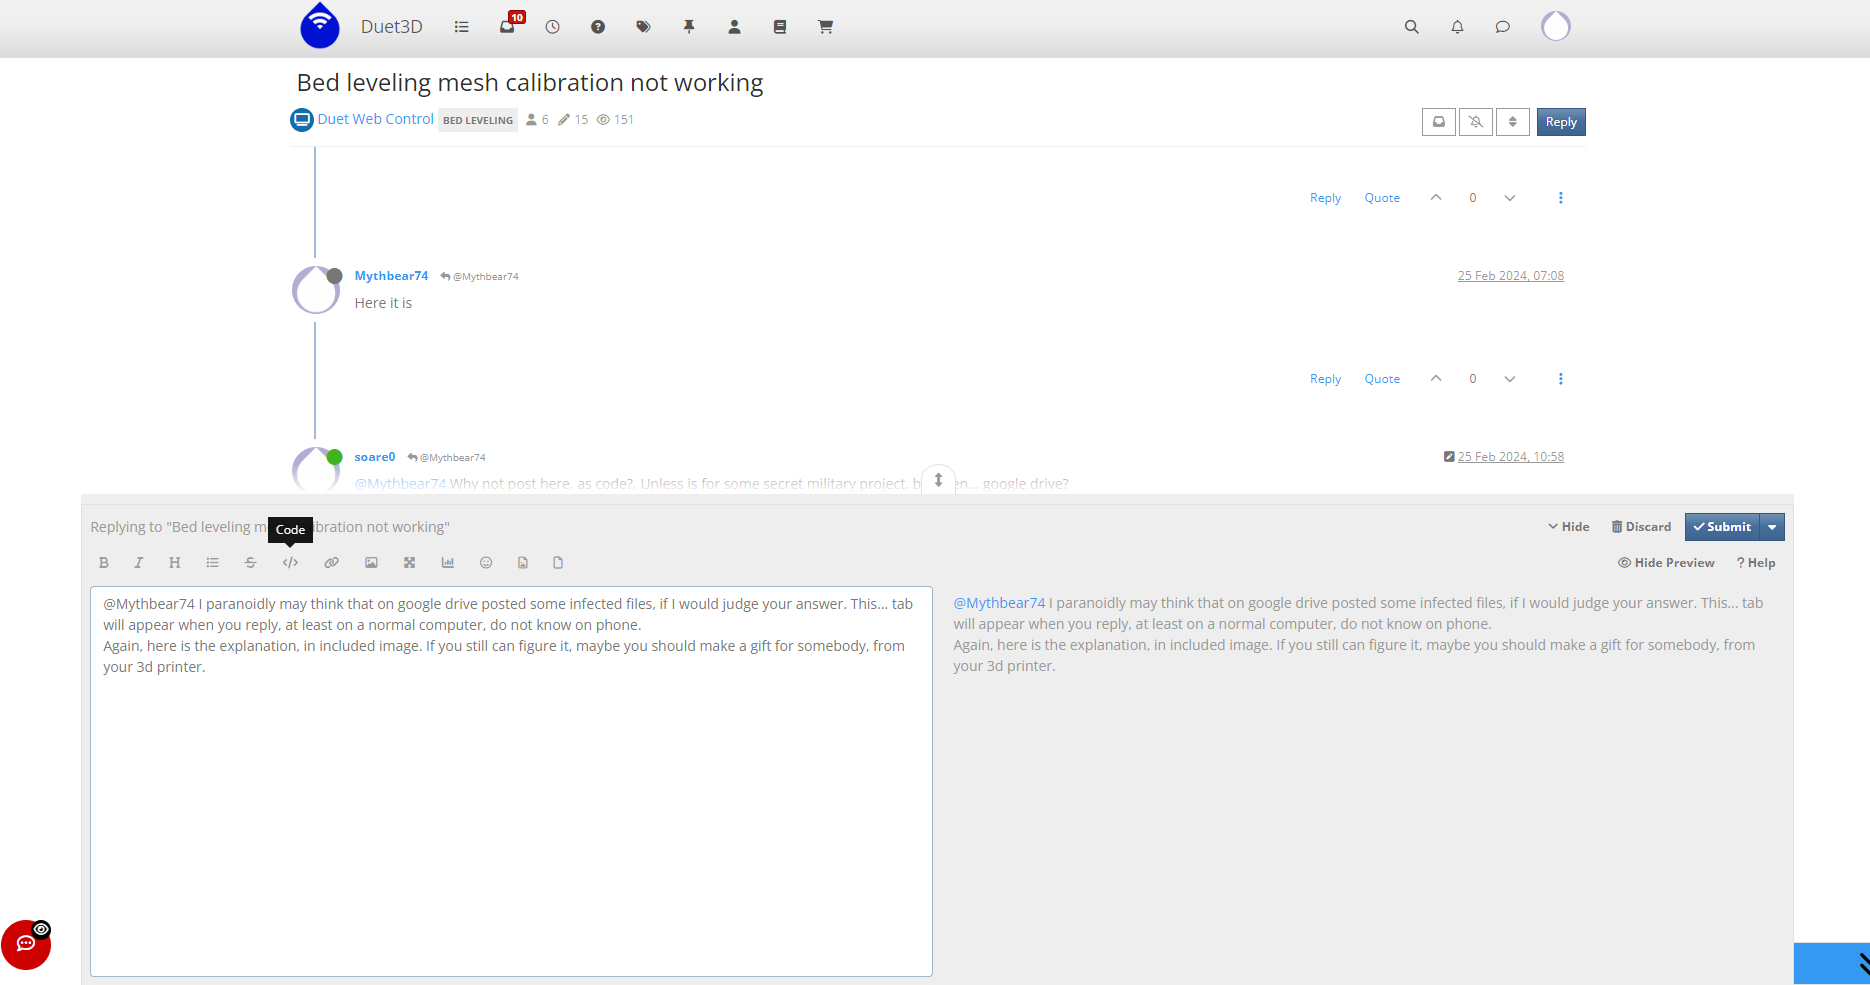
                So do you want me to send the code again but in this other way

                1 Reply Last reply Reply Quote 0
                • Phaedruxundefined
                  Phaedrux Moderator
                  last edited by

                  You can drag and drop the config.g onto the post box to upload it here. Or even copy and paste the text here.

                  Z-Bot CoreXY Build | Thingiverse Profile

                  1 Reply Last reply Reply Quote 0
                  • Mythbear74undefined
                    Mythbear74
                    last edited by droftarts

                    Here is my config.g it was having trouble sending the file

                    ; Configuration file for SKR-E3-RRF (firmware version 3)
                    ; executed by the firmware on start-up
                    ;
                    ; generated by RepRapFirmware Configuration Tool v3.1.10+4-LPC on Tue Jan 19 2021 17:25:01 GMT+0800 (中国标准时间)
                    
                    ; General preferences
                    M950 P1 C"SP"
                    M42 P1 S1
                    
                    G90                                            ; send absolute coordinates...
                    M83                                            ; ...but relative extruder moves
                    M550 PAsa3DPrinter                         ; set printer name
                    
                    ; Network
                    M552 S-1
                    M552 S0
                    M587 S"namllok" P"7856501514"
                    M552 S1
                    M586 P0 S1                                     ; enable HTTP
                    M586 P1 S0                                     ; disable FTP
                    M586 P2 S0                                     ; disable Telnet
                    
                    ; Drives
                    M569 P0 S0                                     ; physical drive 0 goes forwards using default driver timings
                    M569 P1 S0                                     ; physical drive 1 goes forwards using default driver timings
                    M569 P2 S1                                     ; physical drive 2 goes forwards using default driver timings
                    M569 P3 S0                                     ; physical drive 3 goes forwards using default driver timings
                    M584 X0 Y1 Z2 E3                               ; set drive mapping
                    M350 X16 Y16 Z16 E16 I1                        ; configure microstepping with interpolation
                    M92 X80.00 Y80.00 Z400.00 E93.00               ; set steps per mm
                    M566 X900.00 Y900.00 Z60.00 E120.00            ; set maximum instantaneous speed changes (mm/min)
                    M203 X12000.00 Y12000.00 Z600.00 E1200.00      ; set maximum speeds (mm/min)
                    M201 X600.00 Y600.00 Z20.00 E350.00            ; set accelerations (mm/s^2)
                    M906 X700 Y700 Z650 E750 I30                   ; set motor currents (mA) and motor idle factor in per cent
                    M84 S30                                        ; Set idle timeout
                    
                    ; Axis Limits
                    M208 X0 Y0 Z0 S1                               ; set axis minima
                    M208 X230 Y230 Z250 S0                         ; set axis maxima
                    
                    ; Endstops
                    M574 X1 S1 P"xstop"                            ; configure active-high endstop for low end on X via pin xstop
                    M574 Y1 S1 P"ystop"                            ; configure active-high endstop for low end on Y via pin ystop
                    ;M574 Z1 S1 P"zstop"                            ; configure active-high endstop for low end on Z via pin zstop
                    ;M591 D0 P7 C"e0stop" S1  R50:130 L7.0 E10
                    
                    ; Z-Probe
                    M950 S0 C"Servo0"                               ; create servo pin 0 for BLTouch
                    M558 P9 C"^probe" H5 F800 T20000                ; set Z probe type to bltouch and the dive height + speeds
                    M557 X10:180 Y10:180 R-1 P2:2                      ; define mesh grid   
                    G31 P500 X-40 Y10 Z4.3                           ; set Z probe trigger value, offset and trigger height 
                    
                    ; Heaters
                    M308 S0 P"bedtemp" Y"thermistor" T100000 B3950 ; configure sensor 0 as thermistor on pin bedtemp
                    M950 H0 C"bed" T0                              ; create bed heater output on bed and map it to sensor 0
                    M307 B1 S1.00                                  ; disable bang-bang mode for the bed heater and set PWM limit
                    M140 H0                                        ; map heated bed to heater 0
                    M143 H0 S150                                   ; set temperature limit for heater 0 to 150C
                    M143 H0 S150                                   ; set temperature limit for heater 0 to 150C
                    M308 S1 P"e0temp" Y"thermistor" T100000 B3950  ; configure sensor 1 as thermistor on pin e0temp
                    M950 H1 C"e0heat" T1                           ; create nozzle heater output on e0heat and map it to sensor 1
                    M307 H1 B0 R3.192 C111.5:105.0 D6.72 S1.00 V24.0                           ; disable bang-bang mode for heater  and set PWM limit
                    M143 H1 S260                                                  ; set temperature limit for heater 1 to 300C
                    
                    ; Fans
                    M950 F0 C"fan0" Q400                          ; create fan 0 on pin fan0 and set its frequency
                    ;M106 P0 S0 H1 T0                                ; set fan 0 value. Thermostatic control is turned off
                    M950 F1 C"fan1" Q400                          ; create fan 1 on pin fan1 and set its frequency
                    M106 P1 S0 H1 T60                              ; set fan 1 value. Thermostatic control is turned on
                    
                    ; Tools
                    M563 P0 D0 H1 F0                               ; define tool 0
                    G10 P0 X0 Y0 Z0                                ; set tool 0 axis offsets
                    G10 P0 R0 S0                                   ; set initial tool 0 active and standby temperatures to 0C
                    
                    ; Custom settings are not defined
                    
                    ; Miscellaneous
                    ;M575 P1 S1 B57600                              ; enable support for PanelDue
                    ;M575 P1 S2 B57600
                    
                    M552 S1; enable network
                    M150 X2
                    
                    T0 P0
                    G29 S1
                    M501
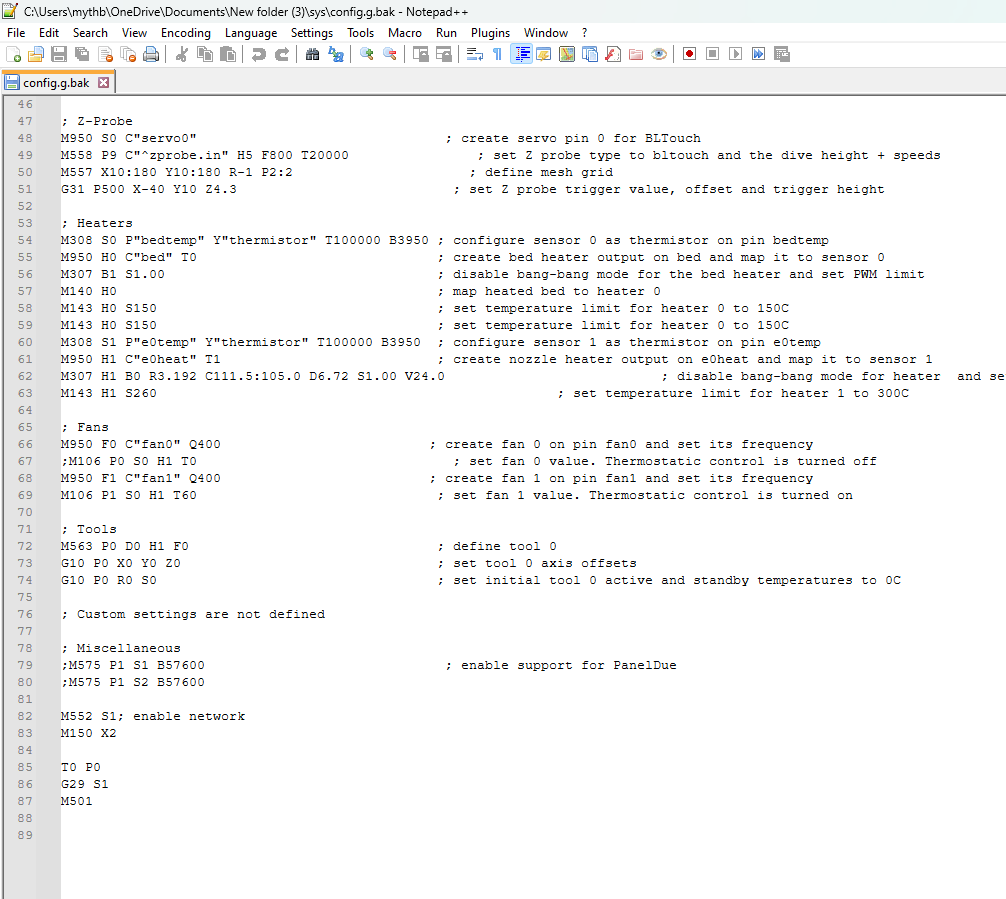


                    Screenshot 2024-02-25 120902.png

                    1 Reply Last reply Reply Quote 0
                    • Mythbear74undefined
                      Mythbear74 @gloomyandy
                      last edited by droftarts

                      Heres the others

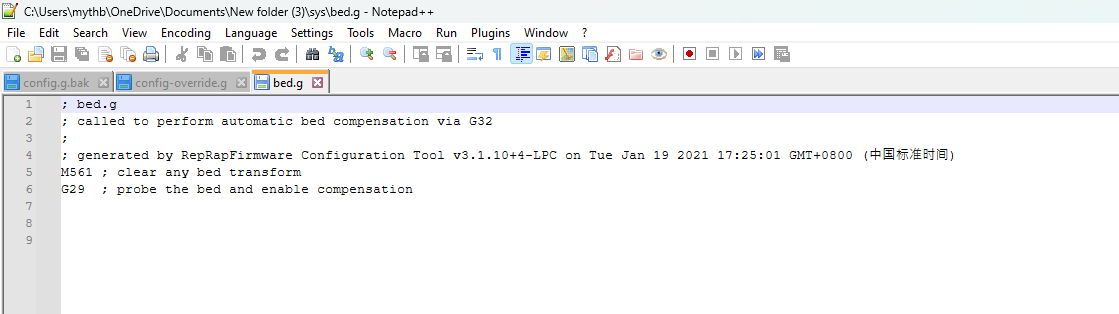
                      ; config-override.g file generated in response to M500 at 2024-02-19 18:43
                      ; This is a system-generated file - do not edit
                      ; Heater model parameters
                      M307 H0 R2.000 C140.000:140.000 D65.00 S1.00 V0.0 B0 I0
                      M307 H1 R3.192 C111.500:105.000 D6.72 S1.00 V24.0 B0 I0
                      ; Workplace coordinates
                      G10 L2 P1 X0.00 Y0.00 Z0.00
                      G10 L2 P2 X0.00 Y0.00 Z0.00
                      G10 L2 P3 X0.00 Y0.00 Z0.00
                      G10 L2 P4 X0.00 Y0.00 Z0.00
                      G10 L2 P5 X0.00 Y0.00 Z0.00
                      G10 L2 P6 X0.00 Y0.00 Z0.00
                      G10 L2 P7 X0.00 Y0.00 Z0.00
                      G10 L2 P8 X0.00 Y0.00 Z0.00
                      G10 L2 P9 X0.00 Y0.00 Z0.00
                      
                      ; bed.g
                      ; called to perform automatic bed compensation via G32
                      ;
                      ; generated by RepRapFirmware Configuration Tool v3.1.10+4-LPC on Tue Jan 19 2021 17:25:01 GMT+0800 (中国标准时间)
                      M561 ; clear any bed transform
                      G29  ; probe the bed and enable compensation
                      

                      Screenshot 2024-02-25 121347.png
                      Screenshot 2024-02-25 121543.png

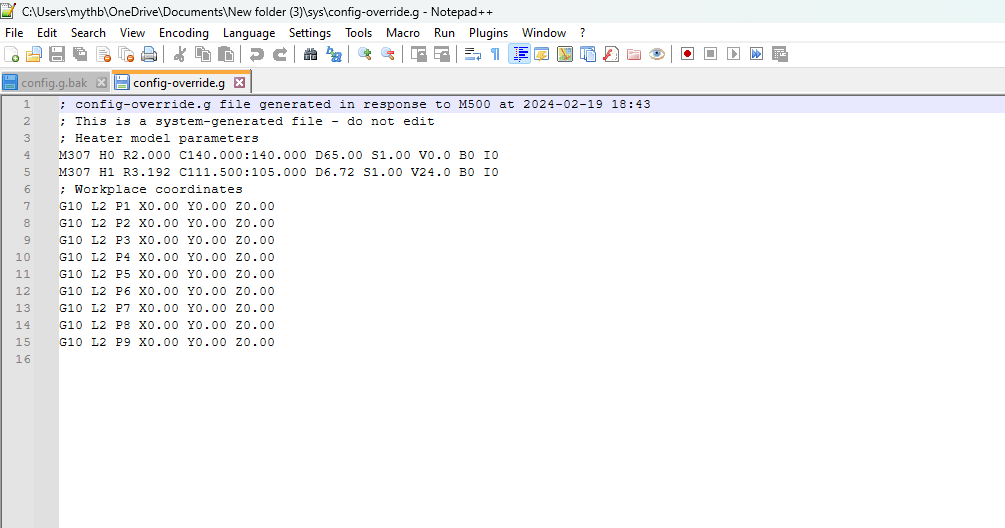
                      I don't have a mesh.g

                      soare0undefined 1 Reply Last reply Reply Quote 0
                      • soare0undefined
                        soare0 @Mythbear74
                        last edited by

                        @Mythbear74
                        I see you have no ideea what you are doing there. Dont know why you used R parameter. I think that is for a delta printer.
                        If you understand what I am saying (as I think you are translating online from chinese), try something like this:

                        M557 X10:180 Y10:180 S40 
                        

                        You will have a 16 point mesh bed.
                        However,

                        M557 X10:180 Y10:180 S4:4  
                        

                        may cover better the area, also, with 16 points mesh bed.

                        1 Reply Last reply Reply Quote 0
                        • Mythbear74undefined
                          Mythbear74
                          last edited by

                          No I’m not from China. It’s just this thing is actually a gift to me and I can just got thrown it after they set it up. I will try putting in that code and then give you an update. thanks😄

                          1 Reply Last reply Reply Quote 0
                          • Mythbear74undefined
                            Mythbear74
                            last edited by

                            All right, so I tried both those inputs, but it did the same problem. Is there any more information you need?

                            soare0undefined 1 Reply Last reply Reply Quote 0
                            • soare0undefined
                              soare0 @Mythbear74
                              last edited by soare0

                              @Mythbear74
                              If you will put here the files, either as code or copy pasted, as well as a short clip with the problem, I am sure that they will be many to help much better than me. I am sorry, but it is difficult otherwise.
                              PS. It is not a problem if you eventually are from China, I just expressed the feeling that you do not understand what we are saying, wich is usually because a language barrier.
                              PS2. Do not insert those files as images/screen captures, as probably some of them will not fit on your monitor (I see that your config files start at line 46). Unless ... you will rotate the monitor to portrait, if you insist with screen captures.
                              PS3. There is also the possibility that the printer has an hardware issue, so.... files and clip needed.
                              PS4. Normally, it should have been a difference between your M557 and mine. Maybe you can show how the original M557 was (assuming it was the original).
                              PS5. If you do not try to do mesh, the printer works right?

                              1 Reply Last reply Reply Quote 0
                              • Mythbear74undefined
                                Mythbear74
                                last edited by

                                Honestly at this point I’d rather like to know how to completely eradicate the height map system so it forgets about it.
                                PS, I am not from china I am in the US and I am quite new to this

                                droftartsundefined 1 Reply Last reply Reply Quote 0
                                • droftartsundefined
                                  droftarts administrators @Mythbear74
                                  last edited by

                                  @Mythbear74 said in Bed leveling mesh calibration not working:

                                  Honestly at this point I’d rather like to know how to completely eradicate the height map system so it forgets about it.

                                  At the end of your config.g are these three lines:

                                  ...
                                  T0 P0
                                  G29 S1
                                  M501
                                  

                                  The G29 S1 loads the mesh file called /sys/heightmap.csv, which is usually the last mesh created. If you comment that out (ie put a semicolon like ; at the beginning of the line) or just delete it, no mesh will be loaded.

                                  However, I think the original problem of your bed mesh probe starting "in an area without anything under it" is caused by your probe offset. This is defined by the G31 command in the probe section, and more specifically I think the X and Y coordinates are incorrect. Currently you have:

                                  ; Z-Probe
                                  M950 S0 C"Servo0"                               ; create servo pin 0 for BLTouch
                                  M558 P9 C"^probe" H5 F800 T20000                ; set Z probe type to bltouch and the dive height + speeds
                                  M557 X10:180 Y10:180 R-1 P2:2                      ; define mesh grid   
                                  G31 P500 X-40 Y10 Z4.3                           ; set Z probe trigger value, offset and trigger height 
                                  

                                  To get them correct, see https://docs.duet3d.com/User_manual/Connecting_hardware/Z_probe_testing#measuring-probe-x-y-offset. The whole page is worth a read.

                                  I've taken the liberty of adding your config.g, config-override.g and bed.g to your posts as text (cut and pasted from the files on Google Drive). We couldn't see the full config.g in your screenshots.

                                  Ian

                                  Bed-slinger - Mini5+ WiFi/1LC | RRP Fisher v1 - D2 WiFi | Polargraph - D2 WiFi | TronXY X5S - 6HC/Roto | CNC router - 6HC | Tractus3D T1250 - D2 Eth

                                  soare0undefined 1 Reply Last reply Reply Quote 0
                                  • soare0undefined
                                    soare0 @droftarts
                                    last edited by

                                    @droftarts said in Bed leveling mesh calibration not working:

                                    However, I think the original problem of your bed mesh probe starting "in an area without anything under it" is caused by your probe offset. This is defined by the G31 command in the probe section, and more specifically I think the X and Y coordinates are incorrect.

                                    Indeed, -40 it is much, but if the printer is something like a ”classic” Ender:

                                    ender.jpg

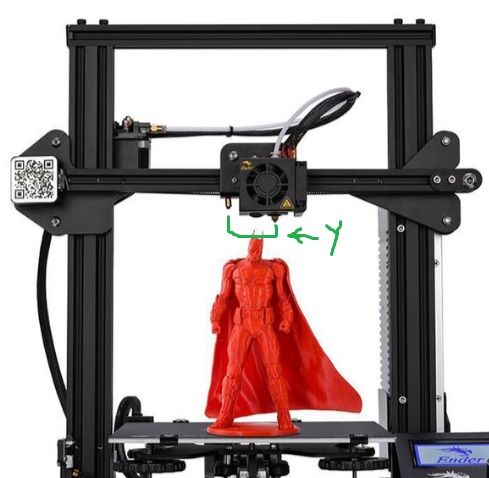
                                    this may be it. Y=10 is almost sure ok, this is why I asked for some clip/photo.
                                    Probably erasing G29 is the best Ideea, anyway...

                                    Mythbear74undefined 1 Reply Last reply Reply Quote 0
                                    • Mythbear74undefined
                                      Mythbear74 @soare0
                                      last edited by

                                      @soare0 yes but do you have a way of actually achieving the erase of the height map/G29

                                      soare0undefined droftartsundefined 2 Replies Last reply Reply Quote 0
                                      • soare0undefined
                                        soare0 @Mythbear74
                                        last edited by soare0

                                        @Mythbear74 Del or Back keys on your keyboard?
                                        And if you are not able at least to submit a photo with your printer or a clip with its behaviour, I am very doubtful that anybody will be able to help you with this.
                                        Maybe Deanna Troy's mother, as she is a good mind reader ...

                                        1 Reply Last reply Reply Quote 0
                                        • droftartsundefined
                                          droftarts administrators @Mythbear74
                                          last edited by

                                          @Mythbear74 The default heightmap is stored in the /sys folder with the name 'heightmap.csv'. In DWC, go to Files > System > System Directory, right click heightmap.csv, and select Delete.

                                          But it is unnecessary, really. If you remove the G29 from config.g, it just won't load, and won't be used. RRF will report 'None' for 'Compensation in use'. If you send G29, it will try to create a new mesh based on the M557 command in config.g, so if you don't want that, delete that too.

                                          However, all of this means that you won't be able to compensate for the bed not being perfectly flat.

                                          Ian

                                          Bed-slinger - Mini5+ WiFi/1LC | RRP Fisher v1 - D2 WiFi | Polargraph - D2 WiFi | TronXY X5S - 6HC/Roto | CNC router - 6HC | Tractus3D T1250 - D2 Eth

                                          Mythbear74undefined 1 Reply Last reply Reply Quote 0
                                          • Mythbear74undefined
                                            Mythbear74 @droftarts
                                            last edited by

                                            @droftarts thank you I will try that

                                            1 Reply Last reply Reply Quote 0
                                            • First post
                                              Last post
                                            Unless otherwise noted, all forum content is licensed under CC-BY-SA