Setting up video streaming using raspberry pi
-
Recently I had to set up a Raspberry Pi is camera to use as a monitoring device for my printer.
I found that pretty much all the online information was outdated and had no end trouble getting it to work on the current version of Pi OS (BullseyeBookworm).
The entire camera and video handling system has changed over the years.
So I decided to document what worked for me.
In the end it was relatively easy (once you knew the correct steps0I must first point out I know bugger all about Linux.
All this work is taken from bits and pieces I found on various sites and cobbled together, so my apologies for not crediting the original author(s)NOTE: These instructions were done using a Raspberry Pi 4 running
BullseyeBookworm 64 bit and an official Pi camera
Also if you're running RRF in SBC mode, you don't need to do this as I believe it has a built in camera setup.The first step is to install the OS using the Pi Imager
https://www.raspberrypi.com/software/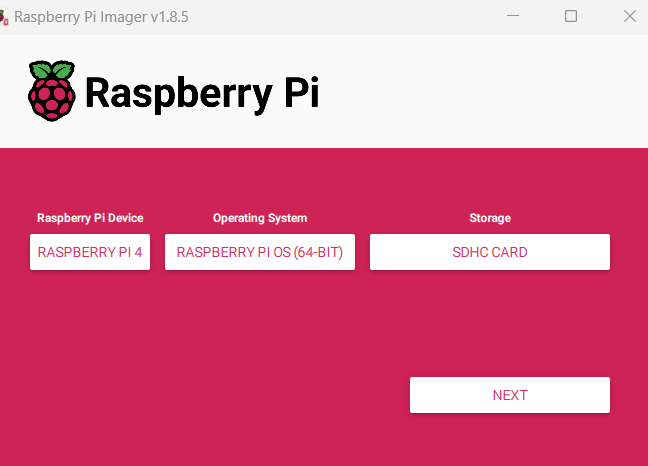
When prompted, choose your user name, password and Wifi details.
NOTE: The current version no longer uses the default user pi and password raspberrywhen you get to this point, click on "edit settings"
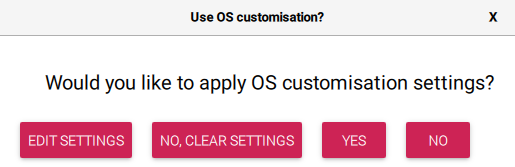
Enable SSH so that you can connect to the Pi via PUTTY rather than always needing a monitor and keyboard.
If you installed a Pi OS that has a desktop you can use the inbuilt command line terminal for all the steps listed below.Then click on YES to apply the settings.
Once the image has been loaded onto the SD card, insert the card in your Pi and start it up.
Start Putty (or some other terminal) and SSH into the Pi
If you used the default settings, you should be able to go to
raspberrypi.local
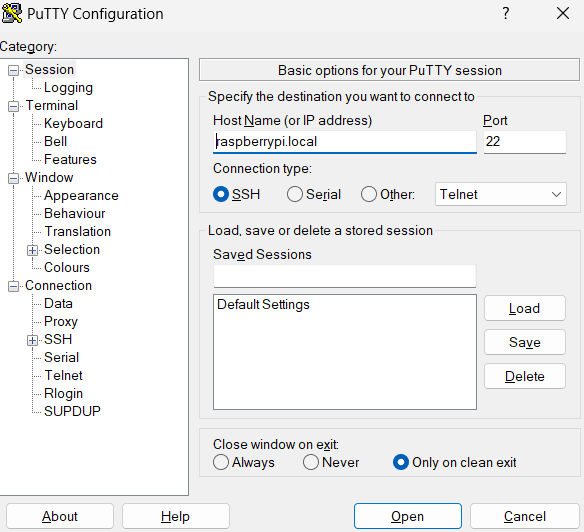
You should see something like this
You may get any updates/upgrade by using these commands
sudo apt updatesudo apt upgradesudo apt install Change directory
cd /usr/local/bin/ Open a text edior
sudo nano streamVideo.py Paste in the following code
#!/usr/bin/python3 # This is the same as mjpeg_server.py, but uses the h/w MJPEG encoder. import io import logging import socketserver from http import server from threading import Condition from picamera2 import Picamera2 from picamera2.encoders import MJPEGEncoder from picamera2.outputs import FileOutput PAGE = """\ <html> <head> <title>3D Printer Camera</title> </head> <body> <img src="stream.mjpg" width="800" height="600" /> </body> </html> """ class StreamingOutput(io.BufferedIOBase): def __init__(self): self.frame = None self.condition = Condition() def write(self, buf): with self.condition: self.frame = buf self.condition.notify_all() class StreamingHandler(server.BaseHTTPRequestHandler): def do_GET(self): if self.path == '/': self.send_response(301) self.send_header('Location', '/index.html') self.end_headers() elif self.path == '/index.html': content = PAGE.encode('utf-8') self.send_response(200) self.send_header('Content-Type', 'text/html') self.send_header('Content-Length', len(content)) self.end_headers() self.wfile.write(content) elif self.path == '/stream.mjpg': self.send_response(200) self.send_header('Age', 0) self.send_header('Cache-Control', 'no-cache, private') self.send_header('Pragma', 'no-cache') self.send_header('Content-Type', 'multipart/x-mixed-replace; boundary=FRAME') self.end_headers() try: while True: with output.condition: output.condition.wait() frame = output.frame self.wfile.write(b'--FRAME\r\n') self.send_header('Content-Type', 'image/jpeg') self.send_header('Content-Length', len(frame)) self.end_headers() self.wfile.write(frame) self.wfile.write(b'\r\n') except Exception as e: logging.warning( 'Removed streaming client %s: %s', self.client_address, str(e)) else: self.send_error(404) self.end_headers() class StreamingServer(socketserver.ThreadingMixIn, server.HTTPServer): allow_reuse_address = True daemon_threads = True picam2 = Picamera2() picam2.configure(picam2.create_video_configuration(main={"size": (640, 480)})) output = StreamingOutput() picam2.start_recording(MJPEGEncoder(), FileOutput(output)) try: address = ('', 8888) server = StreamingServer(address, StreamingHandler) server.serve_forever() finally: picam2.stop_recording() Press CTRL + X to exit and choose Y to save file
change directory
cd /etc/systemd/systemOpen the text editor to create a system service file
sudo nano streamVideo.service Paste in the following code
[Unit] Description=A script for straming video to http After=syslog.target network.target [Service] WorkingDirectory=/usr/local/bin/ ExecStart=/usr/bin/python3 /usr/local/bin/streamVideo.py Restart=always RestartSec=120 [Install] WantedBy=multi-user.target PRess CTRL + X
press Y and enter to saveEnter the following to reload the daemon
sudo systemctl daemon-reload Enable the service
sudo systemctl enable streamVideo.service You should see something like
Created symlink /etc/systemd/system/multi-user.target.wants/streamVideo.service → /etc/systemd/system/streamVideo.service.Restart the Pi
sudo shutdown -r now After the Pi has rebooted, you should be able to access the stream by going to the following URL in your browser
http://raspberrypi.local:8888/index.html
In DWC you need to enter this URL on order to get the stream
http://raspberrypi.local:8888/stream.mjpg
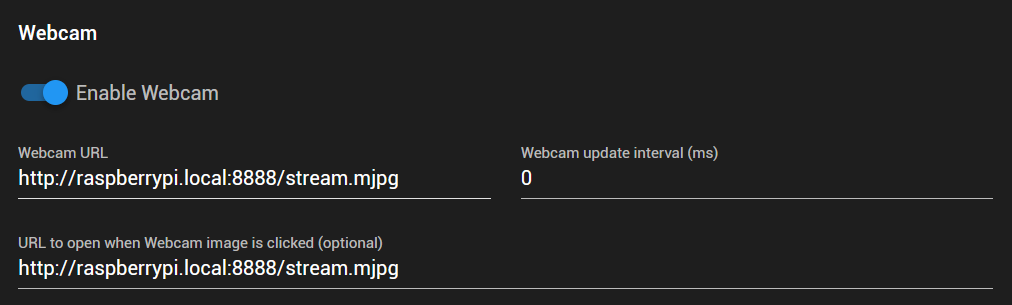
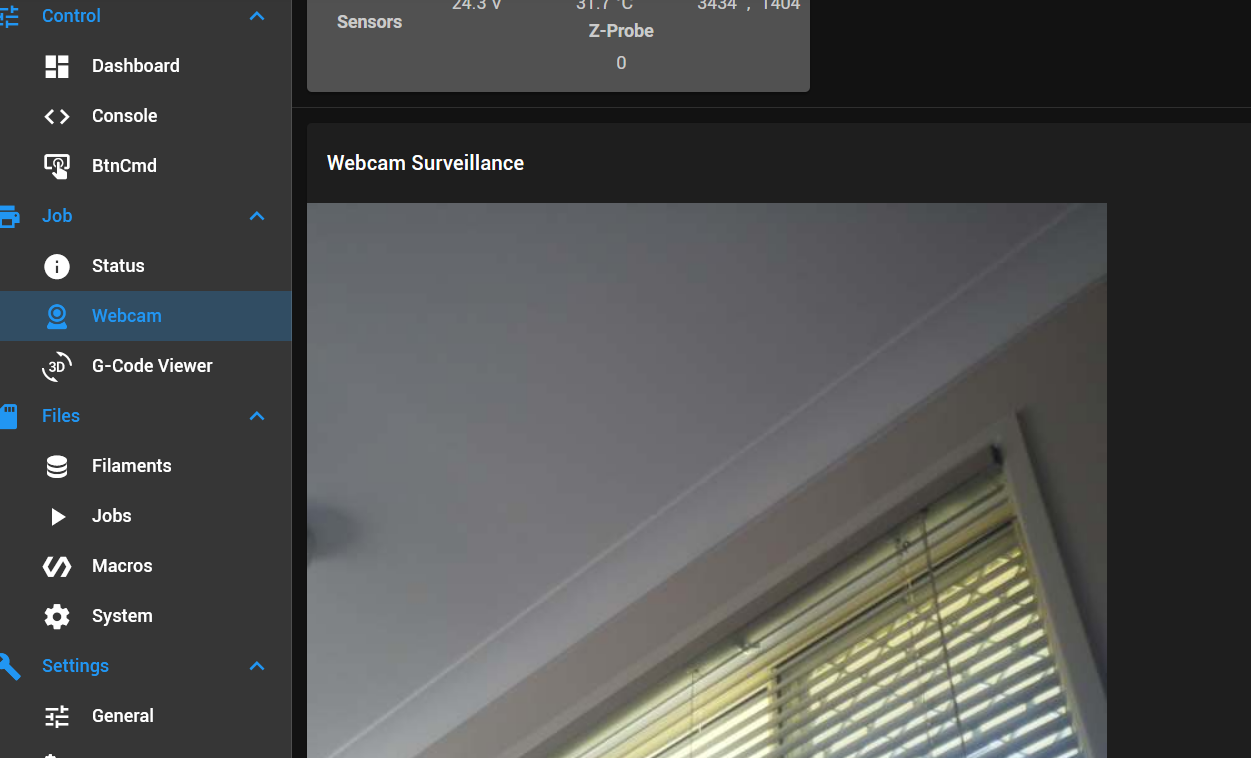
Your video stream should now be visible in the Webcam tab
I hope this saves someone some frustration.
-
I have done a bit more tinkering in an effort to get a high and low resolution stream.
I'm not sure it's the "right" way to go about this as I have no python or Pi experience, but it appears to work.
CPU usage doesn't appear high in use.
Perhaps someone more knowledgeable than I can correct or enhance it.This is the main file that replaces streamVideo.py above
#!/usr/bin/python3 # This is the same as mjpeg_server.py, but uses the h/w MJPEG encoder. import io import logging import socketserver import libcamera from http import server from threading import Condition from libcamera import controls from picamera2 import Picamera2 from picamera2.encoders import MJPEGEncoder from picamera2.outputs import FileOutput PAGE = """\ <html> <head> <title>3D Printer Camera</title> </head> <body> <H2> Camera Feed Low Res</H2> <img src="lores.mjpg" width="640" height="480" /> <H2> Camera Feed Hi Res</H2> <img src="stream.mjpg" width="1280" height="720" /> </body> </html> """ class StreamingOutput(io.BufferedIOBase): def __init__(self): self.frame = None self.condition = Condition() def write(self, buf): with self.condition: self.frame = buf self.condition.notify_all() class StreamingHandler(server.BaseHTTPRequestHandler): def do_GET(self): if self.path == '/': self.send_response(301) self.send_header('Location', '/index.html') self.end_headers() elif self.path == '/index.html': content = PAGE.encode('utf-8') self.send_response(200) self.send_header('Content-Type', 'text/html') self.send_header('Content-Length', len(content)) self.end_headers() self.wfile.write(content) elif self.path == '/stream.mjpg': self.send_response(200) self.send_header('Age', 0) self.send_header('Cache-Control', 'no-cache, private') self.send_header('Pragma', 'no-cache') self.send_header('Content-Type', 'multipart/x-mixed-replace; boundary=FRAME') self.end_headers() try: while True: with output1.condition: output1.condition.wait() frame = output1.frame self.wfile.write(b'--FRAME\r\n') self.send_header('Content-Type', 'image/jpeg') self.send_header('Content-Length', len(frame)) self.end_headers() self.wfile.write(frame) self.wfile.write(b'\r\n') except Exception as e: logging.warning( 'Removed streaming client %s: %s', self.client_address, str(e)) elif self.path == '/lores.mjpg': self.send_response(200) self.send_header('Age', 0) self.send_header('Cache-Control', 'no-cache, private') self.send_header('Pragma', 'no-cache') self.send_header('Content-Type', 'multipart/x-mixed-replace; boundary=FRAME') self.end_headers() try: while True: with output2.condition: output2.condition.wait() frame = output2.frame self.wfile.write(b'--FRAME\r\n') self.send_header('Content-Type', 'image/jpeg') self.send_header('Content-Length', len(frame)) self.end_headers() self.wfile.write(frame) self.wfile.write(b'\r\n') except Exception as e: logging.warning( 'Removed streaming client %s: %s', self.client_address, str(e)) else: self.send_error(404) self.end_headers() class StreamingServer(socketserver.ThreadingMixIn, server.HTTPServer): allow_reuse_address = True daemon_threads = True picam2 = Picamera2() picam2.video_configuration.enable_lores() #adjust resolution as required main_resolution = (1280, 720) low_resolution= (640, 480) #adjust hflip/vflip to 0 or 1 to flip horizontally or vertically orientation=libcamera.Transform(hflip=1, vflip=1) video_config = picam2.create_video_configuration(main={"size": main_resolution, "format": "RGB888"}, lores={"size": low_resolution, "format": "YUV420"}, transform=orientation) picam2.configure(video_config) output1 = StreamingOutput() output2 = StreamingOutput() output = [output1,output2] encoder1=MJPEGEncoder() encoder2=MJPEGEncoder() picam2.start_recording(encoder1, FileOutput(output1)) picam2.start_recording(encoder2, FileOutput(output2),name="lores") picam2.set_controls({"AfMode": controls.AfModeEnum.Continuous}) # set autofocus try: address = ('', 8888) server = StreamingServer(address, StreamingHandler) server.serve_forever() finally: picam2.stop_recording() Then change the DWC setup so that the standard view is the low res stream and clicking on that opens the high res stream
Low res link
http://raspberrypi.local:8888/lores.mjpgHi Res link
http://raspberrypi.local:8888/stream.mjpg
-
@OwenD thanks for this! I guess this is mainly for a RPi running NOT as an SBC connected to a Duet? Though I’d imagine it could work like that too.
You say this is on Bullseye, but Bookworm is the latest RPi OS, see https://www.raspberrypi.com/software/operating-systems/
I think there were quite a few changes to the camera sub-system, so may be worth updating and running through your instructions and see if they still work. I’m going to do the same thing next week with the instructions here: https://docs.duet3d.com/en/User_manual/Reference/DWC_webcam#motion-on-a-raspberry-pi-running-dsfIan
-
very good write up.
In the Klipper world the solution to camera streaming is crowsnest but since that's a mountain of shell scripts I am not super convinced it's something I would recommend people to use unless prepackaged. It does have some nice features like multiple camera support for nozzle cams and the likes, so maybe it's worth looking at for inspiration.
-
@droftarts said in Setting up video streaming using raspberry pi:
@OwenD thanks for this! I guess this is mainly for a RPi running NOT as an SBC connected to a Duet? Though I’d imagine it could work like that too.
Yes, it's for those of us that choose not to run SBC
You say this is on Bullseye, but Bookworm is the latest RPi OS, see https://www.raspberrypi.com/software/operating-systems/
My mistake!
It's actually Bookworm that I'm running.cat /etc/os-release PRETTY_NAME="Debian GNU/Linux 12 (bookworm)" NAME="Debian GNU/Linux" VERSION_ID="12" VERSION="12 (bookworm)" VERSION_CODENAME=bookworm ID=debian HOME_URL="https://www.debian.org/" SUPPORT_URL="https://www.debian.org/support" BUG_REPORT_URL="https://bugs.debian.org/" I think there were quite a few changes to the camera sub-system, so may be worth updating and running through your instructions and see if they still work. I’m going to do the same thing next week with the instructions here: https://docs.duet3d.com/en/User_manual/Reference/DWC_webcam#motion-on-a-raspberry-pi-running-dsf
Ian
Yes, there have been many changes which rendered most of the tutorials online useless.
I had to try to cobble this together from various documents in the picamera documentation. -
@OwenD great! I was wondering if you meant Bookworm, as there were parts I didn’t recognise from previous times I’d messed around with it on Buster and Bullseye.
According to @chrishamm Motion at least provides 32 and 64 bit versions.
Ian
-
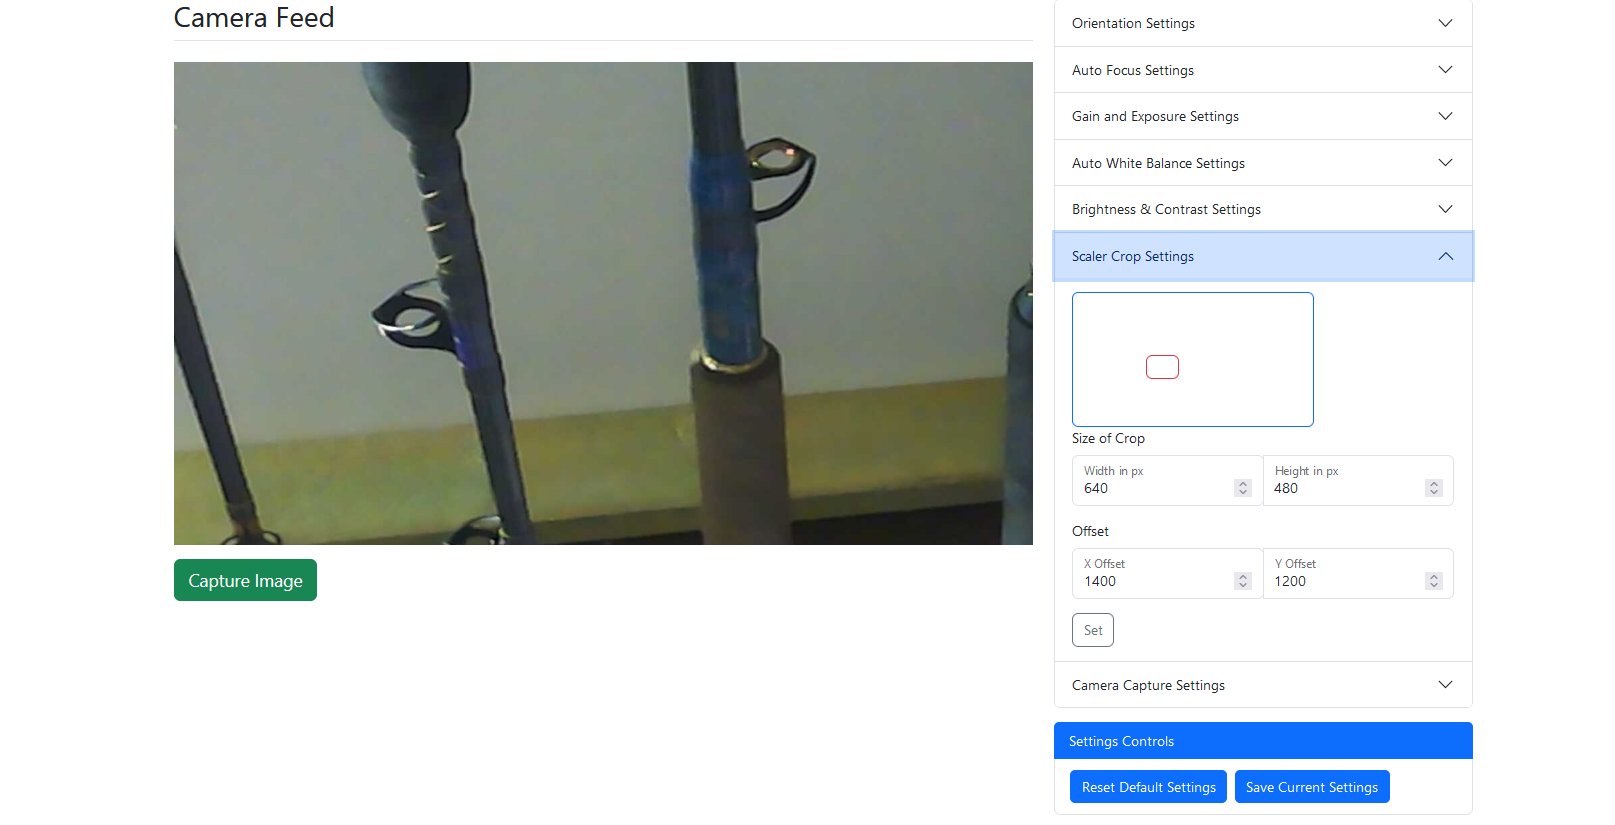
I found another application that works quite easily and has the benefit of being able to adjust all the settings from the web interface.
It's called picamera2-WebUI-Lite

There's a slight error on the instructions to install and it doesn't tell you how to set it up as a service, so I've listed thesteps.
To install.
SSH into your PI (or open a terminal if using a desktop)
Change directory
cd /usr/local/bin/ Clone the repositry
sudo git clone https://github.com/monkeymademe/picamera2-WebUI-Lite.gitChange directory
cd /usr/local/bin/picamera2-WebUI-LiteTest that it's running
python3 app.pyOpen your browser and go to
http://raspberrypi.local:8080/To see just the video feed go to
http://raspberrypi.local:8080/video_feedGo back to the terminal and hot CTRL + C to shut the app down
To set it up as a service
Change directorycd /etc/systemd/systemOpen a text editor to create a system service file
sudo nano webui-lite.service Paste in the following
[Unit] Description=Start script for WebUi-Lite as a service After=syslog.target network.target [Service] WorkingDirectory=/usr/local/bin/picamera2-WebUI-Lite/ ExecStart=/usr/bin/python3 /usr/local/bin//picamera2-WebUI-Lite/app.py Restart=always RestartSec=120 [Install] WantedBy=multi-user.target Press CTRL + X to exit and Y to save
Reload the daemon
sudo systemctl daemon-reload Enable the service
sudo systemctl enable webui-lite.service NOTE that if you already have the other streamVideo service I listed above using Picamera you will have to disable it as you can't run both.
sudo systemctl disable streamVideo.serviceReboot the system to make sure the service starts
sudo shutdown -r now Adjust your DWC settings as follows
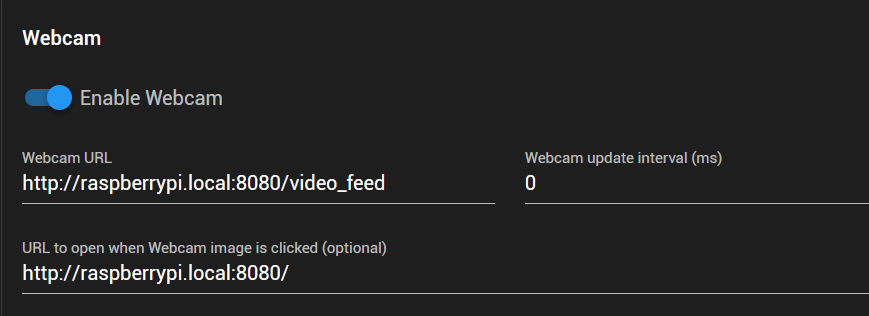
This will allow you to easily get to the settings page by clicking on the webcam image in DWC
From there adjust your resolution and you can also zoom in a particular area using the scaler crop settings.Full view

Cropped view