Hoping for a little print failure guidance...
-
Again thanks for all of the information and suggestions.
I've changed the first layer to .02mm and I slowed down the print from 60mm to 30mm. I keep pushing the nozzle down .05 while test printing, I think its getting close.. thoughts? The rings are built from the center outwards, so the nozzle is getting closer the further out from the center.
VB,
-
@vbtalent2
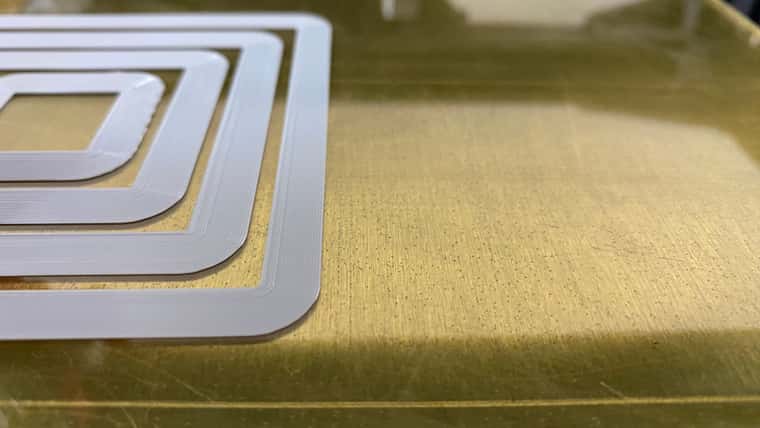
The outer rings are looking much better. Measure them with a micrometer so there is no guesswork going on. Be careful to avoid any bumps so you don't get a false reading.If you set 0.2mm as your first layer in the slicer then your printer should be putting down a 0.2mm first layer. That is the ideal situation you are aiming for.
-
I think you've got this part nailed. Now be sure that your zoffset in config.g matches your outer ring and move on to the next challenge.
-
I really appreciate the insight and help...! you guys are great...


I'm assuming that this should check the box on the Extruder feeds and amount of material as well as Nozzle distance to the build plate, correct?
I'll follow up in another thread about the mechanics to keep things clean and separated.
If it were you troubleshooting the next where would you start?
VB,
-
@vbtalent2 said in Hoping for a little print failure guidance...:
I'm assuming that this should check the box on the Extruder feeds and amount of material as well as Nozzle distance to the build plate, correct?
I'll follow up in another thread about the mechanics to keep things clean and separated.
If it were you troubleshooting the next where would you start?
Wondering if anyone had any input to my last few questions in my last post???
Thanks.
-
Next steps... The big categories (I think) are:
Basic accuracy - if you print a cube, say 25mm on a side, and measure it with calipers, is it the right size? Do the corners look sharp? Are there bumps or wiggles? Does things change if the printing speed is increased? Is the top surface pretty flat, or does it have lumps and ridges?
Ringing - (seen most often at higher speeds). If you have stretch in your belts, or something can wiggle, you can get defects in your prints. The Duet board can compensate for some of these. You'll need to get an accelerometer chip and run some tests.
Adapting for shrinkage - When your parts cool, they'll shrink a bit. Print something long that you can measure after printing with calipers. Once you find the error (as a percentage), you can add compensation for that in your filament files.
-
I'm still having issues getting consistent prints and a little lost on where to start.. I thought I was getting close after getting the nozzle dialed in but, no...
So I recorded a few short videos so people could see what was going on..
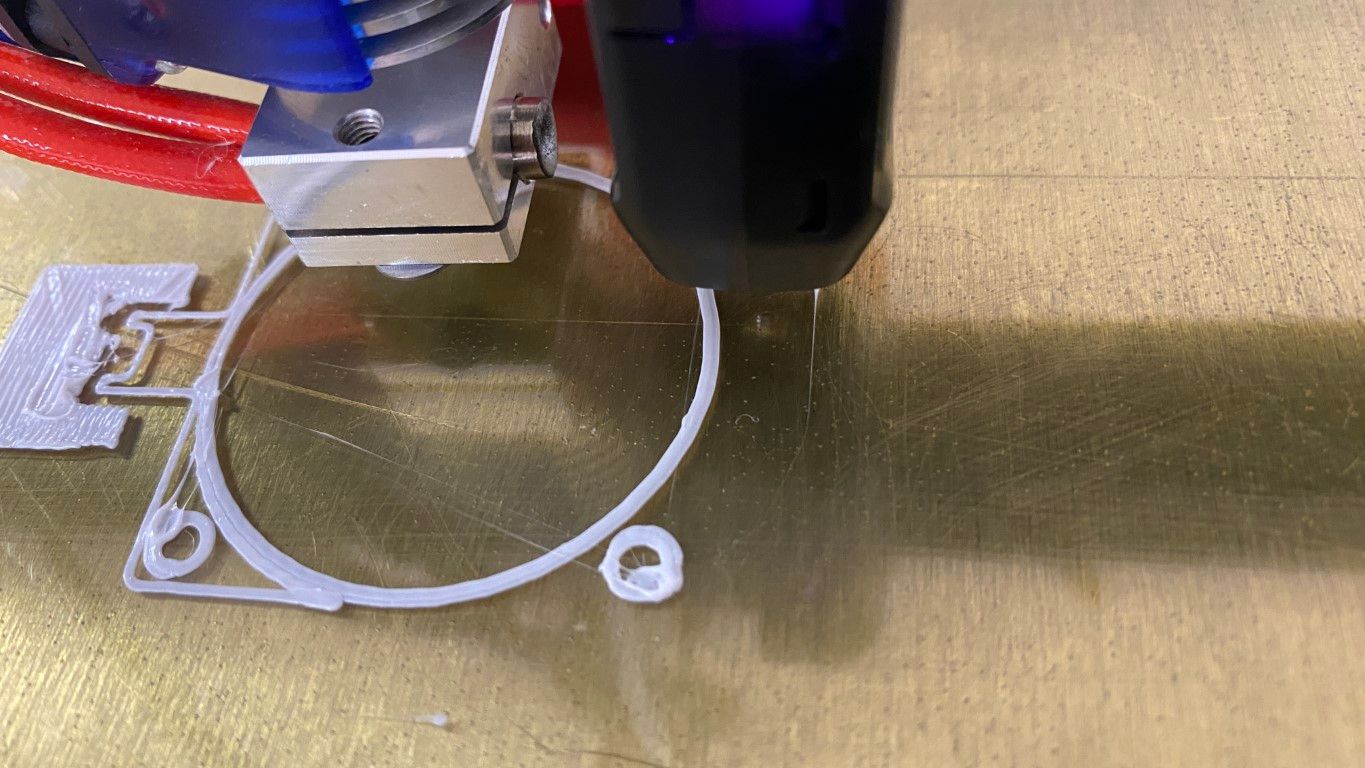
In this 1st video, there's no material coming out when the print starts and when it does it looks like a blob and doesn't seem to stick?
this second video just seems to compound on the problems, each successive line print creates another blob at the starting point and gaps can be seen in the "finished" section, it's just junk.
The third video, is just showing the progression and is a bit clearer where you can see the mass of material where each line starts as well as the gaps.
I also snapped a few pics of the print, hoping to get some clearer images.
Any suggestions would be helpful...
VB,
-
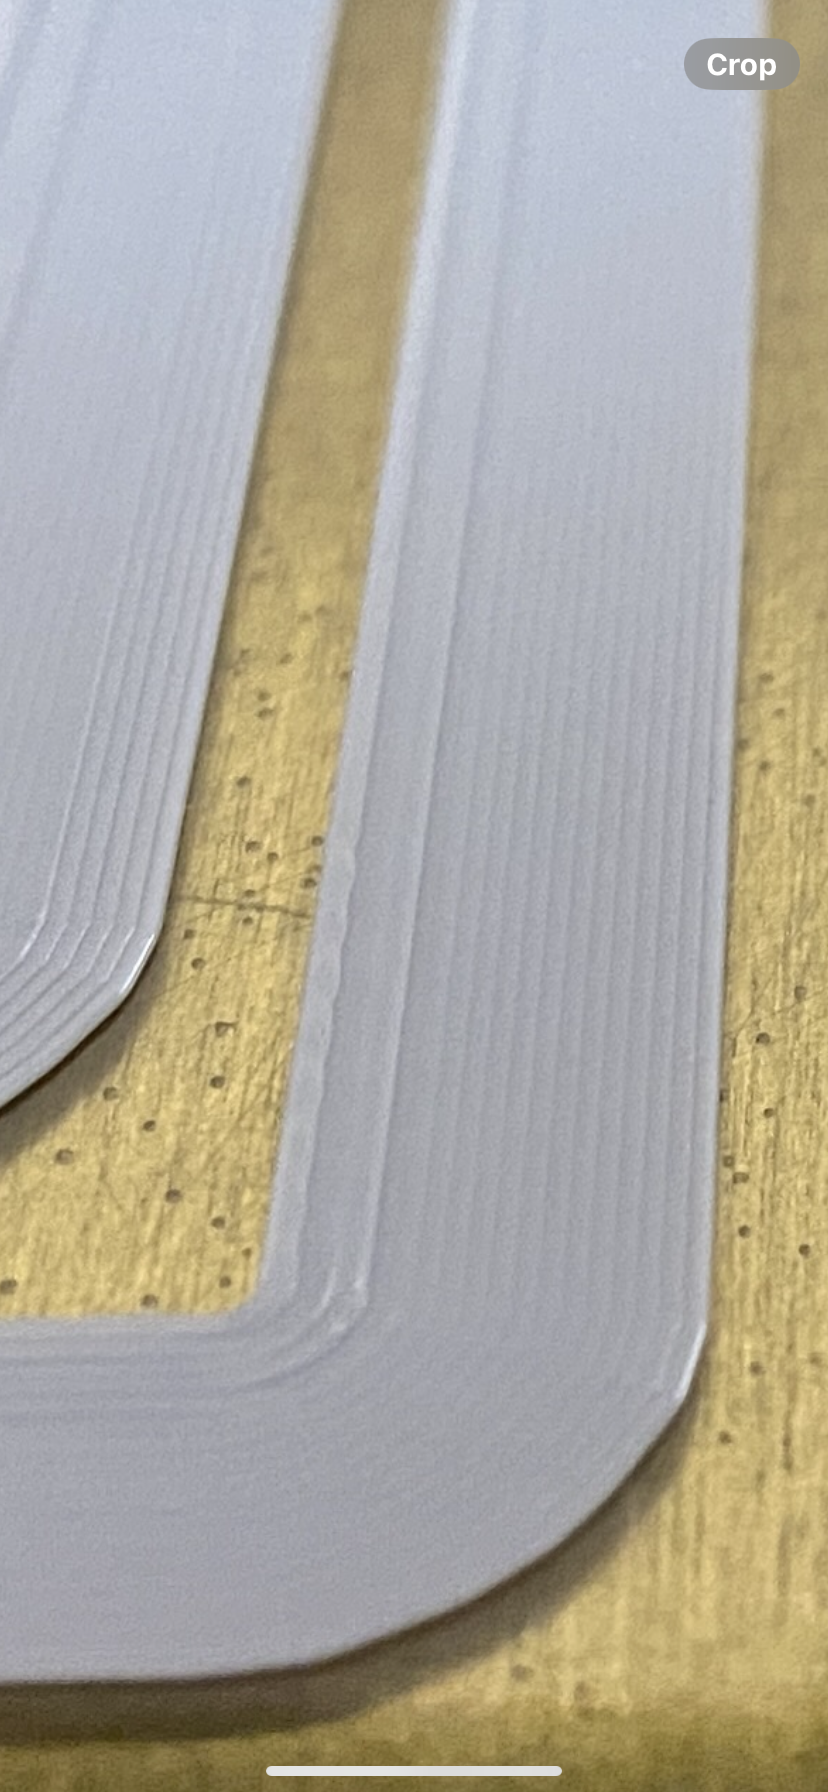
To me, this looks like the nozzle is too far from the bed. I say this because the individual filament lines look rounded on their tops. If they are rounded on their tops, they are probably also rounded on the side that is touching your glass plate. That can lead to bit and pieces coming off the build plate to make blobs. On my printer, I try to make the top surface of the first layer flat and smooth. The part of the nozzle where the plastic comes out is most likely flat next to the hole. I like to think of that little flat space as an iron that is flattening out the filament on top and providing some pressure to push it against the build plate.
This is where baby stepping should be used. you start the print as you have it, then use baby steps to move the nozzle closer while observing whether the result on the build plate is looking better (in this case smoother). If the nozzle gets too close, then the end of the nozzle will be "plowing" through the plastic already put down and you'll get rough ridges, not the smooth ones you see in your pictures. Then baby step away from the plate until it looks better. .
-
@mikeabuilder thanks for the reply... I understand the rounded tops, makes total sense.
How will I be able to tell if its over/under extruding?
Any thoughts on the blobs when its moving to the next line to print?
VB,
-
@vbtalent2 The gaps between adjacent seams look frightening. Maybe you can get rid of them following @mikeabuilder’s advice - but I’m puzzled by the fact that these gaps just begin to appear after about 10 perfectly looking rounds. From your videos, I get no clue: the nozzle deposits the first layer pretty well.
I can imagine two possible suspects:
-
Mechanical issues. I've seen inappropriately adjusted V rollers to generate these gaps. However, as the first few rounds look perfect, probability of this to be the cause is low.
-
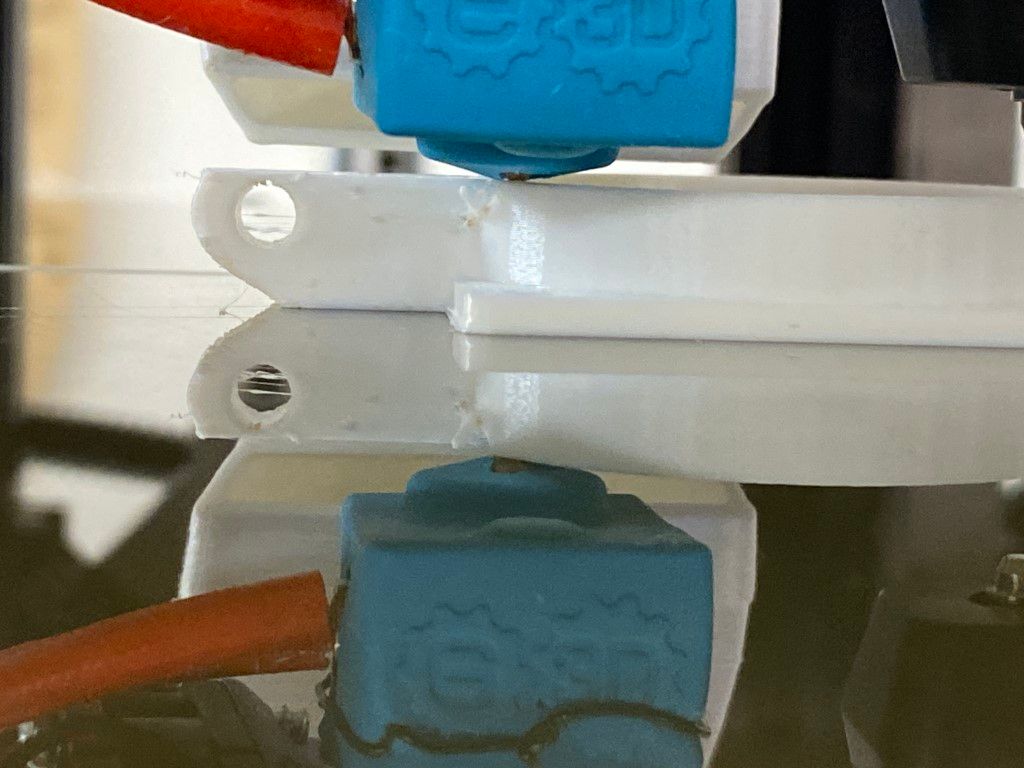
Under extrusion due to some clogging which develops over time. It is often caused by heat creep, i.e. the temperature of the heater block gradually overcomes the heatbreak up into the cold end (of your hotend). In most cases, this indicates insufficient cooling by the tool fan or a blocked air flow. Can you provide an image of your print head?
The blobs should be a minor problem - they didn’t appear with the gray filament you used before, so I think you you just have to fine-tune nozzle temperature and maybe pressure advance for the black filament (to begin with, I would not enable PA at this stage).
As a final note, I'd like to add that you got to manage adjustment of the nozzle height very well. It's a long time since I saw such a perfect first layer seam as demonstrated in your videos. On glass, this is a rare event. Congratulations.
-
-
I've been doing some more work on my printer and feel that I'm getting closer to resolving the issues. I still seem to be plagued mostly by what I would call the lack of "higher definition" in prints and of course the "blobs" which I think are happening at the layer change or even just a repositioning of the printer head.
PLA Hatchbox
215 1st layer
210 remaining layers
.04 nozzle
Bowden extruder
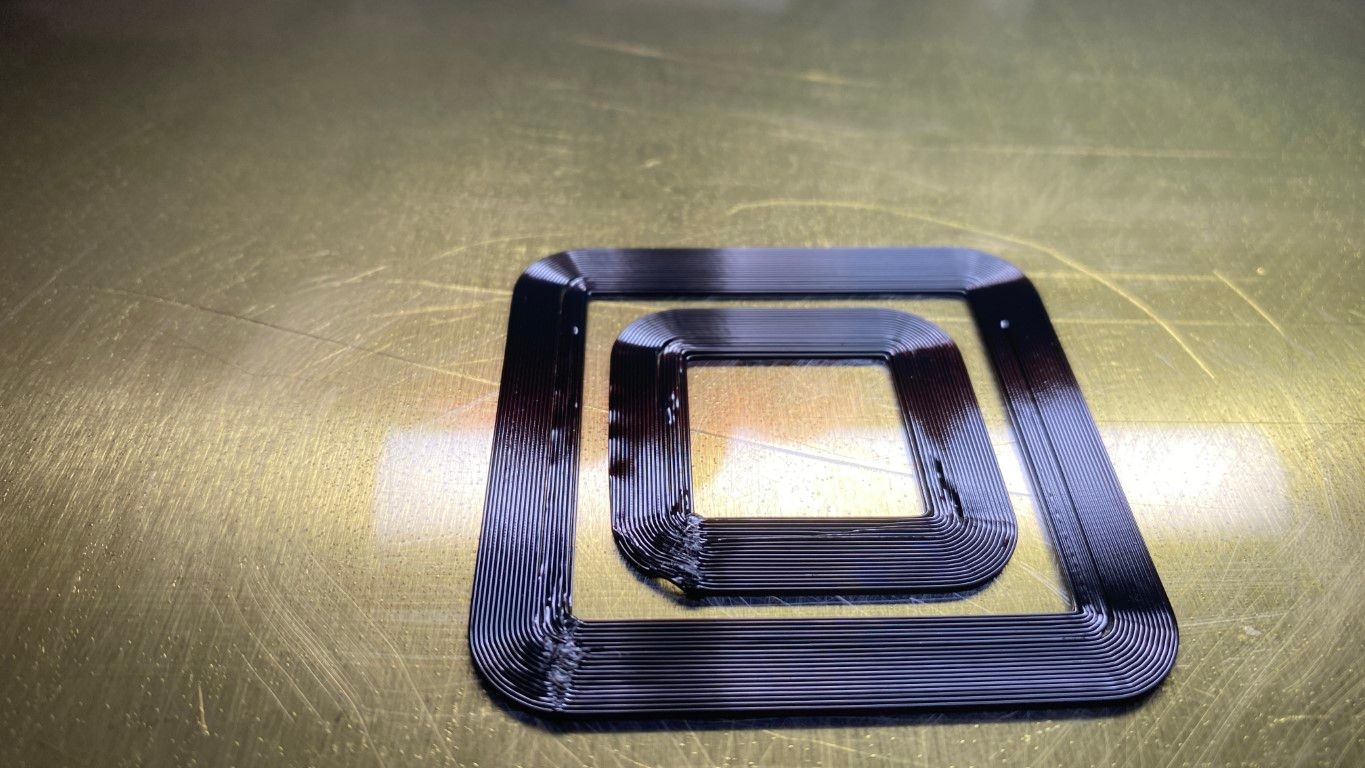
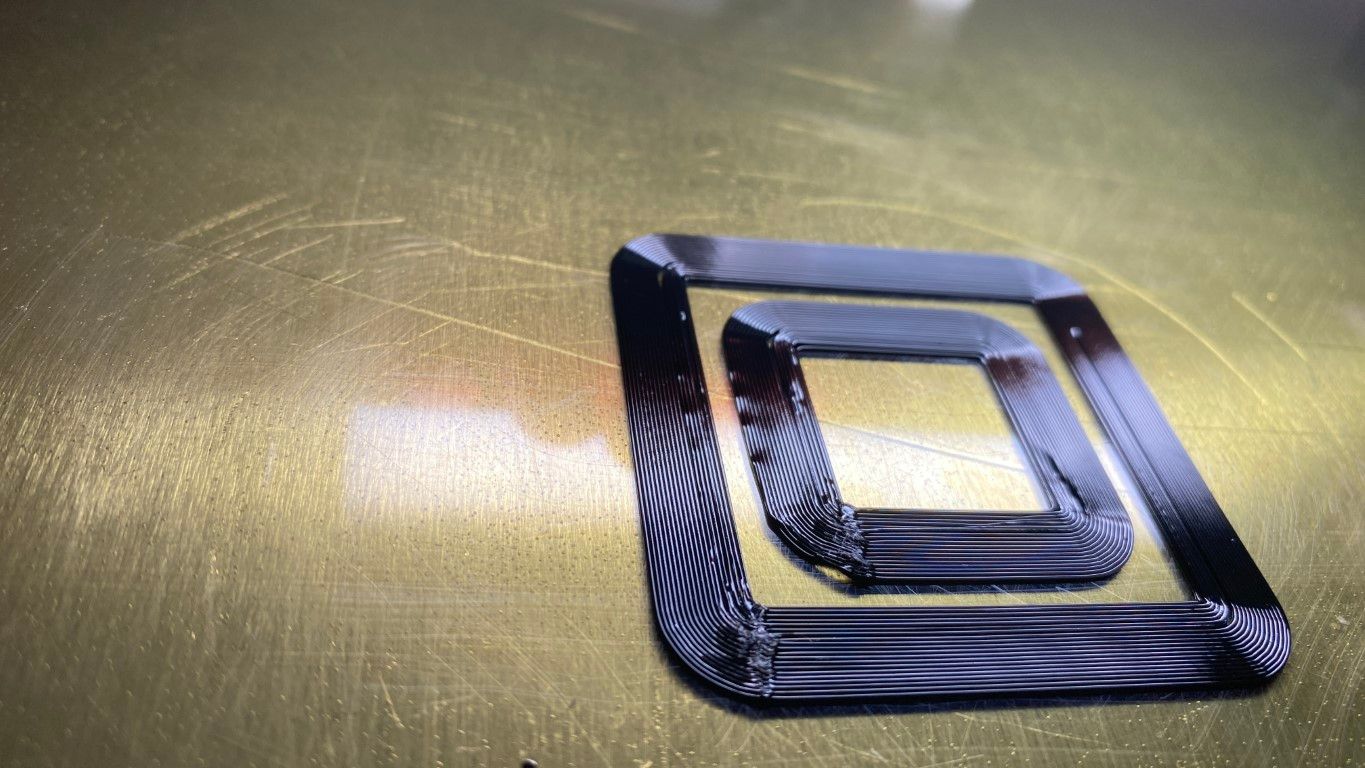
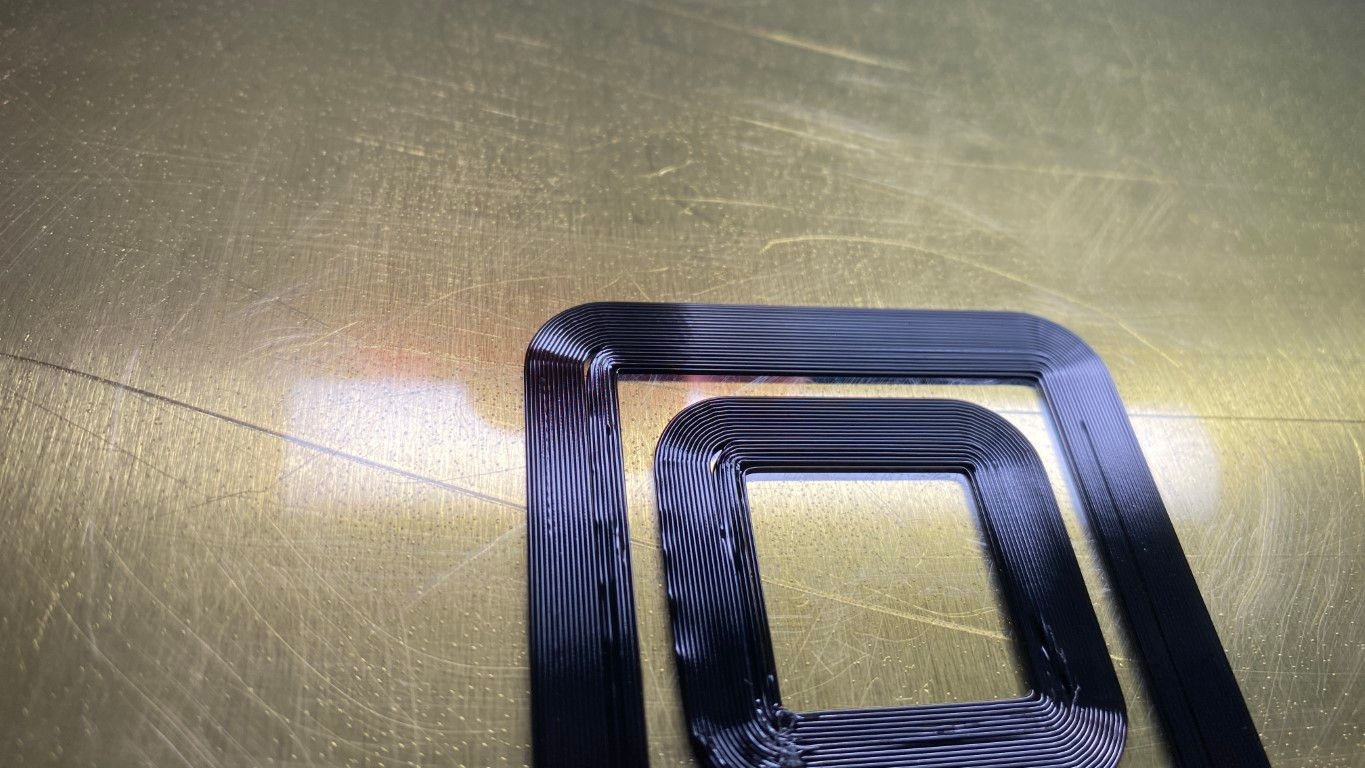
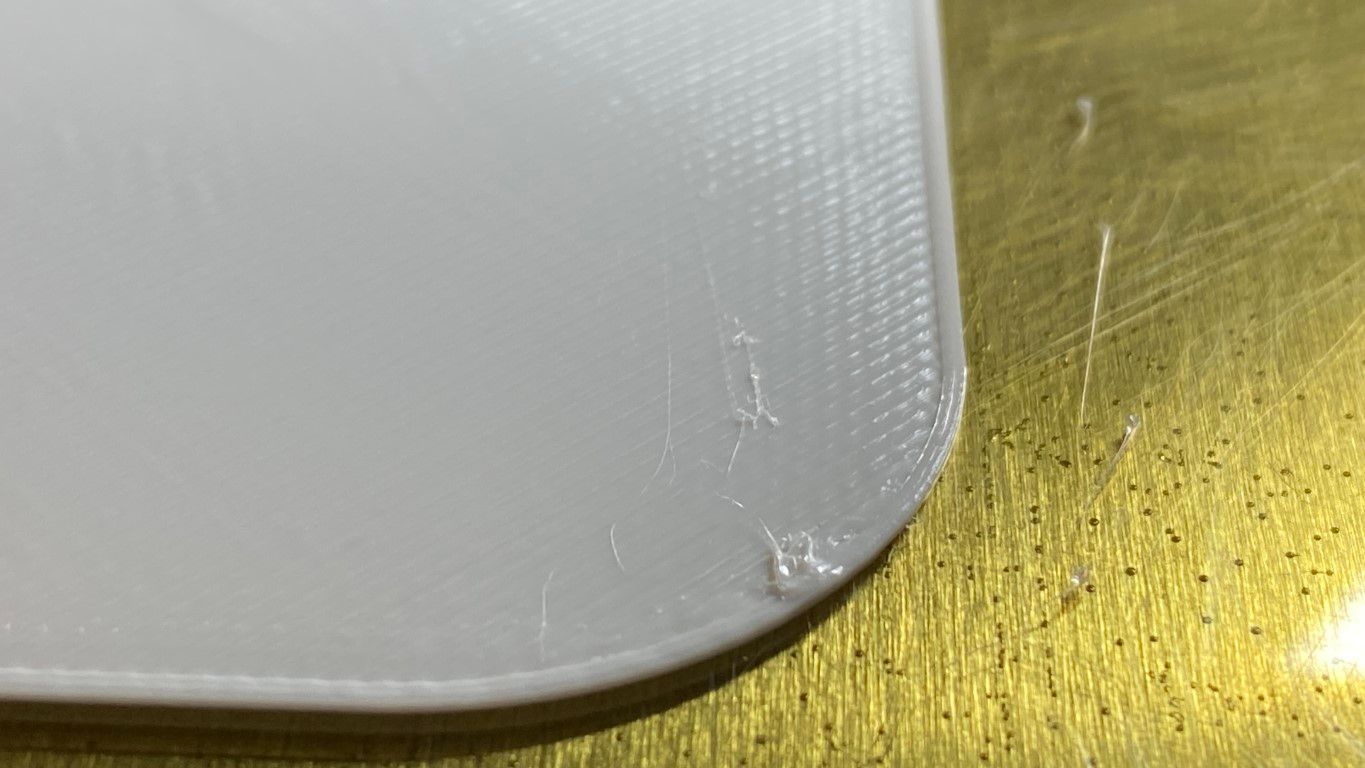
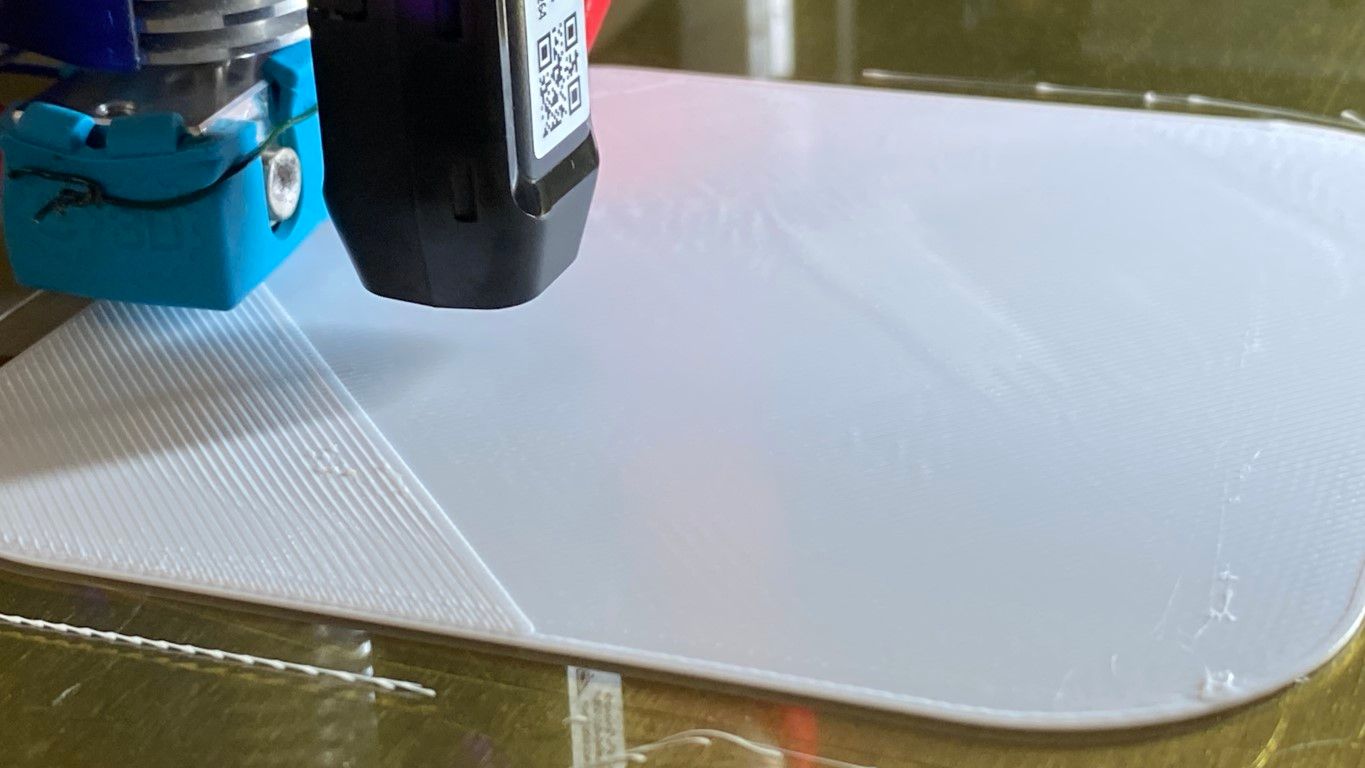
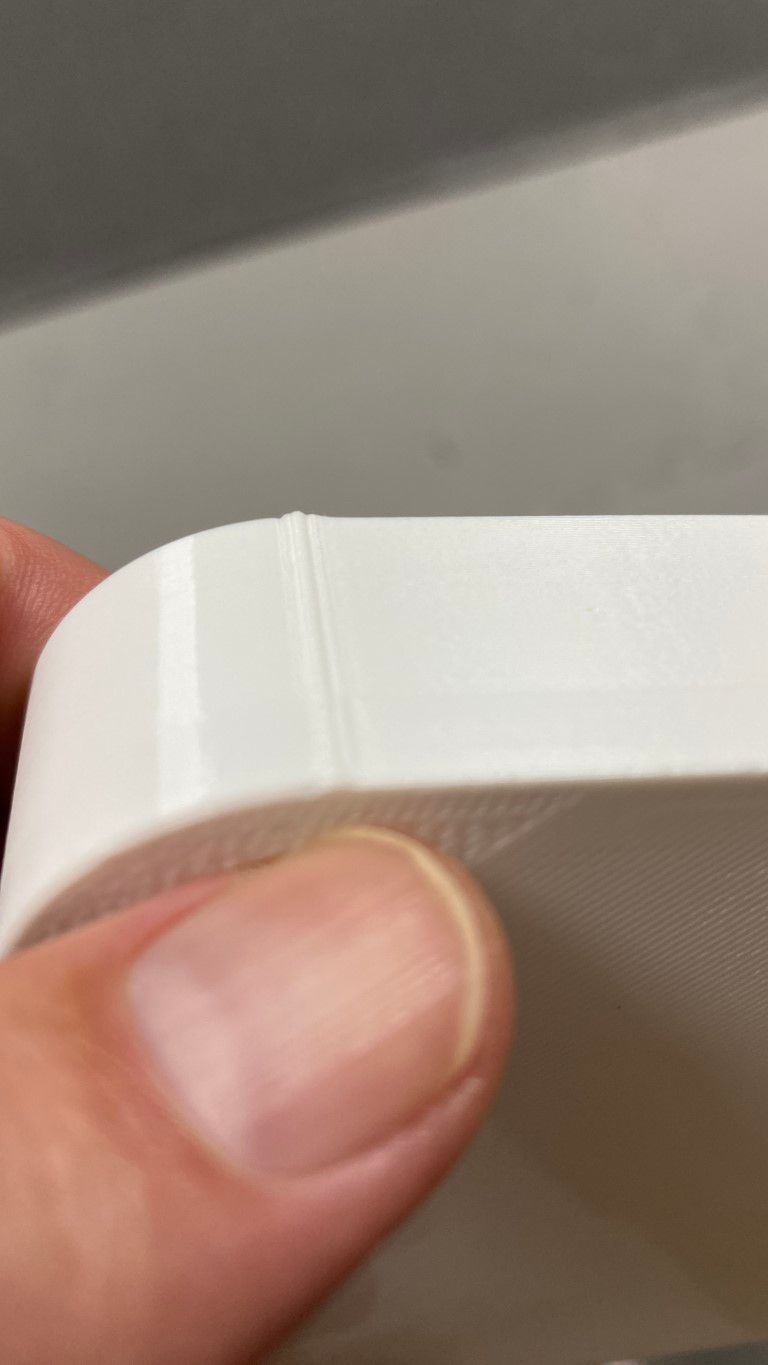
Retraction 3mm/50I believe I was able to finally dial in the 1st layer, and the temp as can be seen from this print. To me it looks like a perfect first few layers and continues throughout the print. Notice there is a "blob" at the layer change, pretty consistent and also when the head moves. During this print, I made a change to the "extrusion factor" midway through to see the impact, so I think that is the abnormality that appears in the walls. Because of the shape in this print, the definition issue doesn't appear.

So I shot some more video and you can clearly see the print head stop at the layer change, which is where the blob is happening. So how do I get rid of that blob???
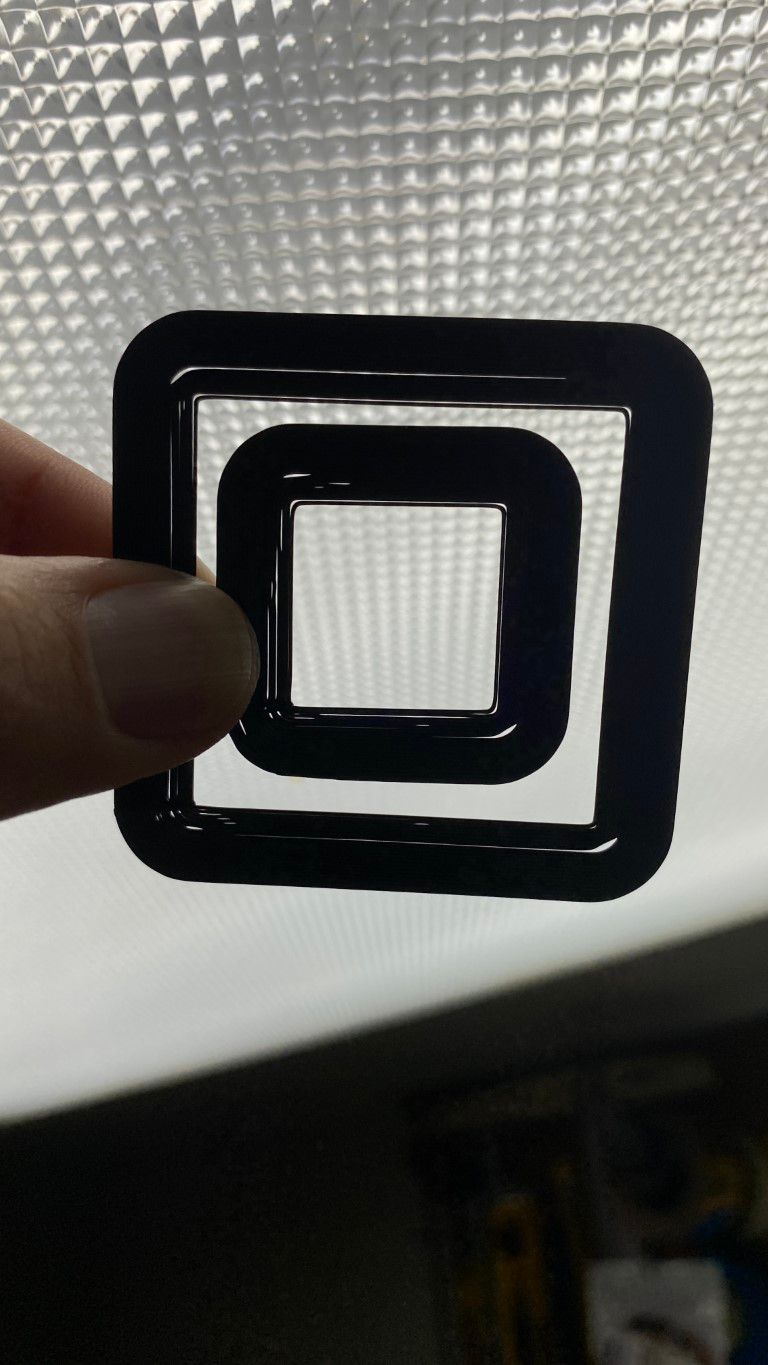
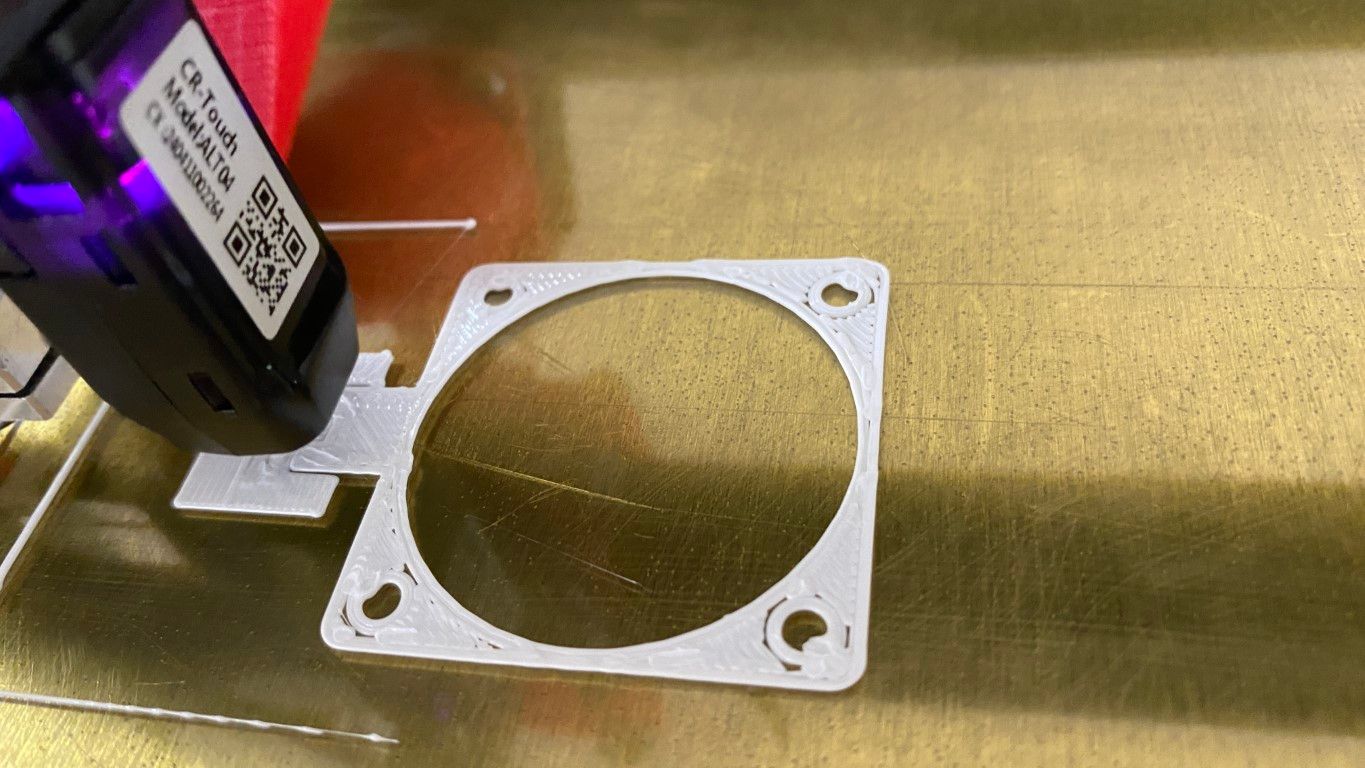
This was another model I was printing that required better detail. This is where I was noticing the lack of "detail" in the print, it just looks runny.. I also printed this model a second time with a layer height of .013 instead of .020, the detail perked up a bit but I'm not sure if its just masking a problem??
I apologize for dumping alot of info out there, just trying to put out as much info as I can so that I might get some guidance on how to resolve these issues.
VB,
-
Great progress. You are nearly to the realm of fine tuning. I have a few specific suggestion, but they do not address all your questions. Specifically, I still have a similar blob on layer changes and I'll be watching fro someone to suggest something that helps me too.
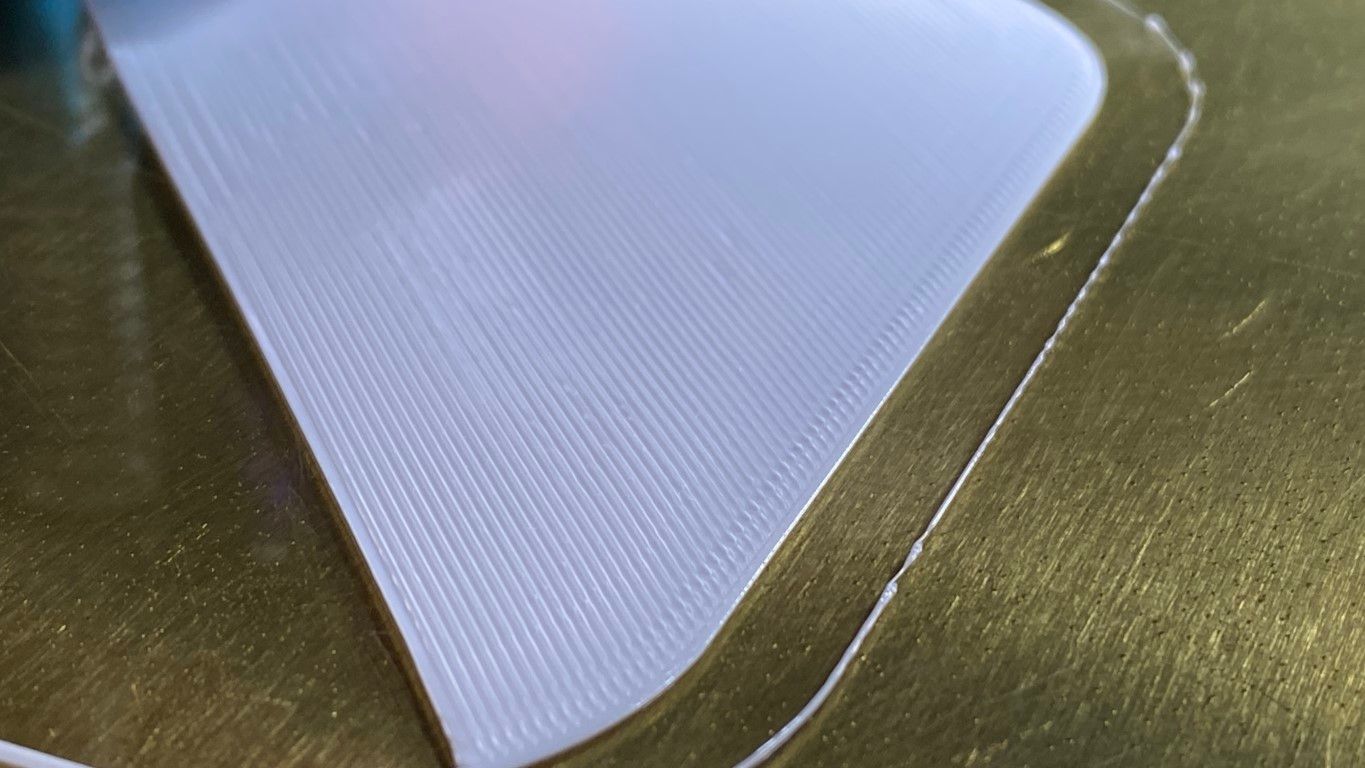
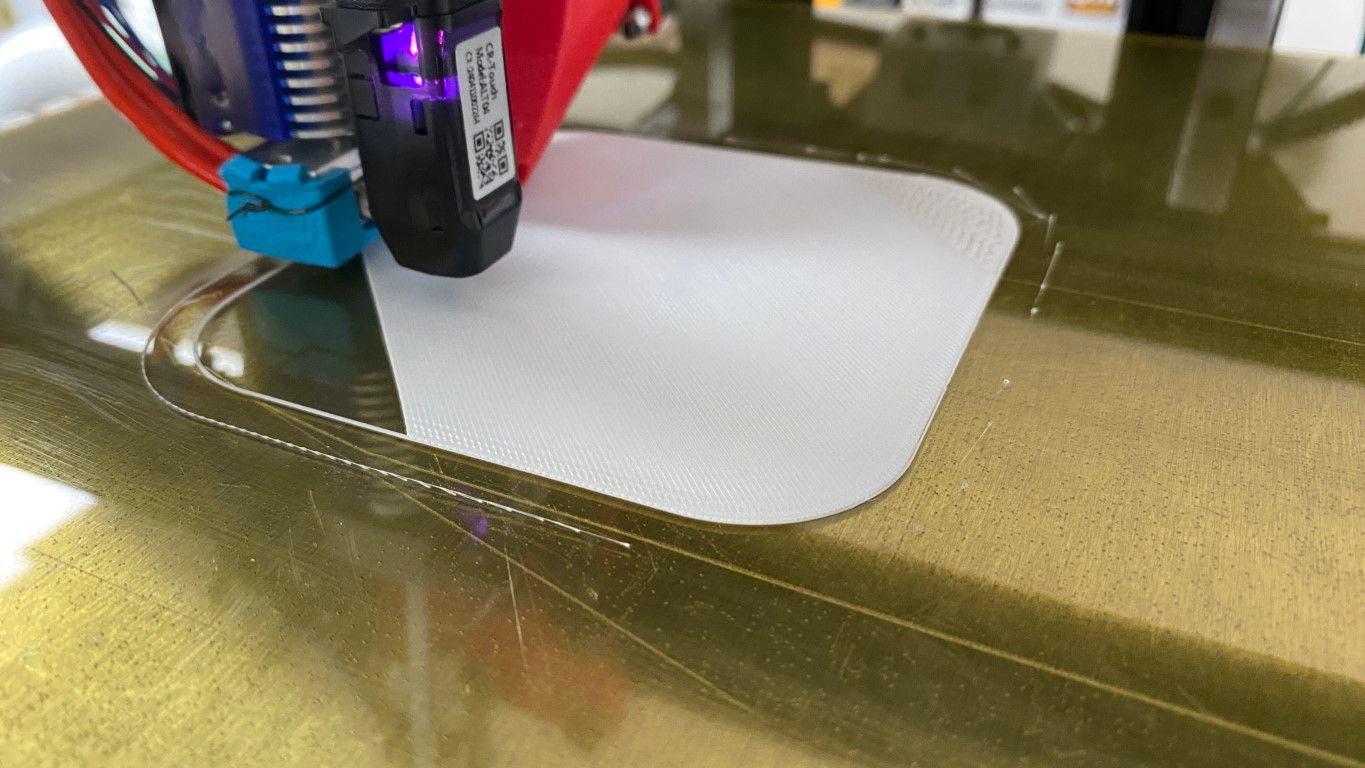
First Layer - In the initial photos, it looks pretty good. The top surface looks flat completely filled. The last photos of the more details part do look pretty bad. My first impression is that there may be a combination of too close to the bed (I know, your fixed that!), too much extrusion, and not sticking well to the glass plate. You may also have the hot end temperature too high. In my experience, I usually run the hot end just a few degrees above the low temperature rating of the filament.
Second layer - In picture 5, the second layer looks like it has ridging between the lines. This means excess plastic is being pushed around by the nozzle. If the layers below don;t have excess plastic (and they look good in this picture), I would suspect your extrusion rate is too high. You can reduce it in the web interface while printing, change the extruder steps per mm in your config.g, or (probably) make a setting change in your slicer. If you consistently change it in the printer interface or in the slicer, and with different reels of filament, you should probably adjust the steps per mm in config.g. I think it's best to tweak the extrudion % while looking at the second or third layer and not the first layer because the first layer can be affected by the z-offset. Once the higher layers look great, use baby steps to adjust the offset so the first layer looks great too.
Picture 6 - This looks to me like a classic example of a need for PA adjustment. PA (Pressure Advance) reduces the extrusion rate before the end of a line to compensate for oozing caused by pressure built up between the extruder motor and the hot end. You can adjust this live as your print builds up using M572 (see https://docs.duet3d.com/en/User_manual/Reference/Gcodes) . You can also probably do some clever stuff in the slicer to have it change the PA every 20 layers so you don't need to sit and watch it.
Blobbies and observations on the last photo. - There is some darkened filament stuck to the side of the part. In my experience, this is plastic that's been clinging to the nozzle and burning, then finally getting pulled off. The causes is often stringing that gets picked up when the nozzle runs past it, or anything else sticking up - like those blobs at the layer change, or the ridges from too much extrusion. And one you get some plastic built up on the nozzle, it becomes a stick place to grab more. I also notice that the blue boot looks like it might be dragging on the plastic surface and this could be sweeping up more crud to melt on the nozzle. I'd get that boot pushed on better (you might need to make the hole around the nozzle bigger). And I'd also look at the nozzle after every print and clean off any excess plastic you see while it's still hot. And also take the boot off occasionally and clean off the bottom of the hot end. I like these brushes because they are cheap and there's a box full ( https://www.amazon.com/Pack-Brass-Brush-Tooth-Brushes/dp/B07FN6K9J9). I keep some long and trim the bristles on some shorter with scissors. I like brass better than stainless because it's less likely to mar the hot end or nozzle. And don't let plastic build up on the brush or you'll be brushing on as much as you're brushing off.
Lastly - sorry this is so long. I like to use PrusaSlicer to get an idea for values of settings. I'll download the prusa config for a MK3.5 printer and see what it would use for all the settings. If mine are way off from that, I try to find a good reason, or test the Prusa value.
-
@mikeabuilder thanks for the great information and suggestions...
I'm surprised with the too close to the bed thought, I'm using a CR Touch and have gone through the setup more than once, I bought the tool to eliminate the guess work. The temperature comment I can understand, it looks too "liquid" to me also, I think the 1st and 2nd layers were printed at 210, as well as the detail part.
I'm guessing that I really need to print a Temperature tower, are there any good models out there, and do they adjust the temperature for you or do you have to adjust as it prints??
Today I was running some tests on a Test cube printing at 185 and raised the tip .010. Still some noise in the print and it still looks too hot. I'm wondering if there might be a problem with the thermistor cartridge and the temps are off?? I'm going to do some work here for sure.. I think a temp tower is probably my next best avenue.
Over extrusion seems logical, but I've also gone through the extruder setup a couple of times. I've measured and marked the filament and fed the extruder 5mm from the control panel, and it seems to exactly feed 5mm. Its tough to work on all of the issues at once.. so I'm thinking a temp tower still might be my best starting point. I may also change back to the grey filament, its easier to see...
I took your advice on the sock, I cleaned the tip and trimmed the sock to expose the tip better and to eliminate the possibility of dragging if it were to occur.
I've also switched to using Prusa as a slicer, I like the interface and like all of the other slicers there, there are a lot of options! I'm trying to stick to the basics as the moment. Layer hieght, retraction, temp, etc.
-
@vbtalent2
You can't "calibrate" an Extruder with feeding only 5mm of filament. This is a much more sensible system.
Try to feed 100mm... A temp tower is a good idea. It will help to find good settings.
If you use cura, you can change temp with post processing. Not sure if is possible with Prusa slicer. -
@vbtalent2 - You are correct in thinking there are a lot of variables you can control and knowing where to begin can be challenging. With PrusaSlicer, using the Beginner, Normal, and Expert modes can help. If you turn on Expert mode, all of the controls are shown, and they are color coded (Green for beginner, Yellow for normal, and Red for expert) so you can see what available and know which are usually important.
For making temperature towers, Prusa Slicer lets you insert your own gcode in sliced files in various places. In the Printers tab, under Custom G-code, there is a place where you can put some gcode that will be inserted every time a layer change happens. In this space you can add code that follows the Prusa coding conventions (https://help.prusa3d.com/article/macros_1775) and will change parameters for you. Here's an example I made for a Pressure Advance tower. It looks at a Prusa variable called layer_num and when it hits different values it inserts an M572 command to change the PA value. You can easily put a different gcode in to change the nozzle value (or just about anything else).
{if layer_num == 0}
;PA_tweaks - START
M572 D0 S.028   ; Adjust pressure advance
;PA_tweaks- END

       {elsif layer_num == 25}
;PA_tweaks- START
M572 D0 S0.03   ; Adjust pressure advance
;PA_tweaks- END

       {elsif layer_num == 50}
;PA_tweaks- START
M572 D0 S0.035 ; Adjust Pressure advance
;PA_tweaks- END

       {elsif layer_num == 75}
;PA_tweaks- START
M572 D0 S0.040 ; Adjust Pressure advance
;PA_tweaks- END

       {elsif layer_num == 100}
;PA_tweaks- START
M572 D0 S0.044 ; Adjust Pressure advance
;PA_tweaks- END

       {elsif layer_num == 125}
;PA_tweaks- START
M572 D0 S0.048  ; Adjust Pressure advance
;PA_tweaks- END
{endif}