Beginner Needs Help - Anycubic Kossel Plus + Duet WiFi -- HOW?
-
; config-override.g - After running your instructions above a couple of times.
; Delta parameters
M665 L269.146 R263.947 H386.312 B85.0 X45.291 Y16.851 Z0.000
M666 X7.276 Y22.820 Z-30.096 A0.00 B0.00
; Heater model parameters
M307 H0 A90.0 C700.0 D10.0 S1.00 V0.0 B1
M307 H1 A340.0 C140.0 D5.5 S1.00 V0.0 B0
M307 H2 A340.0 C140.0 D5.5 S1.00 V0.0 B0
M307 H3 A340.0 C140.0 D5.5 S1.00 V0.0 B0
M307 H4 A340.0 C140.0 D5.5 S1.00 V0.0 B0
M307 H5 A340.0 C140.0 D5.5 S1.00 V0.0 B0
M307 H6 A340.0 C140.0 D5.5 S1.00 V0.0 B0
M307 H7 A340.0 C140.0 D5.5 S1.00 V0.0 B0
; config.g
; Configuration file for Duet WiFi (firmware version 1.20 or newer) ; executed by the firmware on start-up ; ; generated by RepRapFirmware Configuration Tool on Sun May 13 2018 19:16:40 ; General preferences G90 ; Send absolute coordinates... M83 ; ...but relative extruder moves M555 P1 ; Set firmware compatibility to look like RepRapFirmare ;*** The homed height is deliberately set too high in the following - you will adjust it during calibration. M665 R134 L271 B85 H285 ; Set delta radius, diagonal rod length, printable radius and homed height M666 X0 Y0 Z0 ; Put your endstop adjustments here, or let auto calibration find them ; Network M550 Pduettest M552 S1 ; Enable network M586 P0 S1 ; Enable HTTP M586 P1 S0 ; Disable FTP M586 P2 S0 ; Disable Telnet ; Z-Probe M558 P0 X0 Y0 Z1 H5 F1000 T5000 ;I1 ; Set Z probe type to MANUAL and the dive height + speeds G31 X0 Y0 Z0 P100 ; Set Z probe trigger value, offset and trigger height M557 R130 S20 ; Define mesh grid ; Drives M569 P0 S1 ; Drive 0 goes forwards M569 P1 S1 ; Drive 1 goes forwards M569 P2 S1 ; Drive 2 goes forwards M569 P3 S1 ; Drive 3 goes forwards M350 X16 Y16 Z16 E16 I1 ; Configure microstepping with interpolation M92 X80 Y80 Z80 E96 ; Set steps per mm M566 X1200 Y1200 Z1200 E1200 ; Set maximum instantaneous speed changes (mm/min) M203 X18000 Y18000 Z18000 E1200 ; Set maximum speeds (mm/min) M201 X1000 Y1000 Z1000 E1000 ; Set accelerations (mm/s^2) M906 X1000 Y1000 Z1000 E800 I30 ; Set motor currents (mA) and motor idle factor in per cent M84 S30 ; Set idle timeout ; Axis Limits M208 Z0 S1 ; Set minimum Z ; Endstops M574 X2 Y2 Z2 S1 ; Set active high endstops ; Heaters M305 P0 T100000 B4267 C0 R4700 ; Set thermistor + ADC parameters for heater 0 M143 H0 S120 ; Set temperature limit for heater 0 to 120C M305 P1 T100000 B4267 C0 R4700 ; Set thermistor + ADC parameters for heater 1 M143 H1 S275 ; Set temperature limit for heater 1 to 275C ; Fans M106 P0 S0.3 I0 F500 H-1 ; Set fan 0 value, PWM signal inversion and frequency. Thermostatic control is turned off M106 P1 S1 I0 F500 H1 T45 ; Set fan 1 value, PWM signal inversion and frequency. Thermostatic control is turned on M106 P2 S1 I0 F500 H1 T45 ; Set fan 2 value, PWM signal inversion and frequency. Thermostatic control is turned on ; Tools M563 P0 D0 H1 ; Define tool 0 G10 P0 X0 Y0 Z0 ; Set tool 0 axis offsets G10 P0 R0 S0 ; Set initial tool 0 active and standby temperatures to 0C ; Automatic saving after power loss is not enabled M501 ; Custom settings are not configured -
@danal said in Beginner Needs Help - Anycubic Kossel Plus + Duet WiFi -- HOW?:
Adjust one single screw a little, home (G28), move the nozzle close to the bed (G0 Z0), then move the nozzle across the bed (G0 X0 Y110, or G0 X0 Y-110, or G0 Y0 X110 or G0 Y0 X-110). Repeat, very slowly and patiently. This will take a while.
When I enter G28, the three sliders go up but do not reach the endstops to trigger them. If I click on "Home All" - that allows all three to click all three endstops. G28 does not reach them and results in the following error:
G28 Error: G0/G1: insufficient axes homed Error: Homing failed If I enter G0 Z0, the nozzle buries itself into the bed. Same with G0 Z5. However, G0 Z6 gives just a little room off the bed.
Should I be lowering or raising the screws that touch the endpoints for this test? Because unscrewing them almost to removal doesn't change the results to your instructions above.
Update: My nozzle is burying itself HARD into the bed when I run an auto-calibrate/G32. Then it moves FAST to the X-axis and clicks repeatedly. I have to power down the printer at this point.
These are strange results. What would be causing them?
-
@danal said in Beginner Needs Help - Anycubic Kossel Plus + Duet WiFi -- HOW?:
Resulting in this file:
; bed.g file for RepRapFirmware, generated by Escher3D calculator ; 10 points, 6 factors, probing radius: 105, probe offset (0, 0) G28 M98 Pdeployprobe.g G30 P0 X0.00 Y105.00 Z-99999 H0 G30 P1 X90.93 Y52.50 Z-99999 H0 G30 P2 X90.93 Y-52.50 Z-99999 H0 G30 P3 X0.00 Y-105.00 Z-99999 H0 G30 P4 X-90.93 Y-52.50 Z-99999 H0 G30 P5 X-90.93 Y52.50 Z-99999 H0 G30 P6 X0.00 Y52.50 Z-99999 H0 G30 P7 X45.47 Y-26.25 Z-99999 H0 G30 P8 X-45.47 Y-26.25 Z-99999 H0 G30 P9 X0 Y0 Z-99999 S6 M98 Pretractprobe.g That should give you better results with less manual work.
I don't have the files: deployprobe.g or retractprobe.g, so I'm getting errors when I try to auto-calibrate
-
@danal said in Beginner Needs Help - Anycubic Kossel Plus + Duet WiFi -- HOW?:
To verify correct setting (and I'd try E96 first):
-
Remove filament from the hot end (i.e. heat it up and pull it out)
-
Remove the bowden tube below the extruder motor. (press the collet up and pull the tube down)
-
Load some filament into the extruder motor so that it just hangs out the bottom (because you removed the bottom tube in step (2)).
-
Mark the filament, with a marker or a piece of tape, EXACTLY at the bottom of the extruder. Don't let the collet fool you, it moves a mm or so... measure consistently.
-
Extrude 100mm of filament. Either with a control panel, or the web interface.
-
Measure, carefully, from the bottom of the extruder to your mark. Should be EXACTLY 100mm.
You can extrude and retract a couple of times, and measure, if you want to really verify.
Report back here if it is NOT 100mm measurement.
Three different tests show that (with E96) the extruder pushed out 100mm each time. Exactly. Thankfully.
Thanks for getting me the right values. This Anycubic Kossel Plus is all over the place everywhere else.
-
-
@mindbender9 said in Beginner Needs Help - Anycubic Kossel Plus + Duet WiFi -- HOW?:
@danal said in Beginner Needs Help - Anycubic Kossel Plus + Duet WiFi -- HOW?:
These are strange results. What would be causing them?
We MUST get G28 to work before anything else will work. Many other commands invoke G28 internally, including G32. This explains many, many, different symptoms you are seeing.
Do not adjust screws until G28 makes them touch the switches (endstops). Or, more properly, set them to roughly the middle of their travel, and only fine tune them after we get G28 working.
Can you post your "homedelta.g" please?
-
Hi @danal,
I’ll set the top screws to halfway like you recommended.
; homedelta.g
; called to home all towers on a delta printer ; ; generated by RepRapFirmware Configuration Tool on Sun May 13 2018 19:16:40 G91 ; relative positioning G1 S1 X282 Y282 Z282 F1800 ; move all towers to the high end stopping at the endstops (first pass) G1 X-5 Y-5 Z-5 F1800 S2 ; go down a few mm G1 S1 X10 Y10 Z10 F360 ; move all towers up once more (second pass) G1 Z-5 F6000 ; move down a few mm so that the nozzle can be centred G90 ; absolute positioning ;G1 X0 Y0 F6000 ; move X+Y to the centre Thanks
-
If the carriages don't always move all the way up to the top when you home the printer, then the problem is probably this line in homedelta.g:
G1 S1 X282 Y282 Z282 F1800 ; move all towers to the high end stopping at the endstops (first pass)
The figure "282" is the maximum distance in mm that the carriages will be moved up during homing. You may need to increase it.
-
I’ve changed the homedelta.g to:
; homedelta.g
; called to home all towers on a delta printer ; ; generated by RepRapFirmware Configuration Tool on Sun May 13 2018 19:16:40 G91 ; relative positioning G1 S1 X290 Y290 Z290 F1800 ; move all towers to the high end stopping at the endstops (first pass) G1 X-5 Y-5 Z-5 F1800 S2 ; go down a few mm G1 S1 X10 Y10 Z10 F360 ; move all towers up once more (second pass) G1 Z-5 F6000 ; move down a few mm so that the nozzle can be centred G90 ; absolute positioning ;G1 X0 Y0 F6000 ; move X+Y to the centre Entering G28 now allows the screws (tightened halfway) to reach the endpoints.
What would be the next step to do?
(And thank you for your continued help)
-
Absolutely what David said. My NON-plus Z-height is 289 in the initial firmware (and its not powered up so I can't see the exact calibration number).
So, change
G1 S1 X282 Y282 Z282 F1800to something likeG1 S1 X300 Y300 Z300 F1800Then see if your G28 causes the screws to touch the switches. If it DOES, try another G32. If it does NOT, don't do anything else with the printer until we get that working...
-
Ah, our posts crossed.
Now it is OK to do a G32. If I recall, you are set up for manual probing, and are using paper, correct? If so, you can ignore those "deploy probe" errors.
And/or take the M98 lines out of bed.g.
-
This post is deleted! -
Thanks for your help. I’ll do a G32 now.
Update: The repeated calibration attempts have gouged a deep enough line that the Anycubic printer heat bed sticker has been torn through. I would say that this printer isn't calibrated properly.
Do all delta printers go through this?
-
@mindbender9 said in Beginner Needs Help - Anycubic Kossel Plus + Duet WiFi -- HOW?:
Do all delta printers go through this?
No... However, it can be a real struggle to get started with ANY printer from completely scratch.
For example, there are assumptions built into the documentation. One example, the entire sequence documented here:
https://duet3d.dozuki.com/Wiki/Calibrating_a_delta_printer
assumes that the printer is homing (hitting the limit switches) correctly. Without that, NOTHING is 'safe'; bed strikes will occur. Are the words: "The printer MUST physically touch the home switches" written clearly anywhere? Not really...The other big thing, that from your pictures and descriptions I think you may not have been doing: When commissioning a new printer, have your finger on the power switch, and hit it off INSTANTLY if you see something you don't like. Seriously, a power down can save your bed.
And... don't get discouraged. You are learning a HUGE amount about ALL printers, and there will be many AHA moments.
Last thought: In the grand scheme of things, an Anycubic replacement plastic bed sticker is fairly cheap. I've been through three on my AKL, even though I've never converted the controller board... so, no worries!
-
@danal - Thank you for explaining these things that a newcomer is unaware of - and I mean that. I really appreciate the time and patience you (and everyone) are putting in with me.
—Here’s what happened last night:
Test prints of a 1mm circle start off with the nozzle laying down filament for half the circle “skirt?” and scraping the bed for the other half, with filament being pushed and scattered all over the print area.
At roughly 5-10% of the way, the nozzle grinds into half of the circle itself and then lays down filament from 2-3mm above the bed for the other half for a ragged, stringy result. This implies that the bed is lopsided.
I’ve rescrewed the “clamps” that hold the bed in place, but it’s still lopsided.
-
Dumb question #1: How do I flatten the bed? Do I put shims in under the low side? Is the software supposed to compensate for the bed during calibrations? Not sure how to proceed with this.
-
Dumb question #2: What is the ideal height for a nozzle to be above the bed during printing? What should I aim for during a calibration? 1mm? 2mm? This is one of those “I should know but I don’t” questions.
-
Dumb question #3: What is the config-override.g file used for? Several people and sources suggest that I should delete the contents of this file if I’m having issues, but I haven’t done so unless things go really bad. Am I doing something wrong?
-
Dumb question #4: Do I have to perform a manual calibration before every print? By this, I mean the Auto Delta Calibration or (I think) G32. If I do a back to back print (all of which fail), the failing prints get worse in scale each time.
-
Dumb question #5: Is it wrong to do multiple manual G32’s? The amount of Z height I have to enter for each test point keeps increasing with every attempt.
For example, let’s say I have to adjust the first attempt by -5.5 on one particular endpoint. The next attempt on that same endpoint might be -26. Is this normal? What is happening here for the values to keep increasing or the nozzle to keep setting itself higher and higher?
Thanks again for the help and encouragement. I really appreciate all of this.
-
-
@mindbender9 said in Beginner Needs Help - Anycubic Kossel Plus + Duet WiFi -- HOW?:
@danal - Thank you for explaining these things that a newcomer is unaware of - and I mean that. I really appreciate the time and patience you (and everyone) are putting in with me.
- Question #1: How do I flatten the bed? Do I put shims in under the low side? Is the software supposed to compensate for the bed during calibrations? Not sure how to proceed with this.
Eventually, the combination of G32 and G29 will fix this. Just to confirm: Homing is now working, correct?
- Question #2: What is the ideal height for a nozzle to be above the bed during printing? What should I aim for during a calibration? 1mm? 2mm? This is one of those “I should know but I don’t” questions.
The first layer works best with the nozzle roughly the thickness of a business card above the bed. For PLA. (Some filaments like to be 'squished' on and some like to be 'dropped' on. PLA likes business cards)
- Question #3: What is the config-override.g file used for? Several people and sources suggest that I should delete the contents of this file if I’m having issues, but I haven’t done so unless things go really bad. Am I doing something wrong?
Several commands, like G32, only update things "in memory" and a power cycle will reset to whatever is in config.g
The M500 command really just writes (creates or updates) config_override.g). M501 reads it.
The "delete it" advice comes from all of us humans who look in config.g and FORGET that config_override.g exists !!
- Dumb question #4: Do I have to perform a manual calibration before every print? By this, I mean the Auto Delta Calibration or (I think) G32. If I do a back to back print (all of which fail), the failing prints get worse in scale each time.
Not if the results are saved via an M500, and loaded via an M501 near the end of config.g. In theory, you should only need to do a G32 and/or G29 if something changes. Like you've removed the bed and replaced it, or changed nozzles, or similar.
Personally, I only run G32 M500 G29 when I've done maintenance, and/or when the first layer "just doesn't work" for some reason or another.
By the way, just like dogs can smell fear, 3D printers can smell both frustration and complacency. A printer that was working fine will just "be cranky" one day. Maybe it didn't get enough sleep, who knows...
- Question #5: Is it wrong to do multiple manual G32’s? The amount of Z height I have to enter for each test point keeps increasing with every attempt.
You shouldn't have to enter anything, if you do an M500 to save. The Z Height (H on the M665 in config_override.g) may change a little up or down with each calibration. A few tenths. It should NOT increase after each one. Again checking a basic: Does G28 now cause all three screws to hit all three switches?
Thanks again for the help and encouragement. I really appreciate all of this.
No problem. We'll slay this dragon together. Obviously, I enjoy it!
-
Oh, and to clarify:
Inconsistently enough:
G32 (auto calibrate) requires an M500 to save and a M501 to load. The M501 is most often placed near the end of config.g.
G29 (mesh bed level) saves itself... but requires a G29 S1 to load. The G29 S1 is most often put in the start g-code script of the slicer (because several different things can turn it off, best be sure its on just before a print starts).
-
One more thought: You asked if you should wedge or shim the bed, and I kind of ignored the q. Here's the full answer:
A basic assumption check: Be sure the frame of the printer is "Square". Yeah, I know, it is a triangle!!! Seriously, do the best you can to be sure the towers are 90 degrees to the base and the top, the base is flat, etc, etc.
This does include doing the best you can to get the bed 90 degrees to all three towers. If the base extrusions are flat, and the towers are dead upright, this should happen naturally... but it is ALL worth checking.
Even when G32 and G29 are fully working, they will work best in a square and true set of mechanics.
.
When I did the final assembly and alignment of my BFD (Big Fast Delta), I used a granite slab to do the final alignment of the bottom frame and the top frame. I didn't trust any tables or the floor. (Yeah, I just happened to have access to a granite "flat", machine shop quality, to use for the final assembly).
-
Hi @Danal ,
- I'm able to home successfully now that I've raised the values higher.
A basic assumption check: Be sure the frame of the printer is "Square". Yeah, I know, it is a triangle!!! Seriously, do the best you can to be sure the towers are 90 degrees to the base and the top, the base is flat, etc, etc.
-
So if the bed is lopsided, then something is not aligned right on my delta? Or the three pillars are not set well? How would I be able to check this, because everything seems rigid?
-
I still cannot print a base layer - only half is possible and the nozzle drags along the bed which prevents filament from being laid down.
-
Seems that you have still some mechanical Problems with your frame.
As others stated before..make sure that all angles are near perfection. Put the Printer on flattest surface and check if the printbed is at same angle as the frame. On thingiverse there are some bed holder that works good. _( Prob..how to print without a working printer? )
Manual calibration could be PITA. Tried it on my Anycubic Kossel too before i upgraded to a duet. If Money is not that big prob, get the smart effector ( working with it is like heaven) or if you want a cheap solution, get a foil switch. Its cheap and works quite well to do a autocalibration and make a highmap. Before i used that switch i tried BLTouch and the original Anycubic switch ( both expensive crap..Delta and a z-probe with a XYZ Offset dont work good)
The autocalibration and bedmesh can only compensate mechanical errors to some degree..its not a simsalabim magic wand")
-
@mindbender9 said in Beginner Needs Help - Anycubic Kossel Plus + Duet WiFi -- HOW?:
- So if the bed is lopsided, then something is not aligned right on my delta? Or the three pillars are not set well? How would I be able to check this, because everything seems rigid?
Loosen the bolts/nuts on the "corners" (really triangles) and move the frame to be more square as you tighten them.
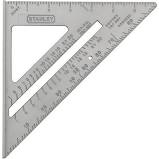
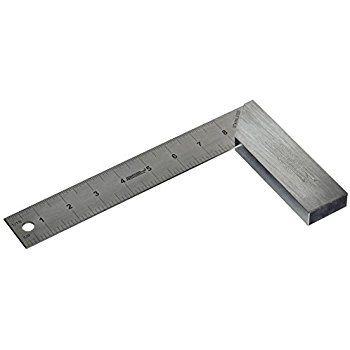
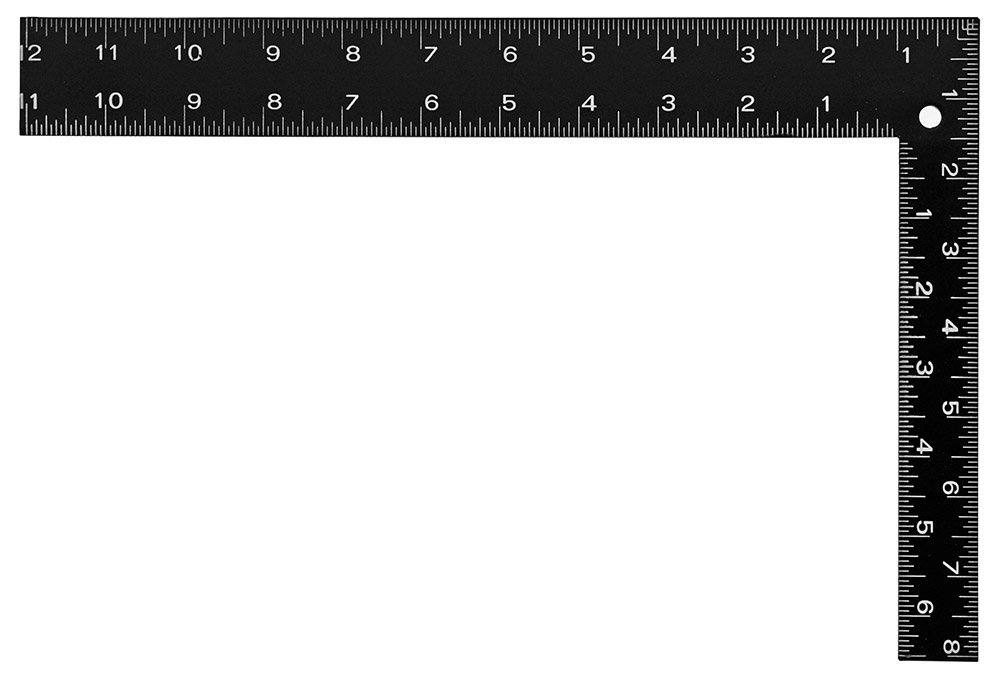
Literally use a "Carpenter's Square" or a "Try Square". This may be where American English and British English confuse things a little, so here are some pictures: