effector tilting into bed on print
-
The new effector is installed with the magnetic rods.
HomeDelta worked fine. I have lights! I hate all crimp connectors!!!
Putting the carriage adapters in took a little creativity. I have three wheels on each, staggered, and the length of one screw was preventing the backing plate from sitting properly. A shorter screw solved the problem, so all is good. All three are identical in construction and are at the same level when homed.
I have no housing for the part fan until I print one, so we shall see how that works at some point down the road.
I also have lost my trigger height capability since it was a physical switch triggered mechanically on the old effector.
On to setting Z=0
-
I'm curious since I have no Z probe right now.
"Your can run auto calibration without a Z probe if you tell RepRapFirmware that you have no Z probe, by using parameter P0 in your M558 command in config.g. However, auto calibration is easier and faster if you have a Z probe. The choice of a suitable Z probe should take account of the following factors:"
The above text was in the page you pointed in your text.If I were to manually send the effector down to z0 at various places, would that give me an accurate reading at each point? ie, since I can't run G32 without a Z probe. (I am assuming that I can't run G32 since I have no spring / switch assembly to protect the nozzle.
Could I run G32 is I set the dive height to 0?
-
I thought you bought the Smart Effector? It has the Z-probe built in.
-
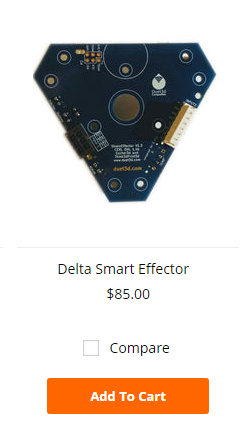
This is the description
The Smart Effector for delta printers allows the hotend to be used as a Z probe giving fantastic accuracy across the whole delta build area by eliminating the effect of tilt. It uses precision PCB manufacturing to ensure equal hole spacing between the effector and the carriages on the towers, further improving accuracy.
Supplied with a custom machined e3d v6 heatsink (produced by e3d on our behalf).
Supplied with 3 PCB carriage adapters with 20mm mounting hole spacing compatible with common linear rails and wheel carriages.
Compatible with Haydn Huntley’s Magball delta arms - available from Haydn directly or other suppliers.
The smart effector simplifies wiring of hotend components with plug connectors from thermistor and fans along with a screw terminal for the heater cartridge. Molex and microfit connections are then used for wiring looms back to the control electronics. Crimp pins and housings are supplied for all connections
On board LEDs for print illumination are compatible with either 12V or 24V power supplies with a jumper selecting the voltage.
More detail is available on the wiki.We recommend you purchase directly from Think3DPrint3D if you are located in the UK.
What's in the box:
Smart Effector board
3 x PCB carriage adapters
Custom E3D heatsink
Connector kit
Buy a Smart Effector from #Spool3D for your 3D printer in Canada without the surprise cost of the exchange rate!This is the photo
I see nothing on the board that indicates there is a z probe installed. I have one on my other printer, which is a separate item. I was assuming it is built in somehow on this board. I see where the cable connects on the 8 pin connector, but there are no angled leds on the board like there are on the separate unit I have.
There is nothing on the hot end that extends close enough that it would trigger. Should there not have been a separate board included? It looks like it is supposed to be screwed onto the fan bracket according to the documentation, but I have no separate board.
-
My kit did not have the blue cap shown covering the nozzle. Is that where the probe is?
-
The probe is built into the PCB. It uses the nozzle to probe the bed and the PCB detects the force. See the commissioning section in the fitting instructions at https://duet3d.dozuki.com/Wiki/Smart_effector_and_carriage_adapters_for_delta_printer.
-
Ooops. Sorry about that. I hadn't read the commissioning part yet when I wrote my note. I'm glad to know that my kit wasn't missing any parts.
I will follow the commissioning instructions very carefully and report back
-
I have gone through the commissioning section.
I get the green light for the z-probe.
The hot end stops on the way down when I tap the nozzle.
Auto configuration returns
G32
Calibrated 6 factors using 10 points, deviation before 2.045 after 0.181Homeall
G32
Calibrated 6 factors using 10 points, deviation before 0.238 after 0.226
G32
Calibrated 6 factors using 10 points, deviation before 0.204 after 0.199Observations / Comments / Chance of printing?
Please advise -
@timvukman do several Autocals (without homing in-between) til it converges so the the before and after figures are about the same your figures still seem a bit high tho they are better than before as a matter of interest high many factors are you calibrating?
Doug
-
I'm not sure what you mean by how many factors. I believe it is 6. That is my S setting
-
G32
Calibrated 6 factors using 10 points, deviation before 0.206 after 0.202Better?
-
yes it is the Param
6 or 8 is ok 7 or 9 will try and adjust the rod length which if your using haydn's rods should be set correctly anyway
-
Check this out!!!
G32
Calibrated 6 factors using 10 points, deviation before 0.206 after 0.206 -
@timvukman said in effector tilting into bed on print:
Check this out!!!
G32
Calibrated 6 factors using 10 points, deviation before 0.206 after 0.206That's a lot better than you were getting before. It's still a lot worse than is possible with the Smart Effector, so I suspect that either the carriages are out of alignment or the towers are not quite parallel to each other. If it's the carriages then the spirit level will probably show some varying tilt.
You can try printing with it, but you will need to use either a higher than normal first layer height, or mesh bed compensation.
-
I am going to order a metal kit for the top and bottom frames. There are visible spaces that I can't get rid of on the current injection molded ones.
Would my original 80 steps / mm change for the M92 command?
My test prints are really unusual. I will send a calibration cube so I can see what I am physically getting, but I tried a couple of small items and I am getting puddles. The hotend is not going up quickly enough and the nozzle is plowing through previous layers.
Should I get rid of the microstepping?
-
M92: the tower steps/mm depends on the number of teeth on the motor pulleys and on whether you have 1.8 or 0.9deg motors. 80 steps/mm is correct for 20 tooth GT2 pulleys and 1.8deg motors.
Microstepping: I recommend you use the default x16 with interpolation to 256 until you have the printer working well.
-
Thanks
Motors are 1.8. 20 tooth, microstepping is 16. Interpolation is off.I'm going to try mesh bed compensation
Ran a test print. Way too much filament. Had to stop the print since it was bogged down in the cube.
X and Y dimensions appear pretty close. Z not doing well. Z height
DWC has extruder controls set at 1 mm feed amount and 1 mm feed rate. Extrusion slider is at 100%
-
Watching the print. Z is climbing at .2 for each layer which is what is set my my slicer software (Simplify3d)
I guess I need to take apart the hotend so I can see what length is being extruded when I tell it to extrude 100mm
-
Backed the filament out of the hot end.
Extruded 10mm and it advanced 40mm. Searching for my notes on adjusting.
-
Extruder Adjusted
Printing Calibration Cube.
Print is looking very good. X and Y are 20mm.
I can't thank you all enough for the help and support that you have provided. You are all consistently knowledgeable and helpful every time I contact you.
My printer is completely silent except for the fans that are cooling the main board. There is no motor sound at all.
I am really very impressed with the Smart Effector.
Is there any way I can adapt my cartesian printer to support one of these? My current hot end is a square unit that mounts via screws through the top. It would be great to be able to bolt one of these on somehow.
(edited for spelling)