Your Duet rejected the HTTP request: page not found
-
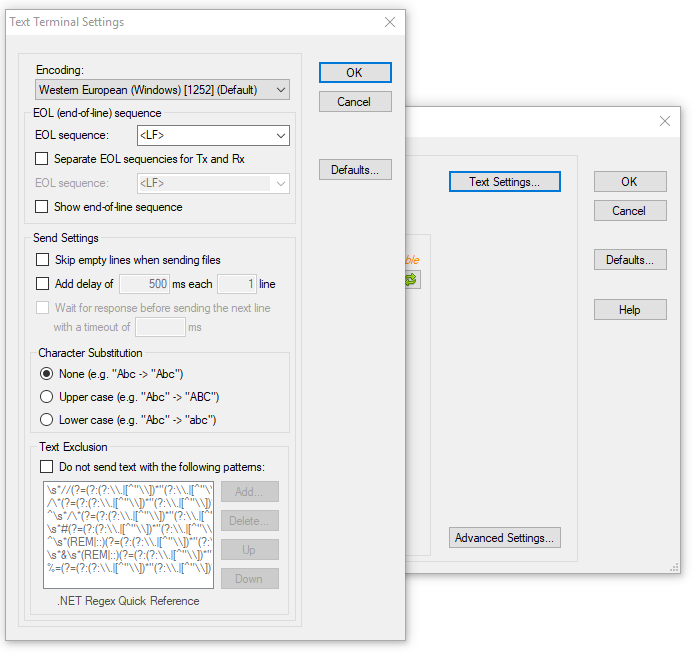
@sleepless please setup the terminal to display the messages properly:
Part of the M122 message is truncated.
-
sorry about that. thanks for the picture it really helps
-
=== Diagnostics ===
RepRapFirmware for Duet 2 WiFi/Ethernet version 2.0(RTOS) running on Duet WiFi 1.02 or later
Board ID: 08DGM-9T6BU-FG3SJ-6J9D4-3S86T-TAXRD
Used output buffers: 1 of 20 (1 max)
=== RTOS ===
Static ram: 28380
Dynamic ram: 95740 of which 0 recycled
Exception stack ram used: 300
Never used ram: 6652
Task NETWORK ready, free stack 1408
Task HEAT blocked, free stack 1256
Task MAIN running, free stack 3624
=== Platform ===
Last reset 00:05:40 ago, cause: power up
Last software reset at 2018-10-24 20:24, reason: User, spinning module GCodes, available RAM 6152 bytes (slot 0)
Software reset code 0x0003 HFSR 0x00000000, CFSR 0x00000000, ICSR 0x0041f000, BFAR 0xe000ed38, SP 0xffffffff
Error status: 0
Free file entries: 10
SD card 0 detected, interface speed: 20.0MBytes/sec
SD card longest block write time: 0.0ms
MCU temperature: min 26.1, current 30.3, max 30.4
Supply voltage: min 12.3, current 12.3, max 12.5, under voltage events: 0, over voltage events: 0
Driver 0: standstill, SG min/max not available
Driver 1: standstill, SG min/max not available
Driver 2: standstill, SG min/max not available
Driver 3: standstill, SG min/max not available
Driver 4: standstill, SG min/max not available
Date/time: 1970-01-01 00:00:00
Slowest loop: 1.08ms; fastest: 0.07ms
=== Move ===
Hiccups: 0, StepErrors: 0, LaErrors: 0, FreeDm: 240, MinFreeDm 240, MaxWait: 0ms, Underruns: 0, 0
Scheduled moves: 0, completed moves: 0
Bed compensation in use: none
Bed probe heights: 0.000 0.000 0.000 0.000 0.000
=== Heat ===
Bed heaters = 0 -1 -1 -1, chamberHeaters = -1 -1
=== GCodes ===
Segments left: 0
Stack records: 1 allocated, 0 in use
Movement lock held by null
http is idle in state(s) 0
telnet is idle in state(s) 0
file is idle in state(s) 0
serial is ready with "m122" in state(s) 0
aux is idle in state(s) 0
daemon is idle in state(s) 0
queue is idle in state(s) 0
autopause is idle in state(s) 0
Code queue is empty.
=== Network ===
Slowest loop: 14.21ms; fastest: 0.01ms
Responder states: HTTP(0) HTTP(0) HTTP(0) HTTP(0) FTP(0) Telnet(0) Telnet(0)
HTTP sessions: 0 of 8- WiFi -
Network state is running
WiFi module is connected to access point
Failed messages: pending 0, notready 0, noresp 0
Failed to get WiFi status
Socket states: 0 0 0 0 0 0 0 0
=== Expansion ===
ok
- WiFi -
-
it looks like im in the -70 range which is bad. so i just need to be patient and wait for the network to see it.
-
@sleepless your Wifi does not appear to be up properly:
Failed to get WiFi status
Please can you send the following:
M552M552 S1
Also please share your config.g here
-
@t3p3tony [0_1540514887260_config (1).zip](Uploading 100%)
-
@sleepless I think you'll have to upload it as a plain text file, or just copy and paste the contents into a post.
-
; Configuration file for Duet WiFi (firmware version 1.21)
; executed by the firmware on start-up
;
; generated by RepRapFirmware Configuration Tool on Wed Oct 24 2018 18:43:01 GMT-0700 (Pacific Daylight Time); General preferences
G90 ; Send absolute coordinates...
M83 ; ...but relative extruder moves; Network
M550 PRobo_Duet1 ; Set machine name
M551 Psafety13 ; Set password
M552 S1 ; Enable network
;*** Access point is configured manually via M587
M586 P0 S1 ; Enable HTTP
M586 P1 S0 ; Disable FTP
M586 P2 S0 ; Disable Telnet; Drives
M569 P0 S1 ; Drive 0 goes forwards
M569 P1 S1 ; Drive 1 goes forwards
M569 P2 S1 ; Drive 2 goes forwards
M569 P3 S1 ; Drive 3 goes forwards
M350 X16 Y16 Z16 E16 I1 ; Configure microstepping with interpolation
M92 X80 Y80 Z800 E723.38 ; Set steps per mm
M566 X900 Y900 Z12 E120 ; Set maximum instantaneous speed changes (mm/min)
M203 X18000 Y18000 Z180 E1200 ; Set maximum speeds (mm/min)
M201 X500 Y500 Z5 E25 ; Set accelerations (mm/s^2)
M906 X1000 Y1000 Z1000 E1000 I30 ; Set motor currents (mA) and motor idle factor in per cent
M84 S30 ; Set idle timeout; Axis Limits
M208 X0 Y0 Z0 S1 ; Set axis minima
M208 X230 Y254 Z200 S0 ; Set axis maxima; Endstops
M574 X1 Y2 Z1 S1 ; Set active high endstops; Z-Probe
M558 P5 H5 F120 T6000 ; Set Z probe type to switch and the dive height + speeds
G31 P500 X0 Y0 Z2.5 ; Set Z probe trigger value, offset and trigger height
M557 X15:215 Y15:239 S20 ; Define mesh grid; Heaters
M305 P0 T100000 B4138 C0 R4700 ; Set thermistor + ADC parameters for heater 0
M143 H0 S110 ; Set temperature limit for heater 0 to 110C
M305 P1 T100000 B4138 C0 R4700 ; Set thermistor + ADC parameters for heater 1
M143 H1 S300 ; Set temperature limit for heater 1 to 300C; Fans
M106 P0 S0.3 I0 F500 H-1 ; Set fan 0 value, PWM signal inversion and frequency. Thermostatic control is turned off
M106 P1 S1 I0 F500 H1 T45 ; Set fan 1 value, PWM signal inversion and frequency. Thermostatic control is turned on
M106 P2 S1 I0 F500 H1 T45 ; Set fan 2 value, PWM signal inversion and frequency. Thermostatic control is turned on; Tools
M563 P0 D0 H1 ; Define tool 0
G10 P0 X0 Y0 Z0 ; Set tool 0 axis offsets
G10 P0 R0 S0 ; Set initial tool 0 active and standby temperatures to 0C; Automatic saving after power loss is not enabled
; Custom settings are not configured
-
anyone can help with the robo3d r1 plus auto level and z home setup?
-
OK I got all axis to home but cant get it to auto level. I read this https://forum.duet3d.com/topic/4737/zprobe-robo3d-r1/9 but am still confused. please help
-
Have you gone through https://duet3d.dozuki.com/Wiki/Test_and_calibrate_the_Z_probe ?
Duet WiFi hardware designer and firmware engineer
Please do not ask me for Duet support via PM or email, use the forum
http://www.escher3d.com, https://miscsolutions.wordpress.com -
Should my z endstop be plugged into the z probe area instead of the z endstop area on the board? Sorry Im feel like im just getting more and more confused
-
@sleepless said in Your Duet rejected the HTTP request: page not found:
Should my z endstop be plugged into the z probe area instead of the z endstop area on the board? Sorry Im feel like im just getting more and more confused
That's up to you depending on which probe mode you choose. Either mode 4 or mode 5 (or one of the slight variations (mode 6, 7, or, 8 which use different connection options.)
https://duet3d.dozuki.com/Wiki/Connecting_a_Z_probe
Mode 4
The trigger signal is read from the E0 endstop circuit. You can choose whether the signal is high or low when triggered. In firmware 1.15 and earlier this is done by using M574 E0 S1 to select active high, or M574 E0 S0 to select active low. In firmware 1.16 and later, use I1 in the M558 command to select active low, otherwise it defaults to active high. The device connected to the E0 STP pin must be able to sink 1.5mA for the Duet 2 WiFi and Duet 2 Ethernet, 0.3mA for the Duet 2 Maestro, or 2.1mA for the Duet 0.6 or 0.8.5.Mode 5
A switch or digital output device connected between the IN and GND terminals of the Z probe connector. Similar to mode 4 except that the Z probe connector is used. The input must be active high when triggered, or in firmware 1.16 and later you can use the I1 parameter in the M558 command to select active low. The only pullup resistor is the 100K nominal pullup in the microcontroller so the sink current requirement is tiny.Mode 6
Similar to mode 4 except that the E1 endstop input is used.Mode 7
Similar to mode 4 except that the Z endstop input is used.Mode 8
Similar to mode 5 except that the input is not filtered, for slightly faster response. Supported in firmare 1.20 and later.It would help to know what type of switch it's using for the Z axis endstop, but I think you may want to use Mode 8, which would connect your switch to the Z probe connector.
-
@sleepless do you have both a Z probe and a Z endstop or just a probe? Generally a Z probe would be plugged into the prob header.
edit @Phaedrux provided a far more detailed answer, posts crossed.
-
@t3p3tony The Robo3D appears to have 2 end stop switches wired in parallel for the z axis.
At least that's what I gathered from the thread linked above.
It looks like they used mode 4, inverted, wired to the z endstop pins.. But I think mode 8 connected to the z probe pins would also work.
-
Thanks everyone so to clarify I am using the robo3d r1 plus stock endstops and autolevel. It uses microswitches that get triggered when the x axis is lifted off the endstop by the nozzle touching the bed. I will move the z endstop to the z probe connection and give it a go
-
z probe seems to need the plug wired differently am I seeing that correctly?
-
forgot to mention I only have endstops no z probe
-
what is parameter I1?
Connect it between the STP and GND pins of the E0 connector and select mode 4. If it is a normally-closed microswitch, then with version 1.15 or earlier firmware use M574 E0 S1 to select active high trigger level. For normally-open contacts (not recommended), send M574 E0 S0 instead. With 1.16 or later firmware, include parameter I1 in the M558 command if you are using a normally-open switch.Ok so if I understand this correctly I need to plug my Z endstop into the E0 Stop. I need to connect the black wire to the GRD and the Red wire into the E0 Stop pin ports. Then I need to send M558 parameter I1?
-
I1 will invert the signal. That's an upper case i.