Duet3D Logo Duet3D
    • Tags
    • Documentation
    • Order
    • Register
    • Login

    My Second build (in progress)

    Scheduled Pinned Locked Moved
    My Duet controlled machine
    6
    55
    3.3k
    Loading More Posts
    • Oldest to Newest
    • Newest to Oldest
    • Most Votes
    Reply
    • Reply as topic
    Log in to reply
    This topic has been deleted. Only users with topic management privileges can see it.
    • cosmowaveundefined
      cosmowave @Dad003
      last edited by

      @Dad003 said in My Second build (in progress):

      but the tubing couldn't make the bend

      Eventually, a spring over the tube helps against kinking?
      But this works only, when the tube isn't to stiff.

      Mankati FSXT+, DeltaTowerV2, E3D MS/TC

      Dad003undefined 1 Reply Last reply Reply Quote 0
      • Dad003undefined
        Dad003 @cosmowave
        last edited by

        @cosmowave I didn't think of that .

        1 Reply Last reply Reply Quote 0
        • Dad003undefined
          Dad003
          last edited by

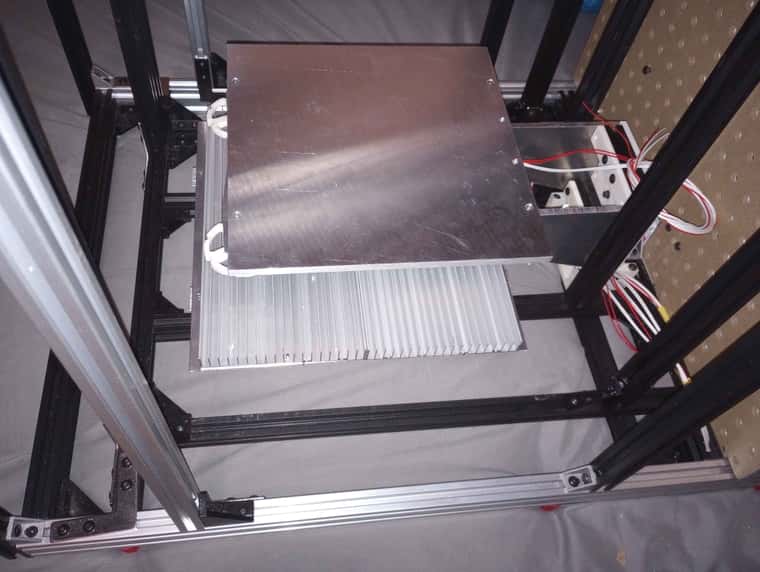
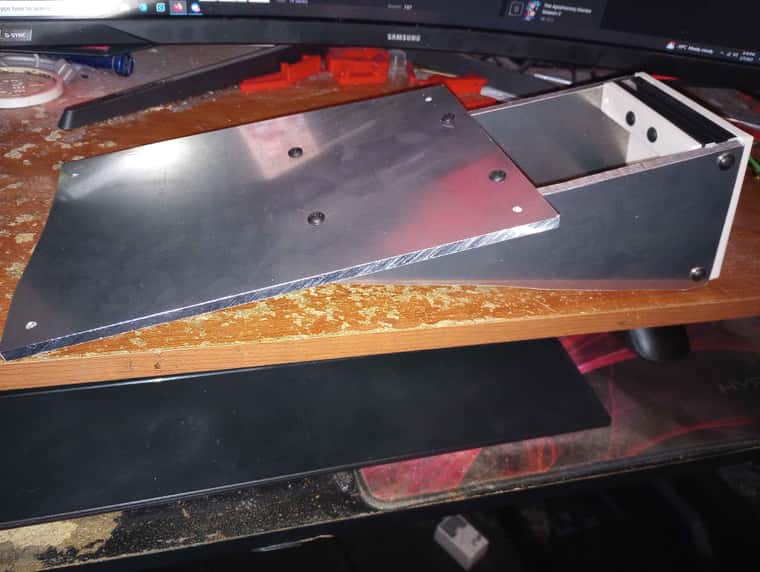
          swapped my 3d printed bed base for some basic aluminum parts , they are a bit crude lol i have limited tool at my hand for that but they will be good enough .

          IMG_20250207_202859524.jpg IMG_20250207_201045456.jpg IMG_20250207_201552357.jpg

          mrehorstdmdundefined 1 Reply Last reply Reply Quote 0
          • mrehorstdmdundefined
            mrehorstdmd @Dad003
            last edited by

            @Dad003 That looks like a piece of cast tooling plate. That means it is flat. 3 points define a plane, not 4, so trying to tram with 4 screws is not a great idea.

            You might want to look into a kinematic mount for that bed plate. As it heats it will expand. That means something is going to have to flex and that means it will shift out of tram. A kinematic mount has 3 bed support points and just two tramming adjustments. It allows the bed to expand without causing anything to flex so doesn't go out of tram.

            https://drmrehorst.blogspot.com/

            Dad003undefined 1 Reply Last reply Reply Quote 0
            • Dad003undefined
              Dad003 @mrehorstdmd
              last edited by

              @mrehorstdmd it a voron 8mm thick plate , and I will use a glass bed on top I don't think it will warp much to make any issue , time will tell anyways

              1 Reply Last reply Reply Quote 0
              • Dad003undefined
                Dad003
                last edited by

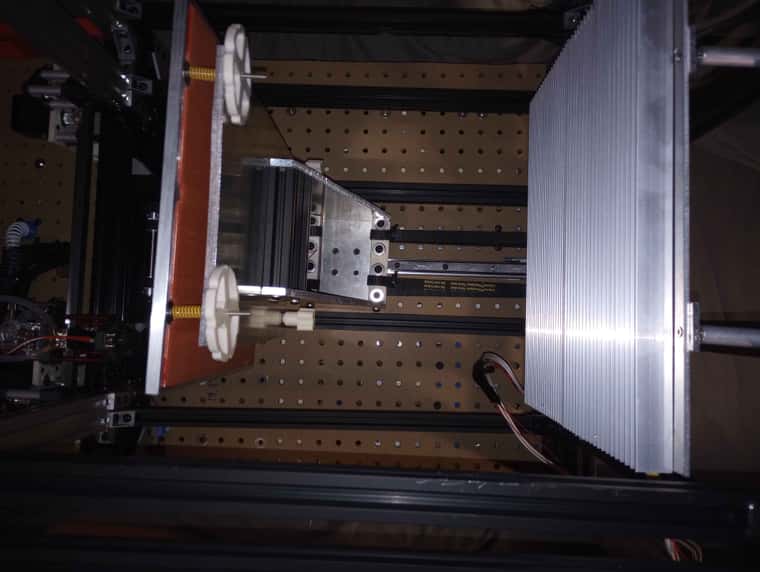
                z axis belt have been put in , and the pulley ratio are doing their job well , bed is not dropping free working as intended . just waiting for the expansion board showing up in the mail to finish wiring , and organizing the last few wiring . with a bit of luck i might be able to test print this monster next week-end , still need to enclosed this things but it not my priority right now that for a later stage

                IMG_20250209_150119536.jpg IMG_20250209_150332562.jpg

                1 Reply Last reply Reply Quote 0
                • Dad003undefined
                  Dad003
                  last edited by

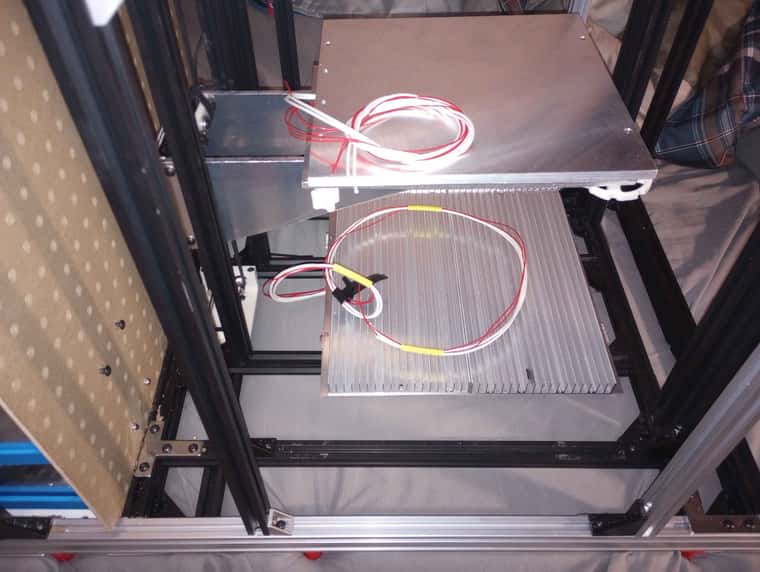
                  got the lED light and heated bed and heated chamber heater plugged

                  IMG_20250209_211206313_HDR.jpg

                  droftartsundefined 1 Reply Last reply Reply Quote 0
                  • droftartsundefined
                    droftarts administrators @Dad003
                    last edited by

                    @Dad003 said in My Second build (in progress):

                    got the lED light

                    Hopefully an LED, not an IED!

                    Ian

                    Bed-slinger - Mini5+ WiFi/1LC | RRP Fisher v1 - D2 WiFi | Polargraph - D2 WiFi | TronXY X5S - 6HC/Roto | CNC router - 6HC | Tractus3D T1250 - D2 Eth

                    Dad003undefined 1 Reply Last reply Reply Quote 0
                    • Dad003undefined
                      Dad003 @droftarts
                      last edited by

                      @droftarts danm autocorrect lol 😂

                      1 Reply Last reply Reply Quote 0
                      • Dad003undefined
                        Dad003
                        last edited by

                        So got the expansion board up and running ,

                        Just need to work out a few sensor and the config and then i can put the xy axis belt on and fill up that water loop hopefully this weekend

                        alt text

                        1 Reply Last reply Reply Quote 0
                        • Dad003undefined
                          Dad003
                          last edited by Dad003

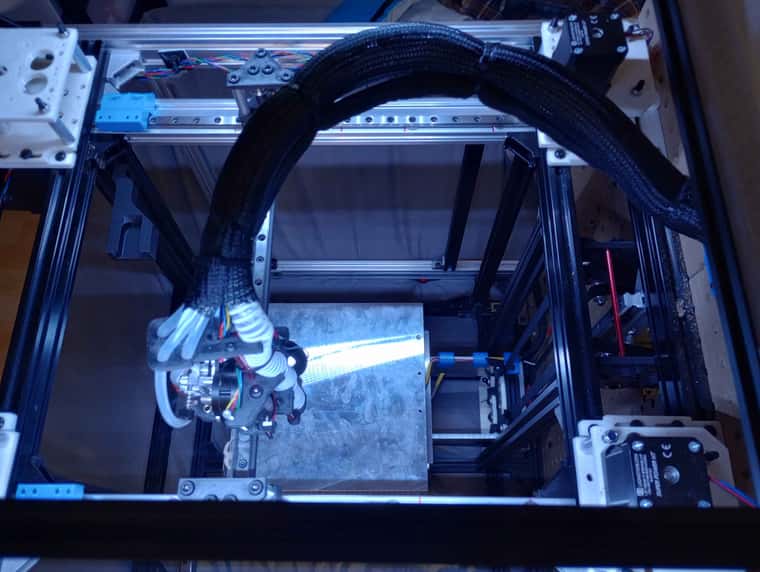
                          wiring is all done , basically only things left is to go throw the config and make sure axis and limit switch are good , need to replace some of the 3d printed gantry to aluminum , added an extra thermistor that will monitor temp of the gantry between both watercooled hotend and extruder . tested the cpap fan and it work even at 5% and it feel stronger than most fan ive tried before at that level , cant wait to test that baby at 100% lol were we come with speed run benchy lol

                          alt text

                          just need to dremel it a bit to get it closer of the 3d printed part and clean it a bit , might be a bit crude but him not worried about that lol

                          alt text

                          alt text

                          1 Reply Last reply Reply Quote 1
                          • Dad003undefined
                            Dad003
                            last edited by

                            Had to redesign some part , there was a few issue but i might have this thing going today ! Reprinted a few part overnights , and hopefully they fix the problem then I only need to fill up the water loop .

                            alt text

                            1 Reply Last reply Reply Quote 0
                            • Dad003undefined
                              Dad003
                              last edited by

                              alt text

                              1 Reply Last reply Reply Quote 0
                              • Dad003undefined
                                Dad003
                                last edited by Dad003

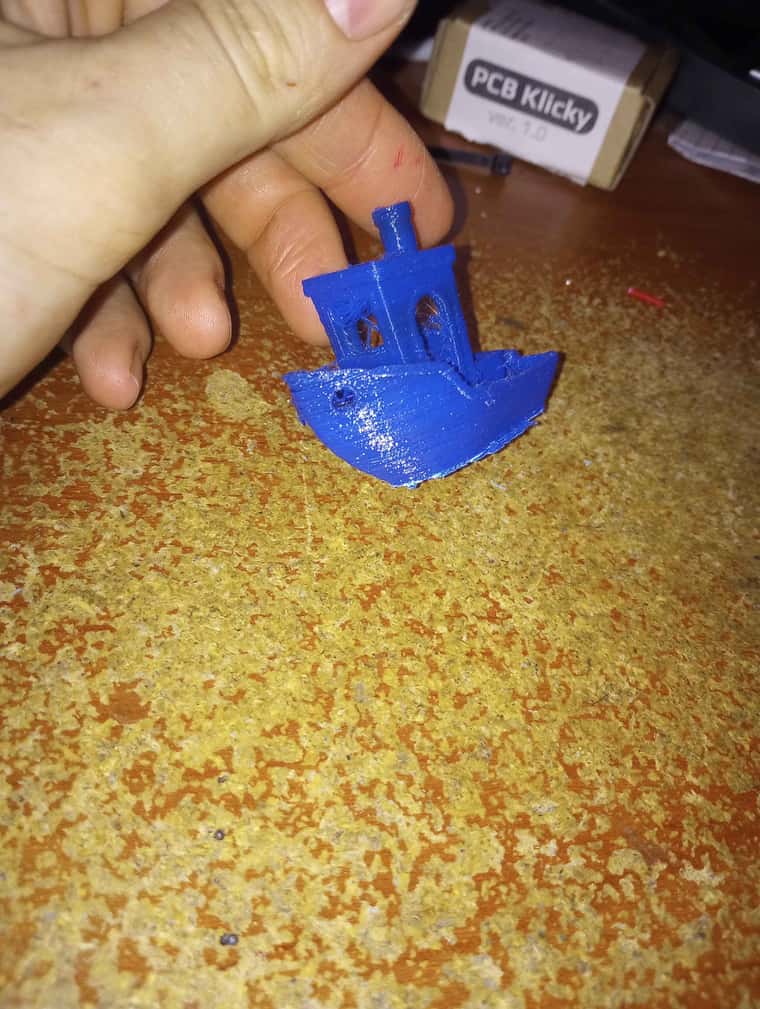
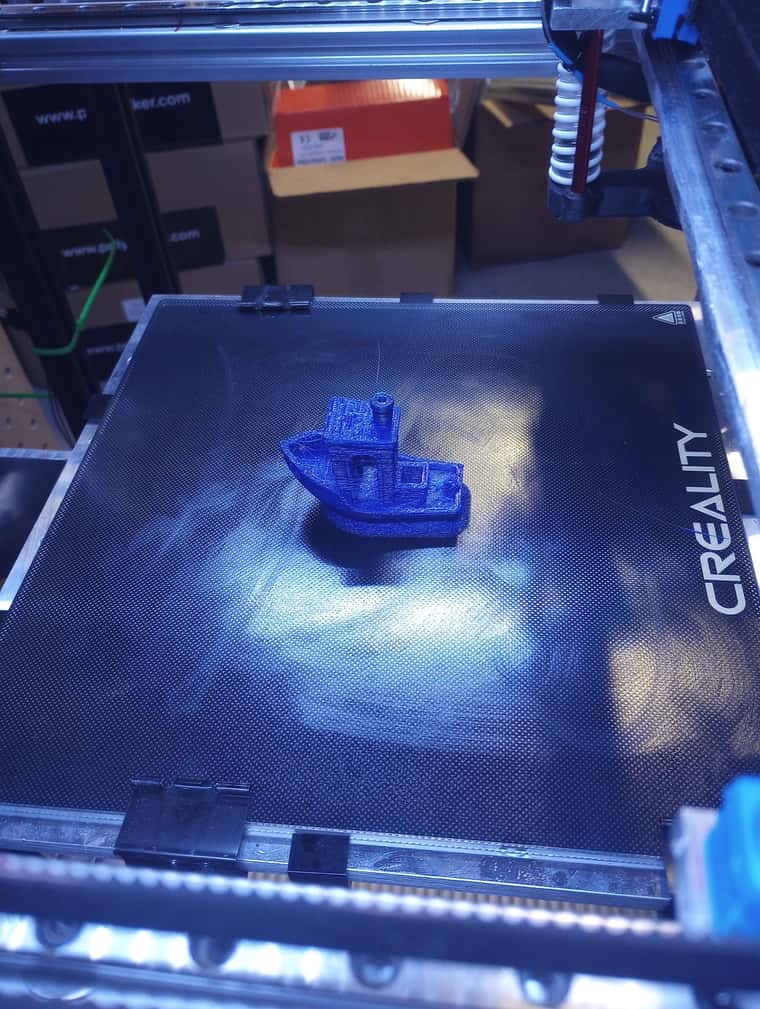
                                So now I need to calibrate things a bit more but I ended up doing it quick I wanted to test print lol

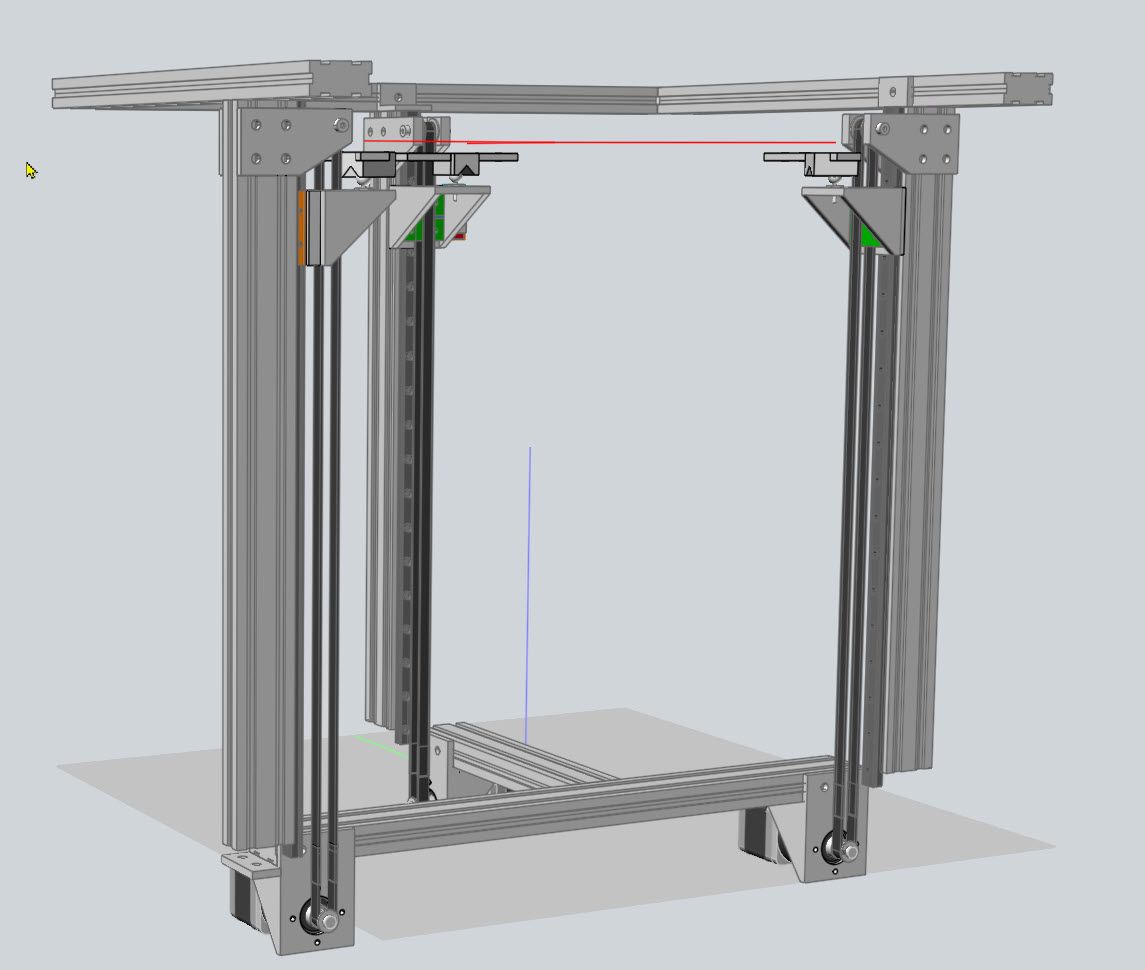
                                So far it seem the single 2020 were the z axis rail is, is not stiff enough and make the bed shake a bit , so I will need to had Some reinforcement to stiffen that . Need to work on my klicky dock as well . test printed with some old PLA that i had laying around ,

                                current setting in config is :

                                ; Axes
                                M584 X0.0:0.1:0.2 Y0.4:0.5:0.3 Z1.1:1.2 ; set axis mapping
                                M350 X16 Y16 Z16 I1 ; configure microstepping with interpolation
                                M906 X2400 Y2400 Z1200 ; set axis driver currents
                                M92 X80 Y80 Z2560 ; configure steps per mm
                                M208 X10:205 Y-40:200 Z0:300 ; set minimum and maximum axis limits
                                M566 X900 Y900 Z100 ; set maximum instantaneous speed changes (mm/min)
                                M203 X90000 Y90000 Z500 ; set maximum speeds (mm/min)
                                M201 X20000 Y20000 Z500 ; set accelerations (mm/s^2)

                                him curious to see how far i can push this machine once i fix the last few things

                                https://youtube.com/shorts/fzIPFbDoUN0?si=KXMfYhU3RpQwFzUO

                                1 Reply Last reply Reply Quote 0
                                • Dad003undefined
                                  Dad003
                                  last edited by

                                  so a bit rough looking and lots of stringing from the old pla but not the worst benchy ive ever seen since it on an untuned machine , lots of stringing lol

                                  IMG_20250218_232449649.jpg IMG_20250218_230746747.jpg

                                  1 Reply Last reply Reply Quote 1
                                  • Dad003undefined
                                    Dad003
                                    last edited by

                                    Did some further tuning , extruder is nearly fully dial , skew compensation should be bang on , z axis step seem fine , just need to reinforce the z axis and we should all be set for more printing test .

                                    1 Reply Last reply Reply Quote 0
                                    • Dad003undefined
                                      Dad003
                                      last edited by

                                      Got the accelerometer working tonight and I it seem zvddd at 40-42hz was the flatest curve like.
                                      Tomorrow I can hopefully fix the print bed shaking and keep going on those calibration and push the speed to see how far it can go

                                      1 Reply Last reply Reply Quote 1
                                      • Dad003undefined
                                        Dad003
                                        last edited by

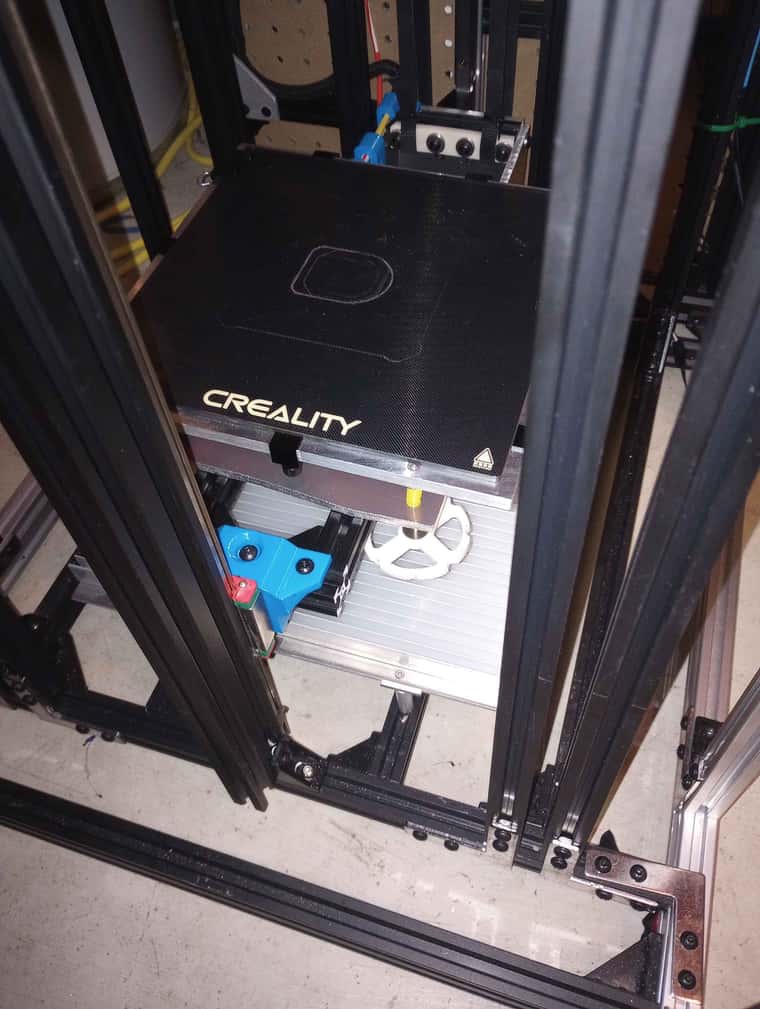
                                        Well adding up reinforcement on the z axis didn't seem to have fixed my issue , i think i would just have to double the linear rail and block on it , but i had some old mgn15 rail laying around and tested something , so i decided to put that rail at the front of the platform , it look at bit goody but so far it seem to have completely eliminated any wobbling of the print bed . platform goes up and down without any problem , so i think him gonna test this a bit more and see how to it goes . before i order any more rail for this

                                        IMG_20250222_011234784.jpg

                                        1 Reply Last reply Reply Quote 0
                                        • fcwiltundefined
                                          fcwilt @Dad003
                                          last edited by

                                          @Dad003

                                          I had my bed being lifted at three points, so as to allow auto leveling.

                                          I used steppers with integral planetary gearboxes. He are most of the parts related to the Z axis. It is quite simple, to my way of thinking.

                                          MF1 Z Concept.jpg

                                          Regards, Frederick

                                          Printers: a E3D MS/TC setup and a RatRig Hybrid. Using Duet 3 hardware running 3.4.6

                                          Dad003undefined 1 Reply Last reply Reply Quote 0
                                          • Dad003undefined
                                            Dad003 @fcwilt
                                            last edited by

                                            @fcwilt yea , my goal was to keep it simple with only one axis to power the bed , I always run a bed mesh before print so bed leveling doesn't need to be 100% perfect , him just testing things out .

                                            fcwiltundefined 1 Reply Last reply Reply Quote 0
                                            • First post
                                              Last post
                                            Unless otherwise noted, all forum content is licensed under CC-BY-SA