Print Quality Issues
-
Hi Everyone,
I am currently experiencing some really annoying print quality issues. I am using Cura 3.5.1 as the slicer and am not quite sure when these issues started cropping up as I have updated it a couple of times since I first started. The first issue you can see in the first three photos. You will see that between the walls and the top layer, there seems to be missing plastic. I am not sure why. I have enabled pressure advance 0.03 and coasting in Cura to try and fix the issues. I am using 0.064 for the coasting as per the recommendations in Cura.


It is not filament specific.
The second issue is the reason why I decided to try pressure advance and coasting. You can see along the Z seam on the outer wall, there is missing plastic. It is like it takes a while for it to take up from a retraction, even with the settings.

It is quite hard to see due to the colour of the plastic, but it is the same with the black plastic.
Can anyone shed any light on it?
Kind Regards,
Sam -
Try turning off coasting, it's not really compatible with pressure advance.
-
Hi @dc42
Thanks for your reply. I will give it a go tomorrow night as see how I get on.
Kind Regards,
Sam
-
The wavy pattern on your last picture looks like a symptom of under extrusion. Same with some of the gaps in the earlier images. Try doing a cold pull on your nozzle to clear up any clogs.
The combination of coasting and pressure advance could be exacerbating the under extrusion.
-
Hi @Phaedrux yeah it definitely is at the start of the next layer. I am using a flex3drive so effectively a direct drive and with the gearing it should be fine. The gap in the top layer is only on one side of the print but not the other. There is no consistency as to where it happens on the print other than if you print the same thing again, it happens in the exact same place. I will try and do a cold pull but with the rest looking ok and it being in the same place every time I am not holding much hope.
I have turned coasting off in Cura. I am going to also upgrade to the latest one and then downgrade if the issue is still there. I didn’t notice these issues between the walls and the top layers in older versions. I need to check my bag of failed parts to see however. The underextrusion at the start of the next layer has been there for a while however.
Kind Regards,
Sam -
@samlogan87 There also appears to be gaps between layers, which was the first thing that made me think under extrusion.
Cura has a few options for adjusting overlaps between areas. Hidden by default. You may want to look into that. I find the defaults to be quite low.
-
So I have turned coasting off to see if it has helped. I am currently running pressure advance of 0.01 and am still getting issues on the side.
I have attached photos of the print that I cancelled part way through to show a gap in the wall after the z seam.


Do I need more pressure advance? Or is it still overlaps I need to deal with.
Kind Regards,
Sam -
Pressure advance of 0.01 is very low. More typical values are 0.05 for direct-drive extruders, and 0.2 or higher for Bowden extruders.
-
Hi @dc42
I have increased to 0.05 and it seems to have helped a wee bit. I have also got it printing outer walls first. The gap for the first 10 odd mm after a layer change seems to have thinned a bit. I may try going a bit higher with it. Do you have any other thoughts of things I could try?
Kind Regards,
Sam -
Can you post your config.g and some details about your printer? Direct drive? Bowden? Is Cura set to force a retraction before outer layer?
Have you calibrated your e steps? Measured your actual filament diameter and input it into Cura?
-
Hi @Phaedrux ,
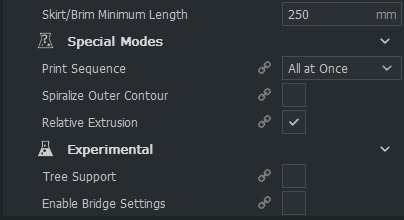
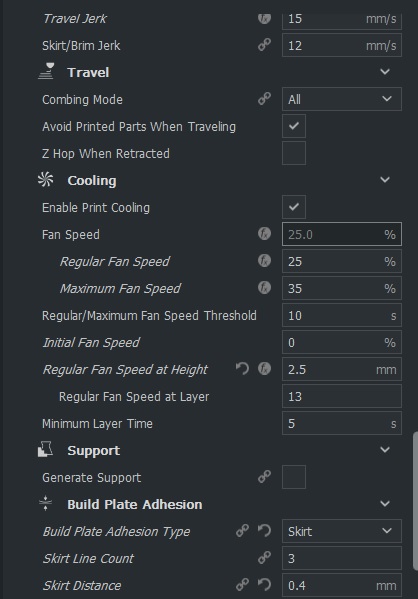
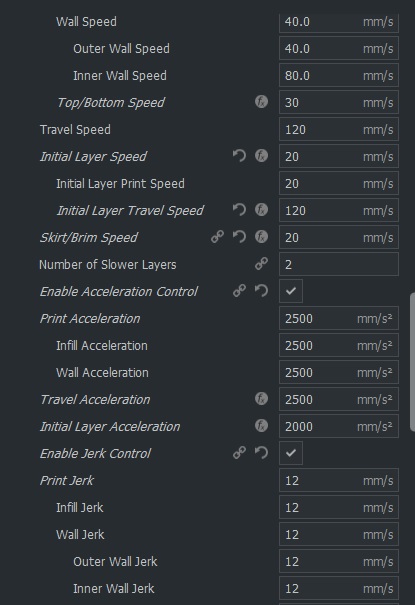
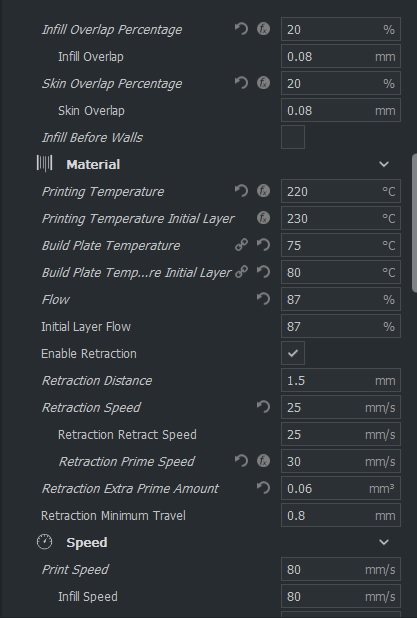
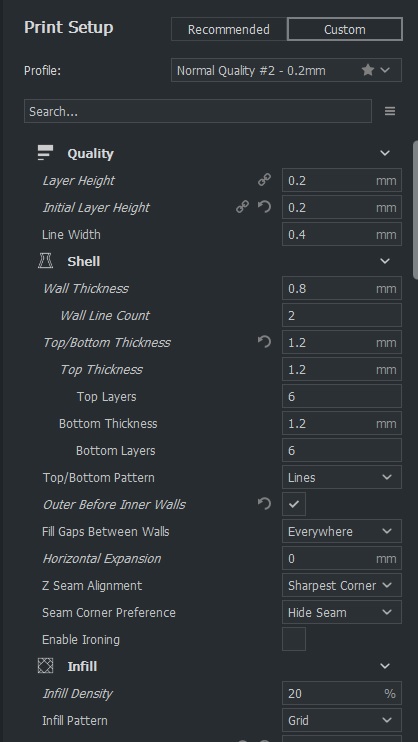
It is a corexy with a flex3drive. I have checked the settings and "retract before outer wall" is turned off. Currently the settings in Cura I am using are below:
and here is my config file:
; Configuration file for Duet Ethernet (firmware version 1.20 or newer)
; executed by the firmware on start-up
; generated by RepRapFirmware Configuration Tool on Wed May 30 2018 19:04:08 GMT+1200 (New Zealand Standard Time); General preferences
G90 ; Send absolute coordinates...
M83 ; ...but relative extruder moves
M555 P1 ; Set firmware compatibility to look like RepRapFirmare
M667 S1 ; Select CoreXY mode
M912 P0 S-0.5 ; CPU Temp adjustment to extruder PT100; Network
M550 PSam's Printer ; Set machine name
M552 P192.168.1.40 S1 ; Enable network with Static IP
M586 P0 S1 ; Enable HTTP
M586 P1 S0 ; Disable FTP
M586 P2 S0 ; Disable Telnet; Drives
M569 P0 S1 ; Drive 0 goes forwards X Axis
M569 P1 S0 ; Drive 1 goes forwards Y Axis
M569 P2 S0 ; Drive 2 goes forwards Z Axis FL
M569 P3 S1 ; Drive 3 goes forwards Z Axis RL
M569 P4 S1 ; Drive 4 goes forwards Z Axis RR
M569 P5 S0 ; Drive 5 goes forwards Z Axis FR
M569 P6 S1 ; Drive 5 goes forwards Extruder; Motor remapping for dual Z
M584 X0 Y1 Z2:3:4:5 U3 V4 W5 E6 P6 ; Driver 0 For X, 1 for Y, Z=2:3:4 U3 V4, Extruder 5
M350 X16 Y16 Z16:16:16:16 U16 V16 W16 I1 ; Configure microstepping with interpolation
M350 E8 ; Set Extruder to 8x Microstepping with no interpolation
M92 X80 Y80 Z400:400:400:400 U400 V400 W400 E2218.4 ; Set steps per mm 81.4 2218.4 1900
M566 X1200 Y1200 Z120:120:120:120 U120 V120 W120 E12 ; Set maximum instantaneous speed changes (mm/min)
M203 X12000 Y12000 Z400:400:400:400 U400 V400 W400 E3600 ; Set maximum speeds (mm/min)
M201 X3000 Y3000 Z250:250:250:250 U250 V250 W250 E150 ; Set accelerations (mm/s^2)
M906 X1000 Y1000 Z1850:1850:1850:1850 U1850 V1850 W1850 E600 I75 ; Set motor currents (mA) and motor idle factor in %
M84 S30 ; Set idle timeout; Axis Limits
M208 X0 Y0 Z0 S1 ; Set axis minima
M208 X354.0 Y375 Z412 S0 ; Set axis maxima
M671 X-61:-62:384:383 Y86:291:296:89 S2.5 ; Define the X and Y coordinates of the lead screw. Motor order: FL (1), RL (2), RR (3), FR (4).Snn Maximum correction in mm to apply to each leadscrew; Endstops
;Piezo Probe
M574 X1 Y1 S1 ; X home to min. Y home to max. Normally Closed limit switches.
M574 Z1 S0
M558 P8 I1 R0.4 F300 X0 Y0 Z0 A5 ; digital piezo sensor, output rises on contact, probing speed, not used to home axes
G31 X0 Y0 Z-0.1 P500 ; sensor is nozzle and debounce value.;Bl Touch Config
;M574 X1 Y1 S1 ; X home to min. Y home to max. Normally Closed limit switches.
;M307 H3 A-1 C-1 D-1 ; Disable the 4th Heater to free up PWM channel 2 on the Duex board for BL TOUCH.
;M574 Z1 U1 V1 S2 ; Define Z to use Probe. Home to Min
;M558 P9 F100 H5 R0.2 T6000 A5 ; MUST CHANGE H=== TO SUIT BEFORE RUNNING!!!!!!!!!!!!!!
;G31 X-4 Y-33.2 Z0.864 P25 ; BLTouch Offset from Nozzle;Filament out sensor
M581 E3 S-1 T1 C0 ; invoke trigger 2 when a rising edge is detected on the E1 or E2 endstop input
; Define mesh grid
M557 X0:363.5 Y0:373 S20
M376 H10; Heaters
M140 H1 ; Remap heated bed to heater 1
M305 P0 X200 ; Set PT100 for Hot End
M143 H0 S300 ; Set temperature limit for heater 0 to 300C
M307 H0 A609.0 C239.9 D6 B0 ; set model parameters for heater 0 and use PID mode Heater 0 model: gain 609.0, time constant 239.9, dead time 6.0,
M305 P1 X201 ; Set PT100 Channel 2 to Heat Bed
M143 H1 S130 ; Set temperature limit for heater 1 to 130C
M307 H1 A276.9 C1121.5 D20.4 S1.00 B0 ; Set model parameters for Heat Bed 1 and use PID mode gain 276.9, time constant 1121.5, dead time 20.4
M305 P100 X1000 S"MCU Temperature" ; Map Duet MCU to the Extra Table
M305 P101 X1001 S"Duet Drivers" ; Map Duet Drivers to the Extra Table
M305 P102 X1002 S"Duex2 Drivers" ; Map Duex2 Driver to the Extra Table; Fans
M307 H2 A-1 C-1 D-1 ; Disable the 2th Heater to free up for cooling fan
M106 P0 A2 X0.5 F25000 H-1 C"Part Cooling" ; Part Cooling Fan Remap to Heater 2
M106 P1 F25000 L.5 B1 T30:65 H100:101:102 C"Duet Fan" I1 ; Set fan 2 PWR fan. Turns on when MCU temperature (heater 100), hits 45C and full speed when the MCU temperature reaches 65C or if any TMC2660 drivers (virtual
M106 P2 F25000 L.5 B1 T30:65 H100:101:102 C"PWR Supply" I1 ; Set fan 3 PWR fan. Turns on when MCU temperature (heater 100), hits 45C and full speed when the MCU temperature reaches 65C or if any TMC2660 drivers (virtual
M106 P3 H0 B1 L1 T45 C"Extruder" ; Set fan 4 to Extruder, PWM signal inversion and frequency. Thermostatic control is turned on Blip time of 0.5secs and minimum speed of 0.5; Tools
M563 P0 D0 H0 S"Extruder" ; Define tool 0
G10 P0 X0 Y0 Z0 ; Set tool 0 axis offsets
G10 P0 R0 S0 ; Set initial tool 0 active and standby temperatures to 0C
M572 D0 S0.05 ; Pressure Advance; Automatic power saving
M911 S20 R23 P"M913 X0 Y0 G91 M83 G1 Z3 E-5 F1000" ; Set voltage thresholds and actions to run on power loss
Kind Regards,
Sam -
Here are some changes I would try in Cura.
- Reduce inner wall speed from 80mm/s to 60.
- Reduce wall acceleration from 2500mm/s^2 to 1000.
- Turn off outer walls before inner walls. (This should put the under run after a travel move inside so it's not visible on the outside.)
- Turn retract before outer wall on.
- Increase retraction minimum travel from 0.8mm to 2mm.
- Reduce Retraction Prime speed from 30 to 25
- Find the hidden setting for compensate wall overlaps and enabled it
- Find the hidden settings for skin overlap percentage, infill overlap percentage, and skin expand distance and increase them a bit.
Here are some changes I would try in config.g
- These may not be feasible with the flex3drive, since I'm not sure what their recommendations and limitations are.
- Increase E jerk from 12 (that's quite low)
- Increase E accel from 150