Hello everybody,
this is my first post.(Please excuse my bad english it's not my native language)
I've been printing for 8 years now, but with the first M3D Micro beta printer that came out in 2012, but now it is to small for me (10x10). Now I have built a bigger cartaisan printer on my own.
I have learned a lot out of this forum and found a lot of solutions while reading.But now I'm stuck at a few points.
First of all:
Thanks to @deckingman who inspired me to build a multicolor printer by reading his blog.
Of cours also thanks to @DC42 for his help and solutions in this forum.
I'm really glad to be a member in this community
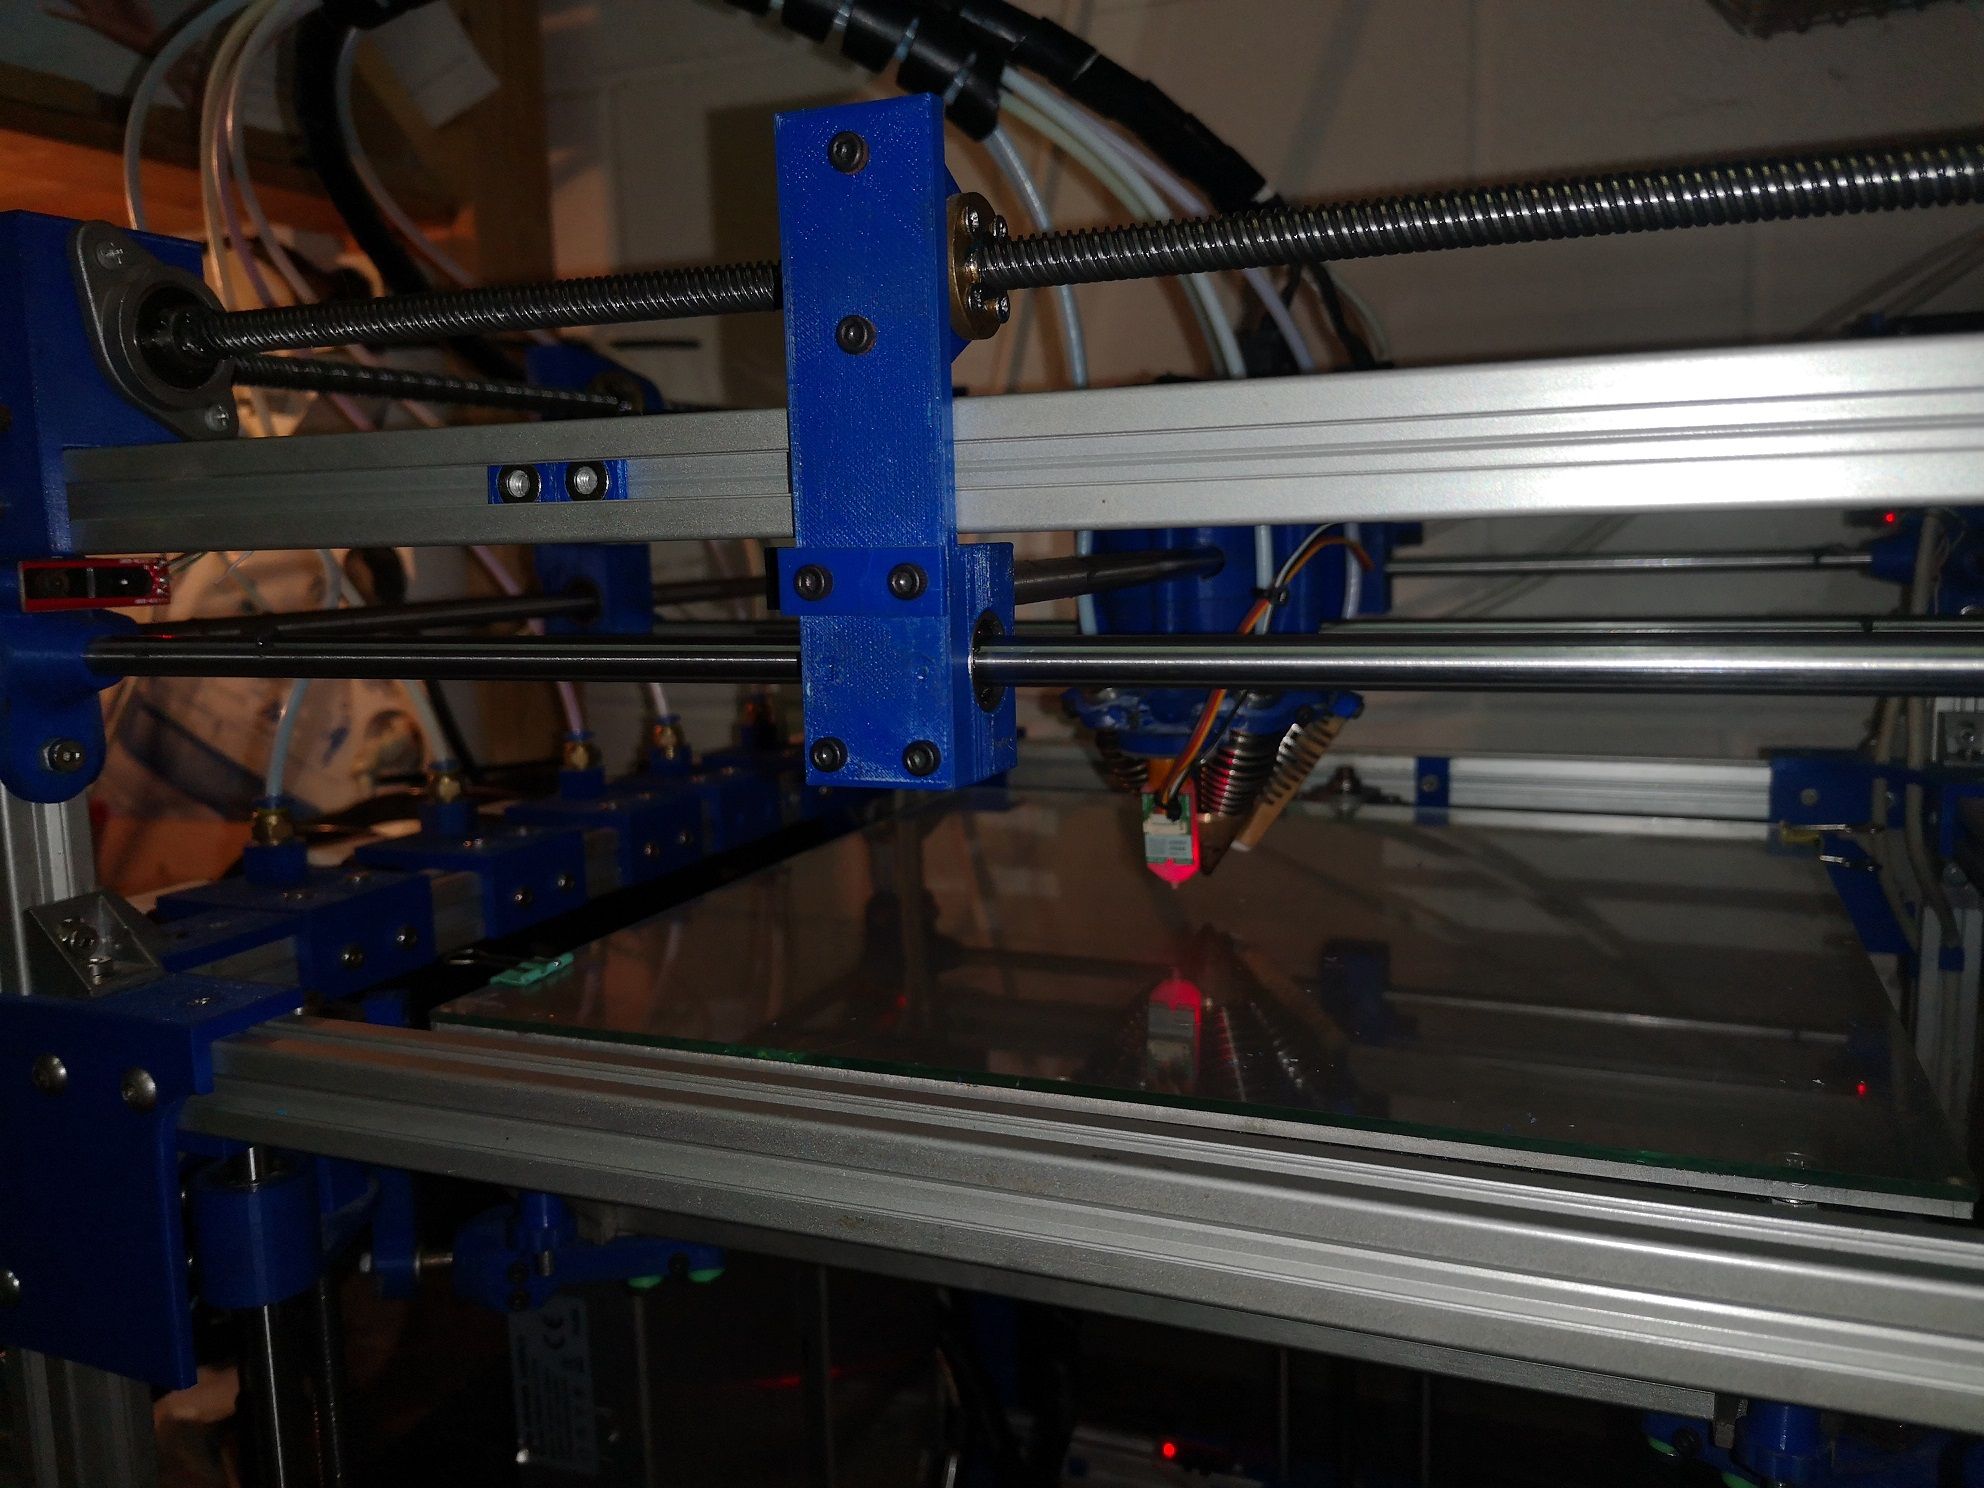
So here is my setup:
- Cartaisan Printer
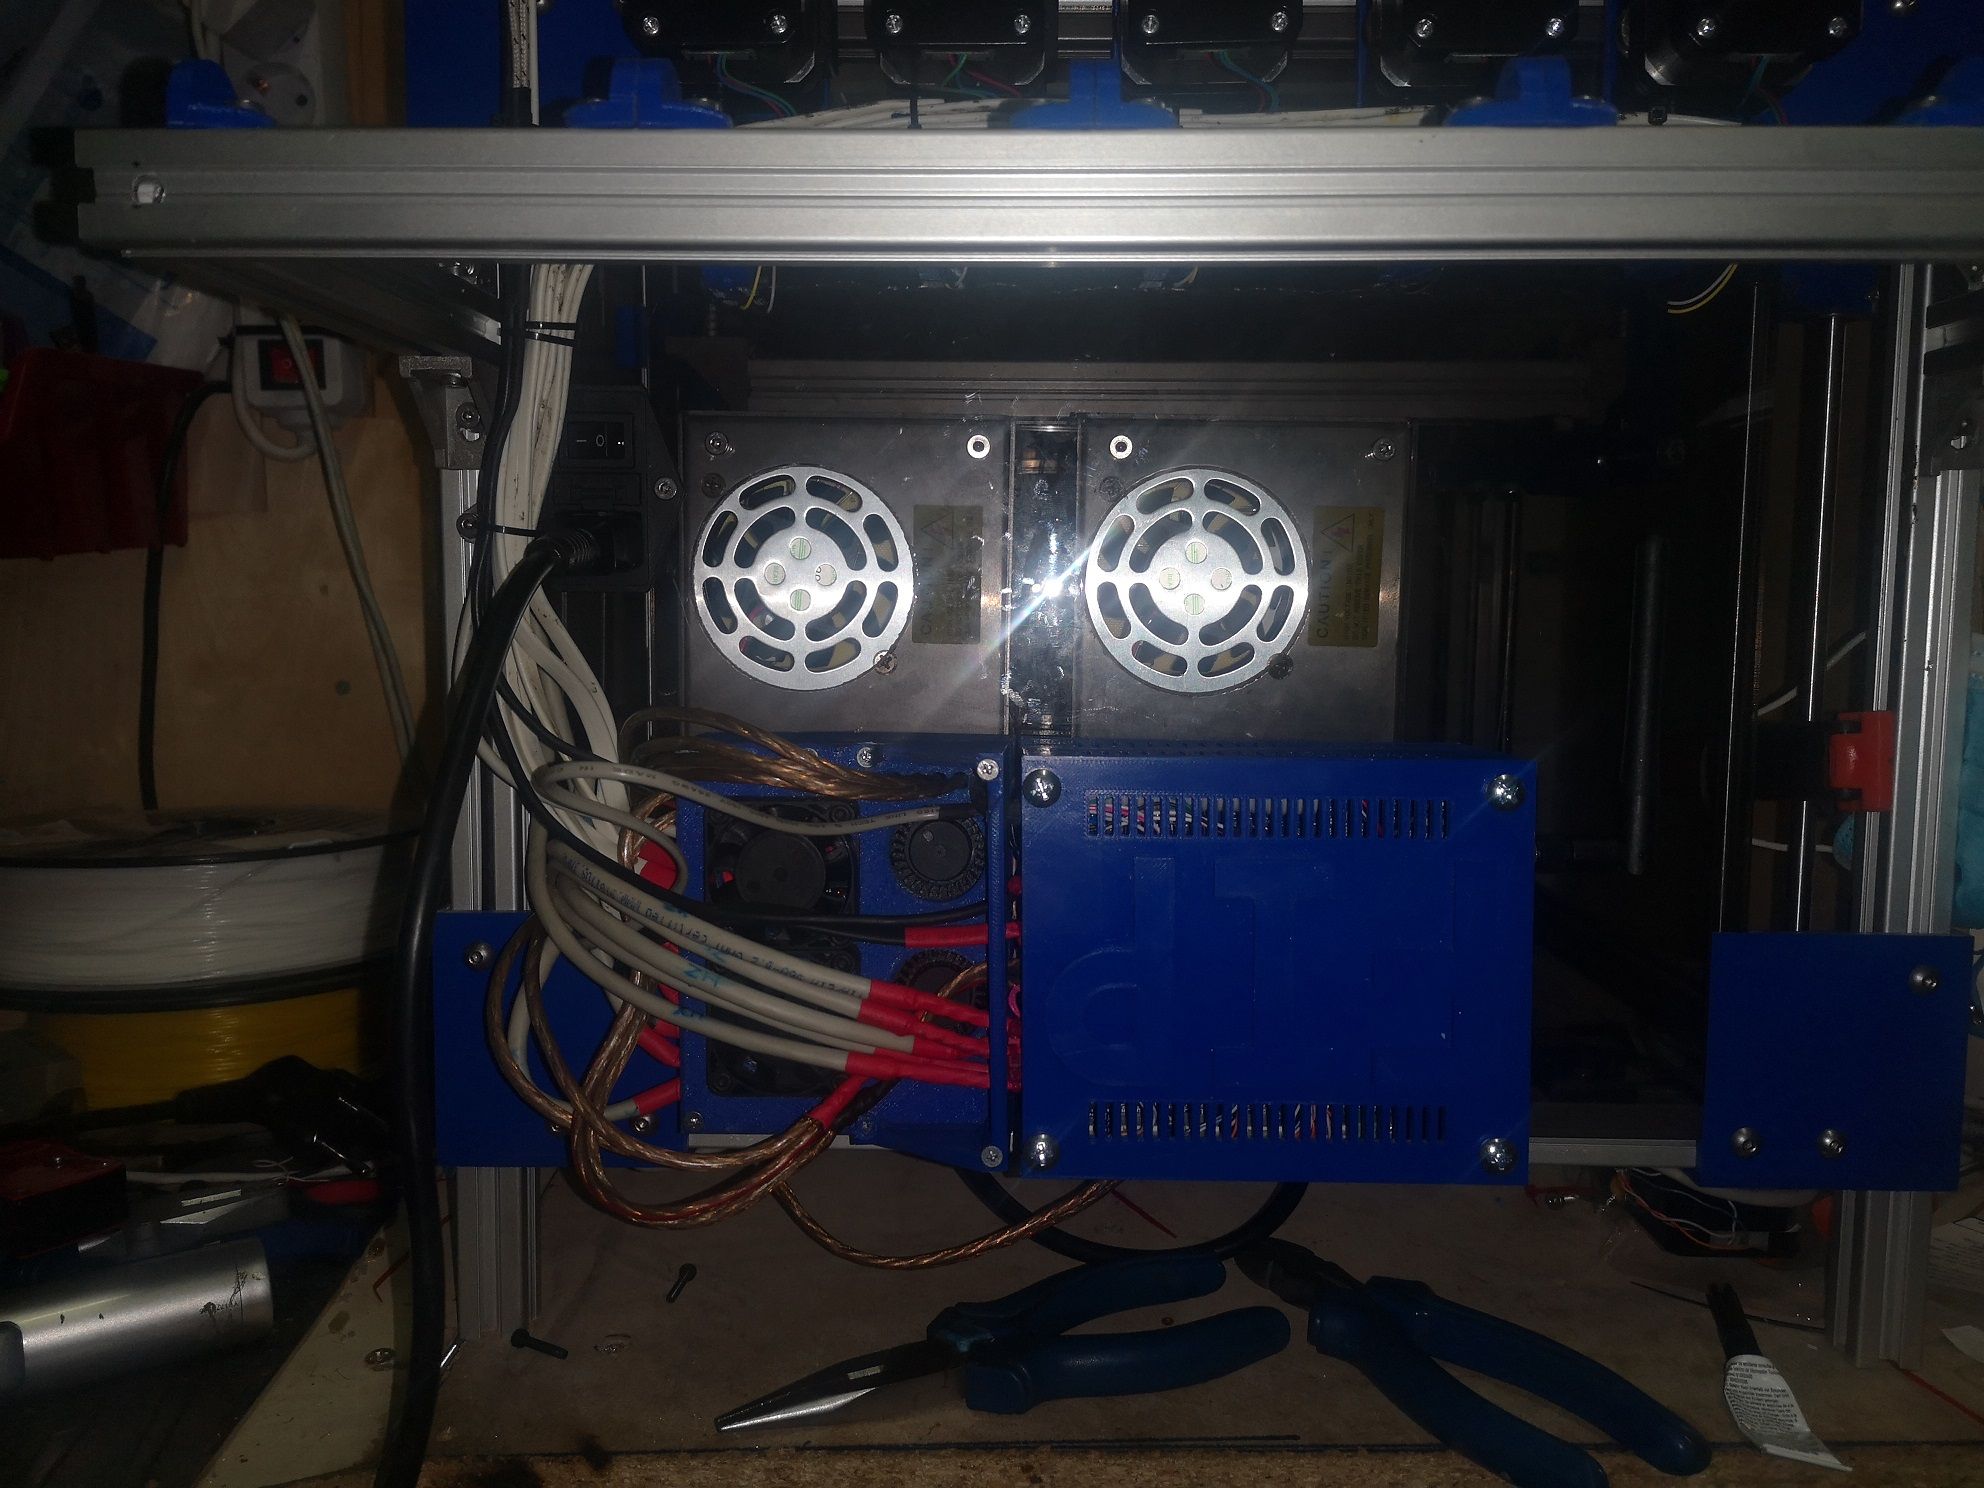
- Duet Wifi v1.04 + Duex
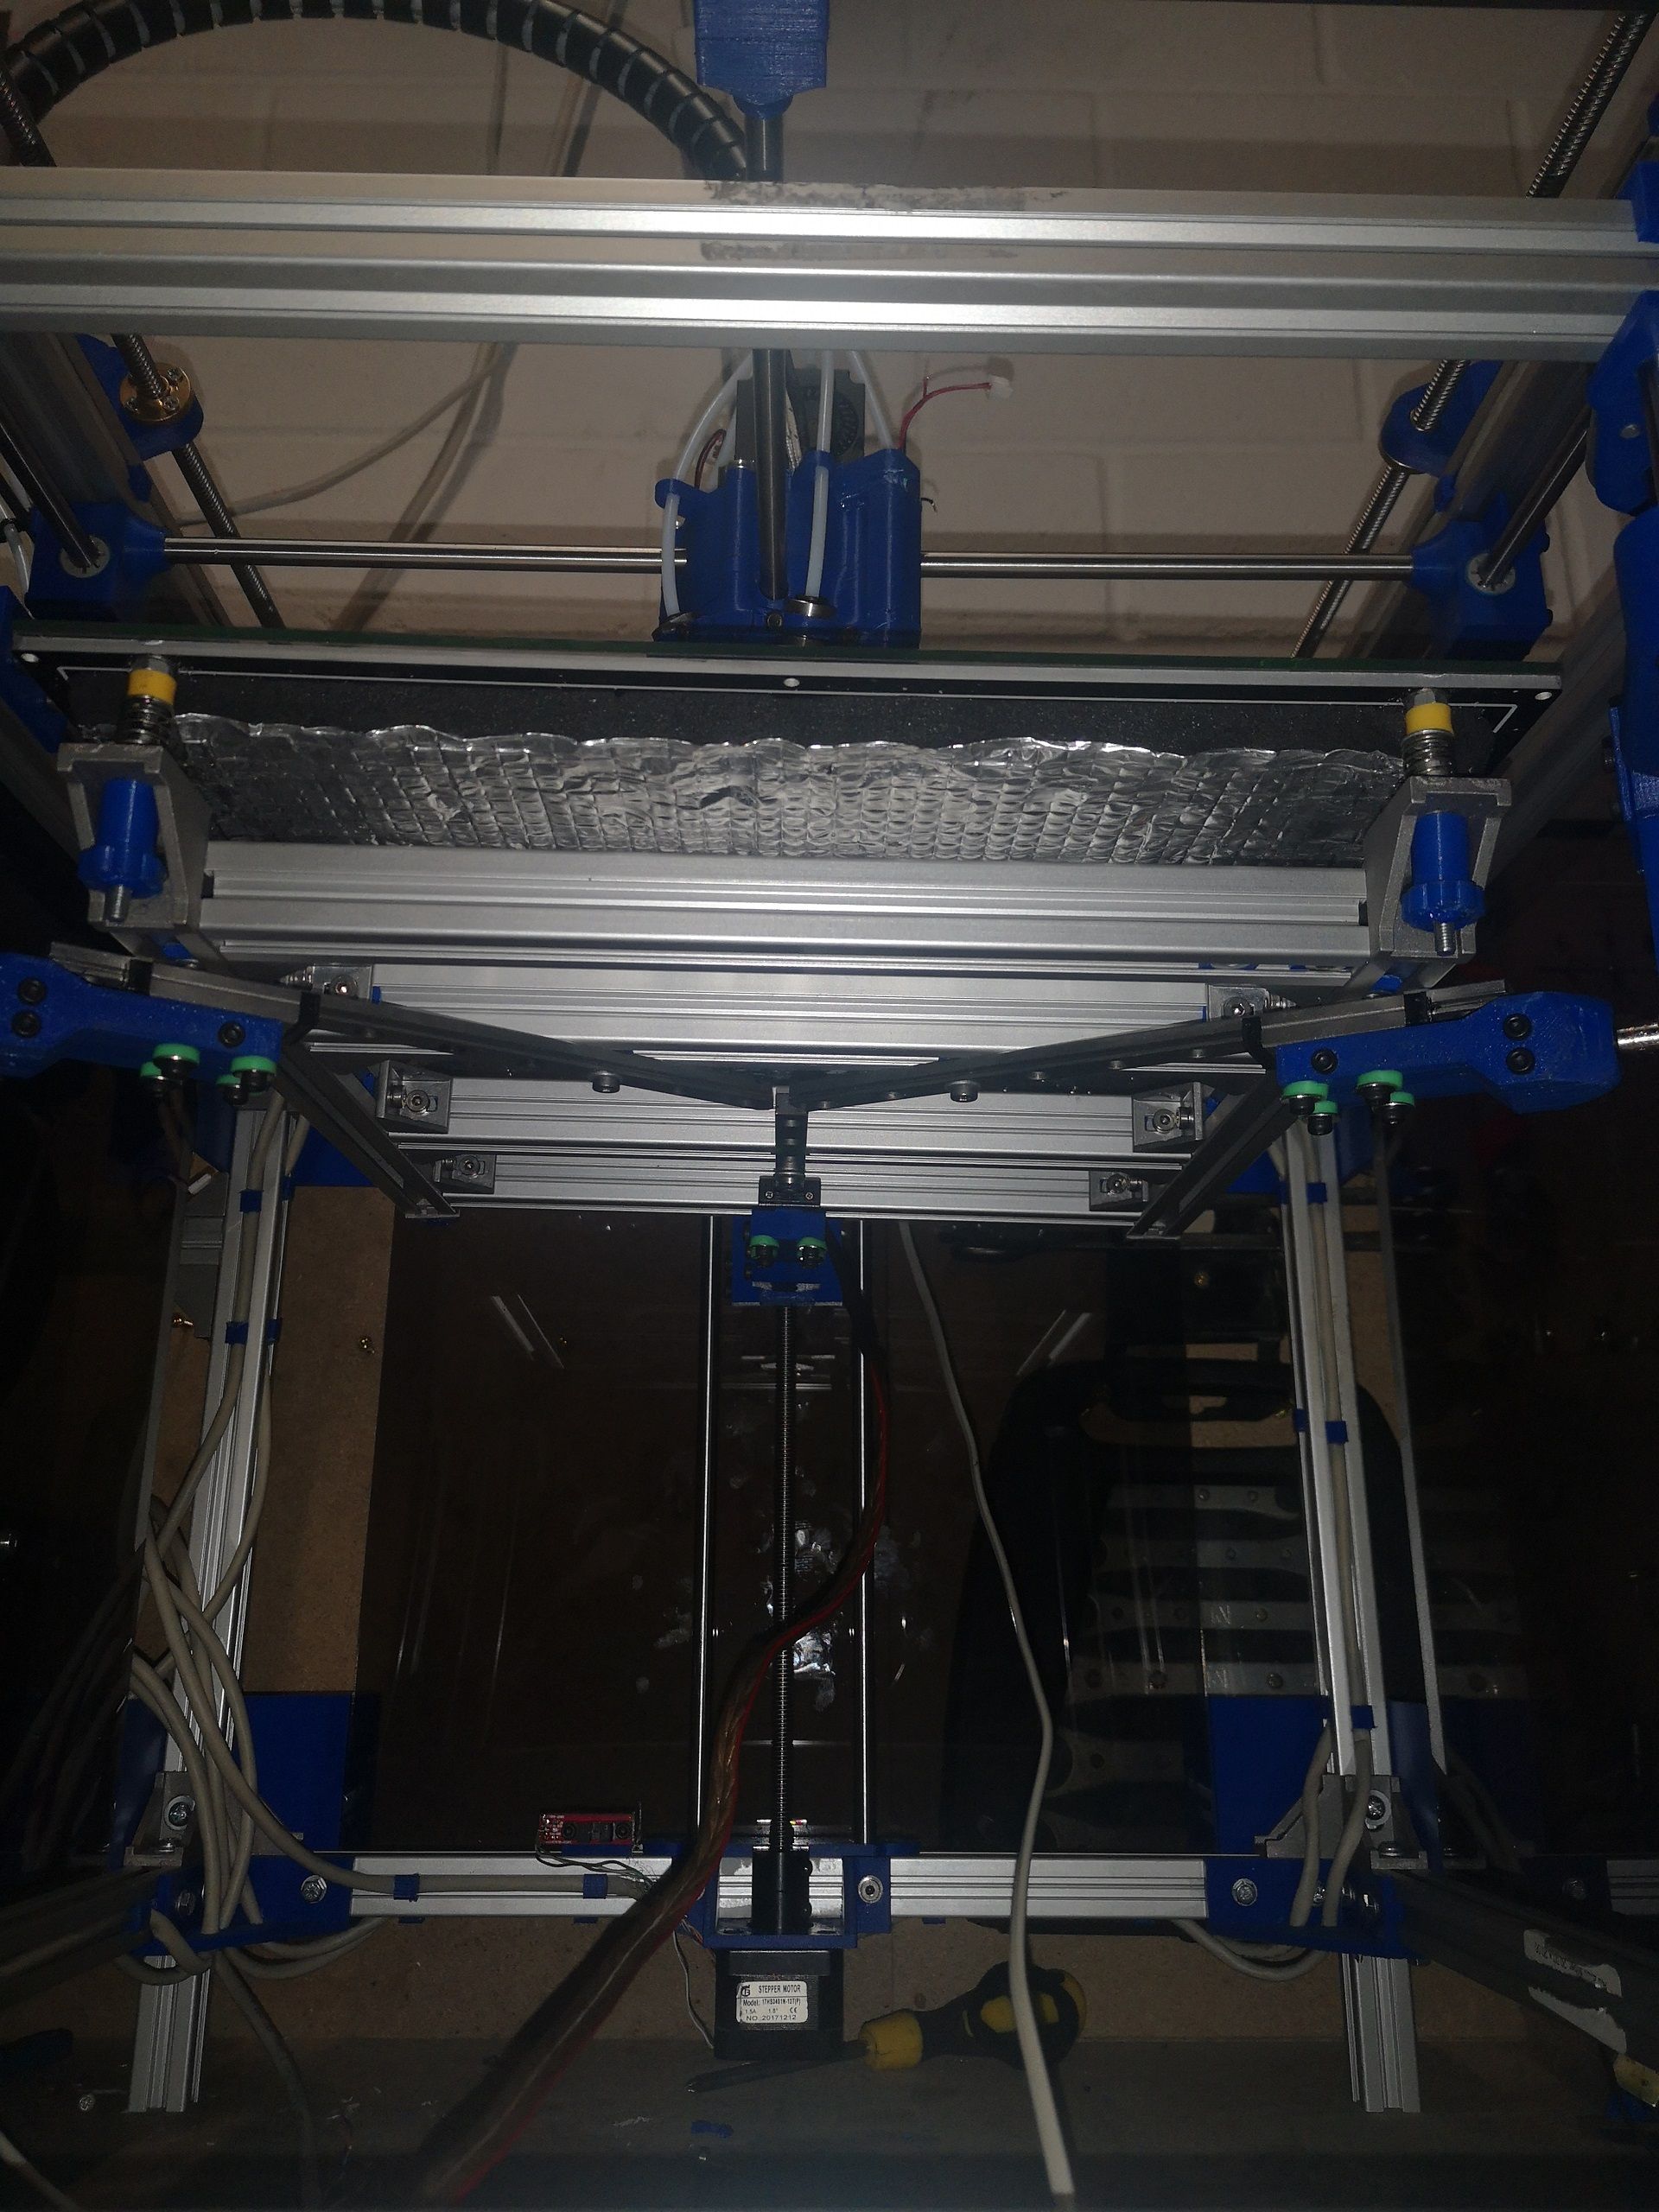
- Dual X and Dual Y and Tripple Z axes
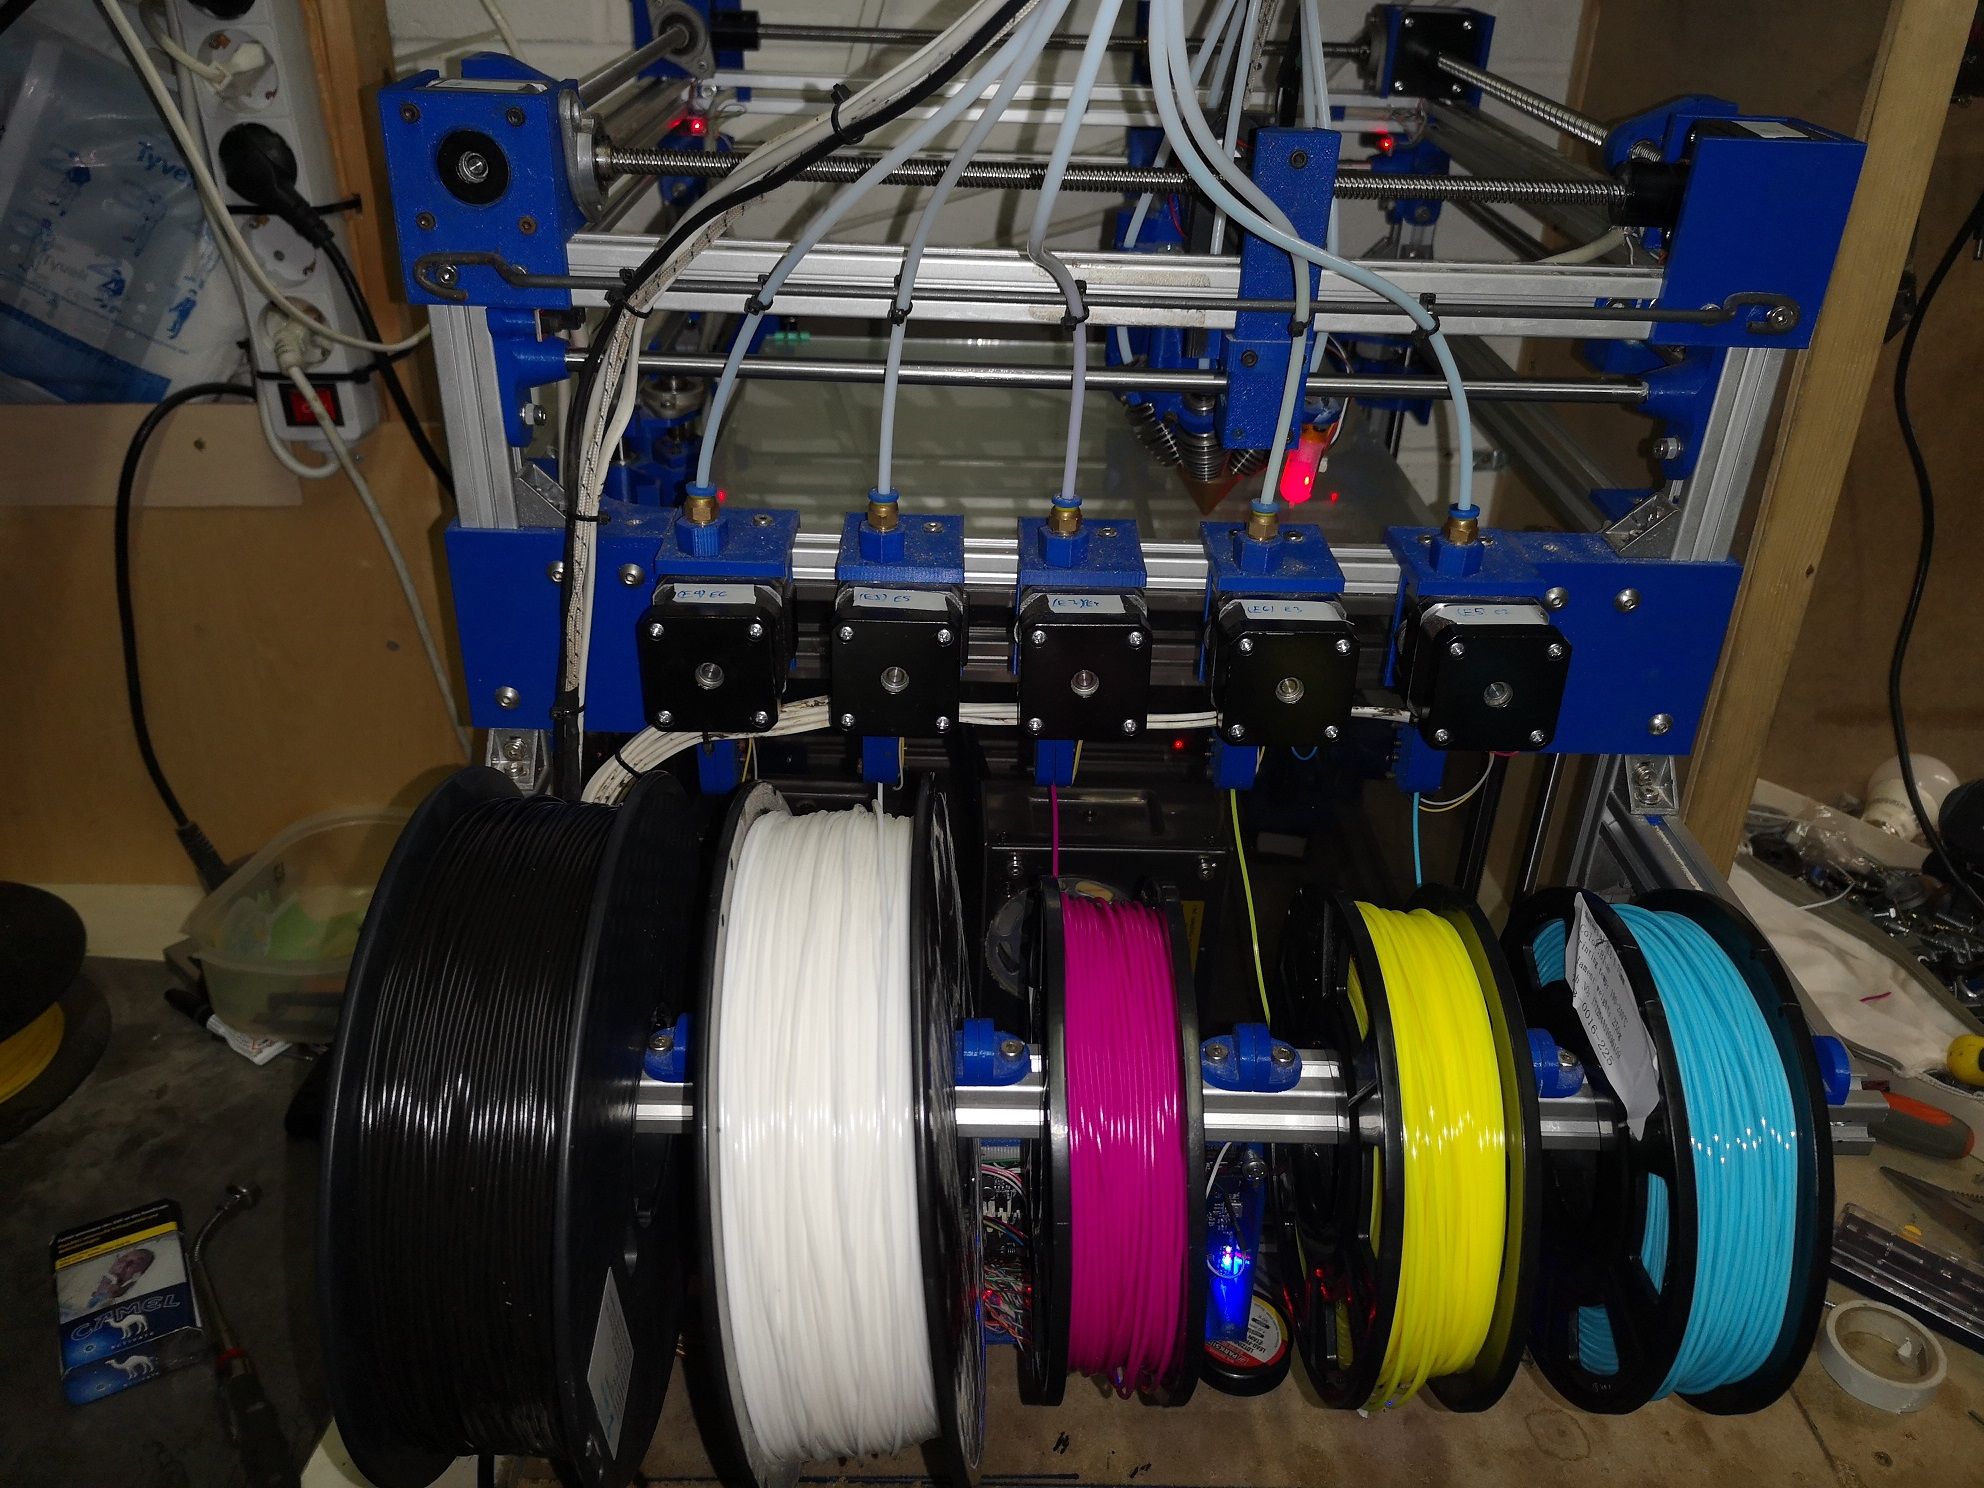
- 5 extruders (Magenta, Yellow, Cyan, White, Black)
- 12 stepper motors NEMA 17 (max 1500ma)(10 on Duet+Duex+2 external)
- Diamond Hotend 5 in 1
- 5 Bowden tubes (80cm)
- 30 x 30 cm Printbed
- 7 optical Endstops + BLTouch
- 2x Vin @ 24Volt and 600Watt (1. Duet+Duexan 2. Printbed via Mosfet)
- 2 Fan + 5 Blower (External Driver, Mosfet, 2 Duet+Duex, 2 Diamondcarriage an 1 Partcooler)
- 5 Activ High switches as filamentsensor*
- 5 temperature sensors ( Hotend, Printbed, Duet, Mosfet & External Driver)
- actually there are 17 Tools set
- RRF 3.1.1.
(* It didn't work well, the printer kept restarting at the beginning of a print, so i deactivated them. Too much noise interferences. I will replace them with other sensors)
I think that's it.
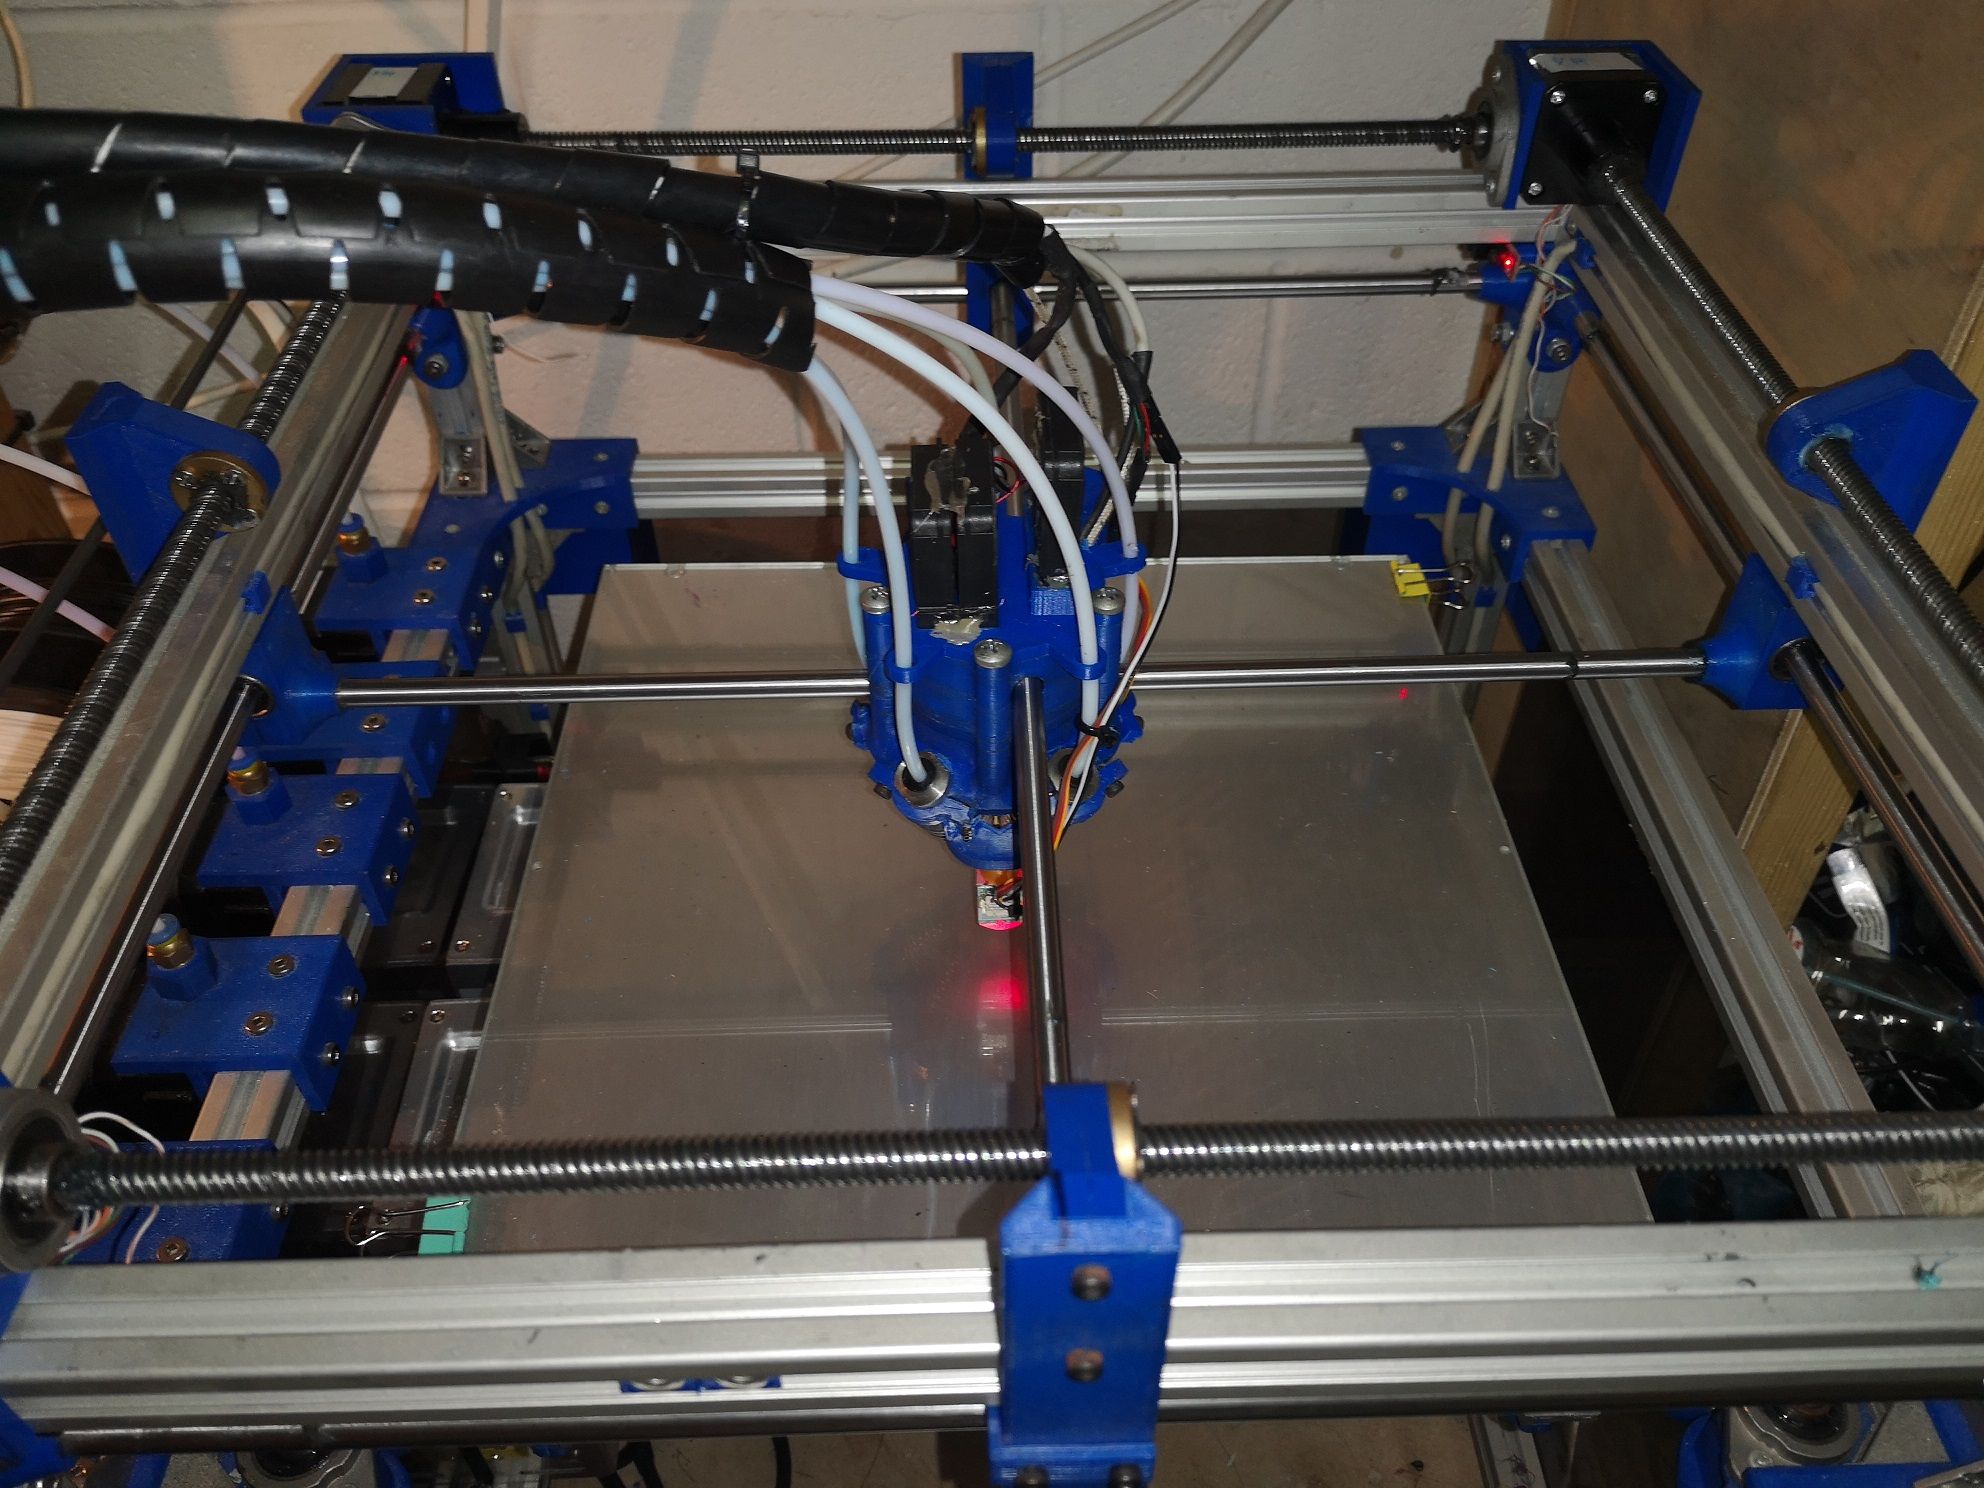
I designed this printer by myself on Solidworks, so all parts are custom made an printed with a small printer( a gift,chinese brand: Singma but it had done his job good) Some parts will be reprinted like the Duethousing with this big printer. The one i used just had a printarea of 13x13 cm.
I tried to build a Printer which isn't too big bud also have a big printarea. So i tried to set it as compact as possible. The outer dimensions are 44x44 cm and the printarea is 30x30 cm. The filamentspool are mounted outside on the left handside.
I've already done some prints an a lot of tests. The instructions an the forum helped a lot, so that it wasn't that hard.
Now my issues:
-
I got a dual X and dual Y setup, it also works very well. But it just uses one endstop switch. it worked good at the beginning, but as i speed up the speed of the axis i got some issues. The carrier stuck on Y axis and the Printhead didn't move or just a bit in that direction.
The reason i speed up the speed was that i tought that it will be usefull to evitate blobs at the beginning of a layer. (At the beginning it was lower and worked very good)
I already set Firmware retraction (8 mm) an pressure advance (0.8) but the blobs never fully disapeared. But it was already better.
I could set down the speed, but then the blobs will become bigger.
I think the longer the hotend stays over the beginning of a layer, the worser the blobs get.
By the way, I use the prusa slicer, it can run 17 tools without crashing.
Slic3er crashed all the time. I also modified Cura to have 18 tools but it get very slow and i couldn't see every icon on the screen, that's why i'm using PrusaSlicer. There I enabled also Firmware retraction (all 5 filaments are beeing retracted)
-
My question is:
How can I set two endstops at each end of the axis? (High and low)
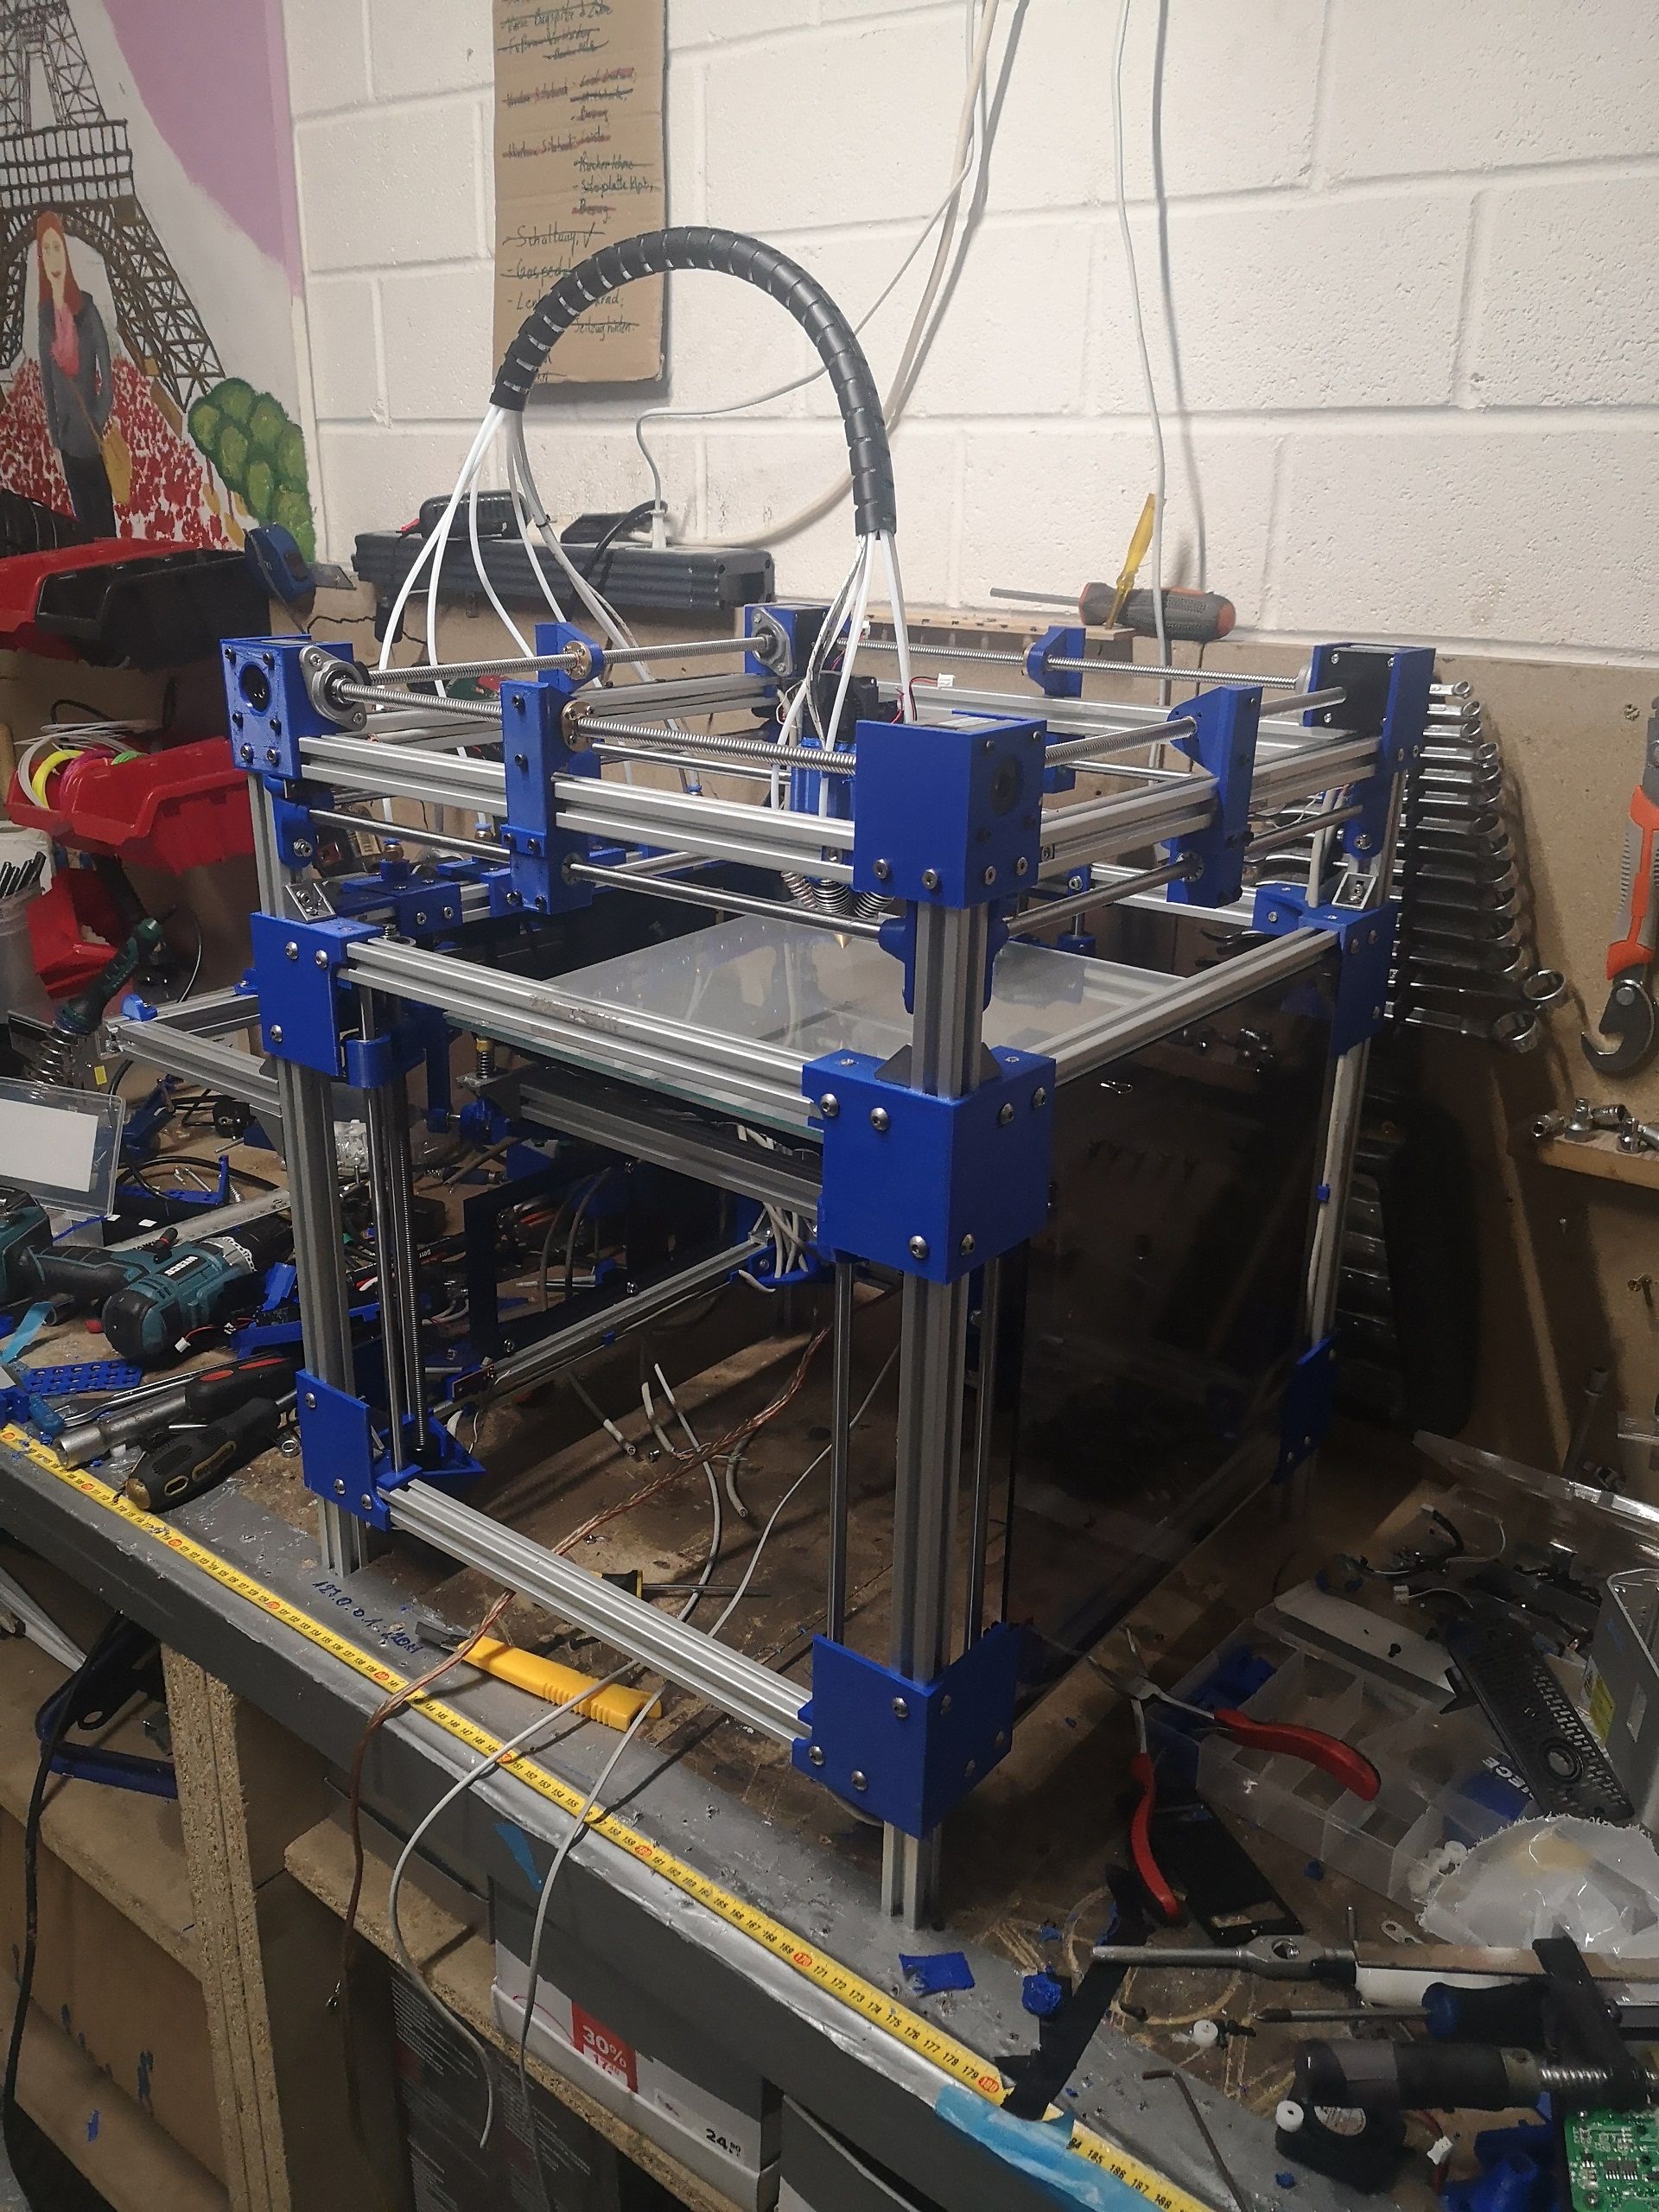
Ass you can see on the pictures, my dual Axis setup is mirrored*.
I want him to go to one end and after i want him to go to the other end.
I think then it will be fully synchronised and wont stuck anymore.
(*Saved place to keep the printe compact)
- And if I have to set down the speed, how could i evitate these blobs?
Here is my actual configuration (shortened):
; Driver mapping
M584 X1:2 Y10:11 Z0:3:4 U2 V11 W3 A4 E5:6:7:8:9 P3 ; set drive mapping
M671 X150:-25:325 Y325:-25:-25 S1 ; leadscrews at rear middle, front left and front right
; Drives
M569 P2 S0 ; physical drive 2 goes forwards
M569 P0 S1 ; physical drive 0 goes forwards
M569 P1 S1 ; physical drive 1 goes forwards
M569 P3 S1 ; physical drive 3 goes forwards
M569 P4 S1 ; physical drive 4 goes forwards
M569 P5 S0 ; physical drive 5 goes forwards
M569 P6 S0 ; physical drive 6 goes forwards
M569 P7 S0 ; physical drive 7 goes forwards
M569 P8 S0 ; physical drive 8 goes forwards
M569 P9 S0 ; physical drive 9 goes forwards
M569 P10 S0 ; physical drive 10 goes forwards
M569 P11 S1 ; physical drive 11 goes forwards
M350 X16 Y16 Z16 E16:16:16:16:16 I1 ; configure microstepping with interpolation
M92 X400.00 Y400.00 Z2133.33 E85.6:85.6:85.6:85.6:85.6 ; set steps per mm
M566 X2000.00 Y2000.00 Z100.00 E2000.00:2000.00:2000.00:2000.00:2000.00 ; set maximum instantaneous speed changes (mm/min)
M203 X6000.00 Y6000.00 Z900.00 E4000.00:4000.00:4000.00:4000.00:40000.00 ; set maximum speeds (mm/min)
M201 X5000.00 Y5000.00 Z100.00 E2500.00:2500.00:2500.00:2500.00:2500.00 ; set accelerations (mm/s^2)
M906 X1000 Y1000 Z1000 E1000:1000:1000:1000:1000 I80 ; set motor currents (mA) and motor idle factor in per cent
M84 S30 ; Set idle timeout
; Axis Limits
M208 X0 Y0 Z0 U0 V0 W0 A0 S1 ; set axis minima
M208 X300 Y300 Z270 U300 V300 W270 A270 S0 ; set axis maxima
; Endstops
M584 X1:2 Y10:11 Z0:3:4 U2 V11 W3 A4 E5:6:7:8:9 ;
M574 X2 S1 P"ystop" ; configure sensorless endstop for low end on X
M574 Y2 S1 P"connlcd.encb" ; configure sensorless endstop for low end on Y
M574 Z1 S1 P"xstop+e0stop+e1stop" ; configure sensorless endstop for low end on Z
M574 U1 S1 P"zstop" ;
M574 V1 S1 P"connlcd.enca" ;
; Z-Probe
M950 S0 C"duex.pwm5" ; create servo pin 0 for BLTouch
M558 P9 C"^zprobe.in" H5 F120 T6000 ; set Z probe type to bltouch and the dive height + speeds
G31 P500 X0 Y-35 Z1.8 ; set Z probe trigger value, offset and trigger height
M557 X35:265 Y35:265 S230 ; define mesh grid
M563 P0 S"Black" D0:1:2:3:4 H1 ; define tool 4
G10 P0 X0 Y0 Z0 ; set tool 4 axis offsets
G10 P0 R200 S200 ; set initial tool 4 active and standby temperatures to 0C
M568 P0 S1 ; enable mixing for tool 4
M567 P0 E0.025:0.025:0.025:0.025:0.9 ; set mixing ratios for tool 4
M563 P1 S"White" D0:1:2:3:4 H1 ; define tool 4
G10 P1 X0 Y0 Z0 ; set tool 4 axis offsets
G10 P1 R200 S200 ; set initial tool 4 active and standby temperatures to 0C
M568 P1 S1 ; enable mixing for tool 4
M567 P1 E0.025:0.025:0.025:0.9:0.025 ; set mixing ratios for tool 4
M563 P2 S"Light Grey" D0:1:2:3:4 H1 ; define tool 4
G10 P2 X0 Y0 Z0 ; set tool 4 axis offsets
G10 P2 R200 S200 ; set initial tool 4 active and standby temperatures to 0C
M568 P2 S1 ; enable mixing for tool 4
M567 P2 E0.034:0.033:0.033:0.675:0.225 ; set mixing ratios for tool 4
M563 P3 S"Grey" D0:1:2:3:4 H1 ; define tool 4
G10 P3 X0 Y0 Z0 ; set tool 4 axis offsets
G10 P3 R200 S200 ; set initial tool 4 active and standby temperatures to 0C
M568 P3 S1 ; enable mixing for tool 4
M567 P3 E0.034:0.033:0.033:0.45:0.45 ; set mixing ratios for tool 4
M563 P4 S"Dark Grey" D0:1:2:3:4 H1 ; define tool 0
G10 P4 X0 Y0 Z0 ; set tool 0 axis offsets
G10 P4 R200 S200 ; set initial tool 0 active and standby temperatures to 0C
M568 P4 S1 ; enable mixing for tool 0
M567 P4 E0.034:0.033:0.033:0.225:0.675 ; set mixing ratios for tool 0
M563 P5 S"Cyan" D0:1:2:3:4 H1 ; define tool 13
G10 P5 X0 Y0 Z0 ; set tool 13 axis offsets
G10 P5 R200 S200 ; set initial tool 13 active and standby temperatures to 0C
M568 P5 S1 ; enable mixing for tool 13
M567 P5 E0.9:0.025:0.025:0.025:0.025 ; set mixing ratios for tool 13
M563 P6 S"Light Blue" D0:1:2:3:4 H1 ; define tool 12
G10 P6 X0 Y0 Z0 ; set tool 12 axis offsets
G10 P6 R200 S200 ; set initial tool 12 active and standby temperatures to 0C
M568 P6 S1 ; enable mixing for tool 12
M567 P6 E0.675:0.034:0.225:0.033:0.033 ; set mixing ratios for tool 12
M563 P7 S"Blue" D0:1:2:3:4 H1 ; define tool 7
G10 P7 X0 Y0 Z0 ; set tool 7 axis offsets
G10 P7 R200 S200 ; set initial tool 7 active and standby temperatures to 0C
M568 P7 S1 ; enable mixing for tool 7
M567 P7 E0.45:0.034:0.45:0.033:0.033 ; set mixing ratios for tool 7
M563 P8 S"Purple" D0:1:2:3:4 H1 ; define tool 11
G10 P8 X0 Y0 Z0 ; set tool 11 axis offsets
G10 P8 R200 S200 ; set initial tool 11 active and standby temperatures to 0C
M568 P8 S1 ; enable mixing for tool 11
M567 P8 E0.225:0.034:0.675:0.033:0.033 ; set mixing ratios for tool 11
M563 P9 S"Magenta" D0:1:2:3:4 H1 ; define tool 2
G10 P9 X0 Y0 Z0 ; set tool 2 axis offsets
G10 P9 R200 S200 ; set initial tool 2 active and standby temperatures to 0C
M568 P9 S1 ; enable mixing for tool 2
M567 P9 E0.025:0.025:0.9:0.025:0.025 ; set mixing ratios for tool 2
M563 P10 S"Hot Pink" D0:1:2:3:4 H1 ; define tool 10
G10 P10 X0 Y0 Z0 ; set tool 10 axis offsets
G10 P10 R200 S200 ; set initial tool 10 active and standby temperatures to 0C
M568 P10 S1 ; enable mixing for tool 10
M567 P10 E0.034:0.225:0.675:0.033:0.033 ; set mixing ratios for tool 10
M563 P11 S"Red" D0:1:2:3:4 H1 ; define tool 6
G10 P11 X0 Y0 Z0 ; set tool 6 axis offsets
G10 P11 R200 S200 ; set initial tool 6 active and standby temperatures to 0C
M568 P11 S1 ; enable mixing for tool 6
M567 P11 E0.034:0.45:0.45:0.033:0.033 ; set mixing ratios for tool 6
M563 P12 S"Orange" D0:1:2:3:4 H1 ; define tool 9
G10 P12 X0 Y0 Z0 ; set tool 9 axis offsets
G10 P12 R200 S200 ; set initial tool 9 active and standby temperatures to 0C
M568 P12 S1 ; enable mixing for tool 9
M567 P12 E0.034:0.675:0.225:0.033:0.033 ; set mixing ratios for tool 9
M563 P13 S"Yellow" D0:1:2:3:4 H1 ; define tool 1
G10 P13 X0 Y0 Z0 ; set tool 1 axis offsets
G10 P13 R200 S200 ; set initial tool 1 active and standby temperatures to 0C
M568 P13 S1 ; enable mixing for tool 1
M567 P13 E0.025:0.9:0.025:0.025:0.025 ; set mixing ratios for tool 1
M563 P14 S"Lime" D0:1:2:3:4 H1 ; define tool 14
G10 P14 X0 Y0 Z0 ; set tool 14 axis offsets
G10 P14 R200 S200 ; set initial tool 14 active and standby temperatures to 0C
M568 P14 S1 ; enable mixing for tool 14
M567 P14 E0.225:0.675:0.034:0.033:0.033 ; set mixing ratios for tool 14
M563 P15 S"Green" D0:1:2:3:4 H1 ; define tool 5
G10 P15 X0 Y0 Z0 ; set tool 5 axis offsets
G10 P15 R200 S200 ; set initial tool 5 active and standby temperatures to 0C
M568 P15 S1 ; enable mixing for tool 5
M567 P15 E0.45:0.45:0.034:0.033:0.033 ; set mixing ratios for tool 5
M563 P16 S"Spring Green" D0:1:2:3:4 H1 ; define tool 13
G10 P16 X0 Y0 Z0 ; set tool 13 axis offsets
G10 P16 R200 S200 ; set initial tool 13 active and standby temperatures to 0C
M568 P16 S1 ; enable mixing for tool 13
M567 P16 E0.675:0.225:0.034:0.033:0.033 ; set mixing ratios for tool 13
M207 S8 F4000 ;set firmware retraction
; Sets filament diameter for all extruders, which also enables volumetric printing
M572 D0:1:2:3:4 S0.8 ;
M200 D1.75 ; set all extruder filament diameters to 1.75mm
And here a few pictures:
( Some of theme are old ones)
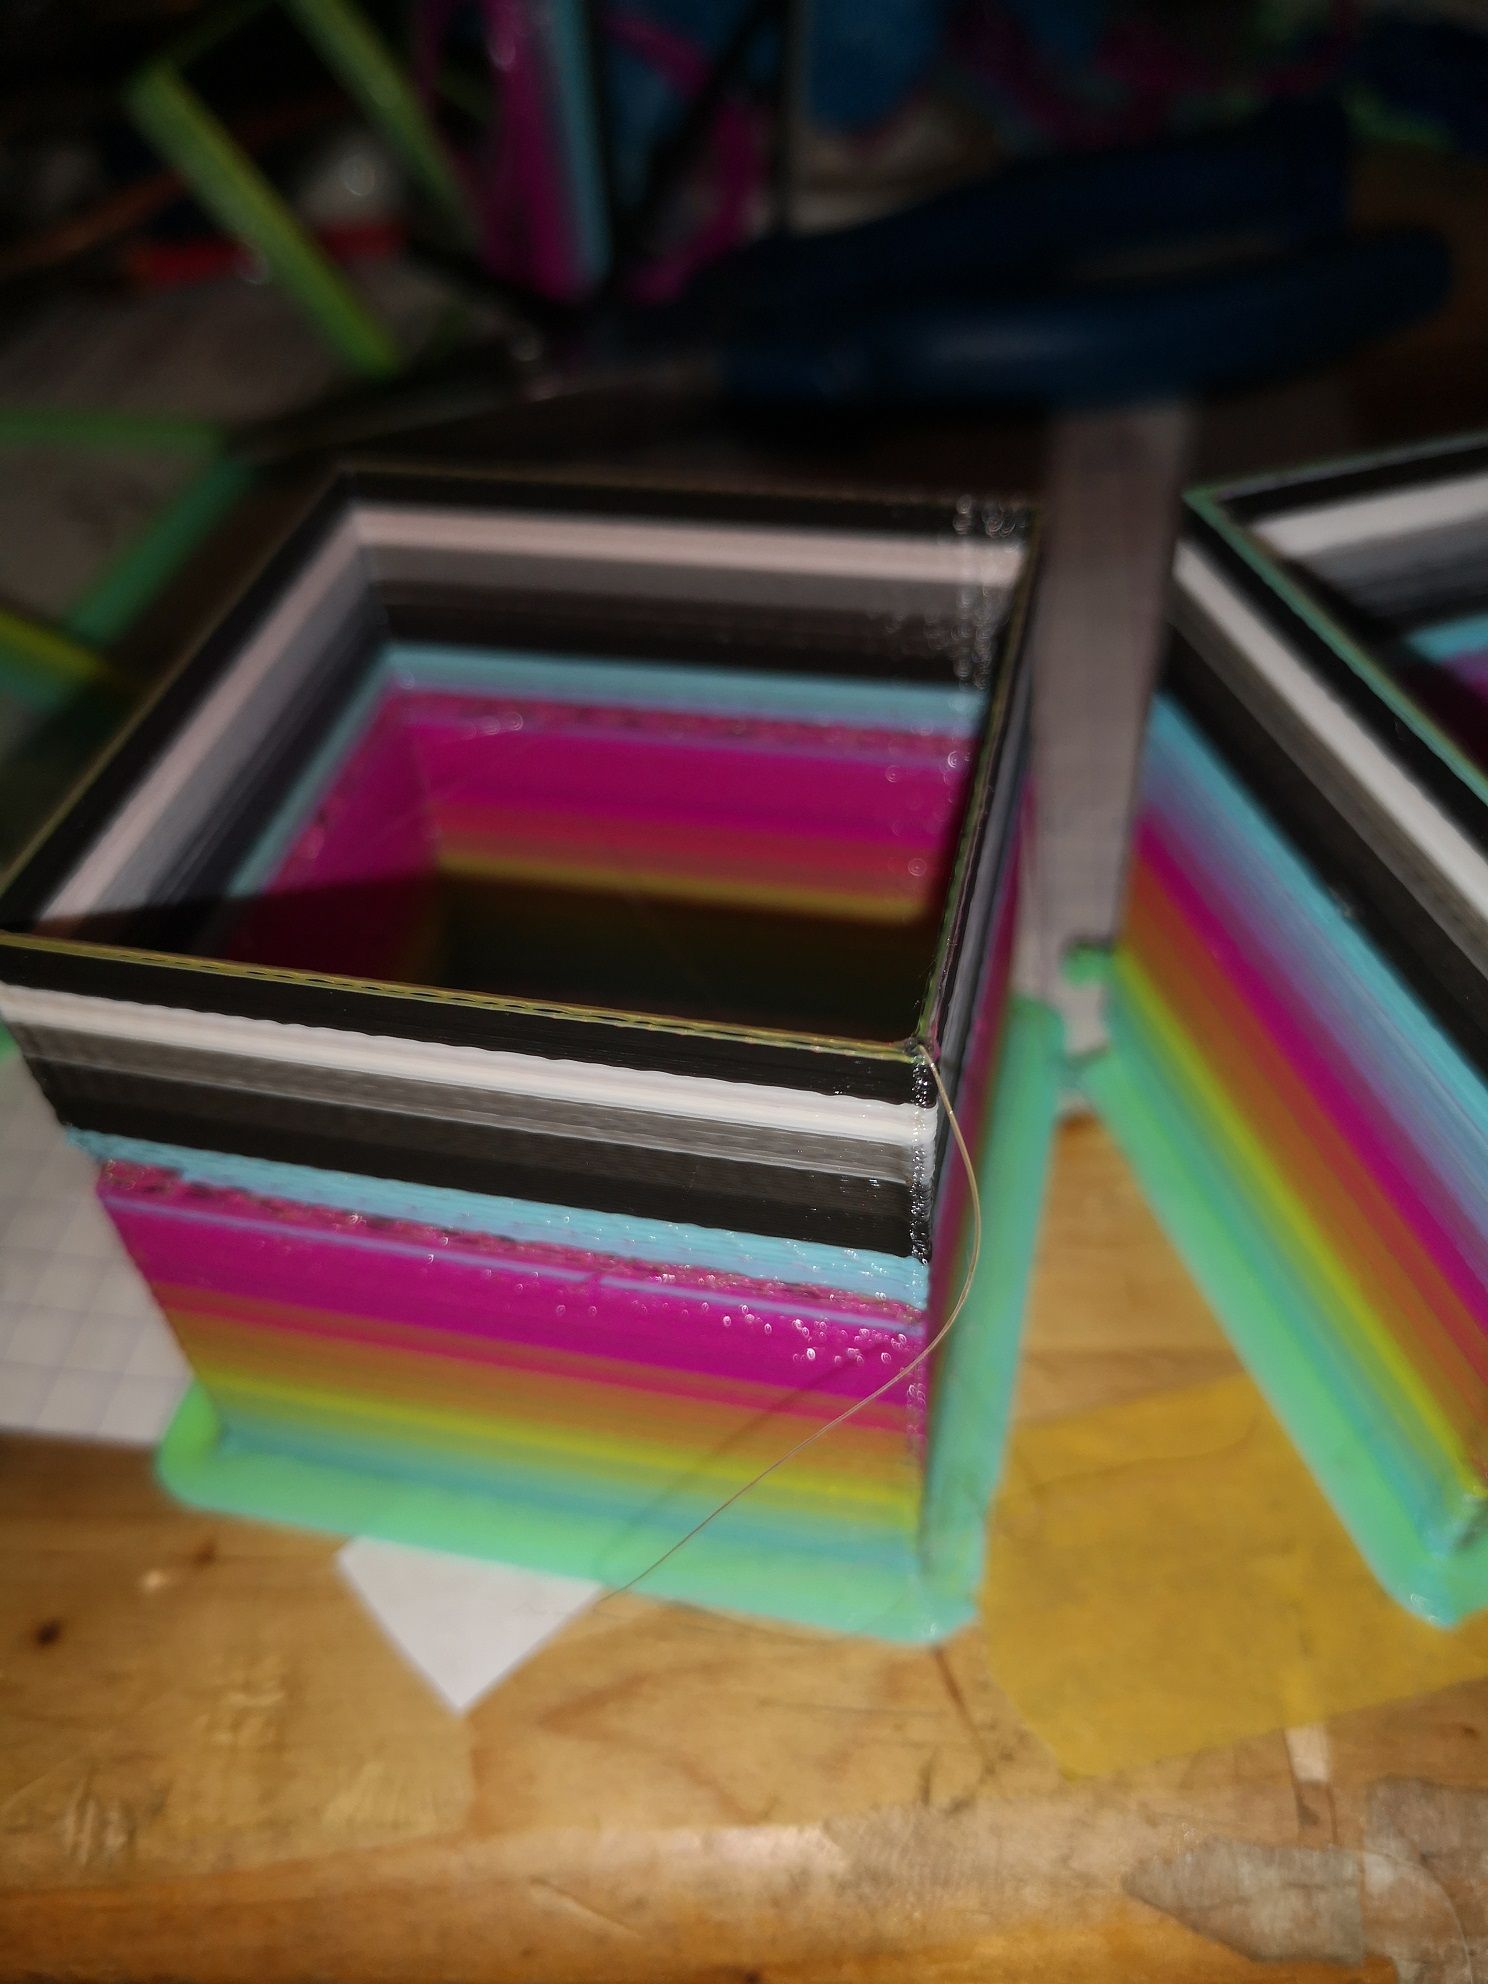
Here are some of my prints i've already done for testing; ther you can also see the blobs and the progress of getting rid of them.
In some Picture you can see that one colour didn't extrudet but i fixed it.
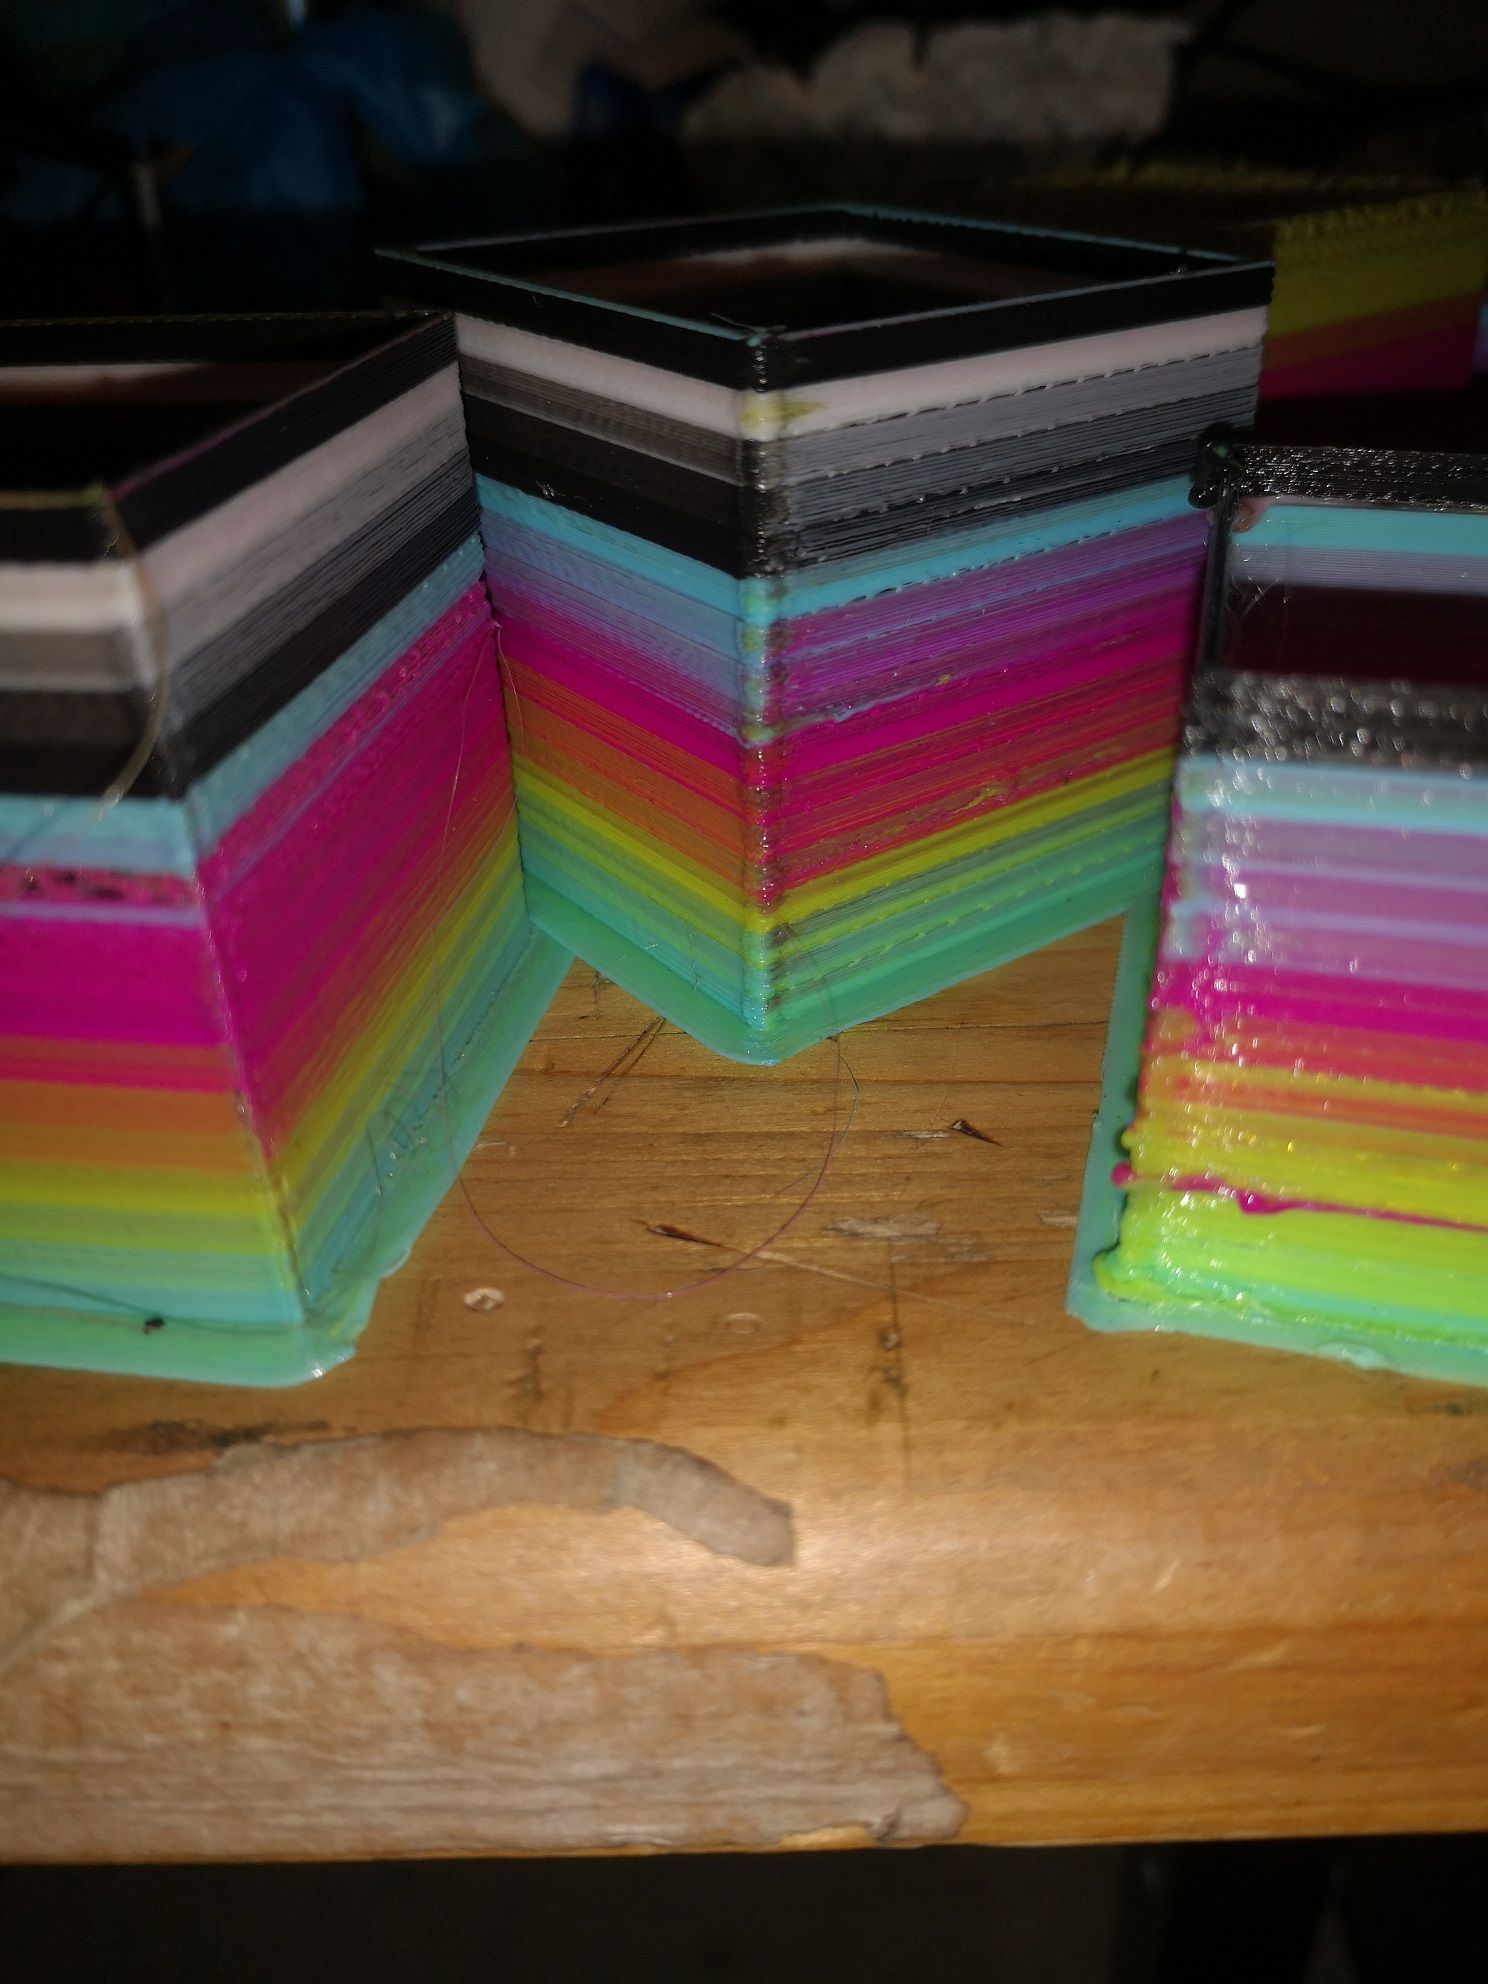
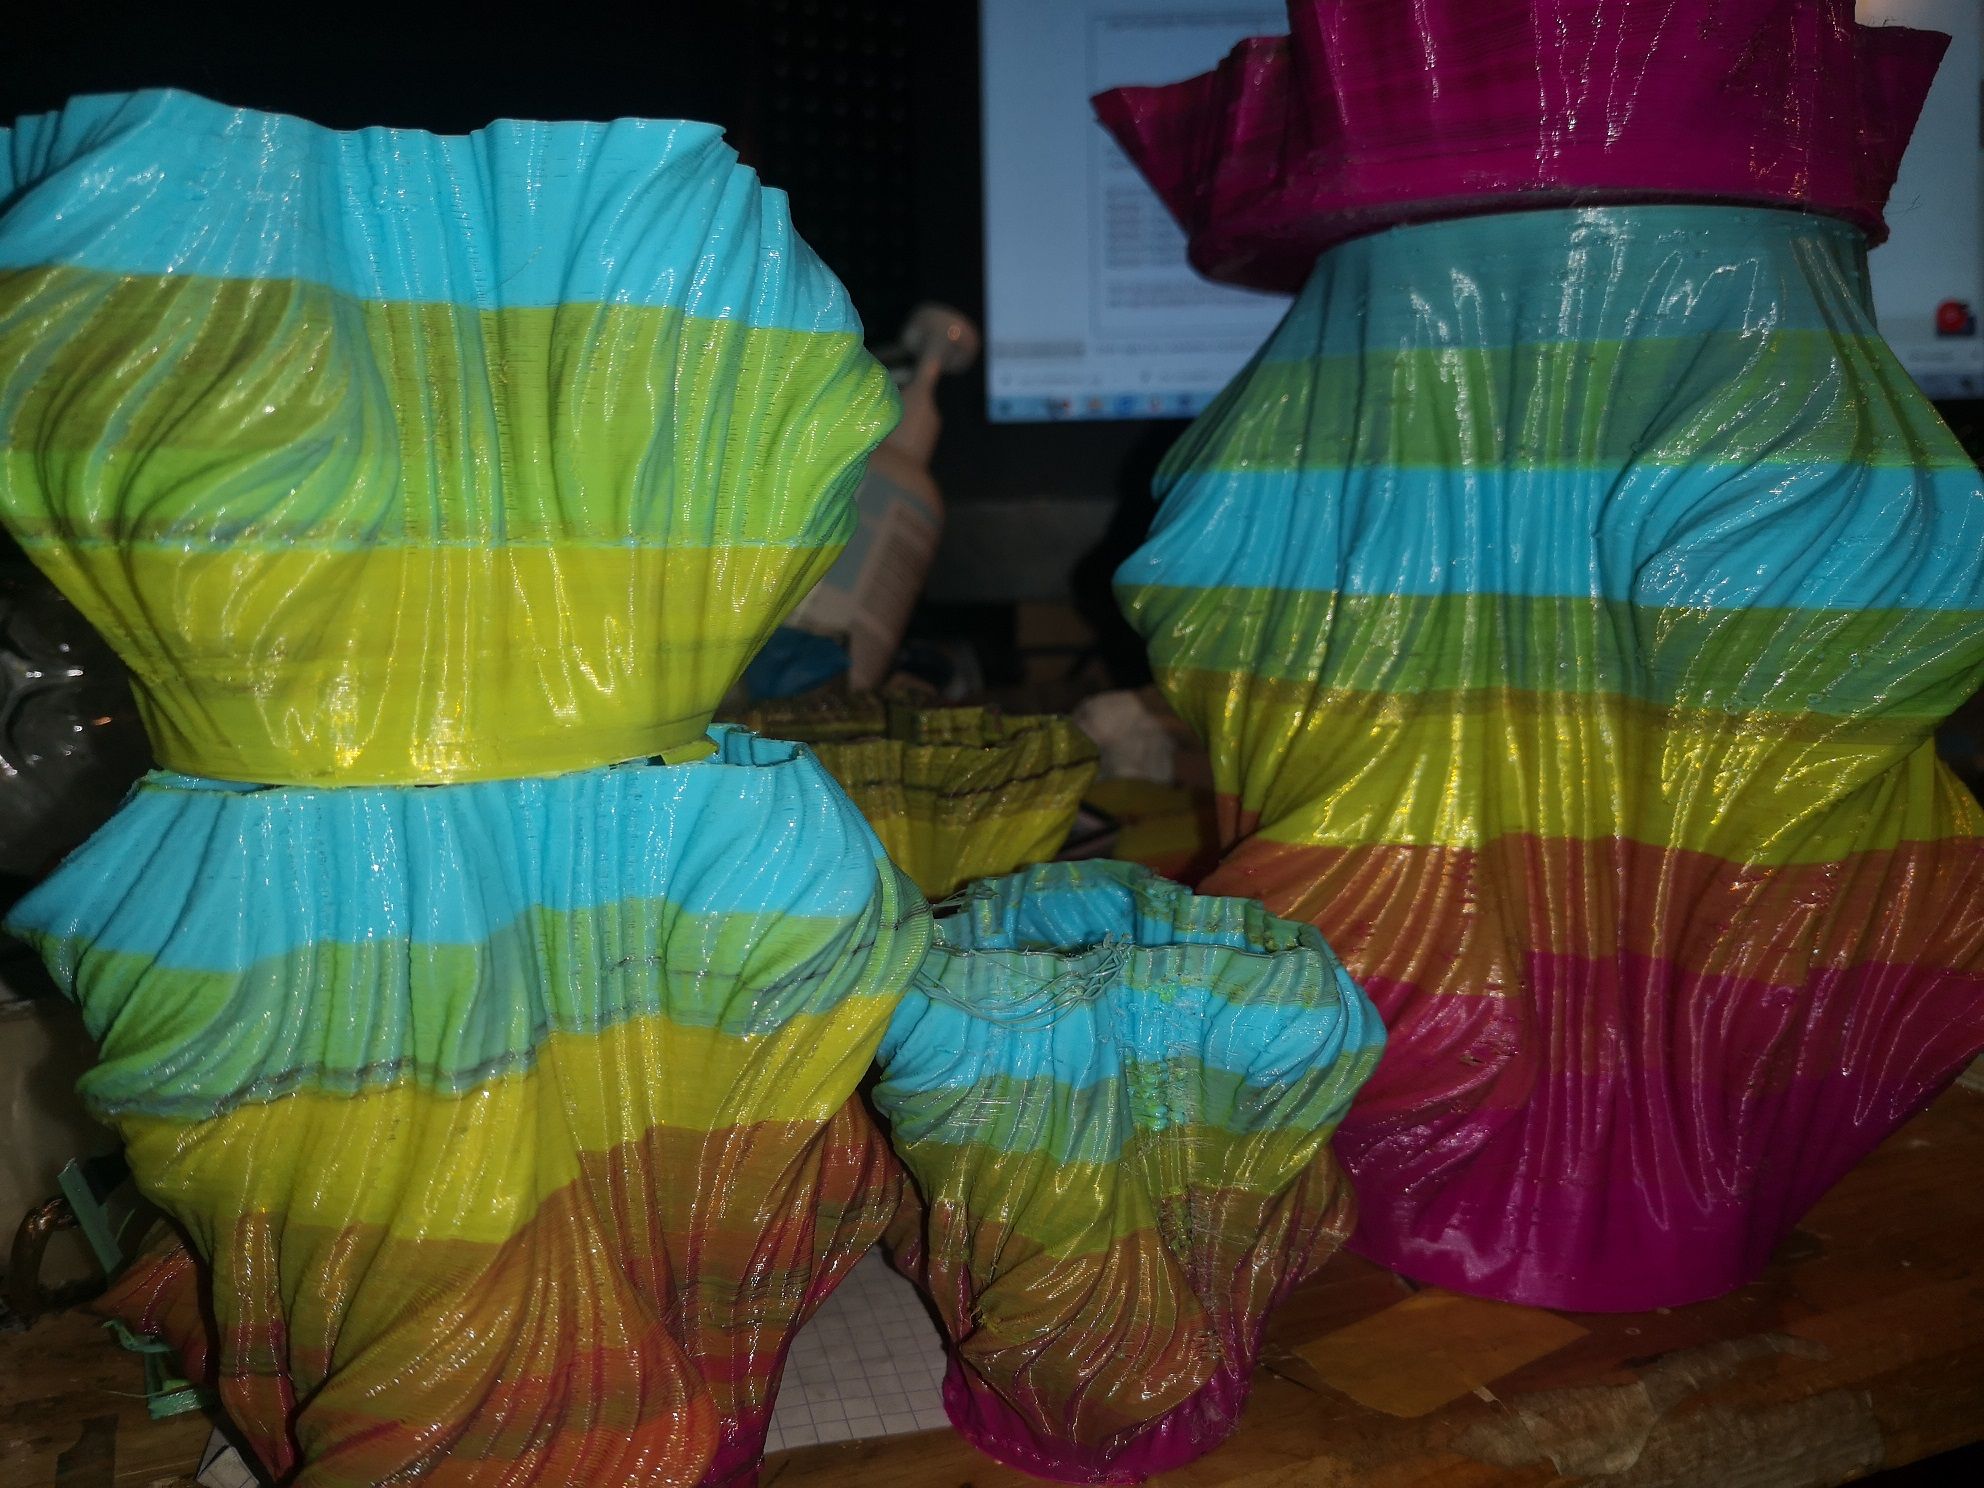
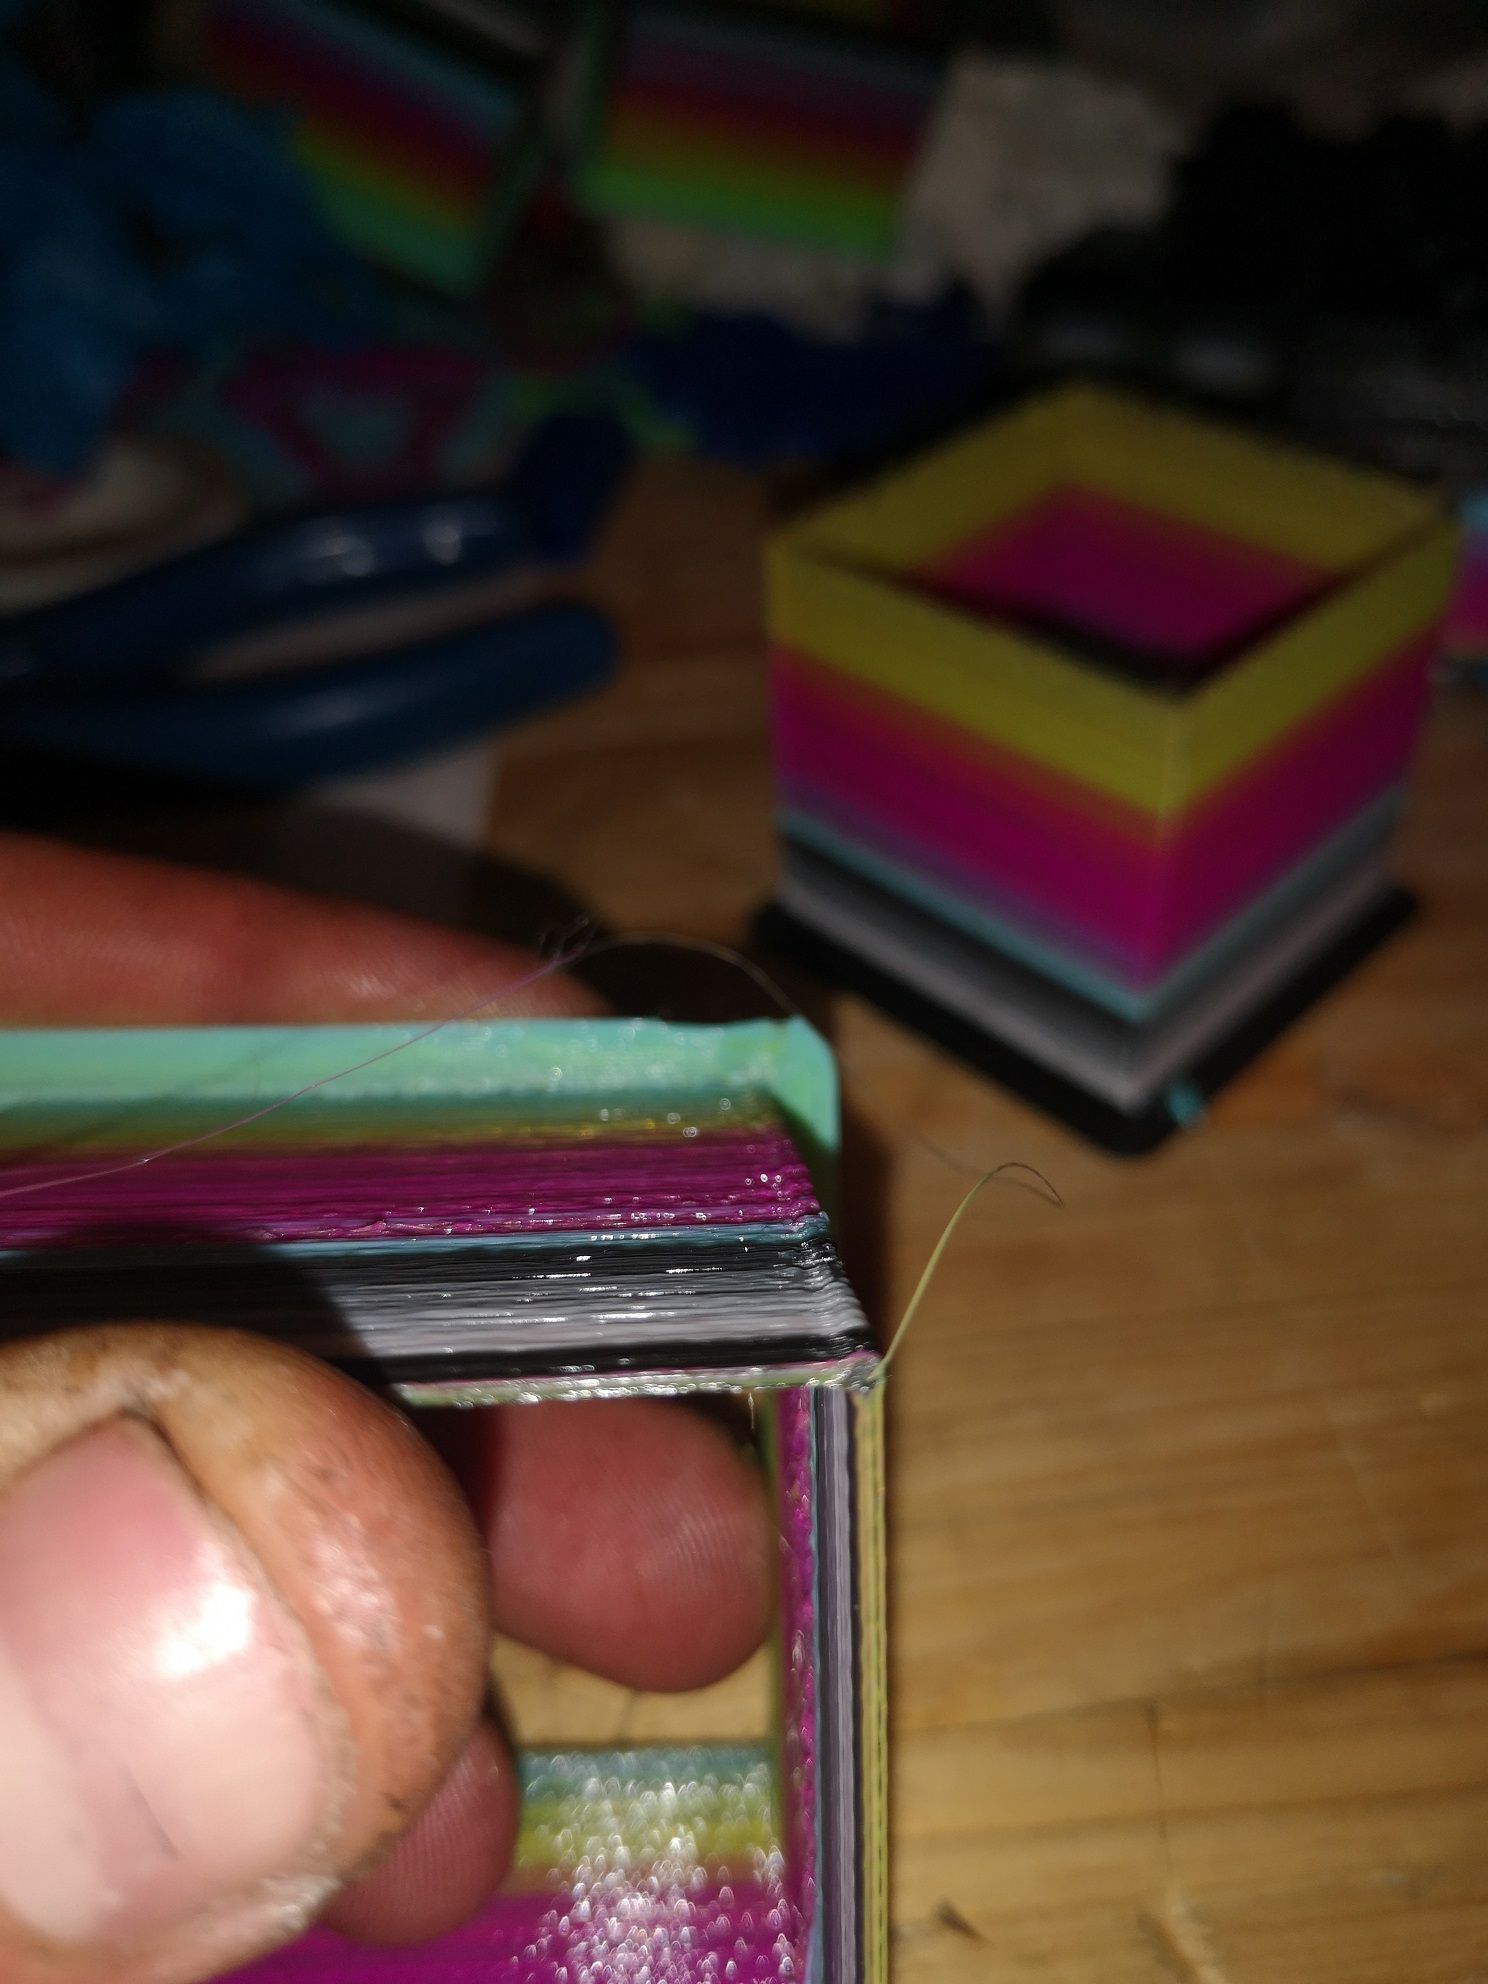
yhis ist the best resultate i get.
maybe someone has an solution for my problem
thanks in advance
FITT