Hi Tony, I have tried another probe with the same result (they are only cheap). If I insert a dress makers pin in beside the zprobe signal pin and short the diode, the voltage at the pin toggles between +0.7 volts and +24 volts with respect to Ground. With the diode in circuit, the signal voltage toggles between approx +1 and +2 volts. It never goes to zero. However, if I unplug the probe at the zprobe socket and jumper the signal pin to Ground (the adjacent pin), I get the same results running command M119 i.e. 'z probe at min stop'.
Late Extra: I just tried it after re-plugging the z probe plug on the Duet board and presto, it's working properly! I've wriggled all the connectors but can't make it fail now. Thanks for walking me through this mysterious problem. I can now proceed to the stepper motors. Cheers, Ralph
Best posts made by RRinOz
-
RE: inductive Z probe problemposted in General Discussion
-
RE: extruder jamsposted in General Discussion
@jay_s_uk Footnote: In case I have misinformed you, I have just located the packet that the 'white' thermistor arrived in. The label describes it as a 'Thermistor 300 C'. I will take your advice and change over to the Pt1000. Thanks again.
Latest posts made by RRinOz
-
RE: extruder jamsposted in General Discussion
@deckingman Sorry, I started a fresh subject since the extruder jam problem is fixed. I have been told to continue the DWC Temperature Chart scaling problem in this thread.
I have fixed the scaling problem. This thread may now be closed.
I am using a thermistor on the toolhead board to control the fume extractor fan at the rear of the printer.
I have been using three micro SD cards while trying G code changes to my homing sub-routines. One of them contained an omission in the config file. As soon as I added T100000 B4138 parameters to the "thermistor" in the M308 command, the Temperature Chart rescaled to 280 degrees.
Thank you all for your interest. -
DWC Temperature Chart y axis is 2000 degreesposted in General Discussion
I recently changed a 'normal' 100k ohm thermistor to a Pt1000 in my Voron 2.4 Mosquito hot-end.
This required that I change the config.g M308 command from
M308 S1 P"e0temp" Y"thermistor" T100000 B4138 to
M308 S1 P"e0temp" Y"pt1000"
As a result, the y axis of the DWC Temperature Chart has re-scaled to an unusable 2000 degrees.
The hot-end heater M143 command is M143 H1 S280
How can I re-scale the chart or have I simply committed a firmware sin? -
RE: extruder jamsposted in General Discussion
@RRinOz Post Script: I changed the hot-end thermistor to a Pt1000, reran the PID tuning and performed the Extruder E steps per mm calibration. All worked beautifully. Knowing all that can go wrong, it's a tribute to the Voron team that it (finally) works so well. The only problem now for me to address is that the y axis of the DWC Temperature Chart has changed to an unusable 2000 degrees. The only change I made was the config.g description of the Heater 0 M308 command. Thanks again for your assistance. RR
-
RE: extruder jamsposted in General Discussion
@jay_s_uk Footnote: In case I have misinformed you, I have just located the packet that the 'white' thermistor arrived in. The label describes it as a 'Thermistor 300 C'. I will take your advice and change over to the Pt1000. Thanks again.
-
RE: extruder jamsposted in General Discussion
@jay_s_uk You are spot on. I self sourced all the parts and not knowing which hot-end thermistor I needed, I ordered two from Slice. One had white braided insulation, one had black. I still have the black thermistor in its packet. It is labeled 'RTD Pt1000' so the one I've used is likely the Pt100. I pulled out my temperature gun and measured much lower temperatures than expected through the front of the print head with fan1 removed. The gun however has a conical detection area and is probably unreliable in this application. It reads the temperature of my soldering iron correctly. I will repeat the thermistor calibration. Thank you for your interest. Regards, RR
-
RE: extruder jamsposted in General Discussion
@jay_s_uk thankyou. Your experience is exactly what I'm after. It's a Slice Mosquito 0.4 hot-end. I've just Googled it. I wasn't aware of the CW1 / CW2 difference
 . It's a Stealthburner CW1.
 -
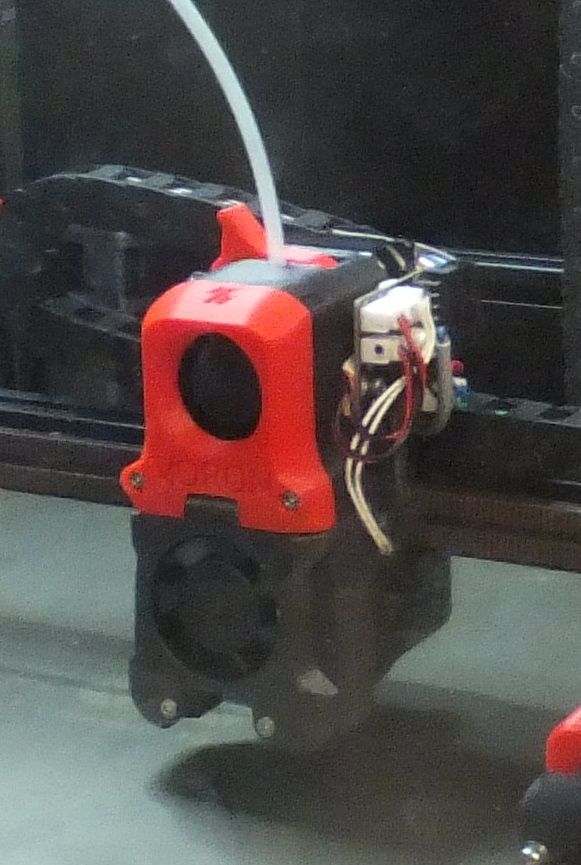
extruder jamsposted in General Discussion
I have been building a Voron 2.4 in my spare time since mid 2022.
I have stumbled over many hurdles along the way, but the biggest has been my lack of experience.
When reading the various websites, I kept a sheet of paper beside me on which I could write the words that I did not know. Slowly I Googled my way through the new words.
The physical assembly was slow but easy. Some of the crimp connectors were at the limit of my failing eyesight. In all it has been a rewarding experience.
Next step was configuring the Firmware.
In February I powered it on for the first time and began battling with config errors. In March I had it homing the axes. In early April she was bed leveling. Along the way I fought with marginal WiFi signal strength from my Router. Now that I have installed a WiFi repeater, I finally have a stable IP address.
Next step was commissioning the printer. Everything seemed to be proceeding well.
Following the website https://docs.duet3d.com, I calibrated the heater temperature parameters.
Then it was time to calibrate the extruder E steps. After I raised the hot-end temperature to 220 degrees, I lifted the feed lever and manually forced filament into the nozzle. No matter how hard I pushed, nothing passed through the orifice. I tried to withdraw the filament but a plastic jam resulted. I dismantled the hot-end and drilled solidified plastic from the passageways using a pin vice. I had to drill out the body of the nozzle with a 0.073 inch numbered drill. I found an old wire brush in the toolbox that had 0.35 mm diameter steel bristles and used one to push through the nozzle. After applying some heat to the nozzle, I was able to remove a fine metal shard from the orifice. Jam number one.
I started again with the drive lever raised and pushing by hand. This time a small coil of plastic thread was dumped onto the bed. I withdrew the filament from the print head but it didn’t come out cleanly. Jam number two.
I repeated the operation but this time instead of withdrawing the filament by hand, I deactivated the heater and waited until the temperature was below 30 degrees. But the filament was stuck again. Jam number three.
I decided to calibrate the extruder cold as described in the Duet documentation. I sent the M564 H0 command, marked off a 110 mm length and sent the G1 E100 F60 command only to receive a message on my DWC tablet, “Event notification: Tool 0 was not driven because its heater temperatures were not high enough or it has a heater fault”. Thwarted again.
So I pressed on. I loaded a marked length of filament into the print head and lowered the feed lever. After issuing the command G1 E100 F60, the filament was extracted from the hot-end. A melted plastic jam was the result. I reversed the direction of the extruder stepper motor in the config file (M569 P3 S0) and dismantled the hot-end yet again. Jam number four.
I reloaded the filament, heated the hot-end to 220 degrees, removed the very hot nozzle, marked off 110 mm and issued the G1 E100 F60 command. A length of distorted filament came through onto the bed confirming that the extruder was at least turning in the right direction. The mark at 110 mm had been consumed. In all about 125 mm of filament was fed through with the 100 E steps.
I replaced the nozzle, reloaded the filament, heated the hot-end to 220 degrees, marked off 110 mm and issued the G1 E100 F60 command again. After feeding a few centimetres of filament the extruder stalled and started clicking. Jam number five. While this was going on, I noticed that the top fan was running. This was when I realized the top fan is the part cooling fan (zero) and the bottom fan is the hot-end fan (fan1). I swapped the fan plugs on the tool-head PCB, removed the jam and started over.
Alas, exactly the same thing happened but at least the hot-end heat break was being cooled. Jam number six.
I’m a patient man but I’ve had enough of pulling the print head apart.
The stepper motors are described in config thus:
M350 X16 Y16 Z16 E16 I1 ; 1/16 micro-steps M92 X80 Y80 Z400 E420 ; steps per mm M906 X800 Y800 Z800 E800 I50 ; motor currents
Question one. What am I doing wrongly?
Question two. Is it normal for the extruder to click due to pressure build-up at the nozzle or should it not click at all?
Question three. When loading the filament, should I insert the plastic all the way down (approx. 120 mm)?
Question four. Should I insert the filament before heating the hot-end or after it is up to temperature? -
RE: inductive Z probe problemposted in General Discussion
Hi Tony, I have tried another probe with the same result (they are only cheap). If I insert a dress makers pin in beside the zprobe signal pin and short the diode, the voltage at the pin toggles between +0.7 volts and +24 volts with respect to Ground. With the diode in circuit, the signal voltage toggles between approx +1 and +2 volts. It never goes to zero. However, if I unplug the probe at the zprobe socket and jumper the signal pin to Ground (the adjacent pin), I get the same results running command M119 i.e. 'z probe at min stop'.
Late Extra: I just tried it after re-plugging the z probe plug on the Duet board and presto, it's working properly! I've wriggled all the connectors but can't make it fail now. Thanks for walking me through this mysterious problem. I can now proceed to the stepper motors. Cheers, Ralph -
RE: inductive Z probe problemposted in General Discussion
@T3P3Tony Tony, thanks for the prompt reply. The probe has a 3 wire cable encapsulated into the body - so no connection at that end. I connected the 3 wires at the Duet2 WiFi end thus: Brown wire to + 24 v at the power terminal of the board; The Blue wire to Ground at the dedicated Probe socket and the Black wire to the signal pin of the same socket via a reverse biased diode. See diagram. Without the diode, the LED incorporated in the probe body would only dim when triggered. This mod was suggested for early Duet2 boards. I attach a copy of the spec sheet for the PL-05 probe family.
 Cheemi Inductive Proximity Sensor Series CJD-PL-05.pdf The PL-05 is the same as the PL-08 but with higher definition and less sensitivity (5mm compared to 8mm).