BLTouch - Struggling with the final steps to setup
-
HI.
So I have just finished the "masking tape" methos for establishing my X&Y offset. It went as follows;
Nozzle position on masking tape mark;
X: 100
Y: 50
Z: 0.25Probe position after jogging to the same masking tape mark;
X: 126.80
Y: 97.40
Z: 0.25X & Y Offset Difference;
X: 26.80
Y: 47.40
Z: 0.00So I imagine that my new entry in config.g for the Z-Probe offset will be as follows;
G31 P500 X0 Y0 Z3.14 : Current Offset.
G31 P500 X26.80 Y47.40 Z3.14 : New Offset.----------------------------------------------
No fate but what we make ....
-
@phaedrux Thanks, that description cleared alot up for me. I had been working on the idea that everything was related to the nozzle position on the bed and not the nozzle's relation to the BLTouch.
-
@b0m0a0k said in BLTouch - Struggling with the final steps to setup:
G31 P500 X26.80 Y47.40 Z3.14 : New Offset.
Correct.
Duet WiFi hardware designer and firmware engineer
Please do not ask me for Duet support via PM or email, use the forum
http://www.escher3d.com, https://miscsolutions.wordpress.com -
@dc42 Thanks.
-
@oliof said in BLTouch - Struggling with the final steps to setup:
- You do use the endstop in homeall.g, but the probe in homez.g
I assume that this needs correcting. Is this then a case of removing the endstop references (2 of) in homeall.g and replacing those references with my new probe G31 line from config.g?
Should there still be the requirement for two G31 references to replace the current two G1 entries?
-
-
@b0m0a0k said in BLTouch - Struggling with the final steps to setup:
; homeall.g
; called to home all axes
;
; generated by RepRapFirmware Configuration Tool v2 on Wed May 29 2019 19:19:18 GMT+0100 (British Summer Time)
G91 ; relative positioning
G1 Z5 F6000 S2 ; lift Z relative to current position
G1 S1 X-203 Y-205 F3000 ; move quickly to X and Y axis endstops and stop there (first pass)
G1 X5 Y5 F6000 ; go back a few mm
G1 S1 X-203 Y-205 F360 ; move slowly to X and Y axis endstops once more (second pass)
G1 S1 Z-185 F1800 ; move Z down stopping at the endstop
G90 ; absolute positioning
G92 Z0 ; set Z to axis minimum (you may want to adjust this)
; Uncomment the following lines to lift Z after probing
;G91 ; relative positioning
;G1 S1 Z5 F100 ; lift Z relative to current position
;G90 ; absolute positioning
; homez.g
; called to home the Z axis
;
; Authored by B0M0A0K following BLTouch installation. June 18 2019
G30 ; Do a single probe to home our Z axis
G90 ; Set positioning to Absolute Mode
G1 Z10 F6000 ; Rapidly move the Z axis to Z=10.Your homeall and homez would change to this:
; homeall.g
G91 ; relative positioning
G1 Z5 F6000 S2 ; lift Z relative to current position
G1 S1 X-203 Y-205 F3000 ; move quickly to X and Y axis endstops and stop there (first pass)
G1 X5 Y5 F6000 ; go back a few mm
G1 S1 X-203 Y-205 F360 ; move slowly to X and Y axis endstops once more (second pass)
;===========
G90 ; absolute positioning
G1 X150 Y150 ; move probe to bed center
G30 ; probe z height
G1 Z5 ; lift print head for clearance
G1 X0 Y0 ; return print head to home position
You could do the same for HomeZ. Basically all you'd need to do is move the probe to the same point in the center of the bed as you use in homeall for consistency. I chose X150 and Y150 in the example, but you should choose the coordinates so that the probe is positioned in the center. Then move the print head back to wherever you want after probing. Or leave it in place if you wish. Depends how you want to use homez versus homeall.
-
@phaedrux Thanks very much - I appreciate your efforts in assisting me and will take a look at this when I get back in front of my printer.
-
Well it's been a while, but I have finally managed to get this BLTouch running with my printer. I have to say that all those folks that asked if there was any real need for the hassle of installing a BLTouch may have had a point.
I started by adding the slicer code to my test print and cleaned and reapplied a spray of EZ3D to the glass bed. Set the temperature to 60 for the bed and 190 for the extruder. The BLTouch did it's thing and probed then referred to the heightmap.csv (generated by Mesh Bed Compensation) I told it to load.
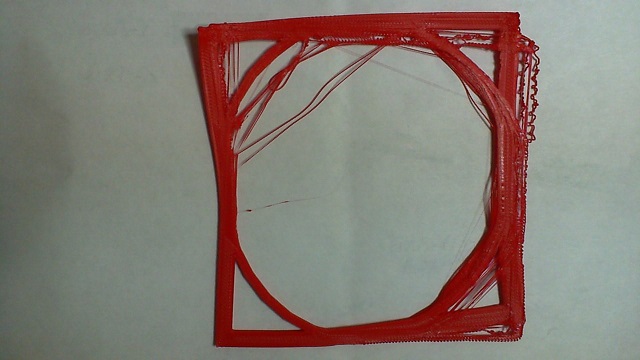
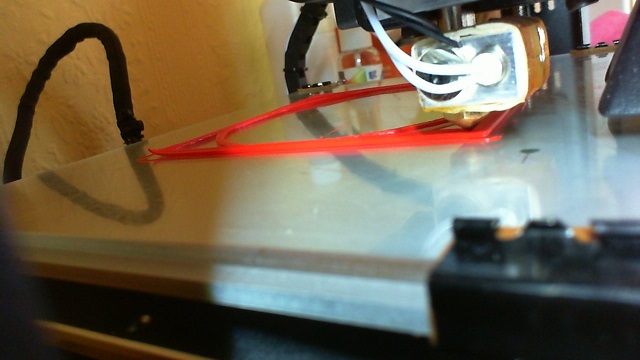
The print started and the first layer was 'blobby' as it extruded and then didn't extrude well at all through the first right hand corners. Eventually it seems to have settled down.
I have to laugh, after all the hassle it's worse than when I manually leveled the bed.
-
I ended up cancelling the print, but I can see a marked difference in my prints already
")