BLTouch - Struggling with the final steps to setup
-
I am struggling with the final stage of my BLTouch installation.
I have used the Betrue3D "BLtouch on Duet WiFi configuration and usage" tutorial for most of the setup and have configured and calibrated the BLTouch up to the point where I am looking at adding the probe GCode to my slicer. I decided that I needed to get something printed quickly before proceeding with that so leveled then bed and setup the print "Square & Circle 1mm & 2mm by BaudlerArtDesign".
It was my belief that the probe would remain inactive if the start GCode was not placed at the start of the print file code, but when I kicked off the print the extruder moved to it's normal Home All position and then proceeded to crash into the glass bed (because the probe was positioned off the side of the bed and couldn't trigger.
So I am left trying to understand how all the component code parts come together to control the BLTouch. There is a probe section in config.g that I assumed would remain inactive if it did not see the instruction at the start of the print job code. I guess the BLTouch GCode at the start of the print job tells the printer how to read the heightmap.csv file and where to place the extruder to allow for the BLTouch offset. Is that right?
So when I tried to print the test job without adding the start code to the print job and the extruder hit the glass bed that was because the Home All command was still trying to use the Probe section of the config.g file to manage the BLTouch?
As always, I'm a little confused. Sorry Folks.
-
show us your homeall.g homez.g and config.g please
<>RatRig V-Minion Fly Super5Pro RRF<> V-Core 3.1 IDEX k*****r <> RatRig V-Minion SKR 2 Marlin<>
-
Always test and calibrate a newly-installed Z probe before you start to rely on it. https://duet3d.dozuki.com/Wiki/Test_and_calibrate_the_Z_probe
-
@oliof Please see below;
config.g
; Configuration file for Duet WiFi (firmware version 1.17 to 1.19)
; executed by the firmware on start-up
;
; generated by RepRapFirmware Configuration Tool v2 on Wed May 29 2019 19:19:18 GMT+0100 (British Summer Time); General preferences
G90 ; Send absolute coordinates...
M83 ; ...but relative extruder moves; Network
M550 P"REMOVED" ; Set machine name
; M551 P"REMOVED" ; Set password
M552 S1 ; Enable network
; M587 S"SSID" P"PASSWORD GOES HERE" ; Configure access point. You can delete this line once connected
M586 P0 S1 ; Enable HTTP
M586 P1 S0 ; Disable FTP
M586 P2 S0 ; Disable Telnet; Drives
M569 P0 S1 ; Physical drive 0 (X) goes forwards
M569 P1 S0 ; Physical drive 1 (Y) goes forwards
M569 P2 S1 ; Physical drive 2 (Z) goes backwards
M569 P3 S0 ; Physical drive 3 (E) goes forwards
M350 X16 Y16 Z16 E16 I1 ; Configure microstepping without interpolation
M92 X80.00 Y80.00 Z400.00 E96.50 ; Set steps per mm
M566 X900.00 Y900.00 Z12.00 E1200.00 ; Set maximum instantaneous speed changes (mm/min)
M203 X6000.00 Y6000.00 Z600.00 E6000.00 ; Set maximum speeds (mm/min)
M201 X1000.00 Y1000.00 Z100.00 E5000.00 ; Set accelerations (mm/s^2)
M906 X800.00 Y800.00 Z800.00 E800.00 I30 ; Set motor currents (mA) and motor idle factor in per cent
M84 S30 ; Set idle timeout; Axis Limits
M208 X200 Y200 Z180 S0 ; Set axis maximum
M208 X0 Y0 Z0 S1 ; Set axis minimum (should stop at the edge of the bed ready to print position)Currently this just lets paper under the extruder.; Endstops
M574 X1 Y1 Z1 S0 ; Set active low and disabled endstops; Z-Probe
M307 H3 A-1 C-1 D-1 ; BLTouch control instruction.
M558 P9 H5 F100 T2000 ; BLTouch control instruction.
G31 P500 X0 Y0 Z3.14 ; Set Z probe trigger value, offset and trigger height. Parameters from RepRap Configurator.
M557 X28:190 Y49:185 S40 ; PROBE on the edges setting; Heaters
; Bed [H0 - Heater 0]
M143 H0 S70 ; Set temperature limit for heater 0 to 70C
M305 P0 T100000 B3988 R4700 ; Set thermistor + ADC parameters for heater 0
M307 H0 A114.0 C410.3 D2.7 S1.0 V12.3 B0 ; PID Auto-tune Values for Bed [H0]; Extruder [H1 - Heater 1]
M143 H1 S245 ; Set temperature limit for heater 1 to 245C
M305 P1 T100000 B3988 R4700 ; Set thermistor + ADC parameters for heater 1
M307 H1 A500.0 C184.9 D8.9 S1.00 V12.4 B0 ; PID auto-tune Values for Extruder [H1] : A = gain : C = Time Constant : D = Dead Time :
; V = Calibration Voltage : S = PWM Limiter (ex. S0.8 is set PWM to 80%); Fans
M106 P0 S1 I0 F500 H-1 ; Set fan 0 value, PWM signal inversion and frequency. Thermostatic control is turned on
M106 P1 S1 I0 F500 H1 T45 ; Set fan 1 value, PWM signal inversion and frequency. Thermostatic control is turned on
M106 P2 S1 I0 F500 H1 T45 ; Set fan 2 value, PWM signal inversion and frequency. Thermostatic control is turned on; Tools
M563 P0 D0 H1 ; Define tool 0 uses extruder drive 0 and heater 1
G10 P0 X0 Y0 Z0 ; set tool 0 temperatures and offsets
G10 P0 R0 S0 ; Set initial tool 0 active and standby temperatures to 0C; Custom settings are not configured
; Miscellaneous
T0 ; Select first tool; homeall.g
; called to home all axes
;
; generated by RepRapFirmware Configuration Tool v2 on Wed May 29 2019 19:19:18 GMT+0100 (British Summer Time)
G91 ; relative positioning
G1 Z5 F6000 S2 ; lift Z relative to current position
G1 S1 X-203 Y-205 F3000 ; move quickly to X and Y axis endstops and stop there (first pass)
G1 X5 Y5 F6000 ; go back a few mm
G1 S1 X-203 Y-205 F360 ; move slowly to X and Y axis endstops once more (second pass)
G1 S1 Z-185 F1800 ; move Z down stopping at the endstop
G90 ; absolute positioning
G92 Z0 ; set Z to axis minimum (you may want to adjust this); Uncomment the following lines to lift Z after probing
;G91 ; relative positioning
;G1 S1 Z5 F100 ; lift Z relative to current position
;G90 ; absolute positioning; homez.g
; called to home the Z axis
;
; Authored by B0M0A0K following BLTouch installation. June 18 2019
G30 ; Do a single probe to home our Z axis
G90 ; Set positioning to Absolute Mode
G1 Z10 F6000 ; Rapidly move the Z axis to Z=10.----------------------------------------------
No fate but what we make ....
-
Some observations, but it probably is better if you follow the z probe instructions @dc42 linked to and start over, as your current setup looks like it was borne from trial-and-error, and some errors remain ... (I recognize this, because it's usually where I end up asking questions here on the forum as well (-: )
- Your G31 line in config.g is most certainly incomplete as you have no offsets for X and Y, and the BLTouch Probe is not probing with the nozzle.
- You do have a z endstop and a probe defined. That is no problem in and of itself.
- You do use the endstop in homeall.g, but the probe in homez.g
- In homeall.g there is no need to go to relative mode to move Z to 5 and then back to absolute mode, since you set Z to 0 just above that.
- In homez.g, you call G90 without having called G91 before. That is most likely unneccessary. For consistency, you may want to move Z to 5 here as in homeall.g as well
<>RatRig V-Minion Fly Super5Pro RRF<> V-Core 3.1 IDEX k*****r <> RatRig V-Minion SKR 2 Marlin<>
-
@oliof Firstly, I am very grateful for your insight here so please don't take this as a criticism of you. It's not meant to be that.
I have followed the article by @dc42 previously, it will have helped me to get this far.
I have also followed the article by BeTrue3D.
I have also looked at other references as they have been pointed out to me.
Trial and error. That's all I have to go on here, I'm completely new to the Duet2d Wifi, RepRap, the BLTouch and the whole business of how these files should be structured. Empirical evidence makes up a good part of how I am learning. I have to use other people's examples in trying to figure out the 'right' way and apply that to me setup.
There are many, many learned people on this forum, all of whom have vastly more experience than me. Many of them been kind enough to offer advice at various stages of my Wanhao Duplicator i3 V2.1 upgrade, I appreciate that, but each will offer advice in a slightly different way and based on their own experience. That leads to ambiguity when you are as new to this as I am.
The other issue is that hardware is upgraded all the time and this tends to lead to confusion. It also tends to lead to slightly outdated instructions and that leads me to spending hours trying to figure out what the next best course of action should be. Here's an example. The BLTouch. As it has matured from version 1 to the current "smart" version 3.1 the requirement for the distance between the extruder and the BLTouch (using a height gauge) has changed. It has ranged between 8.5 to 9.5mm and on to what appears to be the current 6.6mm. But none of this is confirmed and a response from BLTouch is like searching fro a golden egg. So to progress I am left to guess at the right answer, something I can not abide doing.
These days I tend to sit with the problem and suggested solutions on one side of the screen and the GCode reference on the other (so I can try and begin to learn whats going on and why it might have been sequenced that way).
So, based on my rambling narrative I will answer you suggestions as follows;
"Your G31 line in config.g is most certainly incomplete as you have no offsets for X and Y, and the BLTouch Probe is not probing with the nozzle."
G31 P500 X0 Y0 Z3.14
So I should be using the probing coordinates for X and Y previously worked out when creating the Mesh grid compensation pattern. This ran the Mesh Grid compensation without any issues and the probe was positioned correctly on the bed.
"You do use the endstop in homeall.g, but the probe in homez.g"
OK, so I need to look at making sure that both files use the probe. I'll look at that.
"In homeall.g there is no need to go to relative mode to move Z to 5 and then back to absolute mode, since you set Z to 0 just above that."
I can't really comment on why homeall.g is structured that way, that's how the file was generated. All I have done is try to work on the offset instructions. I would need to see an example of an ideal homeall.g file in order to compare and spot where mine might need reworking.
"In homez.g, you call G90 without having called G91 before. That is most likely unneccessary. For consistency, you may want to move Z to 5 here as in homeall.g as well"
Thanks, I'll take a look at this as well.
In summary. Again, I'm sorry if this is something of a rant, I am painfully aware of how tedious it must be for more experienced folks to see the same questions asked again and again. For me personally, I now dread having to come back here to ask for more help.
Again, please don't think that this is a critique of you @oliof , I really am most grateful for your comments and observation and that you took the time to respond in the first place. This is probably a refection of my own frustration at taking so long to get this project done. I really just want to get back to using my printer and enjoying the upgrades.
----------------------------------------------
No fate but what we make ....
-
No offense taken at all -- I have had my own frustrations with 3d printers in general and RRF at times over the last year (I'm really a newbie). You can see that only yesterday I simply omitted part of a configuration line and @dc42 was helpful in pointing where I needed to fix my config.g and added a hint for me how to check for errors in the future. Meaning: I am as grateful as you for the people in this forum to help even with my simple mistakes -- the main author of RRF to boot!
The best recommendation I can give is to take a breather, look at the documentation again with what you learned during the last round, and taking the next step.
And thinking about it, I forgot to mention the idea I wanted to share: Check if you can remove any calls to
G28from the start code generated by your slicer. I did that while working on the Touch Mi probe support, and so far did not add it back in (mostly because I haven't found a good magnet mount that works for me so far), and the biggest downside is that I have to remember to home myself before each print (the de-energizing of the motors at the end of a print means that the printer is de-homed. I could remove that as well, but I think I need to find a proper magnet mount ...).The morale of all this is: Don't feel discouraged by people pointing at official documentation or spotting "obvious" problems -- we've all been there, and most likely will be there again sooner rather than later. Keep asking questions, so we can find the answers together!
-
@b0m0a0k said in BLTouch - Struggling with the final steps to setup:
"Your G31 line in config.g is most certainly incomplete as you have no offsets for X and Y, and the BLTouch Probe is not probing with the nozzle."
G31 P500 X0 Y0 Z3.14
So I should be using the probing coordinates for X and Y previously worked out when creating the Mesh grid compensation pattern. This ran the Mesh Grid compensation without any issues and the probe was positioned correctly on the bed.Not quite. G31 X and Y describe where the probe is in relation to the nozzle. so if the nozzle is 0,0, the probe is a certain distance away in X and Y.
For example, if it was to the left of the nozzle by 30mm, and behind it by 20mm would be G31 X-30 Y+20.
See here for an easy way to measure the X Y offset: https://duet3d.dozuki.com/Wiki/Test_and_calibrate_the_Z_probe#Section_Measuring_Probe_X_Y_Offset
You're well on your way. Try not to get too frustrated. Part of the challenge of RRF is that everything is open and available to be configured and edited and there are sometimes many ways to do something. Coming from a more locked down paradigm can lead to a state of being overwhelmed by choice.
-
HI.
So I have just finished the "masking tape" methos for establishing my X&Y offset. It went as follows;
Nozzle position on masking tape mark;
X: 100
Y: 50
Z: 0.25Probe position after jogging to the same masking tape mark;
X: 126.80
Y: 97.40
Z: 0.25X & Y Offset Difference;
X: 26.80
Y: 47.40
Z: 0.00So I imagine that my new entry in config.g for the Z-Probe offset will be as follows;
G31 P500 X0 Y0 Z3.14 : Current Offset.
G31 P500 X26.80 Y47.40 Z3.14 : New Offset.----------------------------------------------
No fate but what we make ....
-
@phaedrux Thanks, that description cleared alot up for me. I had been working on the idea that everything was related to the nozzle position on the bed and not the nozzle's relation to the BLTouch.
-
@b0m0a0k said in BLTouch - Struggling with the final steps to setup:
G31 P500 X26.80 Y47.40 Z3.14 : New Offset.
Correct.
Duet WiFi hardware designer and firmware engineer
Please do not ask me for Duet support via PM or email, use the forum
http://www.escher3d.com, https://miscsolutions.wordpress.com -
@dc42 Thanks.
-
@oliof said in BLTouch - Struggling with the final steps to setup:
- You do use the endstop in homeall.g, but the probe in homez.g
I assume that this needs correcting. Is this then a case of removing the endstop references (2 of) in homeall.g and replacing those references with my new probe G31 line from config.g?
Should there still be the requirement for two G31 references to replace the current two G1 entries?
-
-
@b0m0a0k said in BLTouch - Struggling with the final steps to setup:
; homeall.g
; called to home all axes
;
; generated by RepRapFirmware Configuration Tool v2 on Wed May 29 2019 19:19:18 GMT+0100 (British Summer Time)
G91 ; relative positioning
G1 Z5 F6000 S2 ; lift Z relative to current position
G1 S1 X-203 Y-205 F3000 ; move quickly to X and Y axis endstops and stop there (first pass)
G1 X5 Y5 F6000 ; go back a few mm
G1 S1 X-203 Y-205 F360 ; move slowly to X and Y axis endstops once more (second pass)
G1 S1 Z-185 F1800 ; move Z down stopping at the endstop
G90 ; absolute positioning
G92 Z0 ; set Z to axis minimum (you may want to adjust this)
; Uncomment the following lines to lift Z after probing
;G91 ; relative positioning
;G1 S1 Z5 F100 ; lift Z relative to current position
;G90 ; absolute positioning
; homez.g
; called to home the Z axis
;
; Authored by B0M0A0K following BLTouch installation. June 18 2019
G30 ; Do a single probe to home our Z axis
G90 ; Set positioning to Absolute Mode
G1 Z10 F6000 ; Rapidly move the Z axis to Z=10.Your homeall and homez would change to this:
; homeall.g
G91 ; relative positioning
G1 Z5 F6000 S2 ; lift Z relative to current position
G1 S1 X-203 Y-205 F3000 ; move quickly to X and Y axis endstops and stop there (first pass)
G1 X5 Y5 F6000 ; go back a few mm
G1 S1 X-203 Y-205 F360 ; move slowly to X and Y axis endstops once more (second pass)
;===========
G90 ; absolute positioning
G1 X150 Y150 ; move probe to bed center
G30 ; probe z height
G1 Z5 ; lift print head for clearance
G1 X0 Y0 ; return print head to home position
You could do the same for HomeZ. Basically all you'd need to do is move the probe to the same point in the center of the bed as you use in homeall for consistency. I chose X150 and Y150 in the example, but you should choose the coordinates so that the probe is positioned in the center. Then move the print head back to wherever you want after probing. Or leave it in place if you wish. Depends how you want to use homez versus homeall.
-
@phaedrux Thanks very much - I appreciate your efforts in assisting me and will take a look at this when I get back in front of my printer.
-
Well it's been a while, but I have finally managed to get this BLTouch running with my printer. I have to say that all those folks that asked if there was any real need for the hassle of installing a BLTouch may have had a point.
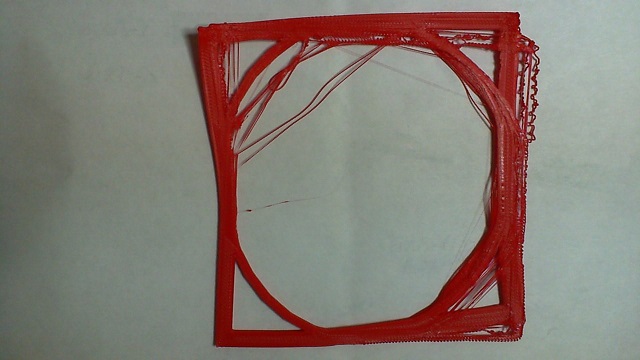
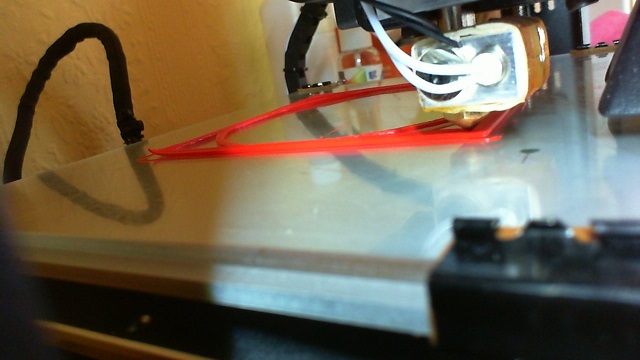
I started by adding the slicer code to my test print and cleaned and reapplied a spray of EZ3D to the glass bed. Set the temperature to 60 for the bed and 190 for the extruder. The BLTouch did it's thing and probed then referred to the heightmap.csv (generated by Mesh Bed Compensation) I told it to load.
The print started and the first layer was 'blobby' as it extruded and then didn't extrude well at all through the first right hand corners. Eventually it seems to have settled down.
I have to laugh, after all the hassle it's worse than when I manually leveled the bed.
-
I ended up cancelling the print, but I can see a marked difference in my prints already
")