G32 Error: Auto calibration failed
-
G32 Error: Auto calibration failed because probe point P0 was unreachable using the current delta parameters. Try a smaller probing radius.
I'm running a small delta, 130mm height, 55mm bed radius.
printed some early stage calibration prints last night. Had some decent results other than having to use about 0.6-7mm baby stepping to the my 1st layer down.
decided to go back to the "calibrating a delta printer" guide to do it properly. got my Z height set and did a probe of the 16 points to identify any variance from X0Y0, entered these into my bed.g, ran auto calibration and get the message above.I can probe P0 manually using G1 X0 Y48 Z10 followed by G30 S-1 and on current config get the following:
10:46:14 PMG30 S-1
Stopped at height -1.331 mm
10:46:04 PMG1 X0 Y48 Z10
10:45:43 PMG28I have no idea what I have done to cause this and cannot revert to any autocalibration
my config is:
; Configuration file for Duet Maestro (firmware version 2.03)
; executed by the firmware on start-up
;
; generated by RepRapFirmware Configuration Tool v2.0.4 on Tue Sep 17 2019 20:28:32 GMT+0100 (British Summer Time); General preferences
G90 ; send absolute coordinates...
M83 ; ...but relative extruder moves
M550 P"My Printer" ; set printer name
M665 L121.290 R64.4 H125 B55.0 X0.058 Y-1.035 Z0.000 ; Set delta radius, diagonal rod length, printable radius and homed height
M666 X0 Y0 Z0 ; put end stop adjustments here, or let auto calibration find them; Network
M552 P0.0.0.0 S1 ; enable network and acquire dynamic address via DHCP
M586 P0 S1 ; enable HTTP
M586 P1 S0 ; disable FTP
M586 P2 S0 ; disable Telnet; Drives
M569 P0 S0 ; physical drive 0 goes backwards
M569 P1 S0 ; physical drive 1 goes backwards
M569 P2 S0 ; physical drive 2 goes backwards
M569 P3 S1 ; physical drive 3 goes forwards
M584 X0 Y1 Z2 E3 ; set drive mapping
M350 E256 I0 ; configure microstepping without interpolation
M350 X32 Y32 Z32 I1 ; configure microstepping with interpolation
M92 X200 Y200 Z200 E1675 ; set steps per mm
M566 X1200.00 Y1200.00 Z1200.00 E1200.00 ; set maximum instantaneous speed changes (mm/min)
M203 X18000.00 Y18000.00 Z18000.00 E1200.00 ; set maximum speeds (mm/min)
M201 X1000.00 Y1000.00 Z1000.00 E1000.00 ; set accelerations (mm/s^2)
M906 X1000 Y1000 Z1000 E1000 I30 ; set motor currents (mA) and motor idle factor in per cent
M84 S30 ; Set idle timeout; Axis Limits
M208 Z-3 S1 ; set minimum Z; Endstops
M574 X2 Y2 Z2 S0 ; set active low and disabled endstops; Z-Probe
M558 P1 H20 I1 F800 T6000 ; set Z probe type to switch and the dive height + speeds
G31 P0001 X0 Y0 Z-0.655 ; set Z probe trigger value, offset and trigger height
M557 R54 S10 ; define mesh grid; Heaters
M307 H1 B0 S1.00 ; disable bang-bang mode for the bed heater and set PWM limit
M305 P1 T100000 B4138 R2200 ; set thermistor + ADC parameters for heater 1
M143 H1 S280 ; set temperature limit for heater 1 to 280C
M305 P0 T100000 B4138 R2200 ; set thermistor + ADC parameters for heater 2
M143 H0 S129 ; set temperature limit for heater 2 to 120C; Fans
M106 P0 S0 I0 F500 H1 ; set fan 0 value, PWM signal inversion and frequency. Thermostatic control is turned off
M106 P1 S1 I0 F500 H1 T45 ; set fan 1 value, PWM signal inversion and frequency. Thermostatic control is turned on; Tools
M563 P0 D0 H1 F0 ; define tool 0
G10 P0 X0 Y0 Z0 ; set tool 0 axis offsets
G10 P0 R0 S0 ; set initial tool 0 active and standby temperatures to 0C; Custom settings are not defined
; Miscellaneous
M501 ; load saved parameters from non-volatile memoryand bed.g is:
; bed.g
; called to perform automatic delta calibration via G32
;
; generated by RepRapFirmware Configuration Tool v2.0.4 on Tue Sep 17 2019 20:28:32 GMT+0100 (British Summer Time)
M561 ; clear any bed transform
G28 ; home all towers
; Probe the bed at 12 peripheral and 3 halfway points, and perform 3-factor auto compensation
; Before running this, you should have set up your Z-probe trigger height to suit your build, in the G31 command in config.g.40
G30 P0 X0 Y48 Z-99999 H0.13
G30 P1 X24.95 Y43.21 H0.0772 Z-99999
G30 P2 X43.21 Y24.95 H-0.159 Z-99999
G30 P3 X48 Y0 H0.099 Z-99999
G30 P4 X43.21 Y-24.95 H0.1712 Z-99999
G30 P5 X24.95 Y-43.21 H-0.027 Z-99999
G30 P6 X0 Y-48 H-0.0902 Z-99999
G30 P7 X-24.95 Y-43.21 H0.133 Z-99999
G30 P8 X-43.21 Y-24.95 H0192 Z-99999
G30 P9 X-48 Y0 H0-0.512 Z-99999
G30 P10 X-43.21 Y24.95 H-0.022 Z-99999
G30 P11 X-24.95 Y43.21 H0.1116 Z-99999
G30 P12 X0 Y24.9 H0.116 Z-99999
G30 P13 X21.56 Y-12.45 H0.008 Z-99999
G30 P14 X-21.56 Y-12.45 H0.146 Z-99999
G30 P15 X0 Y0 H0 Z-99999 S6; Use S-1 for measurements only, without calculations. Use S4 for endstop heights and Z-height only. Use S6 for full 6 factors
; If your Z probe has significantly different trigger heights depending on XY position, adjust the H parameters in the G30 commands accordingly. The value of each H parameter should be (trigger height at that XY position) - (trigger height at centre of bed)Really confused as everything I did tonight should only have improved my calibration, instead of maing things worse. I got a 20mm cube to print at +/-0.5mm so was hopeful of getting good dimensional accuracy with improved calibration and set up.
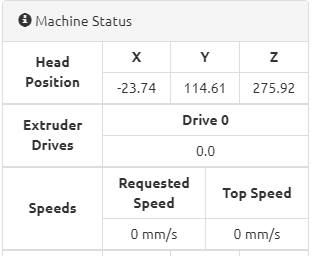
When I run calibration it fails, giving the message, and when I home after it, DWC gives me an error that home cannot be reached but the X, Y, Z co-ordinates ahowing are:
Diagnostic is as follows:
10:56:22 PMM122
=== Diagnostics ===
RepRapFirmware for Duet 2 Maestro version 2.04RC1 running on Duet Maestro 1.0
Board ID: 08DAM-9F9GA-J24TD-6J1F2-3S86P-TP3AT
Used output buffers: 3 of 24 (8 max)
=== RTOS ===
Static ram: 19664
Dynamic ram: 87552 of which 88 recycled
Exception stack ram used: 332
Never used ram: 23436
Tasks: NETWORK(ready,660) HEAT(blocked,1300) MAIN(running,472) IDLE(ready,160)
Owned mutexes:
=== Platform ===
Last reset 00:11:44 ago, cause: software
Last software reset at 2019-10-06 22:44, reason: User, spinning module GCodes, available RAM 23428 bytes (slot 3)
Software reset code 0x0003 HFSR 0x00000000 CFSR 0x00000000 ICSR 0x0400f000 BFAR 0xe000ed38 SP 0xffffffff Task 0x4e49414d
Error status: 0
Free file entries: 10
SD card 0 detected, interface speed: 15.0MBytes/sec
SD card longest block write time: 0.0ms, max retries 0
MCU temperature: min 35.2, current 35.6, max 38.2
Supply voltage: min 0.0, current 13.0, max 13.1, under voltage events: 0, over voltage events: 0, power good: yes
Driver 0: standstill, read errors 0, write errors 1, ifcount 247, reads 28145, timeouts 0
Driver 1: standstill, read errors 0, write errors 1, ifcount 247, reads 28145, timeouts 0
Driver 2: standstill, read errors 0, write errors 1, ifcount 247, reads 28145, timeouts 0
Driver 3: standstill, read errors 0, write errors 1, ifcount 70, reads 28150, timeouts 0
Driver 4: standstill, read errors 0, write errors 1, ifcount 70, reads 28150, timeouts 0
Driver 5: ok, read errors 0, write errors 0, ifcount 0, reads 0, timeouts 28156
Driver 6: ok, read errors 0, write errors 0, ifcount 0, reads 0, timeouts 28156
Date/time: 2019-10-06 22:56:20
Slowest loop: 30.58ms; fastest: 0.06ms
I2C nak errors 0, send timeouts 0, receive timeouts 0, finishTimeouts 0, resets 0
=== Move ===
Hiccups: 0, FreeDm: 169, MinFreeDm: 166, MaxWait: 461810ms
Bed compensation in use: none, comp offset 0.000
=== DDARing ===
Scheduled moves: 66, completed moves: 66, StepErrors: 0, LaErrors: 0, Underruns: 0, 0
=== Heat ===
Bed heaters = 0, chamberHeaters = -1 -1
=== GCodes ===
Segments left: 0
Stack records: 2 allocated, 0 in use
Movement lock held by null
http is idle in state(s) 0
telnet is idle in state(s) 0
file is idle in state(s) 0
serial is idle in state(s) 0
aux is idle in state(s) 0
daemon is idle in state(s) 0
queue is idle in state(s) 0
lcd is idle in state(s) 0
autopause is idle in state(s) 0
Code queue is empty.
=== Network ===
Slowest loop: 9.62ms; fastest: 0.02ms
Responder states: HTTP(0) HTTP(0) HTTP(0) HTTP(0) FTP(0) Telnet(0) Telnet(0)
HTTP sessions: 1 of 8
Interface state 5, link 100Mbps full duplexAny help would be appreciated as I am totally confused. I m hoping that I have put a character in the wrong place or something stupid, but I am now lost.
edited to add some machine dimensions
-
@Dugee not sure quite why it was working and then stopped when you added the H offsets. Try:
- Try moving down before trying to probe. might be that its trying to go to Y48 with the axis at the top, hard up against the endstops..
So in bed.g, after the G28 try adding:
G1 X0 Y0 Z50 F9000 ; move down before probing It should not be that because from the documentation:
With a Z parameter of -9999 or less, the head moves to the specified XY coordinates and the dive height (set using the H parameter in the M558 command), and probes the bed.- It might be the order of the commands (although i doubt it). you have the H value after the Z value in your first line or probing, change to:
G30 P0 X0 Y48 H0.13 Z-99999also should not be this as the command order should be interchangeable, but try it.
- Try sending the exact command that is failing from the console and see if it works.
- Try moving down before trying to probe. might be that its trying to go to Y48 with the axis at the top, hard up against the endstops..
-
Upgrade to firmware 2.04 RC1 as there is a bug in 2.03 for delta auto calibration.
-
prior to running the 1st autocalibration last night I manually probed all the bed points and returned the following figure:
X Y 1 2 3 4 5 AVERAGE variance from x0y0P0 0 48 -0.192 -0.192 -0.212 -0.212 -0.217 -0.205 0.13
P1 24.95 43.21 -0.207 -0.258 -0.263 -0.278 -0.283 -0.2578 0.0772
P2 43.21 24.95 -0.492 -0.492 -0.497 -0.497 -0.492 -0.494 -0.159
P3 48 0 -0.242 -0.237 -0.237 -0.232 -0.232 -0.236 0.099
P4 43.21 -24.95 -0.155 -0.171 -0.166 -0.166 -0.161 -0.1638 0.1712
P5 24.95 -43.21 -0.366 -0.376 -0.356 -0.356 -0.356 -0.362 -0.027
P6 0 -48 -0.446 -0.42 -0.42 -0.42 -0.42 -0.4252 -0.0902
P7 -24.95 -43.21 -0.232 -0.212 -0.171 -0.212 -0.182 -0.202 0.133
P8 -43.21 -24.95 -0.156 -0.151 -0.136 -0.136 -0.136 -0.143 0.192
P9 -48 0 -0.4 -0.384 -0.384 -0.384 -0.379 -0.3862 -0.0512
P10 -43.21 24.95 -0.356 -0.351 -0.356 -0.361 -0.361 -0.357 -0.022
P11 -24.95 43.21 -0.202 -0.218 -0.228 -0.233 -0.236 -0.2234 0.1116
P12 0 24.95 -0.218 -0.218 -0.218 -0.218 -0.223 -0.219 0.116
P13 21.56 -12.45 -0.331 -0.326 -0.326 -0.326 -0.326 -0.327 0.008
P14 -21.56 12.45 -0.201 -0.186 -0.186 -0.186 -0.186 -0.189 0.146
P15 0 0 -0.354 -0.334 -0.329 -0.329 -0.329 -0.335and I was also able to manually probe using a G1 X0 Y48 Z20 followed by G30 S-1.
When I get home later I will retry the autocalibration, but change from S-6 to S-1 initially just to check that there are values being returned for all the probe point before doing anything else, if autocalibration fails after returned data I will remove all the H parameters and try again.
@jay_s_uk I am running 2.04 RC1 firmware, so hopefully that isn't the issue.
edited for spelling
-
the G30 P8 line in your Bed.g is missing a decimal point on the H parameter causing it to think the offset at that point is huge (192mm)also I notice in your M563 line you have the dive hight set to 1mm maybe increase this as well.
Maybe that is what is causing it too fail?
Doug
-
@Dougal1957 I think that missing decimal point may be it! that would throw everything way out. I looked at those files about 40 times and never spotted this.
You may be my new hero. I'll report back as soon as I can.
-
Easy to miss lol
-
@Dougal1957 great spot!
-
17:32:11G32
Calibrated 6 factors using 16 points, deviation before 0.887 after 0.0711st calibration run after putting the decimal place back in!
Dougal, you are my new hero.