Fixed heated bed question and suggestion
-
Hi guys,
I would like to have more opinions on this situation:
I am building my own 3D printer based on CoreXY and Duet wifi. I want to use a fixed build plate without spring level, but mesh level with BL touch or later Metrol sensors if everything succeeds. Does anybody have a similar setup? The heated bed dimension would be 260x330x6mm MiC 6 aluminum plate, cantilevered. I am curious about the way how to install bed as flat as possible from the beginning? BL touch would be used once, saved data to SD card and removed, until next calibration, as I will have a heated chamber to 100C. Any cons and pros to hear from somebody experienced would really appreciate it!
Industrial 3D printing service in the Netherlands - gagatstudio.com
-
For a 100C build chamber, you're going to want as much as possible mounted outside the chamber, including motors and electronics, and have high temperature wiring and everything all-metal.
For the bed, once you go over 250x250mm, I'd say a cantilevered bed is not ideal; if you want to print fast, the bed will wobble as it's only attached on one side. I'd recommend using two- (on either side of the bed) or three-point bed attachment/leadscrews. Three leadscrews (driven by one motor, connected by belt) will allow you to level the bed physically, without other springs/screws/fixings, and once locked in place, should be very consistent. It's more complicated than a cantilever bed, but worth it!
Ian
-
@felt342 What's wrong with starting with a trammed plate? There are better ways to mount the bed plate than standing it on springs.
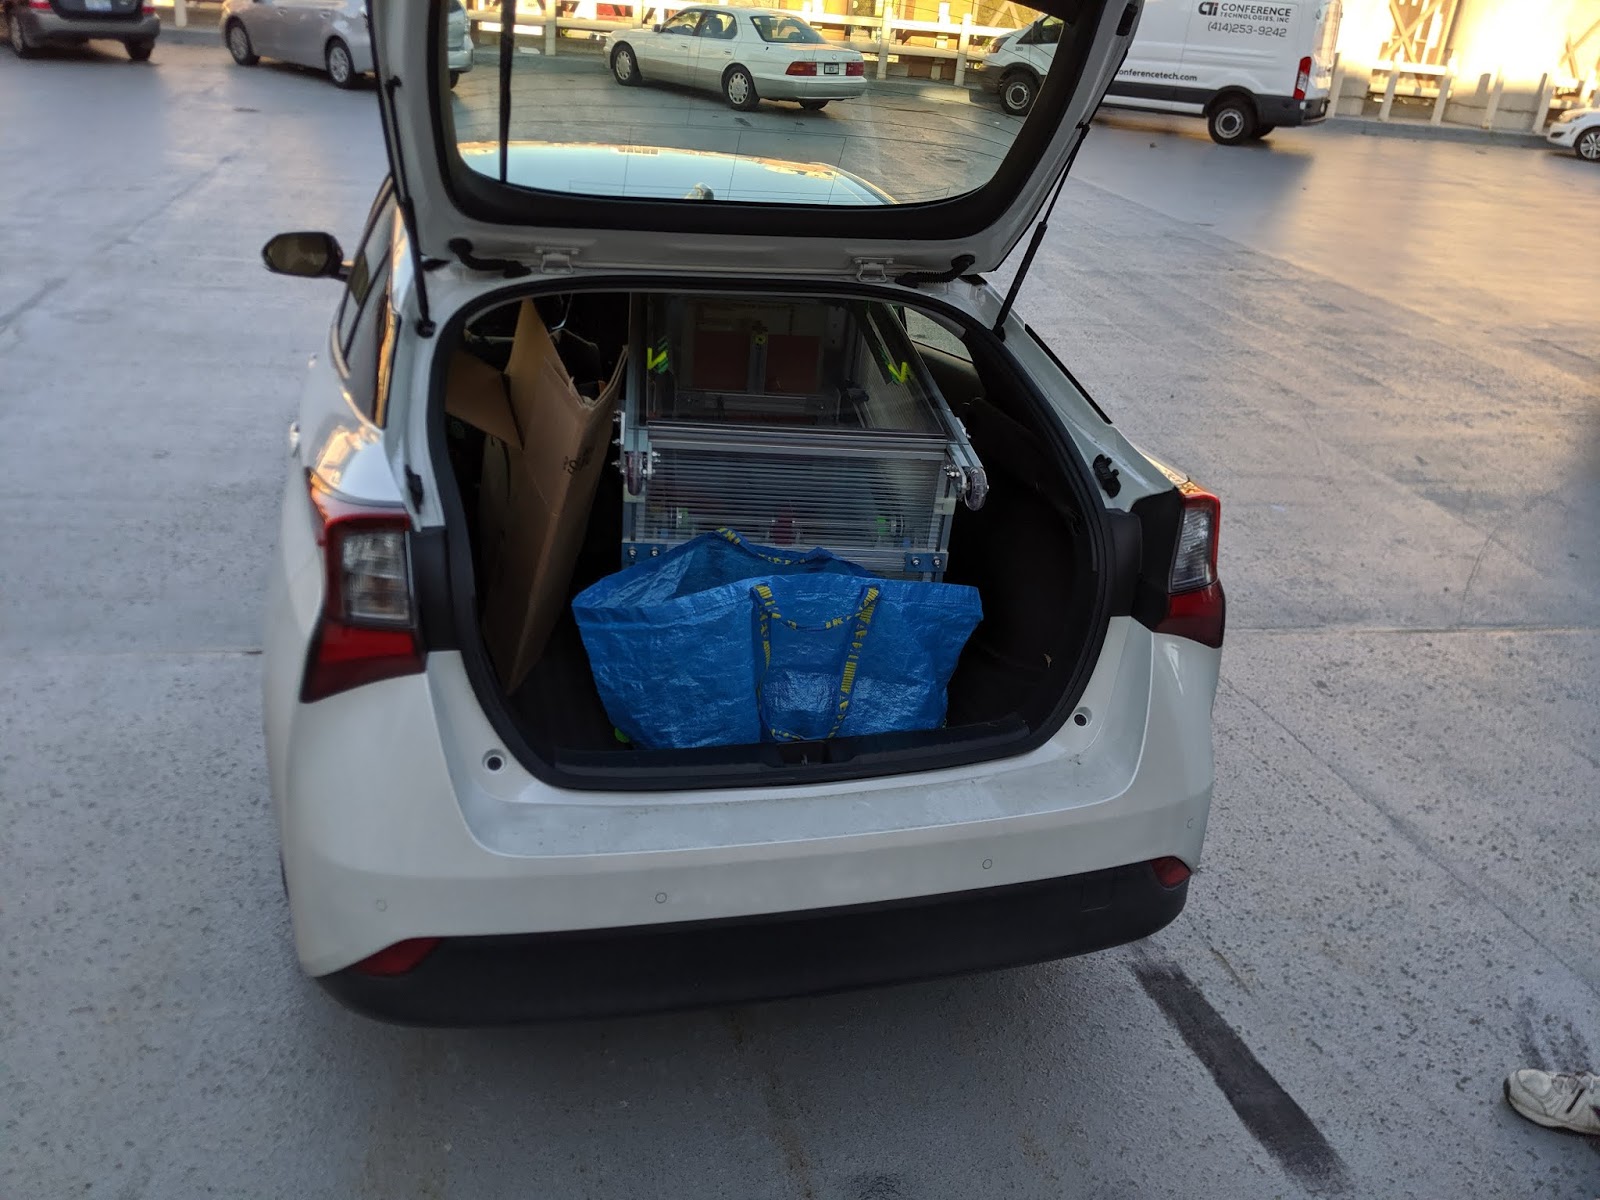
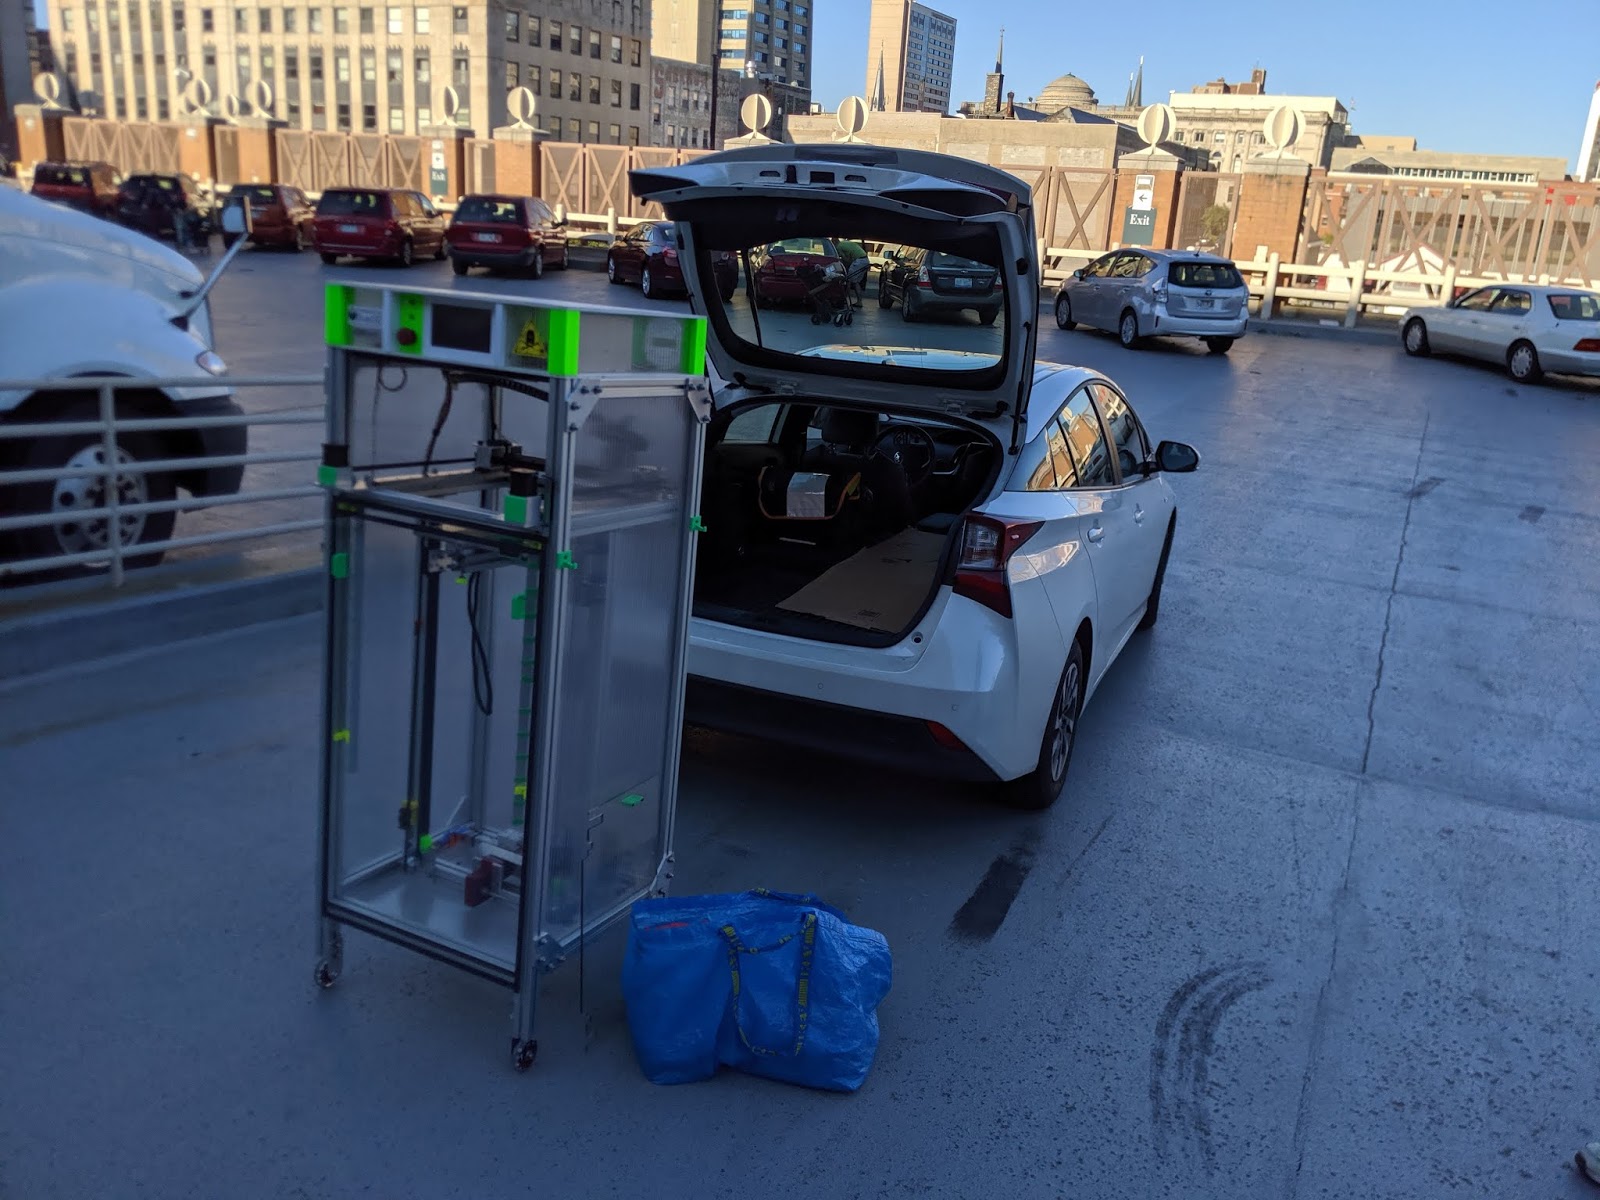
After transporting to the Milwaukee Makerfaire in September, I stood the machine up and started printing. No adjustments required. Then I drove it to the MakerSpace and did the same. Then I drove it home, bounced it down the basement stairs, and did the same. There's no autoleveling at all, and Z=0 is a simple microswitch and screw adjustment.
The manual bed leveling assistant makes it quick and easy to tram the plate when you first set the machine up or after working on the Z axis. The plate can be removed from the machine and replaced without any adjustments because the mount is stable.
-
Thanks droftarts, for a suggestion!
Yes, indeed all electronics would be isolated, silicone wires and all-aluminum. At this moment I need to solve Z axis, I don't want to use more than one leadscrews, I prefer to decrease size of the bed, something to 250x300mm to make it less affected by the cantilever. What I would like to do is just bolted completely bed, and level it only with BL touch/Metrol, but I am not sure if it works well?
")
There is couple of pictures WIP:

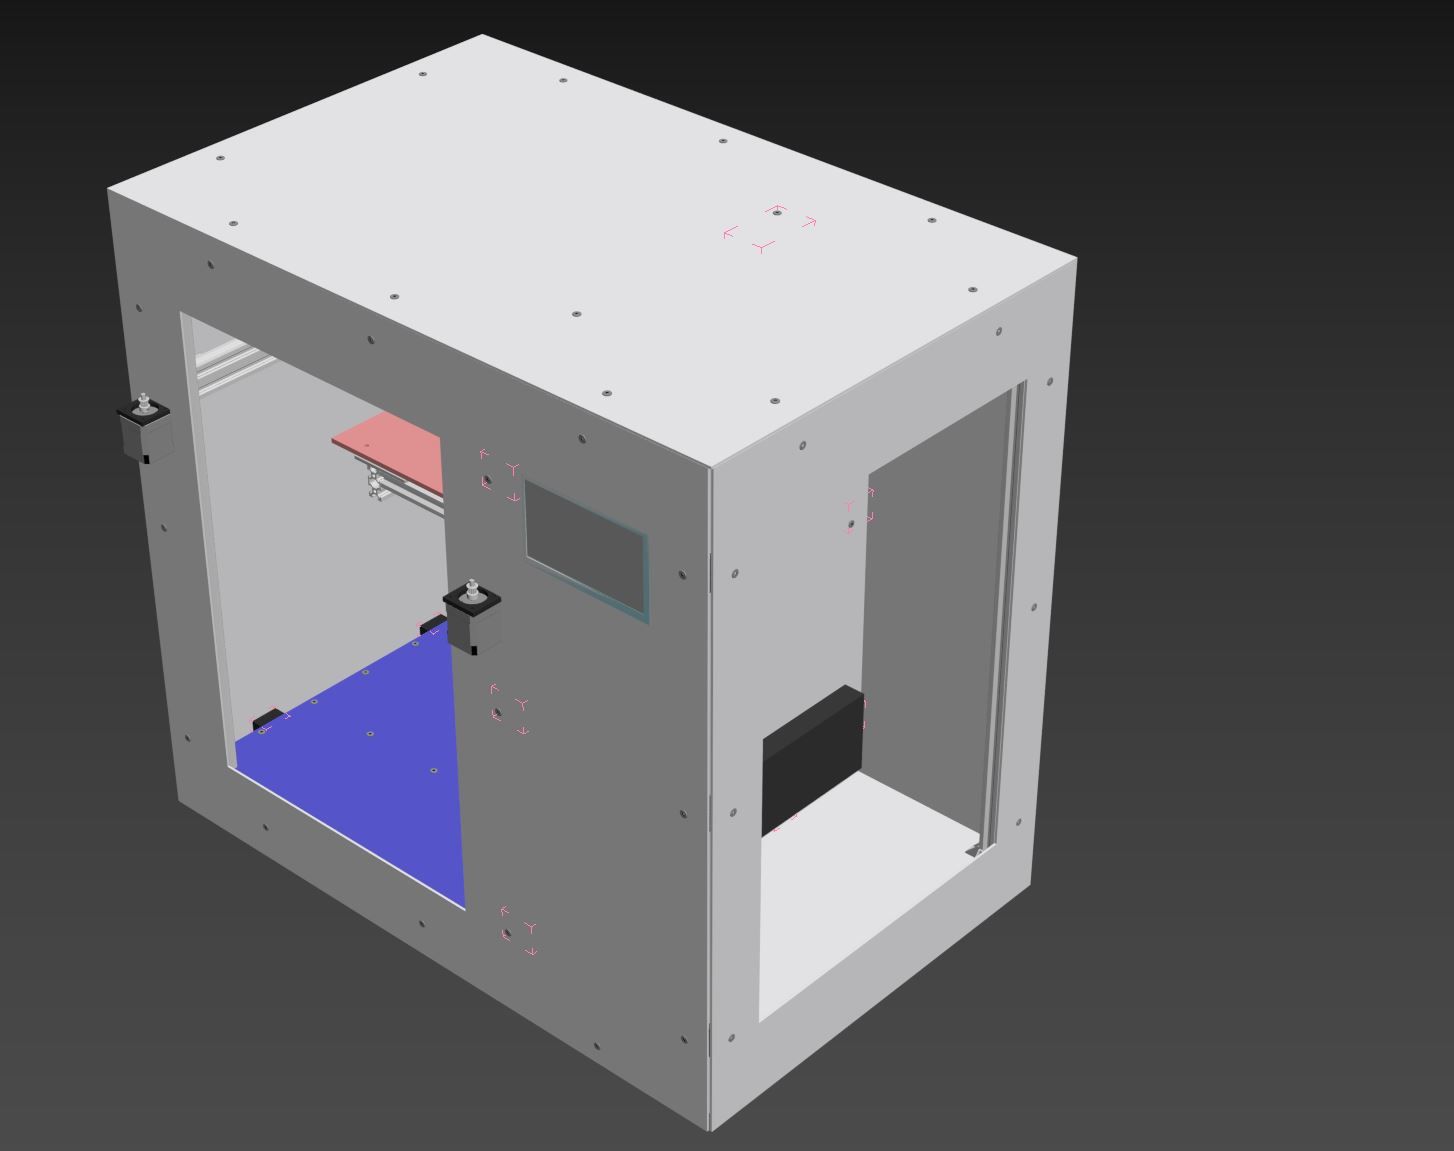


Industrial 3D printing service in the Netherlands - gagatstudio.com
-
That looks impressive indeed!
May you show closely how is your bed-mounted? -
@felt342 said in Fixed heated bed question and suggestion:
What I would like to do is just bolted completely bed, and level it only with BL touch/Metrol, but I am not sure if it works well?
I think that depends on how well the printer is built (which looks great so far)! If it's solid, and you're not moving it around, you probably don't need to adjust it often. Mesh compensation works well, but on a big, heavy bed that doesn't move fast, it will limit the speed you can print, as the bed will need to move up and down as you print. Better to get it as mechanically level as possible and not use mesh compensation. If you're wedded to a cantilever with no adjustment screws, I'd think you're only option is use shims between the bed and bed support arms if it's not flat out-of-the-box. No easy adjustment, but then it shouldn't need it.
The main reason not to use a cantilever bed is because they can wobble (usually the unsupported side of the bed, in Z) when printing at fast speed. However, if the bed support is robust you should be okay. I've used Ultimaker 2+ for a while, and never noticed an issue with bed wobble, but the speeds aren't set particularly high in Cura as standard!
Ian
Bed-slinger - Mini5+ WiFi/1LC | RRP Fisher v1 - D2 WiFi | Polargraph - D2 WiFi | TronXY X5S - 6HC/Roto | CNC router - 6HC | Tractus3D T1250 - D2 Eth
-
The E3D Tool Changer uses a cantilevered bed, which seems to work well, but the bed dimension in the direction of the cantilever is only 210mm.
As shipped it doesn't have any adjusting screws for manual tramming, but I understand that many users have added them. The height map on mine looks like this:
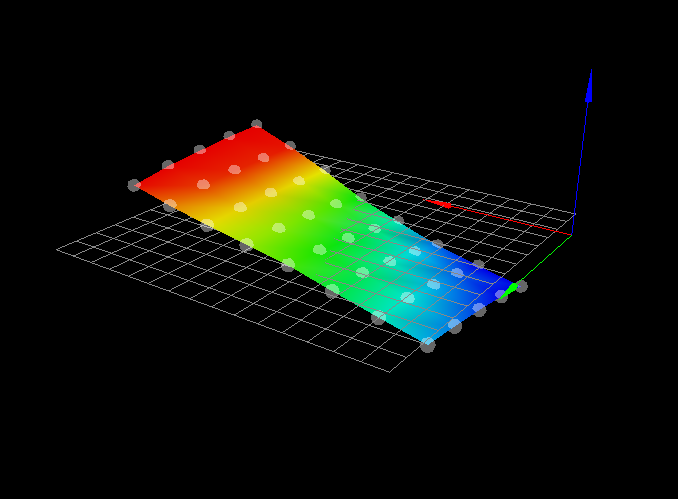
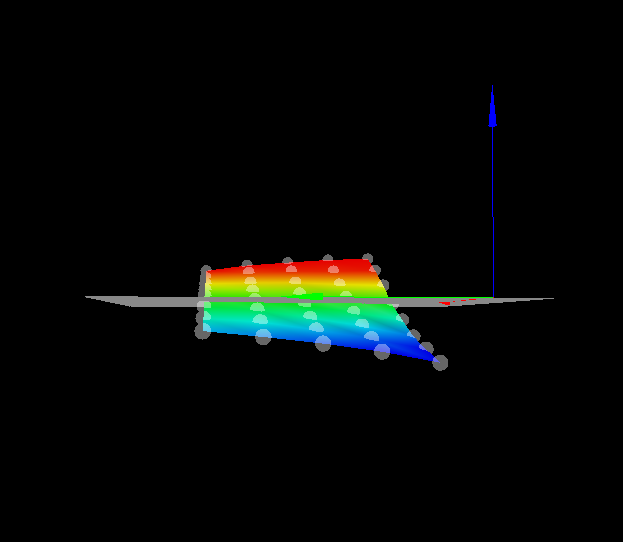
There is about 0.6mm height difference left to right, plus a small amount of twist. I'll definitely add levelling screws, or at least some washers/shims to reduce the differences.
Duet WiFi hardware designer and firmware engineer
Please do not ask me for Duet support via PM or email, use the forum
http://www.escher3d.com, https://miscsolutions.wordpress.com -
The idea is not to move printer at all, I think I would try to use shims hopefully will work, thanks for that! About print speed what is high speed we are talking about is 70mm/s+? What speed did you use on Ultimakers? I am trying to be in 45-50mm/s of printing speed.
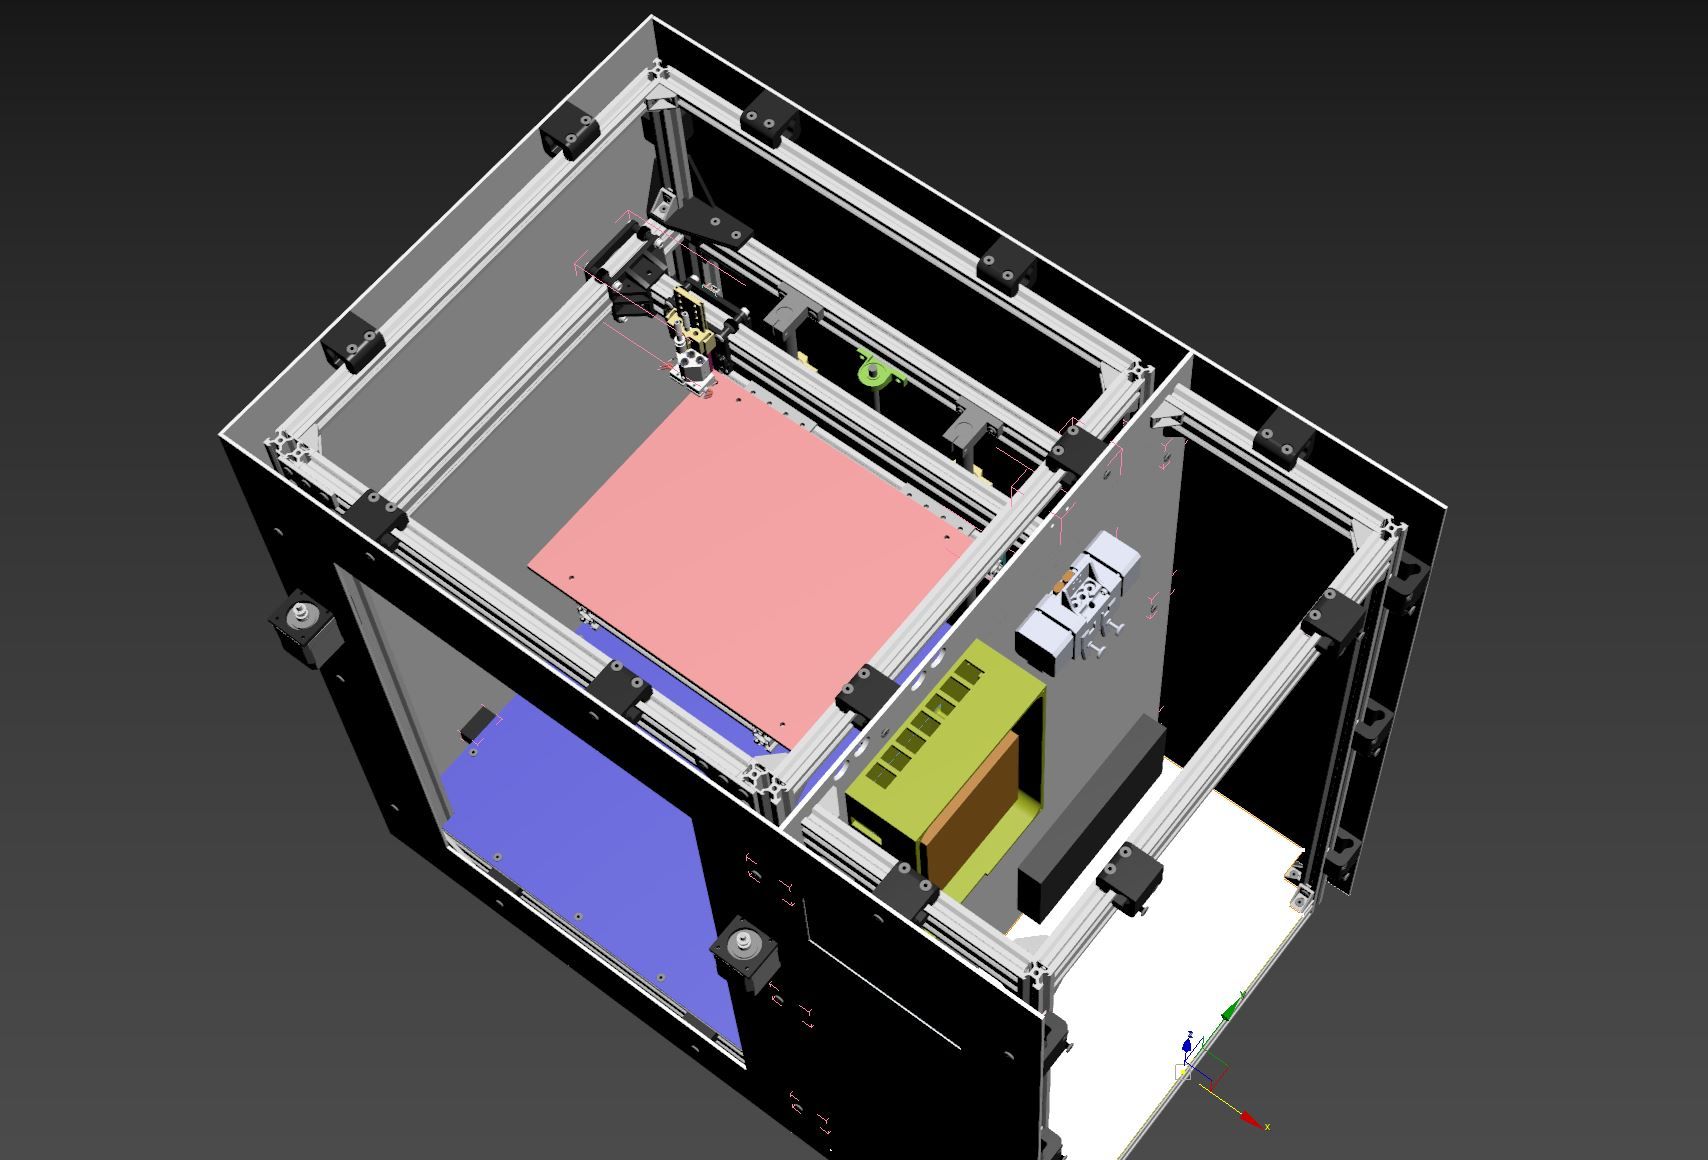
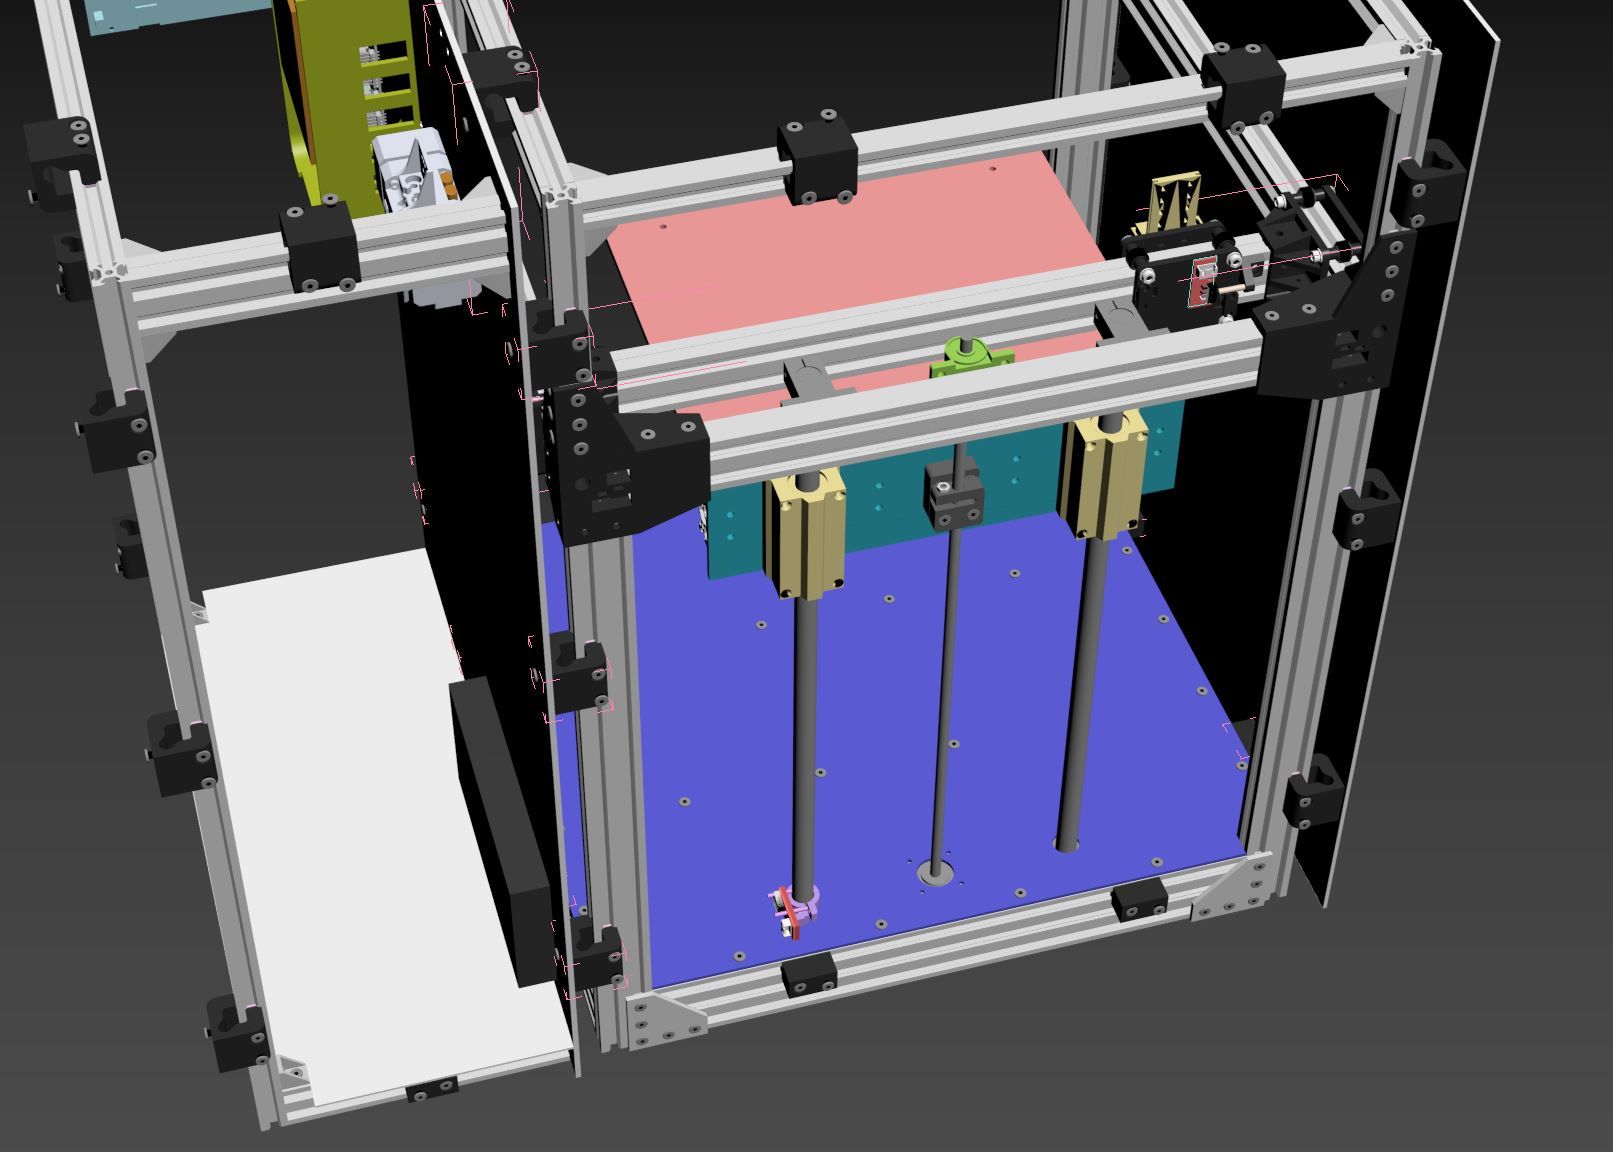
This is my thinking of bed support, very simple at this moment, aluminum profiles connected with Double 90-degree joining plates, 16mm rods with long version bearing blocks:
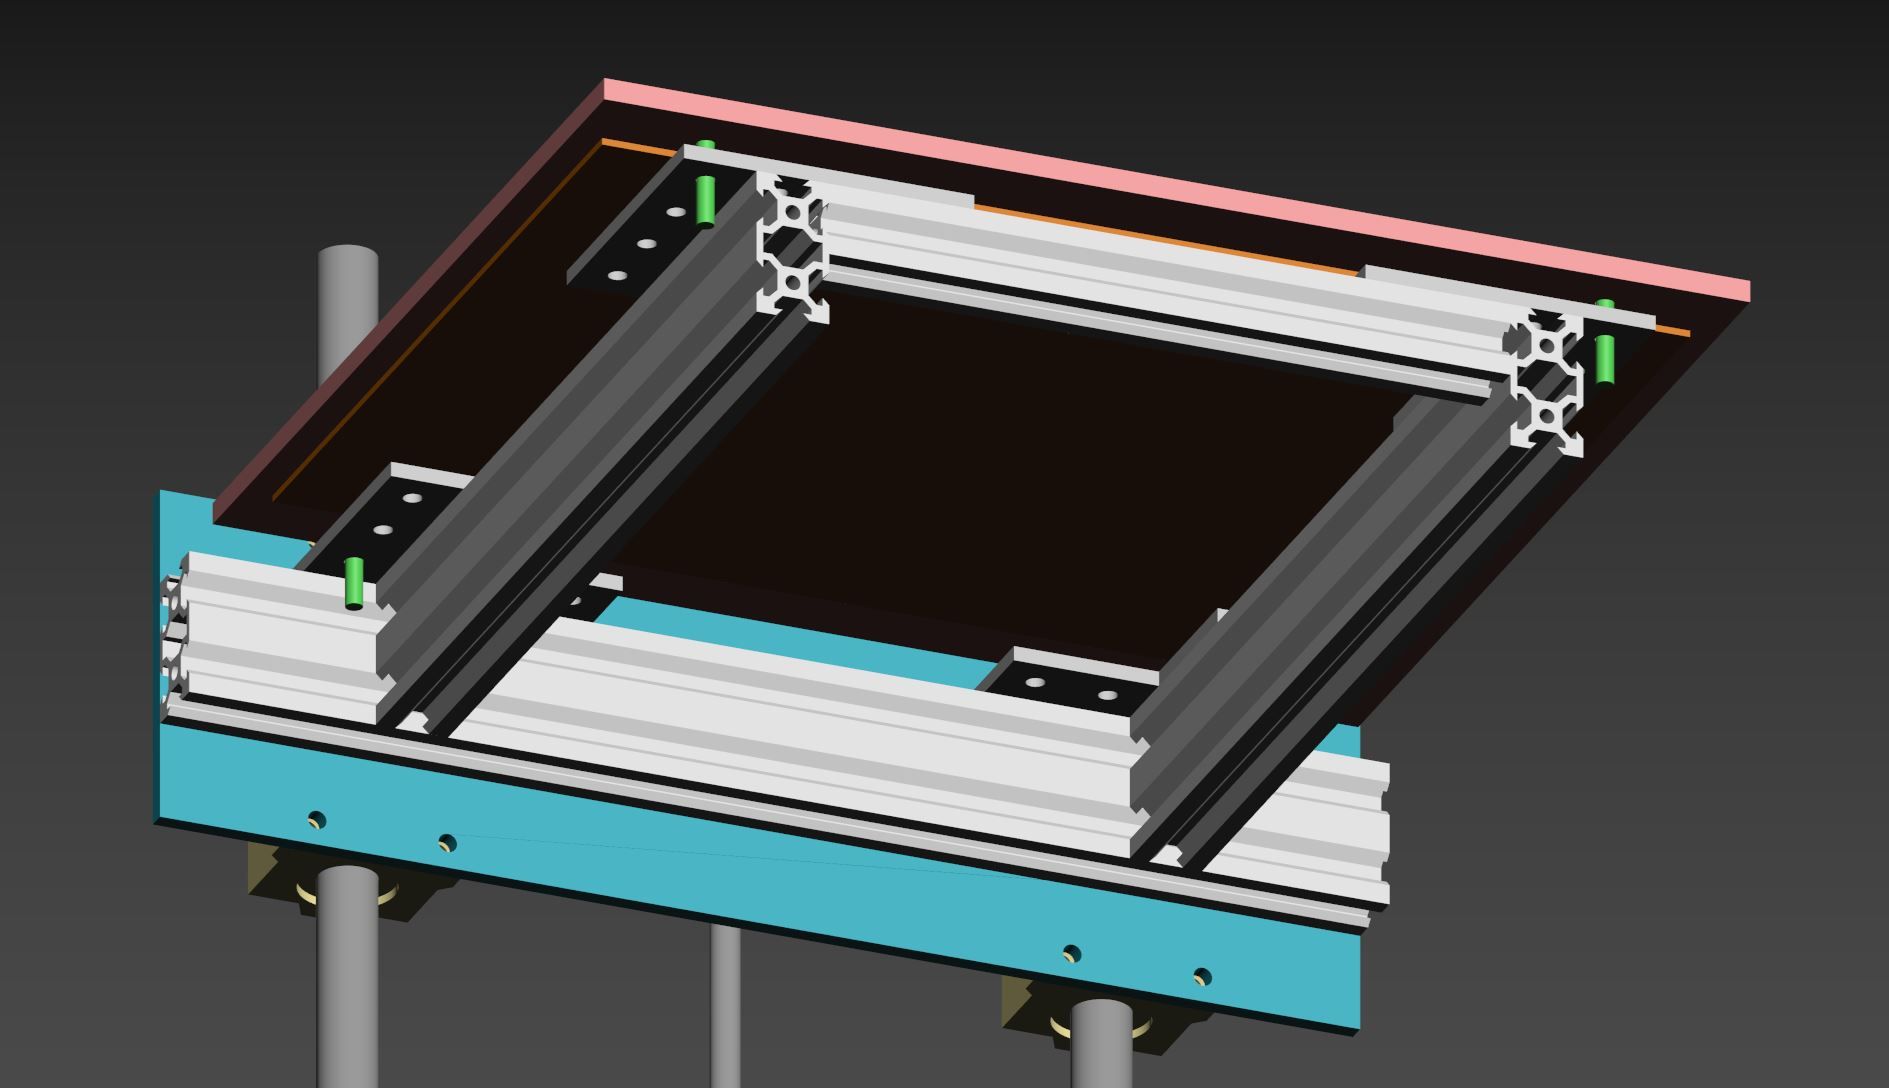
Industrial 3D printing service in the Netherlands - gagatstudio.com
-
Thanks for that, interesting!
I think a small amount of twist might because of one sliding rail in the middle of the bed.
210mm makes me think to decrease my build plate already -
@felt342 said in Fixed heated bed question and suggestion:
What speed did you use on Ultimakers? I am trying to be in 45-50mm/s of printing speed.
No faster than 50mm/s, from memory, and the Ultimakers are built from acrylic and Dibond/Aluminium Composite Material. There may be some reports on the forum about cantilever beds, try looking through: https://forum.duet3d.com/search/?term=cantilever&in=titlesposts
The Hypercube Evolution developer found that they needed to change from cantilever:
https://www.thingiverse.com/thing:2254103The prototype printer, with a build volume of 300 x 300 x 300, met with all expectation but did show some small bed vibrations when printing at high speed due to the large bed and counter levered design. Therefore, two build options are available. A single Z axis version for smaller build platforms and a double Z axis version for larger beds or those wishing for a rock solid build platform.
Unfortunately doesn't specify what 'high speed' is!
Ian
Bed-slinger - Mini5+ WiFi/1LC | RRP Fisher v1 - D2 WiFi | Polargraph - D2 WiFi | TronXY X5S - 6HC/Roto | CNC router - 6HC | Tractus3D T1250 - D2 Eth
-
Yeah saw that topic about Evolutions, but still trying to risk myself...
My printer would be around 70kg estimated. I hope that can help a tiny bit, compared to ultimaker acrylic setup. -
If the chamber will be at 100C, how hot is the bed going to be? The bed plate is going to expand when you heat it up. How will it be attached to the support structure? If it is going to be screwed to the cooler support structure, what will happen when the plate expands?
I used a kinematic mount to allow the plate to expand without forcing the mounting screws to bend (which will tilt the bed plate) to accommodate the expansion. You have to do something to secure the plate, so you may as well make it adjustable so you can tram the plate.
This is the bed support I used for the 300x300 bed plate in UMMD- belt lifted/guided on the two ends of the T. The levelers are screwed into teflon blocks held in place with t-nuts. The bed sits on top of the screws and springs are used to hold it down. As the plate expands it can slide on two of the screws, so nothing bends. Tramming takes about 1 minute- adjust pitch, then roll. No need to adjust again unless you take the Z axis apart. You can take the bed plate off and put it back without any adjustments.

-
As a follow up to my earlier post on the bed map for my tool changer, I added 6mm M3 washers under the bed support pillars on pone side, and that cleared the tilt. It still left some twist. So I tried adding 0.1mm shims to two opposite corners, then 0.2mm shims. Neither had much effect, which is not surprising, because a 300x210mmx4mm glass bed isn't going to twist easily.
It was then that I realised that the twist wasn't in the bed, it was because the two Y linear rails were not exactly parallel. The front (Ymin) end of one was sagging a little relative to the other. This was because I had the tool changer at the end of the workbench, and the weight was making the outside corner of the bench sag. Some folded paper under the foot at that corner fixed that and the apparent twist of the bed.
Duet WiFi hardware designer and firmware engineer
Please do not ask me for Duet support via PM or email, use the forum
http://www.escher3d.com, https://miscsolutions.wordpress.com -
@dc42 said in Fixed heated bed question and suggestion:
It was then that I realised that the twist wasn't in the bed, it was because the two Y linear rails were not exactly parallel.
I think that's quite common in aluminium-extrusion framed printers! Either because the printer isn't built quite square, or it's sitting on a table that isn't flat. Also afflicts bed-slingers, but again, a folded bit of paper under one corner sorts that out too.
Ian