Duet3D Logo Duet3D
    • Tags
    • Documentation
    • Order
    • Register
    • Login

    Smart Effector part cooling

    Scheduled Pinned Locked Moved
    General Discussion
    6
    39
    1.8k
    Loading More Posts
    • Oldest to Newest
    • Newest to Oldest
    • Most Votes
    Reply
    • Reply as topic
    Log in to reply
    This topic has been deleted. Only users with topic management privileges can see it.
    • Danalundefined
      Danal
      last edited by

      I mostly don't run a part fan on my big delta, and I tend to print things pretty hot, to intentionally get really good layer bonding.

      YMMV

      Delta / Kossel printer fanatic

      1 Reply Last reply Reply Quote 0
      • bricorundefined
        bricor @FelixH
        last edited by

        @FelixH I’ve been using the 270 fan duct on a smart effector for some time now and have not had an issue. I print PLA at 225c, 75mm/s with an E3D Volcano hotend.

        On printers that had part cooling issues, for me, it’s typically the bow that has issues.

        HTH

        FelixHundefined 1 Reply Last reply Reply Quote 0
        • FelixHundefined
          FelixH @bricor
          last edited by

          @bricor said in Smart Effector part cooling:

          @FelixH I’ve been using the 270 fan duct on a smart effector for some time now and have not had an issue. I print PLA at 225c, 75mm/s with an E3D Volcano hotend.

          On printers that had part cooling issues, for me, it’s typically the bow that has issues.

          HTH

          The bow??

          bricorundefined 1 Reply Last reply Reply Quote 0
          • bricorundefined
            bricor @FelixH
            last edited by bricor

            @FelixH The front underside curved part of the boat.

            The bow (/baʊ/) is the forward part of the hull of a ship or boat

            FelixHundefined 1 Reply Last reply Reply Quote 0
            • FelixHundefined
              FelixH @bricor
              last edited by

              @bricor said in Smart Effector part cooling:

              @FelixH The front underside curved part of the boat.

              The bow (/baʊ/) is the forward part of the hull of a ship or boat

              Oh... I see... I thought you were talking about a part of a printer...

              bricorundefined 1 Reply Last reply Reply Quote 0
              • bricorundefined
                bricor @FelixH
                last edited by

                @FelixH
                What are the specs of the Delta printer?
                Which extruder and hotend are you using?
                What is the length of diagonal rods that you are using?
                What type of material and heater settings are you printing with?
                If you post your config file it may help in diagnosing the issue.

                1 Reply Last reply Reply Quote 0
                • FelixHundefined
                  FelixH
                  last edited by FelixH

                  @bricor My printer is an Anycubic Kossel Linear Plus XL. The OEM delta rods were 267 mm in length, but I have recently upgraded to an Smart Effector, original from Duet with the original E3D V6 hotend designed for this effector. The temp sensor is a thermistor, not a PT100. I purchased a Magball kit with a length of 288.18 mm.

                  I changed the effector this weekend in what I would consider a painless process. Following the online guide I set it up without headaches: I changed the delta rod lengths on the M665 command, the lines regarding the Z probe sensor and so on and then I run a Delta calibration. I got the results of the delta calibration and I typed it into the M665 and M666 commands on the config.g file. Then, I calculated the Y offset (edited the value on config.g), run a mesh grid calibration and here we are.

                  I am printing PLA on this machine. 210ºC first layer and 200ºC the rest. Cooling disabled for the first 2 layers and 95% the rest, I believe. This settings lead to nice results on cartesian printers I have.
                  my config.g file is as follows

                  ; Configuration file for Duet WiFi (firmware version 1.20 or newer)
                  ; executed by the firmware on start-up
                  ;
                  ; generated by RepRapFirmware Configuration Tool on Thu Jul 12 2018 20:54:00 GMT-0500 (Central Daylight Time)
                  
                  ; General preferences
                  G90                                                ; Send absolute coordinates...
                  M83                                                ; ...but relative extruder moves
                  
                  ; After G32 auto-calibrate, copied from config-override.g
                  ; Note: G31 Z (below) affects M665 H, and this is NOT yet calibrated.
                  
                  M665 L288.18 R139.59 H228.72 B106.0 X-0.192 Y-0.277 Z0.0      ; Set delta radius, diagonal rod length, printable radius and homed height
                  M666 X0.16 Y-0.40 Z0.24 A0.00 B0.00                         ; Put your endstop adjustments here, or let auto calibration find them
                  
                  
                  ; Network
                  M550 P"Kossel"                                     ; Set machine name
                  M552 S1                                            ; Enable network
                  ;*** Access point is configured manually via M587
                  M586 P0 S1                                         ; Enable HTTP
                  M586 P1 S0                                         ; Disable FTP
                  M586 P2 S0                                         ; Disable Telnet
                  
                  ; Drives
                  M569 P0 S0                                         ; Drive 0 goes forwards
                  M569 P1 S0                                         ; Drive 1 goes forwards
                  M569 P2 S0                                         ; Drive 2 goes forwards
                  M569 P3 S1                                         ; Drive 3 goes forwards
                  M350 X16 Y16 Z16 E16 I1                            ; Configure microstepping with interpolation
                  M92 X80 Y80 Z80 E96                                ; Set steps per mm
                  M566 X300 Y300 Z300 E300                           ; Set maximum instantaneous speed changes (mm/min)
                  M203 X12000 Y12000 Z12000 E12000                   ; Set maximum speeds (mm/min)
                  M201 X3000 Y3000 Z3000 E3000                       ; Set accelerations (mm/s^2)
                  M906 X1000 Y1000 Z1000 E1000 I50                   ; Set motor currents (mA) and motor idle factor in per cent
                  M84 S30                                            ; Set idle timeout
                  
                  ; Axis Limits
                  M208 Z0 S1                                         ; Set minimum Z
                  
                  ; Endstops
                  M574 X2 Y2 Z2 S1                                   ; Set active high endstops
                  
                  ; Z-Probe
                  M558 P8 R0.4 F1200 H5 T6000                        ; Set Z probe type to switch and the dive height + speeds
                  G31 P100 X0 Y0 Z-0.14                                  ; Set Z probe trigger value, offset and trigger height
                  M557 R105 S20                                      ; Define mesh grid
                  
                  ; Heaters
                  M307 H0 B0 S1.00                                   ; Disable bang-bang mode for the bed heater and set PWM limit
                  M305 P0 T100000 B4267 C0 R4700                     ; Set thermistor + ADC parameters for heater 0
                  M143 H0 S95                                        ; Set temperature limit for heater 0 to 120C
                  
                  
                  M305 P1 B4725 C7.060000e-8                         ; Set thermistor + ADC parameters for heater 1 ; M305 P1 T100000 B4267 C0 R4700 
                  M143 H1 S280                                       ; Set temperature limit for heater 1 to 280C
                  
                  M307 H1 A462.8 C245.1 D4.5 V24.2 B0                ;Hotend Autotune  //Changed
                  M307 H0 A141.2 C700.0 D0.4 V24.1 B0                ;Bed Autotune //Changed
                  
                  ; Fans
                  M106 P0 S0 I0 F500 H-1                             ; PART FAN   -  Set fan 0 value, PWM signal inversion and frequency. Thermostatic control is turned off
                  M106 P1 S1 I0 F500 H1 T45                          ; HOTEND FAN -  Set fan 1 value, PWM signal inversion and frequency. Thermostatic control is turned on
                  M106 P2 S0.20 I0 F500 H-1                          ; ELECTRONICS FAN - Set fan 2 value, PWM signal inversion and frequency. Thermostatic control is turned off
                  
                  ; Tools
                  M563 P0 D0 H1                                      ; Define tool 0
                  G10 P0 X0 Y0 Z0                                    ; Set tool 0 axis offsets
                  G10 P0 R0 S0                                       ; Set initial tool 0 active and standby temperatures to 0C
                  
                  ; Automatic power saving
                  M911 S10 R11 P"M913 X0 Y0 G91 M83 G1 Z3 E-5 F1000" ; Set voltage thresholds and actions to run on power loss
                  
                  ; Custom settings are not configured


                  1 Reply Last reply Reply Quote 0
                  • FelixHundefined
                    FelixH
                    last edited by

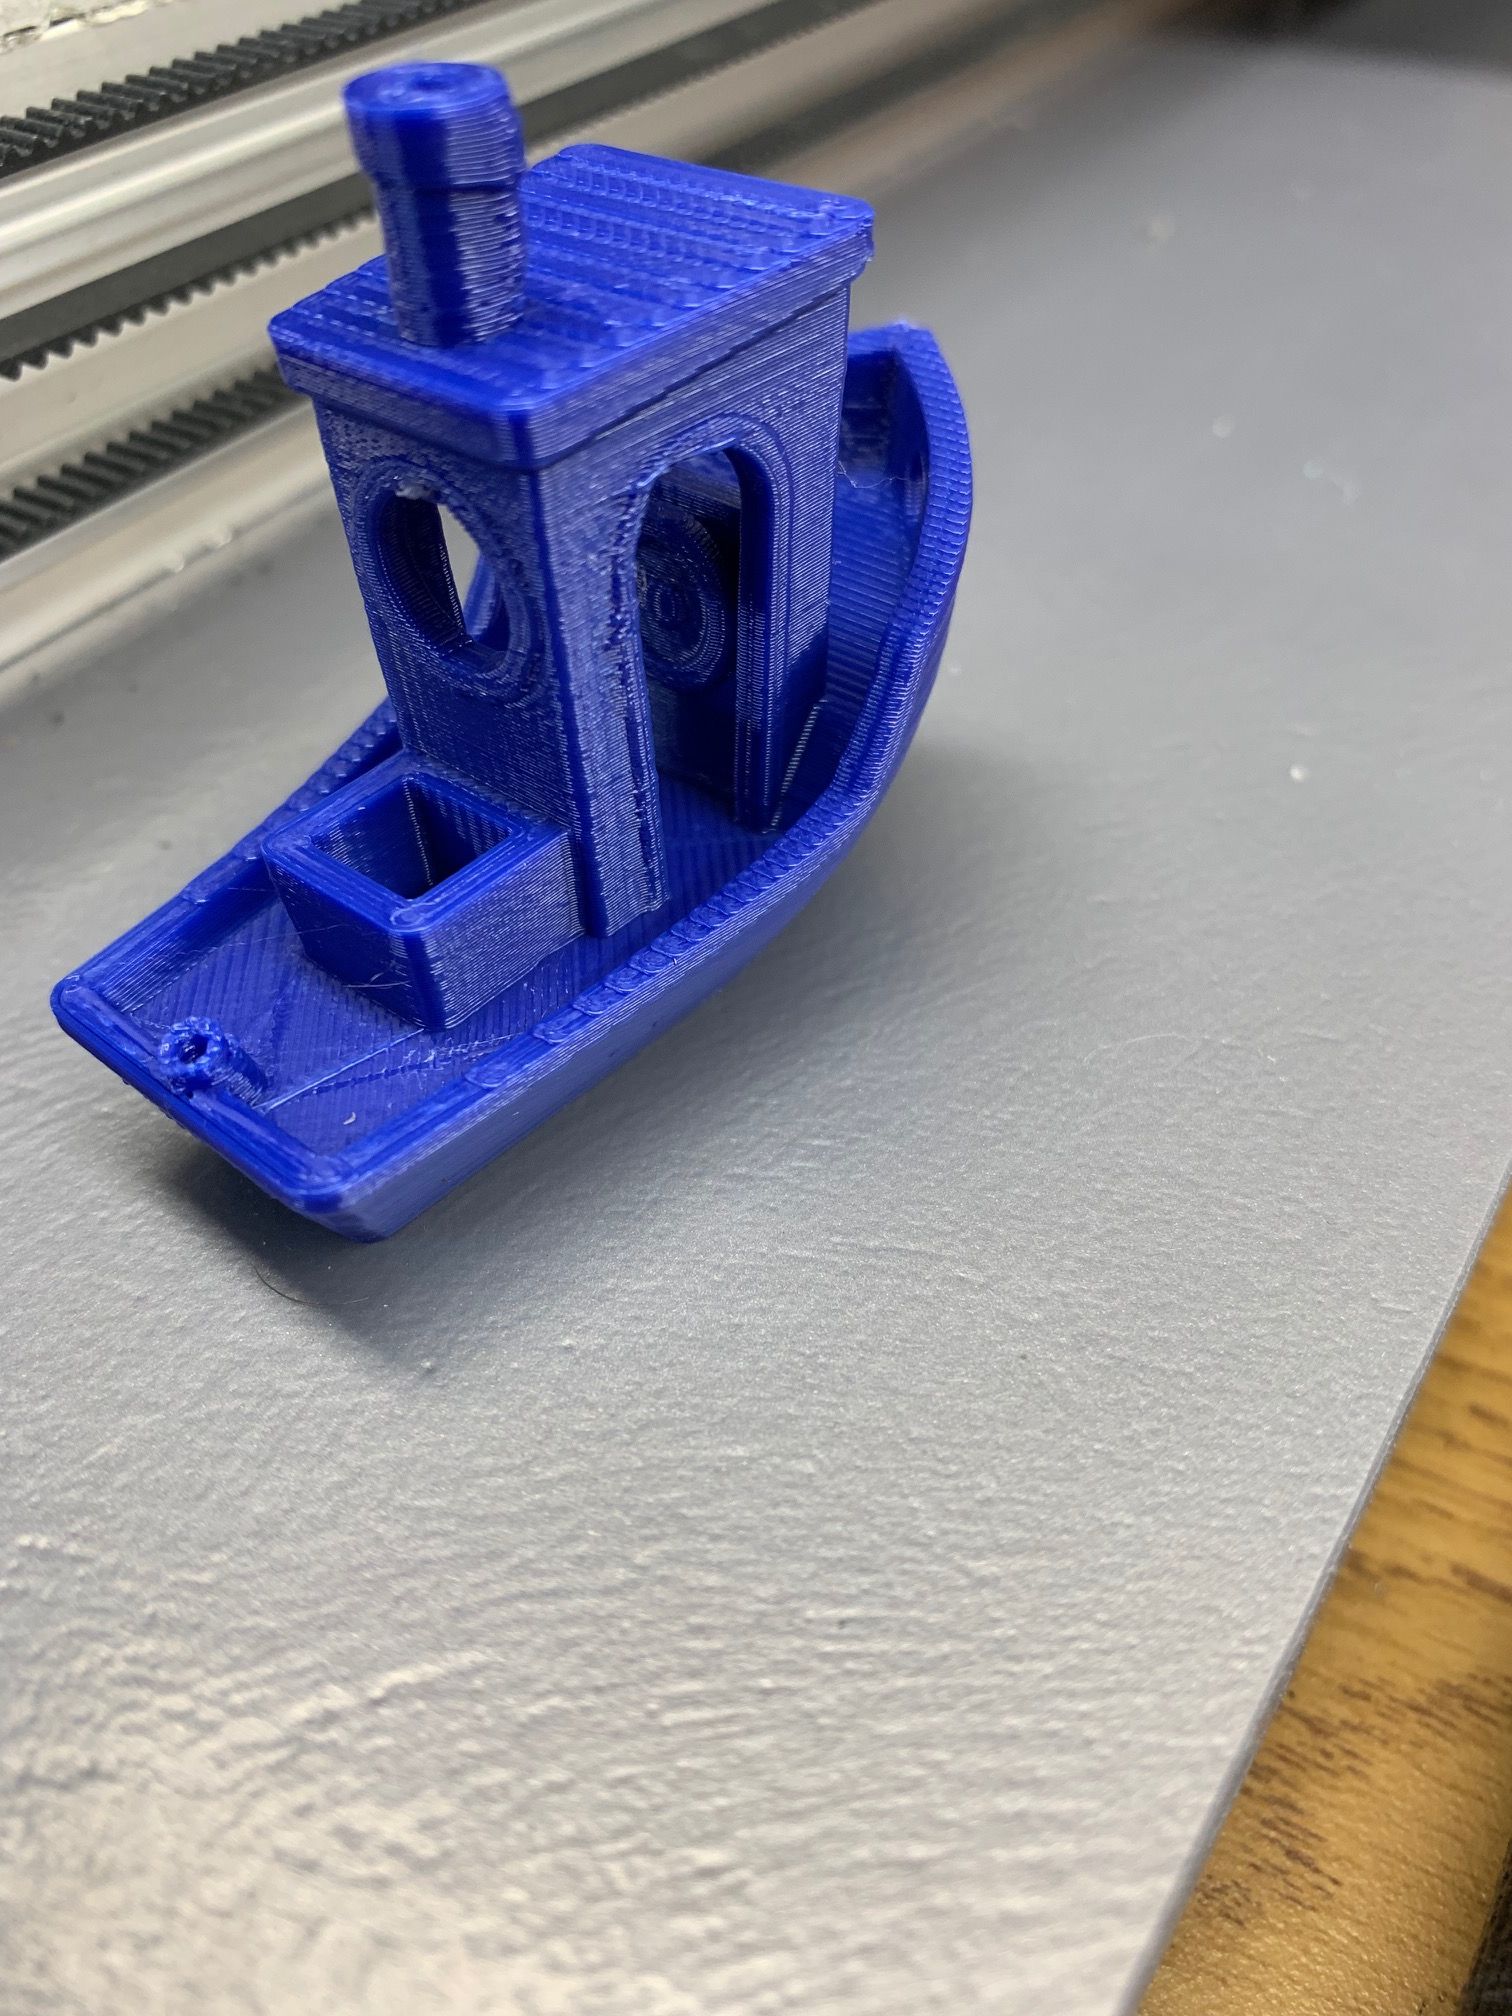
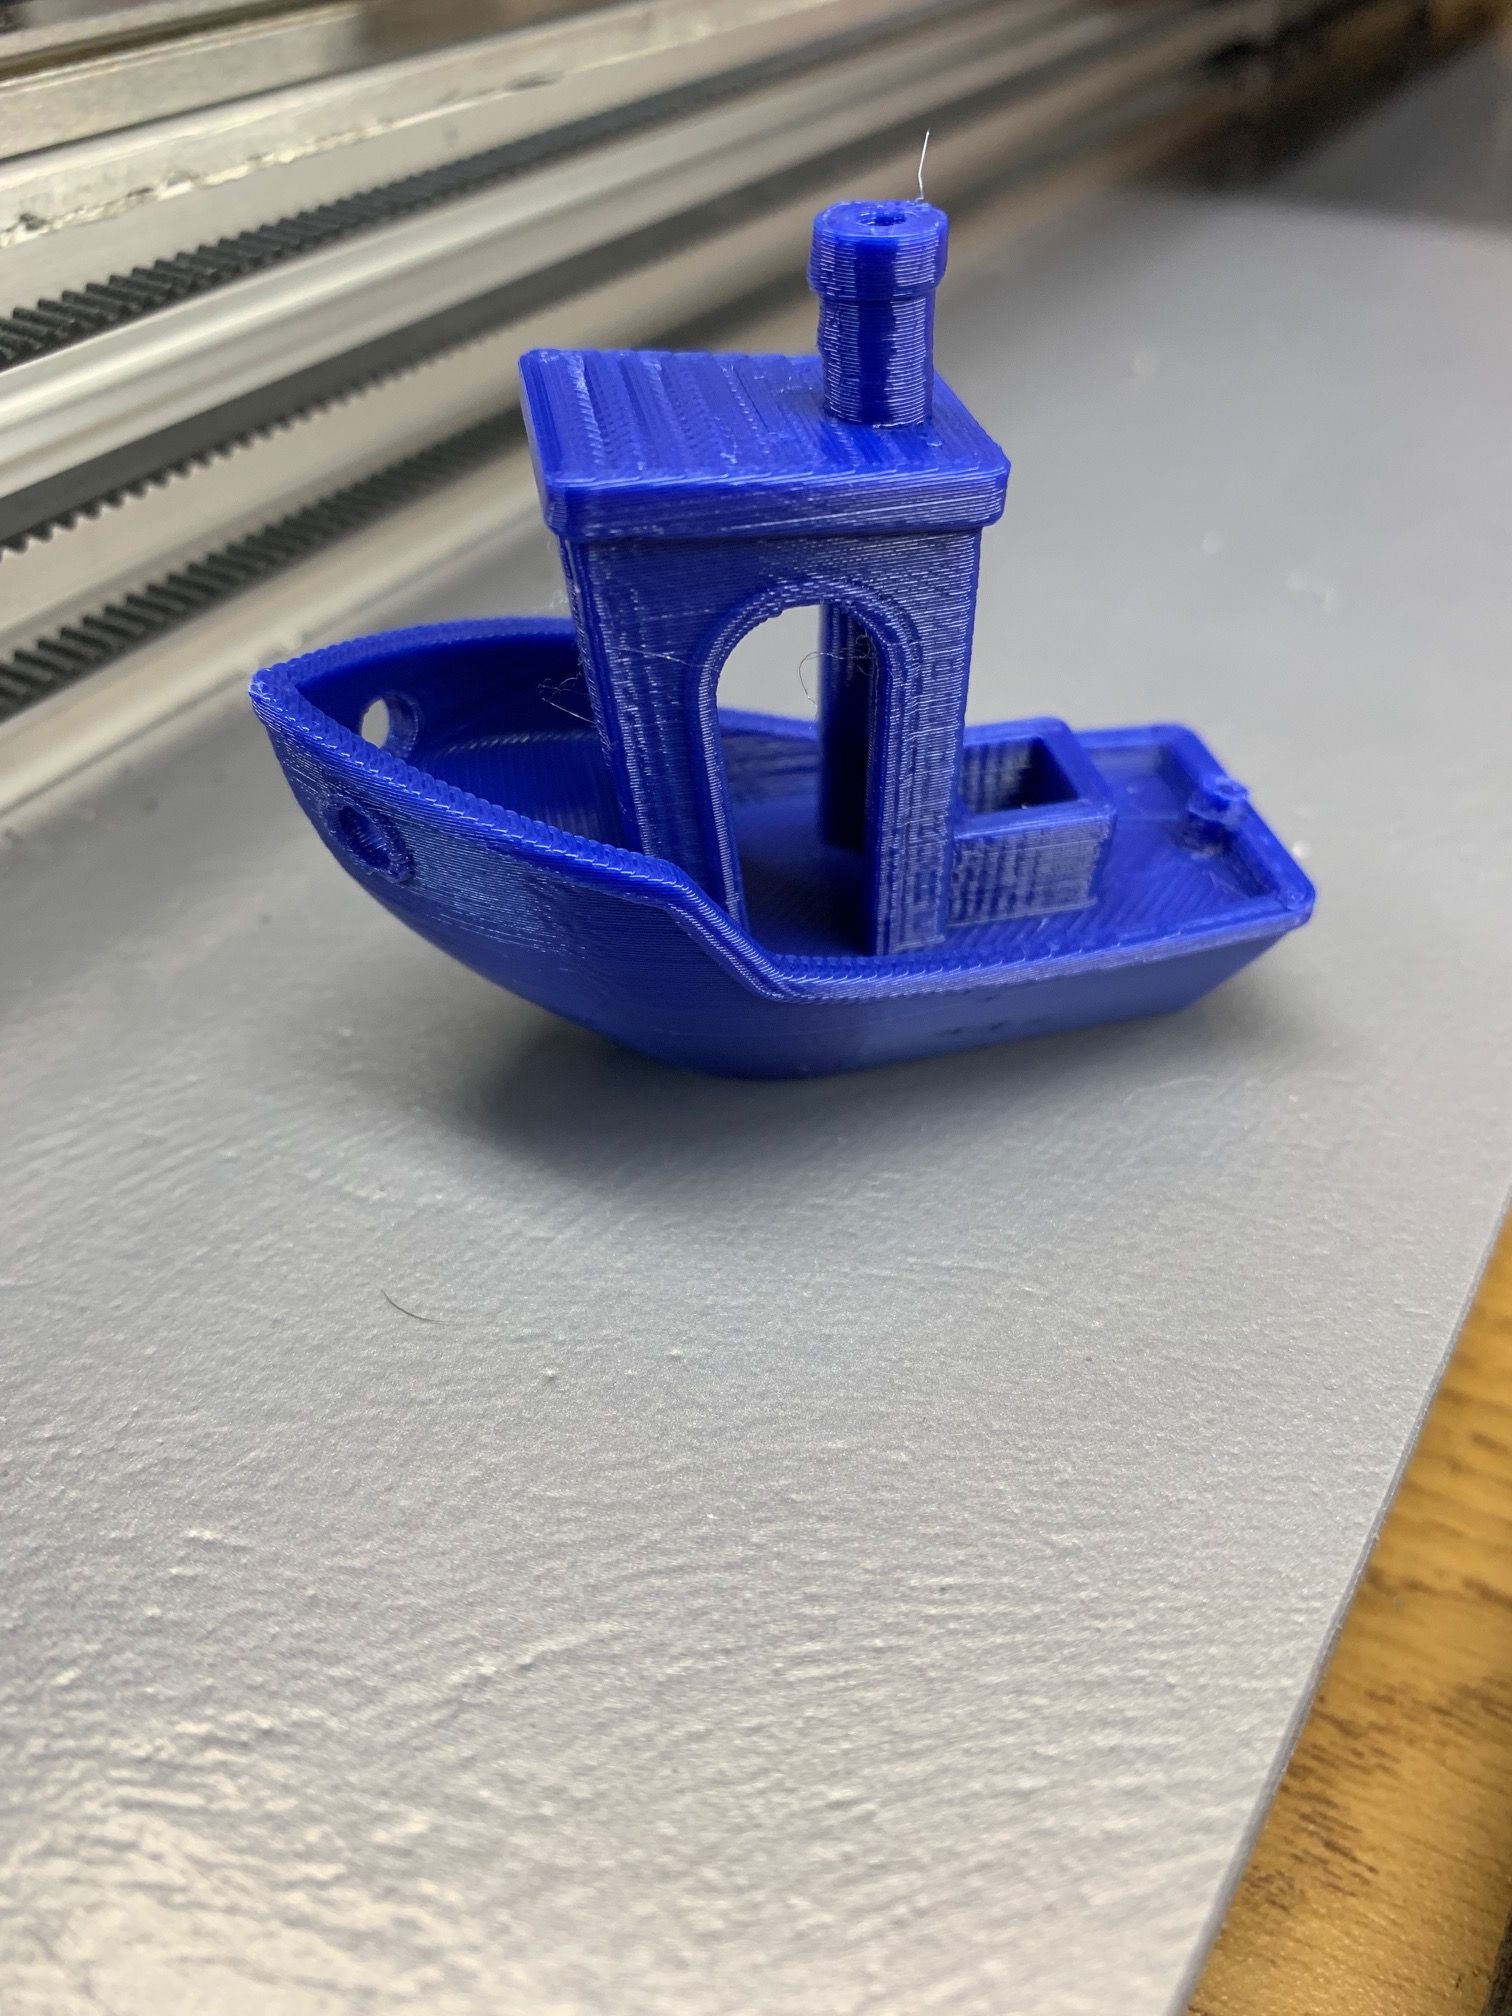
                    As a follow up, I lowered the fan duct on the effector by aprox 2,25mm because I noticed it was quite higher than other printers. The Benchy was significantly better, but still showed a bloop on on of the stern corners. See photo. I beginning to suspect that may!be the fan is not powerful enough for part cooling tasks...

                    IMG_6254.jpg

                    bricorundefined 1 Reply Last reply Reply Quote 0
                    • oliofundefined
                      oliof
                      last edited by

                      the axial fan blowing almost directly against a wall will not give you good cooling results. When my delta was still up and running, I used https://www.thingiverse.com/thing:3229241 with reasonable success.

                      <>RatRig V-Minion Fly Super5Pro RRF<> V-Core 3.1 IDEX k*****r <> RatRig V-Minion SKR 2 Marlin<>

                      1 Reply Last reply Reply Quote 1
                      • bricorundefined
                        bricor @FelixH
                        last edited by bricor

                        @FelixH Take a look at these past posts. They might help. (the parts that relate to the AKLP config)

                        https://forum.duet3d.com/topic/12760/need-help-magballs-smart-effector-for-ac-linearkosselplus?_=1584349301959

                        https://forum.duet3d.com/topic/13813/aklp-ckeck/2?_=1584349301962

                        One point to mention, I'm using a Bontech QR extruder.

                        I just checked, I'm using a PT100 so use the posted data for reference only and focus on the bits that apply directly to your machine like delta parameters and speeds. Not the extrusion and thermistor parameters.

                        FelixHundefined 1 Reply Last reply Reply Quote 0
                        • FelixHundefined
                          FelixH @bricor
                          last edited by FelixH

                          @bricor
                          I see from one of your posts that you seem to fill in the delta settings without running a delta calibration... is that right?

                          ; General preferences
                          G90 ; Send absolute coordinates...
                          M83 ; ...but relative extruder moves
                          ;M665 R133.969 L272.869 B110 H287.79 ; Set delta radius, diagonal rod length, printable radius and homed height
                          ;M666 X0 Y0 Z0 ; Put your endstop adjustments here, or let auto calibration find them
                          
                          M665 L288 R138 H304.65 B110.0 X0 Y0 Z0
                          M666 X0 Y00 Z0 A0.00 B0.00
                          

                          also, how come your height is 304 if you are using the Kossel frame?

                          finally, I found this value for the thermistor setting (original from E3D):

                          M305 P1 B4725 C7.060000e-8  
                          

                          could somebody confirm it is correct?

                          bricorundefined 1 Reply Last reply Reply Quote 0
                          • bricorundefined
                            bricor @FelixH
                            last edited by

                            @FelixH The Delta values in my config file are the default settings I use based on measurements. I set the tower heights (end stop switches) also based on measured values (that is why they are set to 0 in the config file). I then run auto calibration each time I start the printer. I only need to run auto calibration twice to get the desired result.

                            I posted the exact measurements of my printer, you should get the same results for height plus 8.5mm for the V6 compared to the Volcano that I use.

                            The thermistor values you posted are correct, I use the same for my other printers that use a standard E3D thermistors.

                            1 Reply Last reply Reply Quote 0
                            • FelixHundefined
                              FelixH
                              last edited by

                              well, then... Everything seems to be accounted for, but still doesn't nail one of the corners of the stern of the Benchy. My last test was with a lower temperature (by 10°C) but no change at all.

                              I will try another filament now and wait until tomorrow to get new 40mm fans...

                              1 Reply Last reply Reply Quote 0
                              • bricorundefined
                                bricor
                                last edited by bricor

                                What infill % are you using? I typically use 20%.

                                IMG_9511.jpg

                                IMG_9510.jpg

                                1 Reply Last reply Reply Quote 0
                                • FelixHundefined
                                  FelixH
                                  last edited by

                                  15% is my default

                                  bricorundefined 1 Reply Last reply Reply Quote 0
                                  • bricorundefined
                                    bricor @FelixH
                                    last edited by

                                    @FelixH In case you missed it, I edited my last post and included some pictures of a benchy I ran last night

                                    1 Reply Last reply Reply Quote 0
                                    • FelixHundefined
                                      FelixH
                                      last edited by

                                      yes, I saw it. Not bad at all.

                                      mine is not half bad either, only this little bloob of plastic on one corner. I'm printing with a different filament with a different color... let's see...

                                      IMG_1350.jpeg
                                      IMG_1351.jpeg
                                      IMG_1352.jpeg
                                      IMG_1353.jpeg

                                      bricorundefined 1 Reply Last reply Reply Quote 0
                                      • bricorundefined
                                        bricor @FelixH
                                        last edited by

                                        @FelixH I recognize my print could be better, but I don't normally print benchys. I fired up the printer, calibrated, sliced the model and printed. I wanted to see what my results would be as a comparison.

                                        Try 20% infill, see if that makes a difference.

                                        1 Reply Last reply Reply Quote 0
                                        • FelixHundefined
                                          FelixH
                                          last edited by

                                          The test with another filament was even worse...
                                          @bricor could you send me a picture of your part cooling fan?

                                          bricorundefined 1 Reply Last reply Reply Quote 0
                                          • bricorundefined
                                            bricor @FelixH
                                            last edited by

                                            @FelixH what exactly do you need a picture of, the fan or the label on the fan or the whole assembly?

                                            Did you try the print at 20% infill?

                                            FelixHundefined 1 Reply Last reply Reply Quote 0
                                            • First post
                                              Last post
                                            Unless otherwise noted, all forum content is licensed under CC-BY-SA