Volumetric calibration question
-
I have been reading through this Ender 3 calibration guide:
https://duet3d.dozuki.com/Guide/Ender+3+Pro+and+Duet+Maestro+Guide+Part+4:+Calibration/40
Step 11 and 13 provide equations to calculate Maximum Extrusion Rate (MER). I'm using this guide as my teacher as I use and Ender 5. But my E5 is equiped with a Micro Swiss all metal hot end and a Bondtech BMG extruder. I almost exclusively use 0.6mm nozzles @ 0.4 layer height. I use an BLtouch, and Hero ME single blower fan ducts. You know, the typical Creality mod up.
Following this guide to find my MER I can push mine values up to 10mm/s for ext rate, and can push 400mm of Esun PLA through without skipping. I jumped to 15mm/s and then it skipped.
At this point, I decided to pause, calculate my values based on 10mm/s (for practice, NERD!), and ask a question.
Outside of skipping, are there any other things to look for while you are extruding the filament and increasing your extrusion rate?
Thanks
Calculations:
10mm/2 × 3.14 × sqr ( 1.71 ÷ 2 ) = 22.9522.95 ÷ ( 0.4 × 0.6 ) = 95mm/s
CR10S, August 2018
Anycubic Photon S December 2019
Ender 5 Feb 2020
Ender 5 Plus May 2020
Anycubic Photon Mono X Nov 2020
~
https://3dimensiongames.com/ -
Make sure you keep the temperature high enough to maintain good adhesion of extrusion. There is a wide range of acceptable temperatures for some materials, but the faster you print, the higher you need the nozzle temp so that the heat can "soak" into the middle of the filament in the small amount of time it is exposed to the heat zone.
*not actually a robot
-
@bot
I will definitely keep that in mind. -
@bot said in Volumetric calibration question:
Make sure you keep the temperature high enough to maintain good adhesion of extrusion. There is a wide range of acceptable temperatures for some materials, but the faster you print, the higher you need the nozzle temp so that the heat can "soak" into the middle of the filament in the small amount of time it is exposed to the heat zone.
This was great advice. At the given 30mm/s test speed, I dialed in and 100% flow rate was perfect. But I rarely look to print that slow. So I upped the speed to 45mm/s and had to boost the temperature (215 to 220) to keep the extrustion adhering properly. Then 60mm/s, 220 to 230, but also had to turn the blower fan down from 20% to 15%, 66mm/s, I had to go to 235.
Your advice was so helpful to keep in mind while running this test.
CR10S, August 2018
Anycubic Photon S December 2019
Ender 5 Feb 2020
Ender 5 Plus May 2020
Anycubic Photon Mono X Nov 2020
~
https://3dimensiongames.com/ -
I'm glad to hear it. As you may discover, there is a balance of temperature and print quality. The fan helps with PLA. This is a main reason I love PLA.
-
Maybe you can help me a little further. I'm redoing all my printers (CR10, E5, and once I get it overhauled, and E5Plus). Starting with the E5 as it is the one that sits most conveniently on my computer desk and is the easiest one to make simple changes to without have to get up from my chair (lazy). Anyhoo.
So I ran this (https://www.thingiverse.com/thing:3670991/files) test, as noted in previous post.
So far the max I could get was 66mm/s with a temp of 235, and fan at 15%.
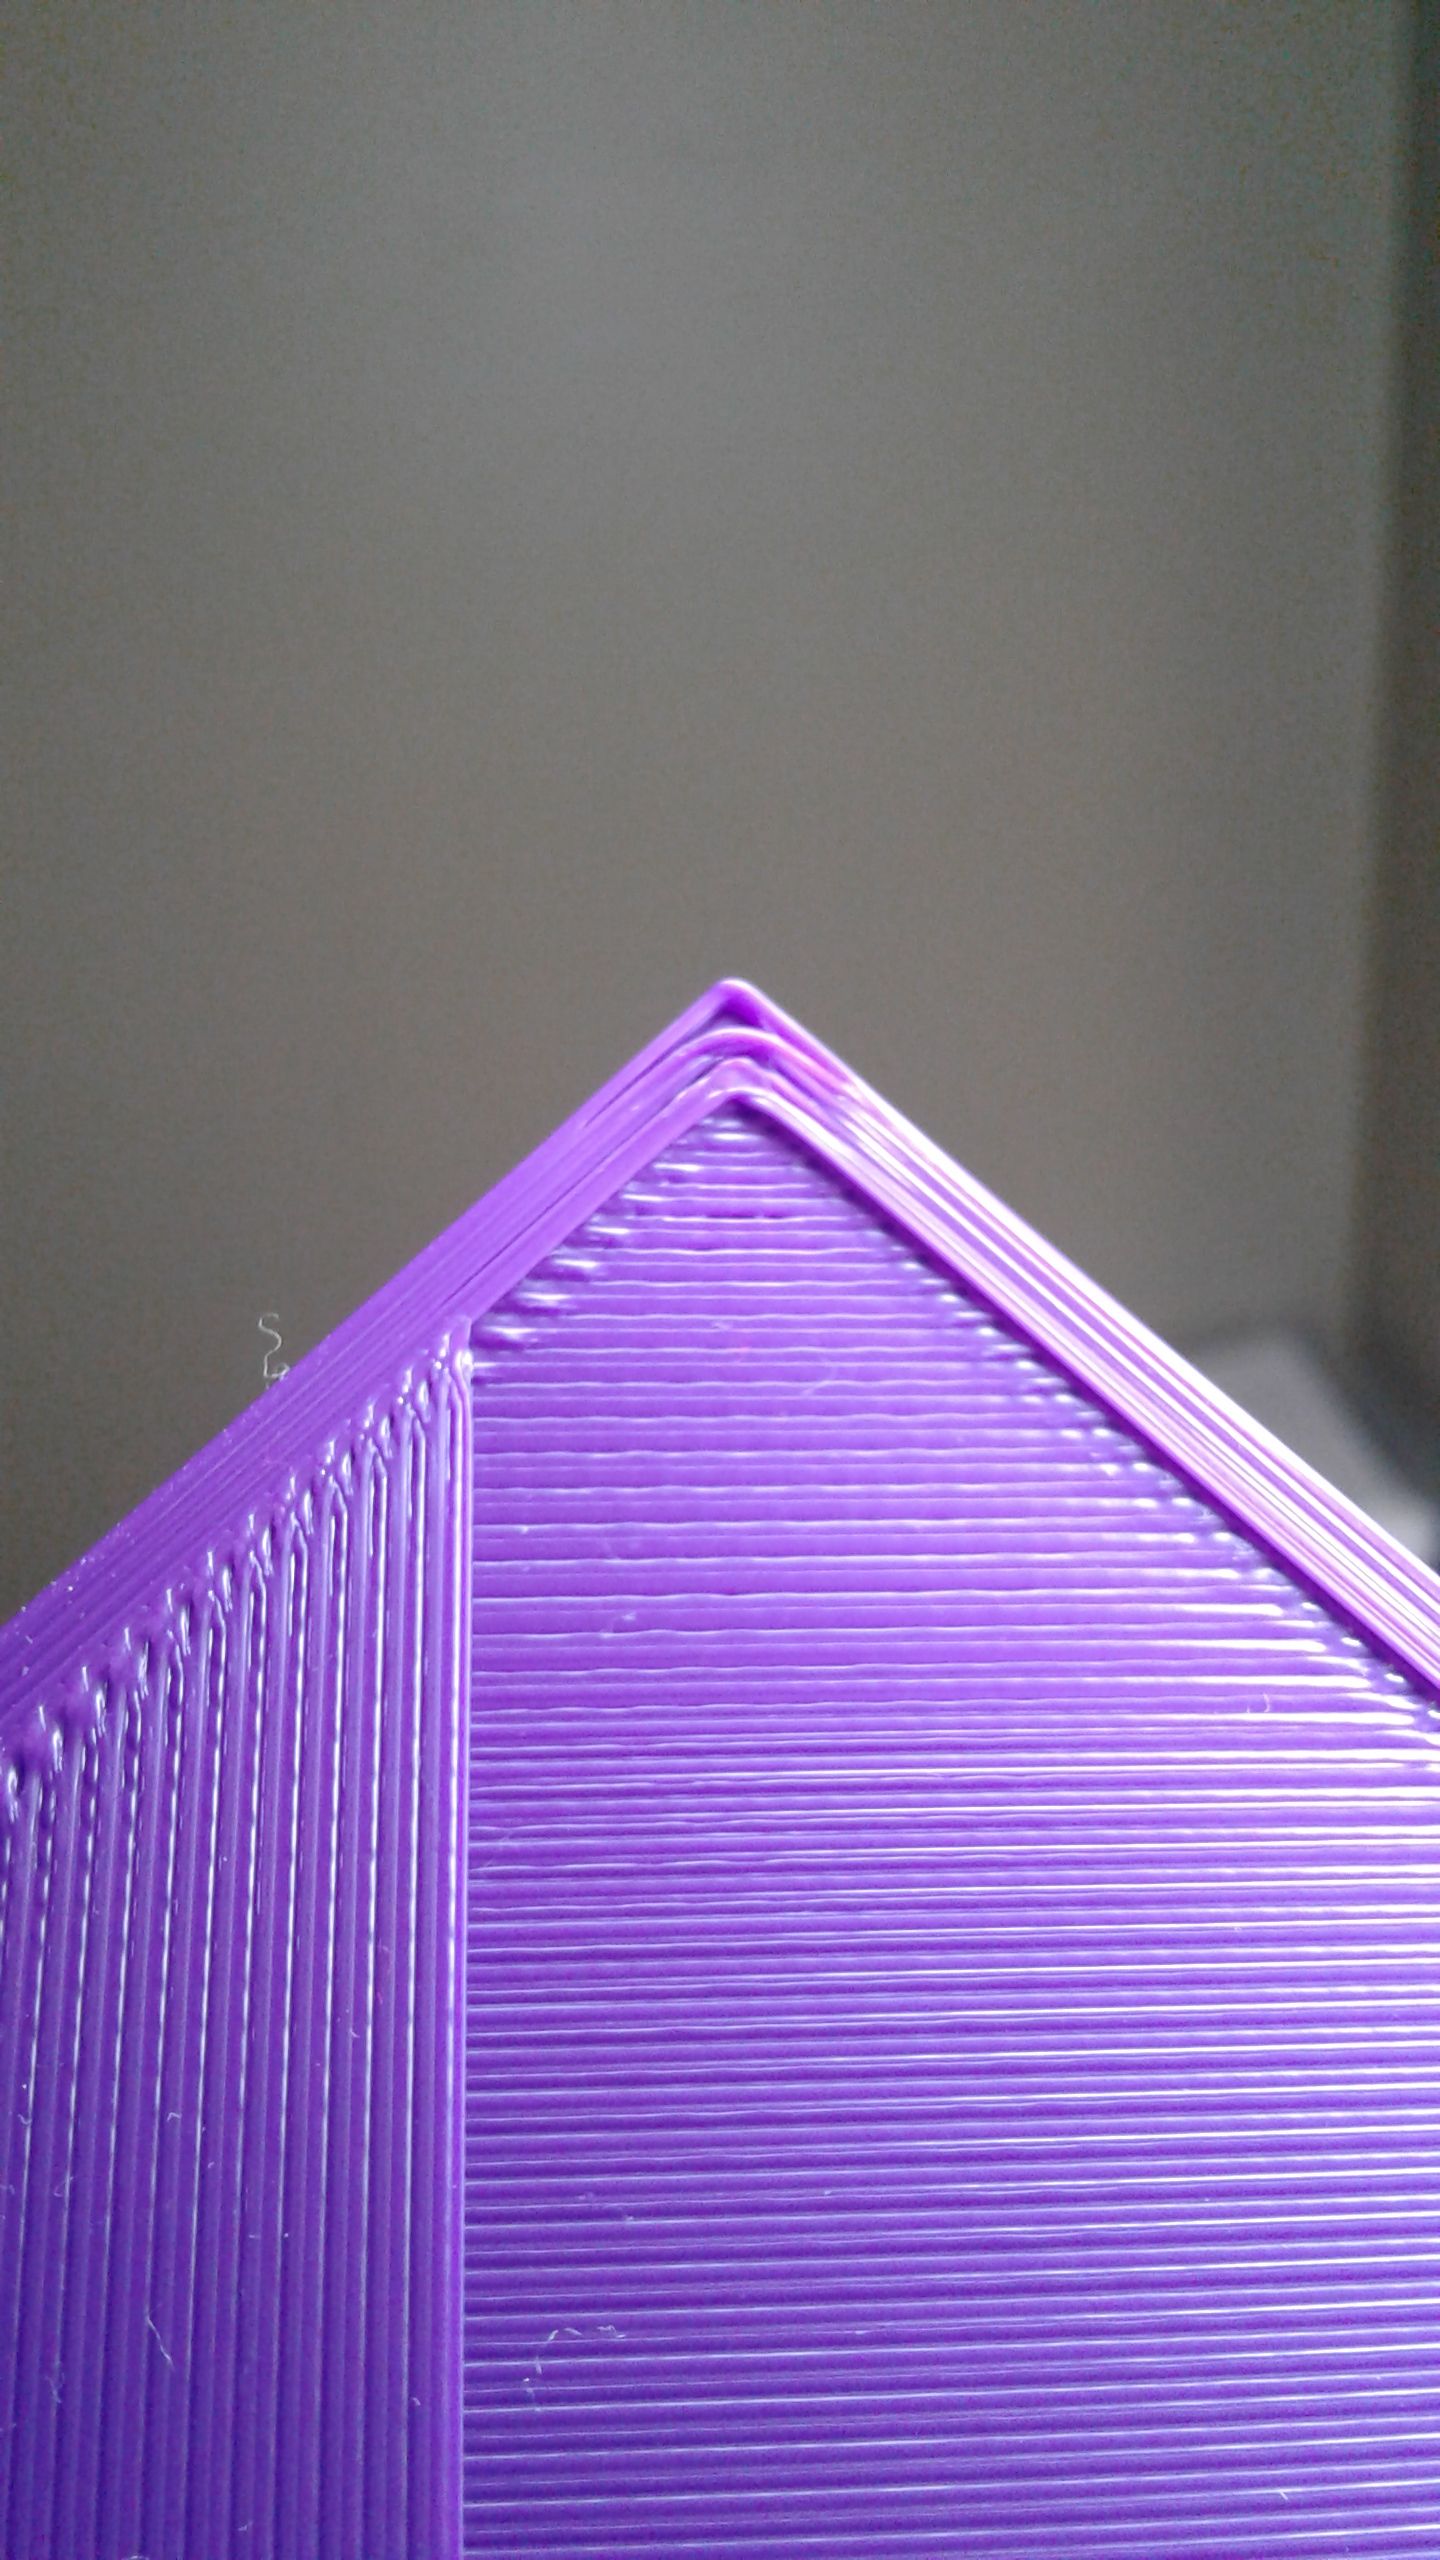
If I attempted 72mm/s I immediately ran into issues on the rounded corners with lifting and line separation. I am using a Jerk setting of 16mm/s (960mm/m) and accel of 1400mm/s(sq).
72mm/s result:
While I am ok with 60 and 66mm/s right now, faster speeds would be something I want to attempt. Is my next step to learn how to properly apply pressure advance.
Before I moved all my printers over to Duet boards (2 wifi and one maestro) I was using linear advance with Marlin. I had good results, but started to have solid infill line separation on my bottom and top layers. When I moved to Rep Rap and the Duets, I did a quick and dirty setup of of pressure advance, but still had line separation on my top and bottom layers. So I uncommented that line in my config.g and continued with traditional jerk and accel settings which have been good.
So would this guide be recommended next?
https://forum.duet3d.com/topic/14525/guide-pressure-advance-calibration-bowden-tube-only
CR10S, August 2018
Anycubic Photon S December 2019
Ender 5 Feb 2020
Ender 5 Plus May 2020
Anycubic Photon Mono X Nov 2020
~
https://3dimensiongames.com/ -
For those corners, I wouldn't focus on PA just yet. Pressure adcance might only make those corners worse, as it will ultimately lead to less material being extruded when rounding corners. Instead, if I were you, I would focus on acceleration and jerk values. It seems that your printhead is "cutting the corner" a little bit at high speeds. This might be due to acceleration (deceleration) being too high. For a given acceleration value, if you increase the speed, you also increase the amount of acceleration that occurs.
Acceleration increases per second of acceleration. If you have a higher top speed, you reach higher amounts of acceleration.
-
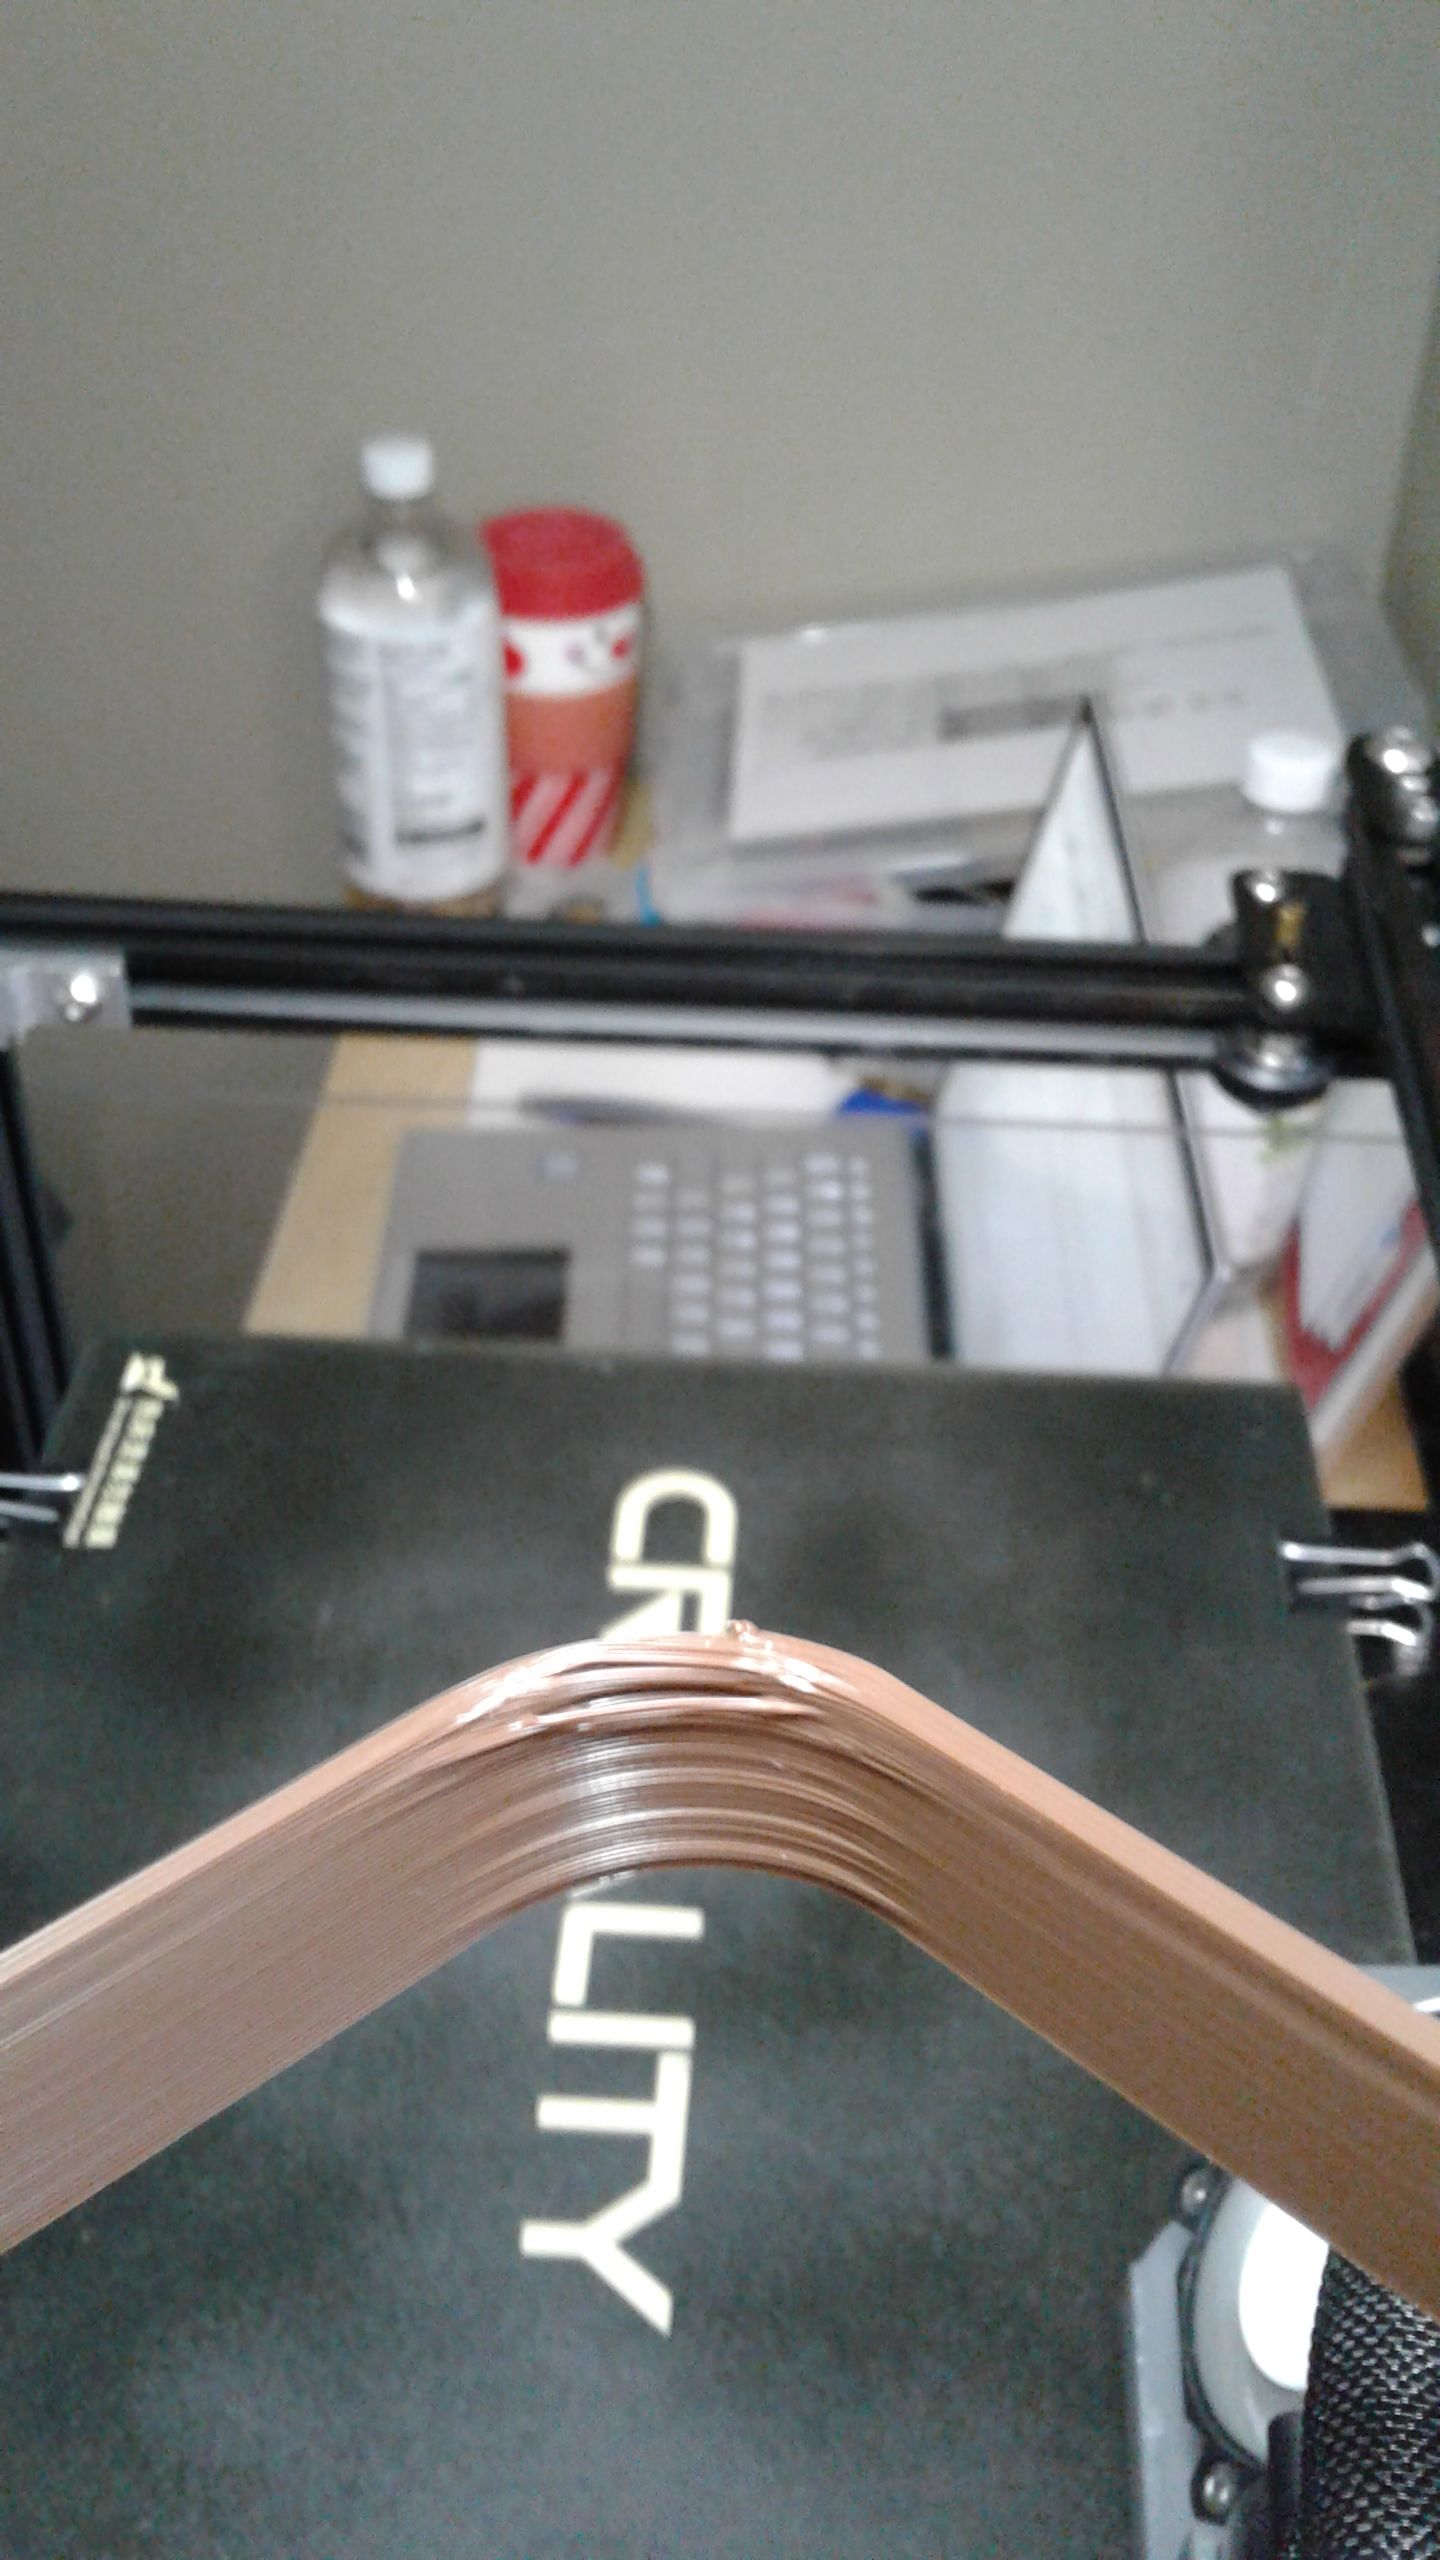
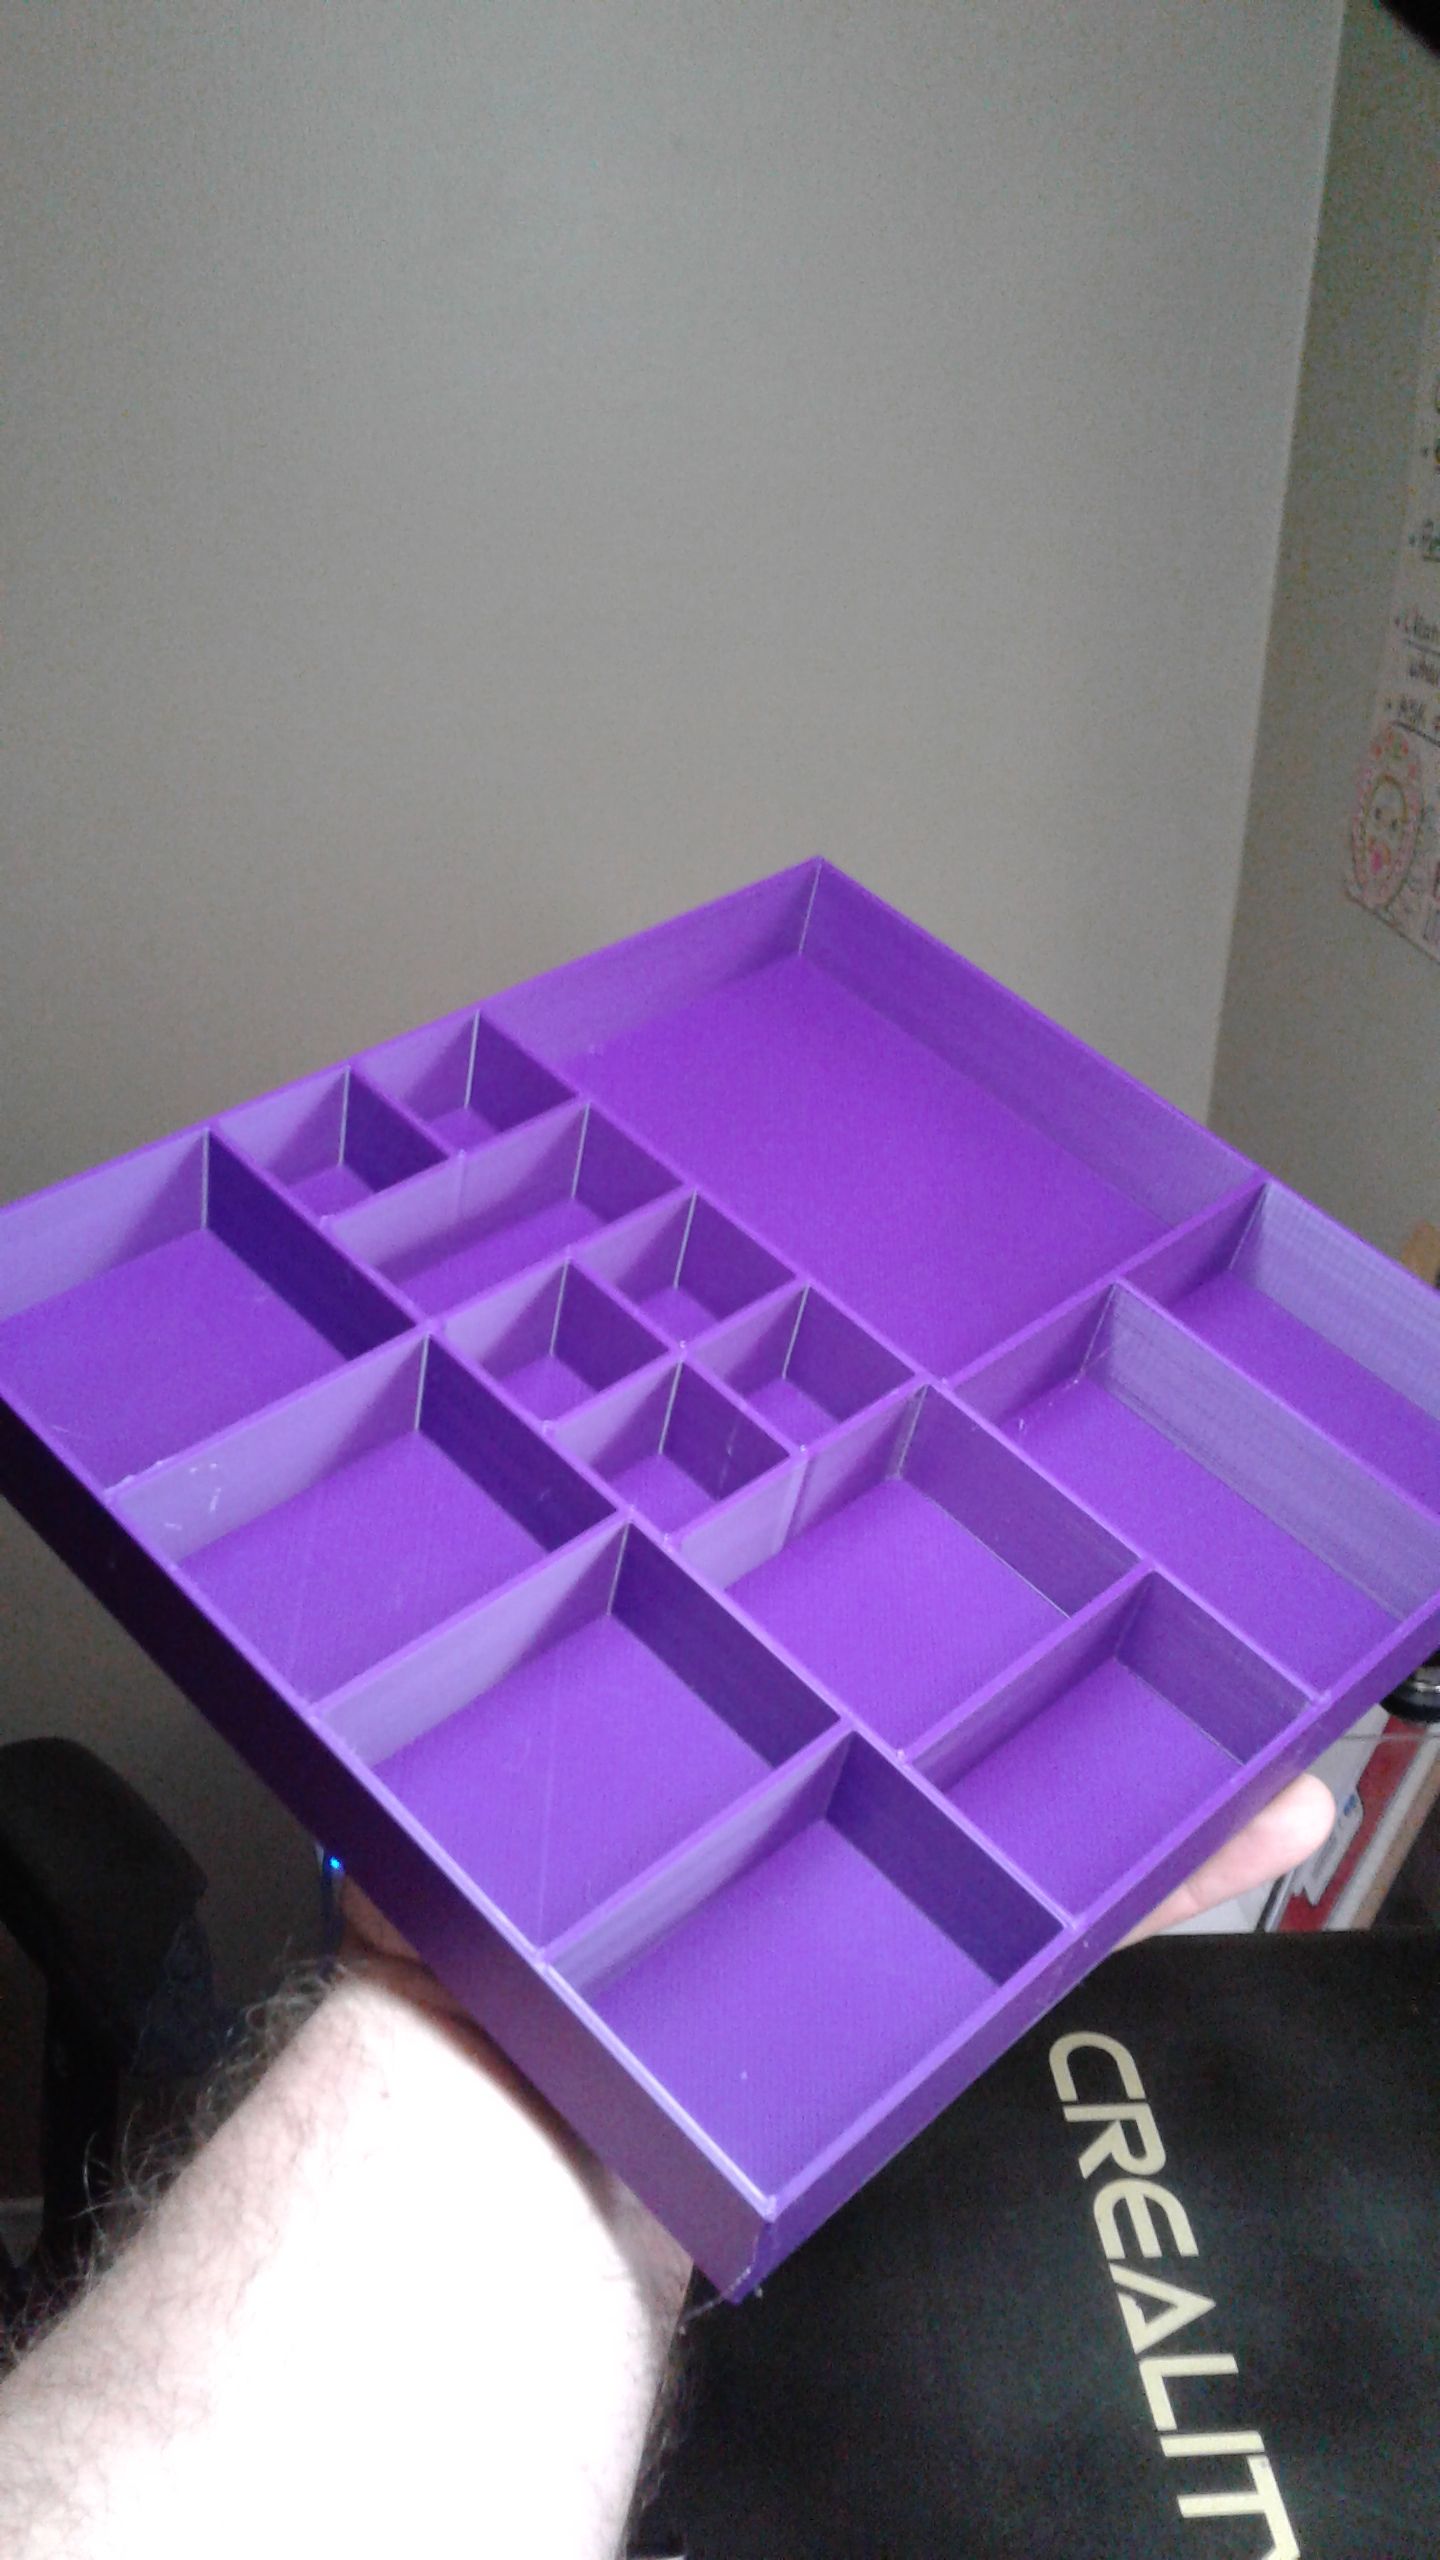
Ok. thanks for the input. I will search for and review acceleration calibration. I print a lot of square boxes for board games. Many with 90deg corners. Outer walls I generally print slower, while inner walls generally faster. Corner lifting, specifically the inner walls, tend to lift. But it almost exponential as the layers climb. So if I notice it, I tend to slow the print down, it corrects itself, and I can speed it back up again.
Here is a typical problem corner, and the finished product I achieve if I slow things down.
-
Hmm, interesting. In this case lowering the jerk value might help, so that the printhead slows down more before cornering.
Is the outer perimeter, that shows a good corner, printed at a speed equal to or lower than your specified jerk value?
*not actually a robot
-
@RyanP said in Volumetric calibration question:
So would this guide be recommended next?
https://forum.duet3d.com/topic/14525/guide-pressure-advance-calibration-bowden-tube-onlyI would get your jerk and acceleration and optimal print speed dialed in first before moving on to pressure advance. See here: https://forum.duet3d.com/post/130939
I now use the same settings for inner and outer perimeters. The only modifier I use is an option in the version of Cura I'm using to slow down on overhang sections. I also use the Cura option of altering jerk and acceleration for perimeters versus infill.
Also, don't worry too much about the sagging/pulled in corners of that print. Without any infill it's susceptible to that. It's not meant for tuning PA at all, it's just a quick way to see if your perimeter extrusions are fusing together or leaving a gap.
If you want to use it to tune PA, check the simple method described here: https://duet3d.dozuki.com/Wiki/Pressure_advance#Section_Methods_of_finding_the_right_amount_of_pressure_advance
-
@bot said in Volumetric calibration question:
Hmm, interesting. In this case lowering the jerk value might help, so that the printhead slows down more before cornering.
Is the outer perimeter, that shows a good corner, printed at a speed equal to or lower than your specified jerk value?
With print speed in Cura 4.5 set to 60mm/s, I have outer walls at 48, and inner at 60. My jerk is set to 16mm/s (960mm/m).
So my outer walls are 3 times my jerk setting. I have never hear it had to be equal to or lower.
Here is my ;Drives text
; Drives
M569 P0 S1                              ; physical drive 0 goes forwards
M569 P1 S1                              ; physical drive 1 goes forwards
M569 P2 S0                              ; physical drive 2 goes backwards
M569 P3 S0                              ; physical drive 3 goes forwards
M584 X0 Y1 Z2 E3                        ; set drive mapping
M350 X16 Y16 Z16 E16 I1                 ; configure microstepping with interpolation
M92 X80.20 Y80.15 Z799 E407.6       	; set steps per mm
M566 X960 Y960 Z30 E300    		; Jerk (mm/min)
M203 X12000 Y12000 Z600 E6000		; set maximum speeds (mm/min)
M201 X1400.00 Y1400.00 Z240.00 E5000.00 ; acceleration  (mm/s^2)
M906 X1000 Y1000 Z800 E1000 I50         ; set motor currents (mA) and motor idle factor in per cent
M84 S30
CR10S, August 2018
Anycubic Photon S December 2019
Ender 5 Feb 2020
Ender 5 Plus May 2020
Anycubic Photon Mono X Nov 2020
~
https://3dimensiongames.com/ -
@Phaedrux said in Volumetric calibration question:
@RyanP said in Volumetric calibration question:
So would this guide be recommended next?
https://forum.duet3d.com/topic/14525/guide-pressure-advance-calibration-bowden-tube-onlyI would get your jerk and acceleration and optimal print speed dialed in first before moving on to pressure advance. See here: https://forum.duet3d.com/post/130939
I now use the same settings for inner and outer perimeters. The only modifier I use is an option in the version of Cura I'm using to slow down on overhang sections. I also use the Cura option of altering jerk and acceleration for perimeters versus infill.
Also, don't worry too much about the sagging/pulled in corners of that print. Without any infill it's susceptible to that. It's not meant for tuning PA at all, it's just a quick way to see if your perimeter extrusions are fusing together or leaving a gap.
If you want to use it to tune PA, check the simple method described here: https://duet3d.dozuki.com/Wiki/Pressure_advance#Section_Methods_of_finding_the_right_amount_of_pressure_advance
Phenomenal. Thank you so much. This is such a great community. I struggle with the "looks like under-extrusion" answers on Reddit and other forums.
Ive also pulled up your Tuning Macros. I've been using Duet for about 3 months....and hot damn do I love macros.
-
@RyanP jerk doesn't need to be equal to or lower, I was just asking if that were the case because then it might indicate jerk was set too high.