Navigation

    Duet3D Logo

    Duet3D

    • Register
    • Login
    • Search
    • Categories
    • Tags
    • Documentation
    • Order
    1. Home
    2. RyanP
    • Profile
    • Following
    • Followers
    • Topics
    • Posts
    • Best
    • Groups

    RyanP

    @RyanP

    CR10S, August 2018
    Anycubic Photon S December 2019
    Ender 5 Feb 2020
    Ender 5 Plus May 2020
    Photon Mono X Nov 2020
    ~
    https://3dimensiongames.com/

    31
    Reputation
    95
    Posts
    9
    Profile views
    0
    Followers
    0
    Following
    Joined Last Online
    Website 3dimensiongames.com/ Location Ontario, Canada

    RyanP Follow

    Best posts made by RyanP

    • Do yourself a favor,use the tuning macros,top of this page

      @Phaedrux has done us all a great service by posting and sharing tuning macros for us Duet users.

      I thoroughly encourage every user here to download them and get to know them.

      These have become the backbone of my calibration over the last 3 weeks on my frankenstein'd Creality printers. In those 3 weeks I resin printed the Hydra Fan system (https://www.thingiverse.com/thing:4062242), converted my CR10 to a Microswiss direct drive, and my Ender 5 to a Bondtech direct drive.

      With all these changes I had a lot of tweaking and tuning to do. As we all know, 3D printing is a dark art. Many times what you want your printer to do...is not what it decides to do.

      But these tuning macros are superb in every way. Not only have they allowed me a better understanding of what Acceleration, Jerk, and PA do, and have giving me better understanding as to how they interact with each other.

      Sure, you can punch in g-code command after command. But these macros make it feel like you have a tuning console to work from.

      So again, do yourself a favor and get these on your machines if you haven't done it already. And send a big thanks to @Phaedrux while you are at it.

      posted in Tuning and tweaking
      RyanP
      RyanP
    • New to Reprap and Duet.....thank you.

      Hi everyone,

      I’ve just started learning Reprap firmware and Duet architecture this week. Have some simple printers that I am working on starting a home business with and, with the help of Ali and digitmakers.ca, got turned onto Duet3D.

      My printers are my 1.5 year old Creality CR10S, and my two recently purchased Creality Ender5Pro and Plus.

      In the Late fall of 2019 I bought an MKS board and touch screen. Never got it installed. Was getting tired of Marlin. So I bought a Duet 2 Wifi. Christmas came around and I never actually installed it on its intended printer, the CR10S.

      Well, this week I finally did. Learned my way through all the setup and software. Once you get to know the basics of the firmware, and the web control, it makes Marlin look like an Abacus.

      So I picked two Duet Maestros for my two ender based printers.

      Halfway through the E5Pro, and will get to the Plus this weekend.

      So I just wanted to say hello, and I look forward to discovering what firmware and hardware can do.

      Thanks,
      Ryan

      posted in General Discussion
      RyanP
      RyanP
    • Thanks to Duet and Digitmakers

      I wanted to give a special thanks to @Phaedrux and Ali from Digitmakers.ca in Toronto.

      I had a Duet 2 Wifi go bad on me this week, fried bed heater connector. I contacted Ali and he provided me with a warranty link. I started a thread as well as I had heard that is required.

      Long story short, in less than 36 hours I had a replacement board and a few hours later my printer was back up and running.

      It was very important to me to have such amazing service as I have started a small home business with my 3D printer lineup.

      I put out a cheesy video on Facebook tonight and made sure anybody watching knew my printers ran on Duet 3D boards.

      https://www.facebook.com/3DimensionGames/videos/326856824984504

      posted in General Discussion
      RyanP
      RyanP
    • RE: Is the a misconception about printing speeds?

      Thanks for all the replies guys. Between the responses here, and the ones I got today from other forums and direct messages, 90% of average printer users do not have a clue what speed they are actually printing at.

      The problem lies in how Cura displays its speed settings and how the average hobby printer user views this information. So many people are simply selecting a profile like "fine", selecting a speed of 60mms, and letting it go. I kindly prompted some of the people I spoke to what their acceleration and jerk settings were, and most of them didn't know. They are just using the stock printer, with preset cura profile at 60mms.

      Earlier this year I started using Simplify3D and I was shocked at how much shorter print time a lot of my prints were compared to my profile in Cura. This led me to finding all the hidden speed settings.

      Now, I am not knocking any of these people and how they use the printer. I'm glad to see people enjoying the hobby. If a person wants to just 'hit print", thats great. If someone else wants to dissect the inner workings, equally great.

      The side effect of this problem is that when one person sees a great print posted on line, especially on the more average user forums like Reddit, many people will ask for their settings such as speed. The answer comes back, 60mms, for example. But that does not mean that three different machines will perform the same at 60mms.

      I was a bit taken aback when I learned how many people thought 60mms was for every aspect of the print and had no clue how many hidden speed settings their were in cura, and how slow they were. On top of that, because many of them didn't know what their accel and jerk settings were, they didn't know how each would affect speed.

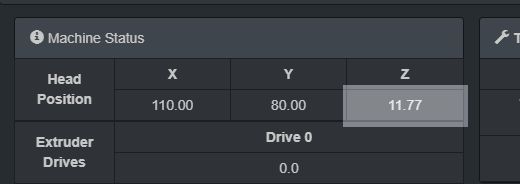
      DWC gives us the benefit of seeing relatively instantaneous feedback on our speed. But the typical stock Creality printer gives none of that at all. Imagine driving a car without a speedometer. That is how most printers are.

      Again, how each person uses their printer is fine. I'm more concerned with how information is shared. I think a lot of printing problems stem from misguided sharing of settings.

      posted in General Discussion
      RyanP
      RyanP
    • Pressure advance tuning...my findings so far

      Hey all,

      Yesterday I decided to take, oh I don't know 5 hours, and tune my Ender 5. This printer has a Duet Maestro, Bondtech BMG bowden setup, microswiss hot end and 0.4mm nozzle. All primary inital calibrations have been completed.

      My bowden tube for this setup is 510mm, so slightly on the long side. I had been using a PA of S0.14 for the past while with decent results, but not perfect. Certain aspects of prints were beautiful while others were not.

      I started using a script I found here:
      PA script

      And I ran this with from S0.0 to S1.0. Thought the results were inconsistent, and the only thing I took away was the S0.0 to S0.2 were meh, S0.5 and S1.0 seem to give the best results. So as you can see, inconsistent.

      Then I moved over to another test I really like prior:
      Bowden Only

      As I was browsing the many, many threads on PA, I stumbled along a two year old post from @Phaedrux stating a possible connections between PA and Jerk. But I think acceleration is tied into a trio with PA and Jerk. Here are my findings.

      So what I did was started printing https://www.thingiverse.com/thing:4175047

      PA set to S0.5, print accel M204 P1000, and jerk set to M566 X1200 Y1200. Also E Jerk and accel are set high enough as to not affect movement.

      Results were ok. But I wanted to see what would happen when I adjusted each of the above setting individually to see how they would react to the print. I started by leaving PA alone, set at S0.5 and focusing on accel and jerk.

      Tuning jerk lower to something like 10 M566 X600 Y600 I found caused problems with the connection of infill lines to wall lines. Then I set it to 40 M566 X2400 Y2400 and this was two violent for small movements. So I set it back to 10.

      Then I decreased my print accel to M204 P500 and infill extrusion improved but caused problems at the start of new lines. Basically under extrustions.

      So then I started treating Accel and Jerk like knobs I could turn up and down. And my best results were with a lower acceleration and high jerk.

      Now your acceleration cant be too low or your prints will take forever because your print head takes too long to get up to speed. But it does need to be lower to allow small aspects of your print to slow down. I now have jerk set to 30. With jerk set to 40, the printing movements of long lines were fine, but short infill lines were way too violent. Turning it down below my initial setting of 20 caused it to slow at line endings too much. So I set it 30 M566 X1800 Y1800 and there were no issues with directional changes and blobs, as well as not being too violent.

      So my final settings are
      M572 D0 S0.5
      M204 P500
      M566 X1800 Y1800

      With accel tuned lower, it slows down short portions of your print so that they don't get herky jerky by your higher jerk. And PA keeps things in check by doing a decent job of keeping a consistent pressure in the nozzle.

      Truth be told, I don't know how correct any of my methodology is, so I would love to hear from everyone what their thoughts are. I will be trying this same tuning method on my CR10 today, and later my Ender 5 Plus.

      posted in Tuning and tweaking
      RyanP
      RyanP
    • RE: Three printers, poor consistency, questions

      @ChrisP said in Three printers, poor consistency, questions:

      Don't forget though that the faster you print, the faster you'll need to get energy into the filament so at some point you'll have to decide whether you want to find the max VFR for your standard temperature or whether you're wanting to explore increasing temperatures to push the VRF up. Based on what you've said so far, I'd probably save increasing temps for another day once you have some nicely tuned profiles.

      I'll reply to the sections before this in another post as the VRF aspect is important for the speed I am trying to determine I can print at.

      Since I wasn't able to find any details beyond the "skipping" method, and figured I'd look at it and see how it can be modified to assist with bowden tube setups.

      So the dozuki ender 3 guide suggests 50mm and increasing by 1mm/s. I'm assuming its being done with a 0.4 nozzle, and I'm using a 0.6 nozzle. But I did two things different.
      One, I doubled the length in the guide. So instead of 50mm followed by 100mm. I started with 100mm, and verified with 200mm. The extra constant length over 50 gives more time for pressure to build up.

      And two, I paid close attention to the bowden tube and its movements. Especially when the extrusion finishes. Anything more than slight flex, I lowered my feed rate.

      1. heat nozzle to 220c
      2. turn on part cooling fan to 20% (I may change this after some test prints)
      3. extrude 100mm @5mm
      4. increase by 1mm/s until poor bowden movement or skipping
        (both which seemed to happen at 10mm/s)
      5. Decreased to 9mm/s, extrude 100, no skipping, but the flex was still there
      6. Double to extrude to 200mm @ 9mm/s (poor flex and skip)
      7. Stayed with 200mm but dropped to 8mm/s, nominal flex and no skipping

      So based on that, I am going to use 8mm/s as the feed rate.

      Max Flow Rate = Max Input Feed rate * pi * (Filament Diameter/2)2

      MFR = 8mm/s * pi * (1.72/2)2 (I used 1.72 as I often get that result in filament measurement)

      MFR = 18.5 or 18.

      I'm going to test this and see how things change.

      posted in General Discussion
      RyanP
      RyanP
    • RE: Volumetric calibration question

      @bot said in Volumetric calibration question:

      Make sure you keep the temperature high enough to maintain good adhesion of extrusion. There is a wide range of acceptable temperatures for some materials, but the faster you print, the higher you need the nozzle temp so that the heat can "soak" into the middle of the filament in the small amount of time it is exposed to the heat zone.

      This was great advice. At the given 30mm/s test speed, I dialed in and 100% flow rate was perfect. But I rarely look to print that slow. So I upped the speed to 45mm/s and had to boost the temperature (215 to 220) to keep the extrustion adhering properly. Then 60mm/s, 220 to 230, but also had to turn the blower fan down from 20% to 15%, 66mm/s, I had to go to 235.

      Your advice was so helpful to keep in mind while running this test.

      posted in Tuning and tweaking
      RyanP
      RyanP
    • RE: BLTouch Bed leveling oddity

      I just finished my conversion of the my CR10S and my Ender 5 Plus to using separate steppers. Through my learning, you only need to add and U* parameters in the descriptions of your steppers (ei; jerk, accel, steps etc).

      In all other instances (such as z probe offset), you simply need to apply a Z* parameter.

      It sounds like what I have been working through for the past few days where my z-offset keeps changing.

      As @Phaedrux said, use the probe. My process is very similar to yours.

      1. home all axis

      2. M564 S1 to make sure virtual endstops enabled so you can't go below 0 for Z

      3. raise 8mm

      4. probe bed

      5. repeat 3 and 4 and review Z offset.

      6. once I am locked in with my z offset, I reboot, home and check with paper.

      But I was doing this over and over and over, daily. But this I learned about operating the dual z axis with separate steppers, and using G32 to align the leadscrews Even though dual z screws is supposed to help with keeping your gantry level, it never does.

      I I made the need hardware changes and firmware changes, and can include G32 in my routine. I have found today on my CR10S I don't have to adjust my z-offset. Its rock solid.

      I will also add that in all this change, I also positioned my probe (BL Touch as well) to be closer to the nozzle. So my z offset is much smaller.

      So I would try

      posted in General Discussion
      RyanP
      RyanP
    • RE: Newbie: New Install on Ender 5 Plus---Willing to PAY$$$

      @shatty

      I'm printing on my E5+ right now. Duet 2 Wifi, running perfectly. Send me your config G and I will look at it.

      posted in Tuning and tweaking
      RyanP
      RyanP
    • RE: <solved>M557 grid parameters not being followed.

      Dumb oversight. I have been using the same parameters for the probe offset, but completely ignored the fact that I just changed this printer from a Microswiss hotend to and E3D Volcano. Y offset was not correct.

      posted in General Discussion
      RyanP
      RyanP

    Latest posts made by RyanP

    • RE: Should I be switching out my Duet 2s

      @Veti Thanks for the info. My base printing speed is 60mms, usually doing 80 to 120 for infill. Above that and my printer can't handle it structurally. Thus the hevort based build.

      posted in General Discussion
      RyanP
      RyanP
    • RE: Should I be switching out my Duet 2s

      @Phaedrux said in Should I be switching out my Duet 2s:

      @RyanP said in Should I be switching out my Duet 2s:

      do you recommend just using the config tool for simplicity?

      To start with, yes. That way you have a good example of the syntax to start with.

      @RyanP said in Should I be switching out my Duet 2s:

      upload the RRF3.2 firmware via the system page on DWC

      You'll need to update to 3.0 first.

      If you still have access to DWC. Upload these 3 zip files, one at a time. Don't extract them. Reboot after each. Use M115 to verify the firmware has been applied.
      https://github.com/Duet3D/RepRapFirmware/releases/download/2.05.1/Duet2Firmware-2.05.1.zip
      https://github.com/Duet3D/RepRapFirmware/releases/download/3.0/Duet2and3Firmware-3.0.zip
      https://github.com/Duet3D/RepRapFirmware/releases/download/3.2/Duet2and3Firmware-3.2.zip
      That will get your firmware and DWC up to date.

      Just to clarify,

      This is what I am on right now on one of the units using a Duet 2 Wifi

      Clipboard04.jpg Clipboard02.jpg

      If might sounds silly, but I just want to cover everything. So do I still have to load up 2.05.1 if I am there already? During the holidays I updated to the latest I could without going to RRF3.

      posted in General Discussion
      RyanP
      RyanP
    • RE: Should I be switching out my Duet 2s

      As for a new CoreXY build, should a stick with Duet 2 products, or just go with the Duet Mini 5+?

      posted in General Discussion
      RyanP
      RyanP
    • RE: Should I be switching out my Duet 2s

      @Phaedrux @fcwilt perfect guys. I'll get to work on this tonight. See you on the other side Ray.

      posted in General Discussion
      RyanP
      RyanP
    • RE: Should I be switching out my Duet 2s

      @fcwilt said in Should I be switching out my Duet 2s:

      @RyanP said in Should I be switching out my Duet 2s:

      With Switching to RRF3 what are the common stumbling blocks (outside of glitches) to look out for?

      It's really rather simple. Some changed syntax, some new commands.

      It took me maybe 30 minutes to convert my config.g file from v2 to v3 BUT I created the config.g file from scratch so I knew it well.

      Those using the configuration tool often seem to never really learn the command set and the syntax.

      Frederick

      I try not to use the config tool simply for this reason. I've spent the last year learning and understanding GCode as I quite enjoy the programming aspect of it.

      So to clarify before I dive down the rabbit hole tonight, upload the RRF3.2 firmware via the system page on DWC, then change the config.g file?

      Or am I simply better to use the config tool to make a clean slate firmware? @Phaedrux do you recommend just using the config tool for simplicity?

      posted in General Discussion
      RyanP
      RyanP
    • RE: Should I be switching out my Duet 2s

      With Switching to RRF3 what are the common stumbling blocks (outside of glitches) to look out for? What have some of you had issues with understanding.

      GPIO simply seems like a open ended connection assignment system for both input and output devices. This was preferred way to deal with inputs and outputs on complex AV systems.

      posted in General Discussion
      RyanP
      RyanP
    • Should I be switching out my Duet 2s

      Hey Duet people,

      With the Duet 3 Mini 5+ now available, I'd love to hear some feedback on them.

      To my questions.

      Firstly, I'm currently sourcing parts for a Hevort based printer. Im using a Meanwell SE600 for power + LRS350 12V, plan for dual z leadscrews (currently happy with that config) and single extruder. Is the Duet Mini 5+ the right board? Not trying to go overboard with my first attempt at a full custom build.

      Secondly, I have three formerly Creality cartesian printers. Two are running (gen) Duet 2 Wifi boards, and the other a Duet Maestro. Should I be upgrading these to the Mini 5+.

      Lastly, should I wait to learn RRF3 on these new boards or should I go ahead and do it on my Duet 2 Wifi boards?

      Thanks guys,
      Ryan

      posted in General Discussion
      RyanP
      RyanP
    • Thanks to Duet and Digitmakers

      I wanted to give a special thanks to @Phaedrux and Ali from Digitmakers.ca in Toronto.

      I had a Duet 2 Wifi go bad on me this week, fried bed heater connector. I contacted Ali and he provided me with a warranty link. I started a thread as well as I had heard that is required.

      Long story short, in less than 36 hours I had a replacement board and a few hours later my printer was back up and running.

      It was very important to me to have such amazing service as I have started a small home business with my 3D printer lineup.

      I put out a cheesy video on Facebook tonight and made sure anybody watching knew my printers ran on Duet 3D boards.

      https://www.facebook.com/3DimensionGames/videos/326856824984504

      posted in General Discussion
      RyanP
      RyanP
    • RE: How is warranty service provided?

      My dealer, Digitmakers in Toronto, just emailed me and advised to bring in the board in for replacement. Thanks @Phaedrux . You guys and Duet3D are the best.

      I can't imagine not using Duet boards in any of my printers.

      posted in General Discussion
      RyanP
      RyanP
    • RE: How is warranty service provided?

      @zapta

      I'm going to build mine in stages. First is a 400x400x500 frame kit.

      Linear rails is my goal across the board. I'm looking consistency, and predictably. Something I am only partially getting with my current spread of creality based printers.

      I converted all my current printers to DD this year and will never go back to Bowden.

      posted in General Discussion
      RyanP
      RyanP