BLtouch v 3.1 running on RR 3.1.1 Duet 2 Eth
-
Good day,
Wanted to apologize in advance if you have seen my kind of request many times. I did search the forum and still have issues with my BL touch running on Duet 2 1.4 ethernet @ 3.1.1
Issue:
BLT version 3.1
BLtouch does not deploy or retract.
@ boot time I see BLT flashing red but after running the macro “deploy” it turns blue and just sits there
Same is with retract, nothing works.
I did follow the direction for “Software setup (RepRapFirmware 3)”
I even went back to reprap 2.05 and followed oftware setup (Duet 2 WiFi/Ethernet running RepRapFirmware 2) without any success.
I took another bltouch from my other printer which I know works and same signature with the 2nd bltouch.
https://betrue3d.dk/bltouch-on-duet-wifi-duetreprapfirmware/ was also looked at and same signature.;config.go
M950 S0 C"exp.heater3" ; create servo pin 0 for BLTouch
M558 P9 C"^zprobe.in" H5 F120 T6000 ; set Z probe type to bltouch and the dive height + speeds
;M558 P9 F100 H5 R0.1 T6000 A5 B1
G31 P500 X0 Y0 Z2.5 ; set Z probe trigger value, offset and trigger heightAny ideas?
Thank you.
-a
-
@Vasir swap your m950 and m558 lines round so it is...
M558 P9 C"^zprobe.in" H5 F120 T6000 ; set Z probe type to bltouch and the dive height + speeds
M950 S0 C"exp.heater3" ; create servo pin 0 for BLTouch
Please try this and report back.
Regards,
PaulRailCore II - Duet Mini + 1LC, Voron V0.1 - Duet Mini
Voron 2.4 disassembled..... Waiting for the RailCore Mini.... -
@Vasir please set the offset values for X and Y in the G31 also, see https://duet3d.dozuki.com/Wiki/Test_and_calibrate_the_Z_probe#Section_Measuring_Probe_X_Y_Offset
If the swap does not work, please show complete config, displayprobe, retractprobe, homeall.
-
@PaulHew
Hello,Same result, I do hear maybe a 5 hz banging on the probe itself now but it does not deploy. When I execute the retract, the banging stops. Same with the S120 selftest.
I am starting to think that somehow I fried the heater pin (3) because it looks like it wants to deploy and cant. BUT the same is on pin heater 7.deploy macro: M280 P0 S10
retract macro: M280 P0 S90 -
@JoergS5
I am using the link:
https://github.com/SecKit/SK-Go_SK-Mini/blob/master/firmware/RepRap/Ravindra Karonde's config
and made modifications to add the bltouch.So I only changed this part.
; Endstops
M574 X1 Y1 S3 ; set X endstops to use motor stall
M574 Z1 S2 ; set z-Probe; Z-Probe
M558 P1 C"zprobe.in" H5 F120 T6000 ; set Z probe type to unmodulated and the dive height +speeds
G31 P500 X-27 Y-11 Z2.53 ; set Z probe trigger value, offset of 43 in X and 29 in Y and trigger height
M557 X15:285 Y15:295 S20 ; define mesh gridto
M950 S0 C"exp.heater3" ; create servo pin 0 for BLTouch
M558 P9 C"^zprobe.in" H5 F120 T6000 ; set Z probe type to bltouch and the dive height + speeds
;M558 P9 F100 H5 R0.1 T6000 A5 B1
G31 P500 X0 Y0 Z2.5 ; set Z probe trigger value, offset and trigger heightChanged the R value to .5 and .6 but no change.
Thanks,
-a
-
@Vasir first step would be all your config files, but I see only part of it, homeall is missing and config also. You have no R value to change, the one line with an R is commented out. homeall is important to see whether z probe is placed and used as z endstop correctly.
But the problem could be mechanical also, the Z distance from Bltouch to bed is important (those 8+-0.5 mm). You can check wiring also.
And G31 X and Y are 0, which is wrong, but of course not the problem now, But please don't forget to set later, otherwise you get wrong mesh compensation.The homeall of Ravindra seems to be not fully correct, e.g. G1 H1 S1 X-325 F4000 has an S1 which is wrong. S is used for laser mode now.
-
Thanks @JoergS5 for responding,
Lets forget about the homing, I am not even close
")
To double check I put the DUT (device under test (bltouch)) to a known working setup (X1) 3d printer and it works as expected so the device mechanical part is not an issue.
I wanted to just check the deploy and retract aspect of the probe and then move to more interesting things. You think that by just setting up the probe and issuing deploy/retract command would at least test the mechanical part of the test?
How would I test the heater 3 pin? -
First lets verify what version of firmware you're running. Send M115 to verify.
Then send M98 P"Config.g" in the gcode console and report any errors that come up.
It sounds like your BLTouch is working in another machine. And your config looks ok, but to be sure, please upload your actual config.g, homeall, and deploy retract files.
-
@Phaedrux said in BLtouch v 3.1 running on RR 3.1.1 Duet 2 Eth:
M98 P"Config.g"
Thanks, here is the info:
sys check output:
M98 P"Config.g"
HTTP is enabled on port 80
FTP is disabled
TELNET is disabled
Warning: Macro file config-override.g not founddeploy:
M280 P0 S10retract:
M280 P0 S90config.g
; General preferences
G90 ; send absolute coordinates...
M83 ; ...but relative extruder moves
M550 P"SK-Go" ; set printer nameM669 K1 ; select CoreXY mode
; Network
M586 P0 S1 ; enable HTTP
M586 P1 S0 ; disable FTP
M586 P2 S0
M552 S1 ; enable network;Set PanelDue 7i
M575 P1 B57600 S1; Drives
M569 P0 S1 ; physical drive 0 goes forwards
M569 P1 S1 ; physical drive 1 goes forwards
M569 P2 S1 ; physical drive 2 goes forwards
M569 P3 S1 ; physical drive 3 goes forwardsM584 X0 Y1 Z2 E3 ; set drive mapping
M350 X16 Y16 Z16 E16 I1 ; configure microstepping with interpolation
M92 X100.00 Y100.00 Z400.00 E400 ; set steps per mm
M566 X1200.00 Y1200.00 Z3.6 E120.00 ; set maximum instantaneous speed changes (mm/min)
M203 X30000.00 Y30000.00 Z900.00 E6000.00 ; set maximum speeds (mm/min)
M201 X2000.00 Y2000.00 Z100.00 E2000.00 ; set accelerations (mm/s^2)
M906 X800 Y800 Z800 E800 I30 ; set motor currents (mA) and motor idle factor in per cent
M84 S30 ; Set idle timeout; Axis Limits
M208 X0 Y0 Z0 S1 ; set axis minima
M208 X300 Y300 Z350 S0 ; set axis maxima; Endstops
M574 X1 Y1 S3 ; set X endstops to use motor stall
M574 Z1 S2 ; set z-Probe; Z-Probe
M558 P9 C"^zprobe.in" H5 F120 T6000
M950 S0 C"exp.heater3" ; create servo pin 0 for BLTouch
;M558 P9 C"^zprobe.in" H5 F120 T6000 ; set Z probe type to bltouch and the dive height + speeds
M558 P9 F100 H5 R0.1 T6000 A5 B1
G31 P500 X0 Y0 Z2.5 ; set Z probe trigger value, offset and trigger height
M557 X15:215 Y15:195 S20 ; define mesh grid;Filament sensor
M591 D0 P5 C"e0stop" R45:150 E6.0 S1 ; Duet3D laser sensor for extruder drive 0, connected to endstop input 3 (E0), tolerance 45 to 150%, 6mm comparison length, disabled;Bed Screws
;https://duet3d.dozuki.com/Wiki/Using_the_manual_bed_levelling_assistant
M671 X-10:310:170 Y-310:-310:5 P0.5 ; point1 (-10,-310), point2 (310,-310), point3 (170,5); Bed Heater
M308 S0 P"bedtemp" Y"thermistor" T100000 B4138 ; configure sensor 0 as thermistor on pin bedtemp
M950 H0 C"bedheat" T0 ; create bed heater output on bedheat and map it to sensor 0
M140 H0 ; map heated bed to heater 0
M143 H0 S120 ; set temperature limit for heater 0 to 120C;TO DO use the following guide to PID tune the bed heater as every build will have different values
;https://duet3d.dozuki.com/Wiki/Tuning_the_heater_temperature_control
;M307 H0 A191.5 C435.9 D4.3 V24.3 B0 ; disable bang-bang mode for bed heater and set PID autotune PWM values; Extruder Heater
M308 S1 P"e0temp" Y"thermistor" T100000 B4725 C7.06e-8 ; configure sensor 1 as Hemera thermistor on pin e0temp
M950 H1 C"e0heat" T1 ; create nozzle heater output on e0heat and map it to sensor 1
M143 H1 S280 ; set temperature limit for heater 1 to 280C;TO DO use the following guide to PID tune the hotend as every build will have different values
;https://duet3d.dozuki.com/Wiki/Tuning_the_heater_temperature_control
;M307 H1 A566.5 C268.7 D4.5 V24.3 B0 ; disable bang-bang mode for heater and set PID autotune PWM values; Fans
;Part cooling fan
M950 F0 C"fan0" Q200 ; create fan 0 on pin fan0 and set its frequency
M106 P0 S0 H-1 ; set fan 0 value. Thermostatic control is turned off;Hotend fan
M950 F1 C"fan1" Q200 ; create fan 1 on pin fan1 and set its frequency
M106 P1 S1 L120 X190 H1 T60:140 ; set fan 1 value. Thermostatic control is turned on. Min speed of 120 as 60 deg, and max speed for 190 at 140+degrees
;!!!Set X255 for full speed hotend fan, if you have heat creep issues
; ToolsM563 P0 D0 H1 F0 ; define tool 0
G10 P0 X0 Y0 Z0 ; set tool 0 axis offsets
G10 P0 R0 S0 ; set initial tool 0 active and standby temperatures to 0C
M572 D0 S0.02 ;Pressure advance
M501 ; Load config-override.g
; Miscellaneous
T0homeall.g
; homeall.g
; called to home all axes
;
; generated by RepRapFirmware Configuration Tool v2.1.8 on Mon Feb 17 2020 22:28:24 GMT-0500 (Eastern Standard Time)
M400 ; make sure everything has stopped before we make changes
M913 X50 Y50 ; drop motor currents to 50%
M915 X Y S4 R0 ; set sensitivity to +3 unfiltered
G91 ; use relative positioning
G1 H1 Z5 F6000 ; Lift ZG1 H1 S1 X-325 F4000 ; move X all the way left and stop at end
G1 H1 X18 ; move to edge of glass -- CHANGE THIS TO SUIT YOUR CONFIGURATION
G92 X0 ; set X0 at edge of glass
M400 ; make sure everything has stopped before we make changesG1 H1 S1 Y-325 F4000 ; move X all the way left and stop at end
G1 H1 Y19 ; move to edge of glass -- CHANGE THIS TO SUIT YOUR CONFIGURATION
G92 Y0 ; set X0 at edge of glass;G1 H1 Z-355 F1800 ; move Z down until the endstop is triggered
;G92 Z0 ; set Z position to axis minimum (you may want to adjust this)
G1 X150 Y150
G30 ;use Z probe
;G29 S1 ; load ABL height mapG90 ; back to absolute positioning
M400 ; make sure everything has stopped before we reset the motor currents
M913 X100 Y100 ; motor currents back to 100% -
@Vasir said in BLtouch v 3.1 running on RR 3.1.1 Duet 2 Eth:
M558 P9 C"^zprobe.in" H5 F120 T6000
M950 S0 C"exp.heater3" ; create servo pin 0 for BLTouch
;M558 P9 C"^zprobe.in" H5 F120 T6000 ; set Z probe type to bltouch and the dive height + speeds
M558 P9 F100 H5 R0.1 T6000 A5 B1It was correct to exchange the order of M558 and M950, M558 first. But the second M558 should be removed, the R A B parameters can be added to the first M558.
The low Z value in M566 is strange, but I am no jerk specialist to know whether it's too low.
-
Yes the second one was a typo.
Looks like it is getting the command but the servo does not respond.
Just for fun I did a rewire with new wire set, still same. -
@Vasir said in BLtouch v 3.1 running on RR 3.1.1 Duet 2 Eth:
Just for fun I did a rewire with new wire set, still same.
I use the positions of the cables at the 5-pin connector of the bltouch to know which cable is which connection, because the colors are sometimes wrong.
If you cannot deploy/retract, it can be a wrong position of bltouch core. Turning carefully half turn the allen key on top of the BLTouch.
https://cdn-3d.niceshops.com/upload/file/BLTouch_Manual.pdf
the picture page 3 "Correct position of core". -
It does work on my second X1 printer. But let me try and I will report back.
Thanks -
This post is deleted! -
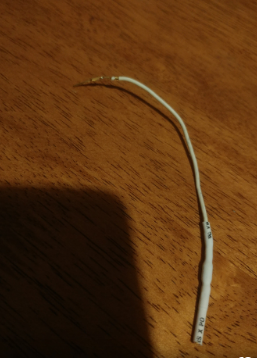
Thank you all for helping me trying to resolve my issue. I believe I know what the issue is.
Trying to get things setup faster I used extra wires I had in my garage. Long story short, the long wires used to be part of an old scope I had many cycles ago. These wires have 50 ohm resistors at the end (line impedance) and that is why the probe did not work. I used normal wires and all is good.
You guys know about these types of wires …..