Indirect Laser Monitor Remix II - working!
-
Although I own a original duet laser filament monitor (v2) I also have a magnetic sensor on order. I have been playing with the various indirect filament monitor approaches lately with limited success and reliability.
FINALLY, I have something that works reliably:
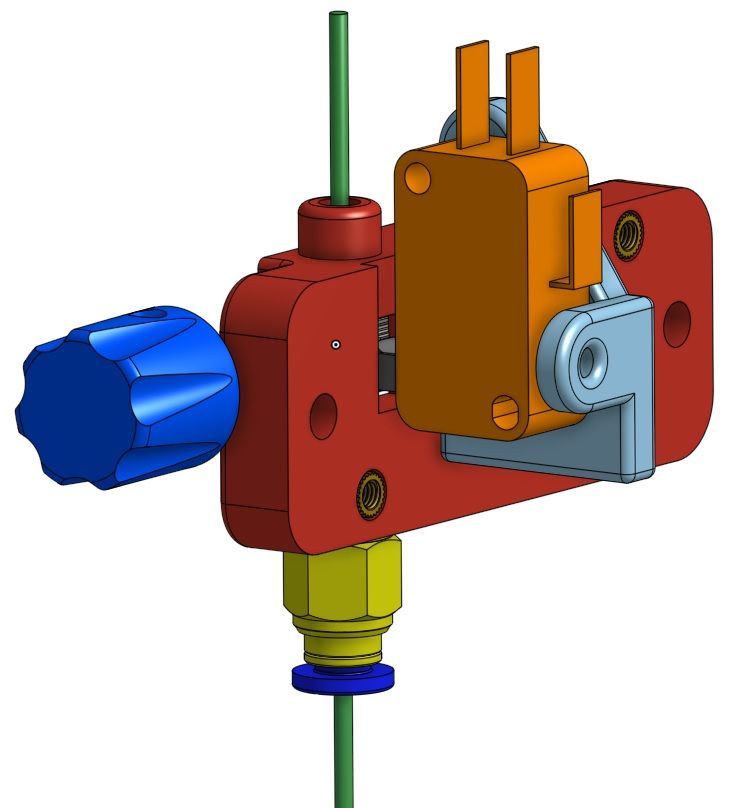
https://www.thingiverse.com/thing:4587312I have remixed the latest carbon fiber method with lots of tweaks as well as getting rid if the idler assembly and instead killing two birds by using a micro switch as the idler assembly.
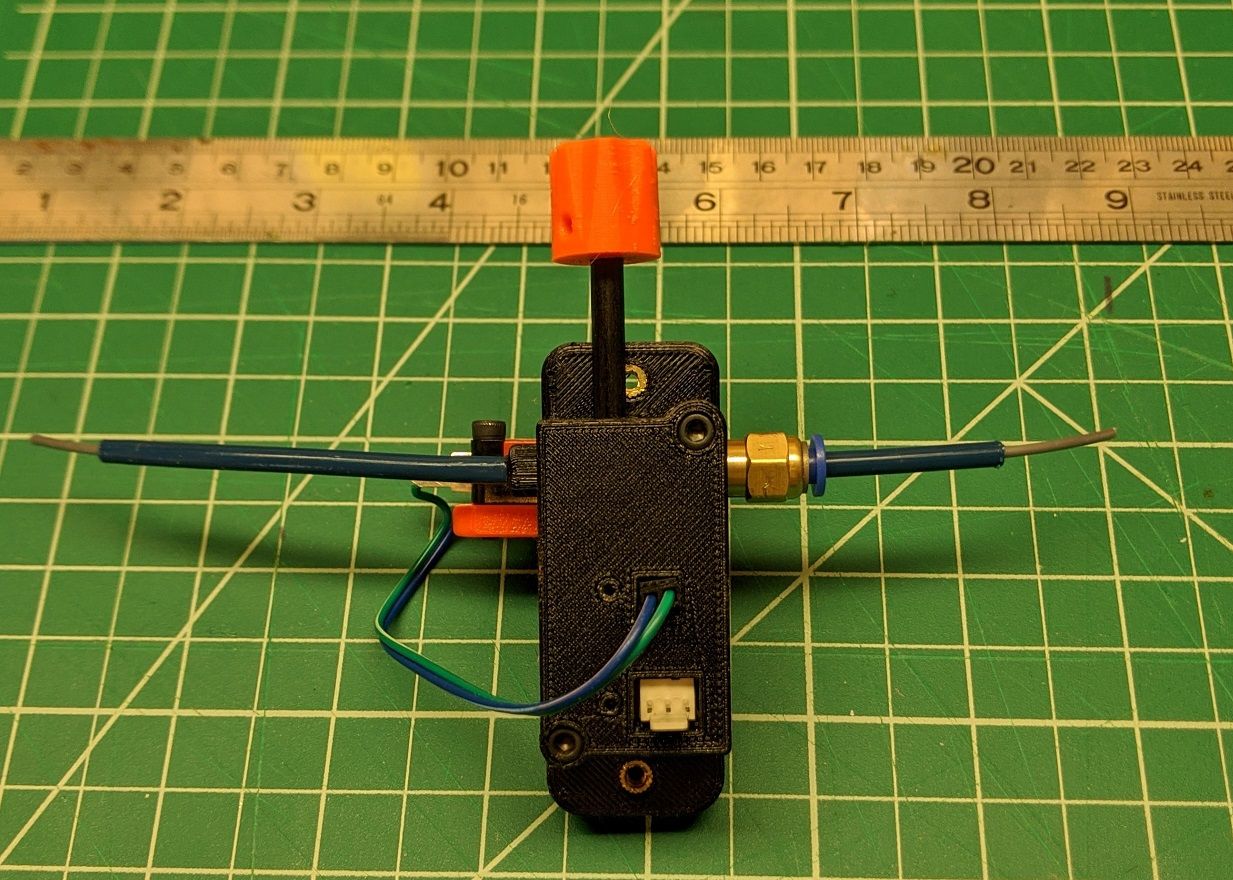
The build was much easier than the original.
My test run yielded very reliable results:
9/3/2020, 12:48:32 PM	M591 D0
Duet3D laser filament monitor v2 with switch on pin e0stop, disabled, allow 70% to 130%, check every 3.0mm, version 2, quality 223, brightness 255, shutter 92, measured min 228% avg 247% max 268% over 2450.8mm

M591 D0
Duet3D laser filament monitor v2 with switch on pin e0stop, disabled, allow 70% to 130%, check every 3.0mm, version 2, quality 223, brightness 255, shutter 89, measured min 228% avg 247% max 268% over 2273.6mm

M591 D0
Duet3D laser filament monitor v2 with switch on pin e0stop, disabled, allow 70% to 130%, check every 3.0mm, version 2, quality 223, brightness 255, shutter 88, measured min 229% avg 247% max 267% over 609.2mm
I have also asked DC to include the L parameter into the the M591 command so that we can tune the ratio to normalize the output and he is making the change per v3.2:
M591 D0 P6 C"e0stop" R70:130 L0.4 E3.0 S0Lnn (firmware 3.2 and later) Calibration factor, default 1.0. The filament movement reported by the laser sensor is multiplied by this value before being compared with the commanded extrusion. Intended for use with sensors that use the laser to read movement of a wheel that is turned by the filament.
I would estimate this indirect setup would L0.4 based on the test runs.
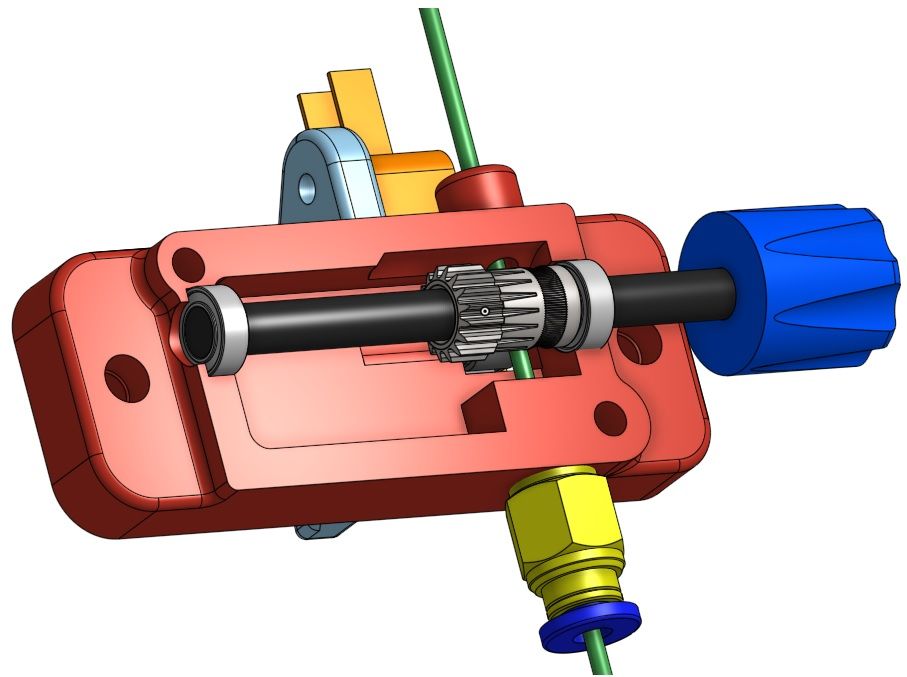
The microswitch has a tuner screw to fine tune the operating distance on the switch by simply turning the set screw.
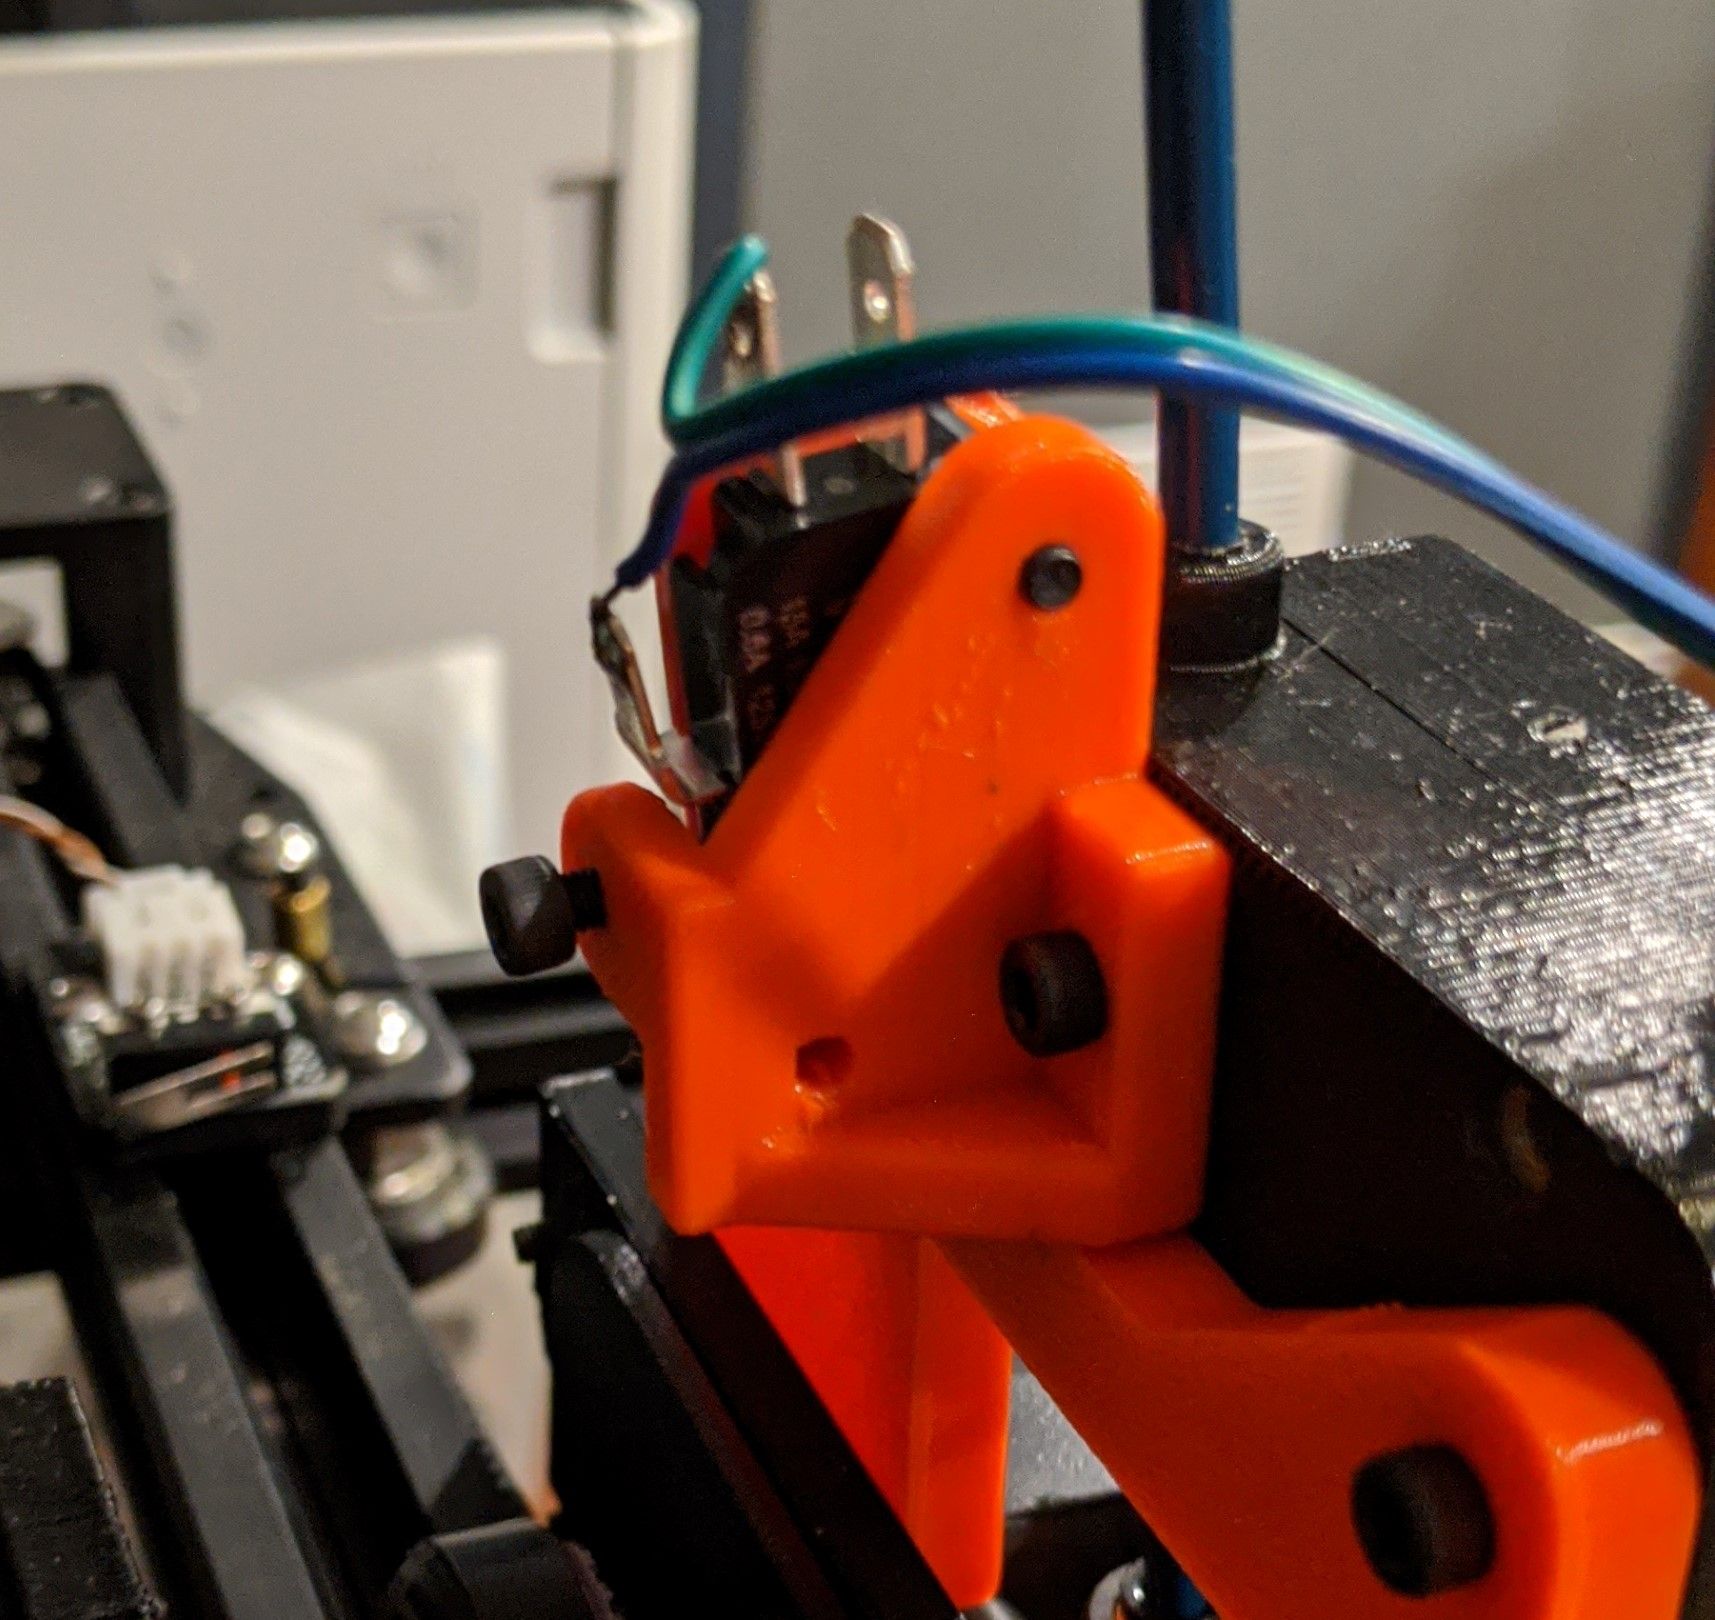
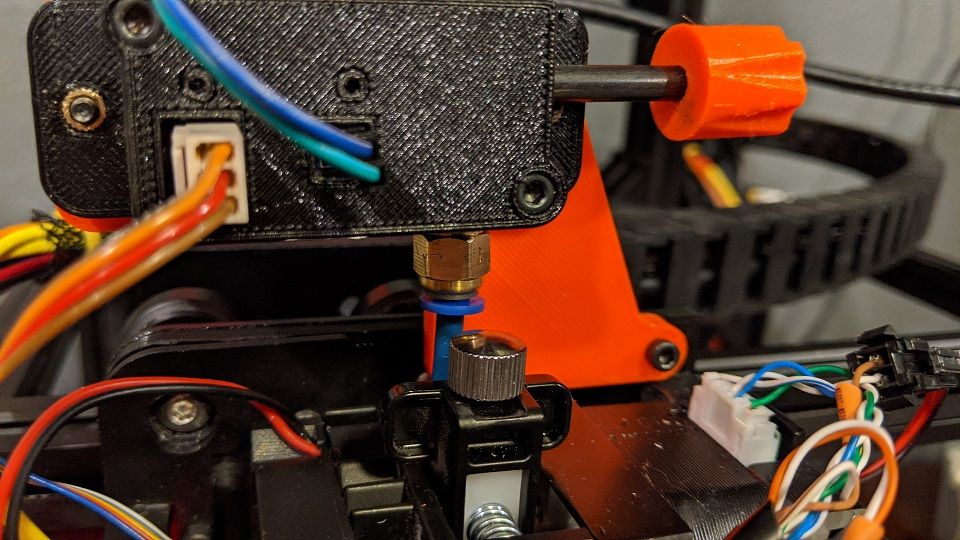
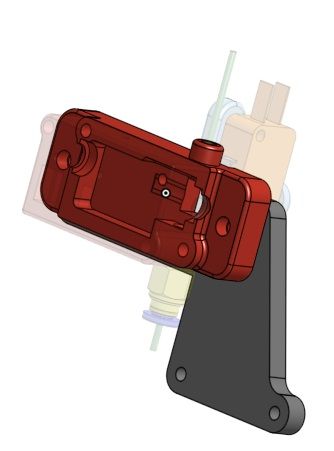
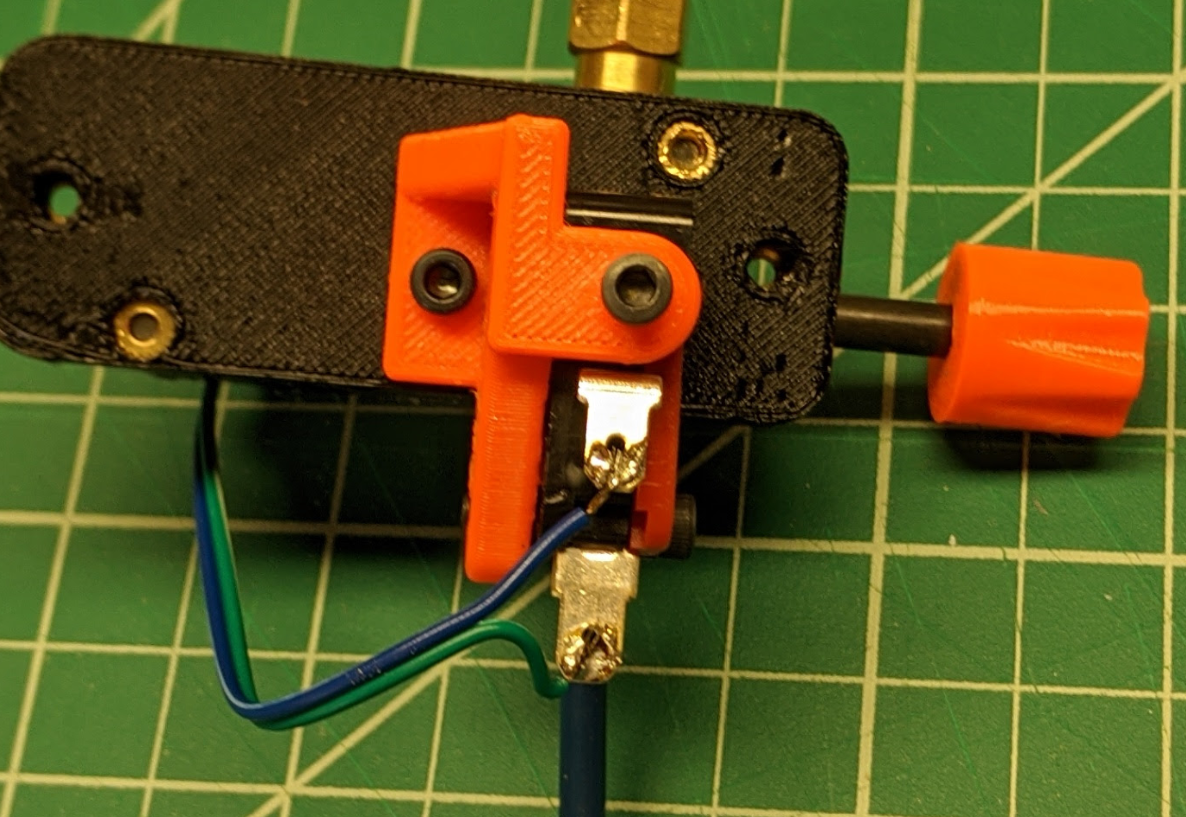
I am printing on a modified Ender 5 with a direct drive Hemera. I have also included a bracket (orange) to make this a rigid mount to make loading and unloading easier. Right now I just push in the filament and it feeds through pretty easily and provides enough clearance to engage/disengage the hemera tension lever.
The real trick was playing with the different hob gear options. The original used a gear that was just to "slick" and didn't have a concave channel to keep the filament centered and create more friction. I had to move to a Mk3 gear in black to get the best performance.
-
@mitch Fantastic! I’ve been tempted to have a go at one of these and this likely pushes me over the edge.

-
@whopping-pochard something is strange with the markdown language on thingaverse right now. The hotlinks for the materials list isn't working o I have copied it here.
I am pretty happy with it. My magnetic one is on backorder. Tempted to cancel it now. Once v3.2 firmware comes out and the L parameter is parsed this will be pretty slick.
- Dual pin header to leverage the micro switch with the Duet3D laser monitor https://amzn.to/2F28p4k
- Microswitch https://amzn.to/31XOMU5
- Bowden Tubing https://amzn.to/3hXAPLm
- PTFE Connector https://amzn.to/354q5qS
- Brass Nuts M3 x 4mm (L) x 5.3mm (OD) https://amzn.to/2EZrfcm
- Duet3d Laser Sensor Monitor or clone (v2) Board (Numerous Sources)
- (2) M2 x 6mm Screws - Fasten board to enclosure
- (1) M2 x 5mm Screw - Knob retention (optional) https://amzn.to/31TdLYq
- (2) M3 x 20mm Hex Socket Cap Bolts - Mate enclosure together
- (1) M3 x 12mm Hex Socket Cap Bolts - Mate switch bracket to the enclosure
- (1) M3 x 8mm Hex Socket Cap Bolts - For micro switch tuning screw
- (1) M3 x 12mm Hex Socket Cap Bolt - Mate/pivot for switch to the switch bracket https://amzn.to/32VThOc
- (2) Bearings 5x9x3mm https://amzn.to/3jN7vYz
- (1) Carbon fiber rod 5mm Bore with 75mm Length https://amzn.to/353QDIE
- Clear Filament (1.75mm) for LED light tube https://amzn.to/32YMVxD
- Wire leads to connect Duet board to the switch https://amzn.to/3lHa7c2
- MK3 Hob https://amzn.to/3lPDo4f
-
Sweet, thanks for duplicating the order list here!
-
Just ordered what I didn't have to make this. Can't wait to finally have a reliable sensor!
-
Well it doesn't work for me. the actual hob gear doesn't grip the filament at all so the rod barely rotates. I'll try with different hob gears I have here. But no luck so far. (I manually pushed the limit switch all the way down to no avail).
Also, the transparent filament channel is right on top of the screw hole, which means the screw is in the way of the filament. I had to bend the filament, but it is now not in line with the LED.
-
found a way to put more pressure on it (tilted down the switch and redrilled the mounting holes for it).
Now works, but still getting shitty readings.
Duet3D laser filament monitor v2 with switch on pin io3.in, disabled, allow 200% to 3000%, check every 3.0mm, version 2, quality 223, brightness 255, shutter 91, measured min -2% avg 152% max 273% over 466.5mm -
@Thalios can you post a pic? Did you use flat head screws. The screws should be countersunk so the filament goes right over them.
-
@Thalios The hob gear is the key. I tried three different ones before I found one that worked well which was the MK3 gear in black.
you shouldn't have to redrill any holes. Which gear did you use? I am on travel but I can post some more images if that would help. The thing is that you need the switch to have enough room to release when filament is not present. Should be able to just adjust the height screw.
-
This looks great and I've got all the parts I need.
The only issue is that it seems like the "microswitch holder" (which you have in two parts in your render) is missing from thingiverse. Any chance you can upload it? (orange part in your render).
-
Orange part here
-
the orange part IS the limit switch.
-
@makemerush No problem. The orange part is that limit switch which is was specifically chosen because of it's activation distance as well as the tension it provides. Essentially this is killing two birds with one stone. The switch acts as an idler assembly to provide tension against the hob and at the same time also acts as a switch to statically detect filament presence.
The switch can be purchased here:
https://amzn.to/2SkgX9UThe switch is attached to the switch assembly with a single screw so it can pivot. The hole on the top side of the switch assemble is used so you can insert a screw to increase or decrease tension and activation distance to tweak your setup. The screw just pushes the switch tighter against the hob.
The second thing that may not be obvious. Is the mount. I got great results once I used a rigid mount. You don't want this flopping around and only held on by the tube. I hope that helps.
BTW, with the new firmware beta released the L parameter can be used in the config.g to normalize the results between 0-100%.
