Aluminium plate for heat bed what alloy type ?
-
@nuramori Put the plate on a kinematic mount and the thermal expansion won't matter.
@percar If the heater is the same size as the aluminum plate you won't have much distortion because the temperature will be very close to uniform over the plate's surface. A lot of people use a heater that is smaller than the plate which results in the edges of the plate being cooler than the area covered by the heater. That forces the plate to bow. Here's the 300 x300 x8mm thick MIC6 bed in my printer with a 300x300 mm heater:
Thermal distortion isn't a problem with a glass plate, however it isn't without its own problems- specifically poor thermal conductivity.
The heater doesn't heat evenly by itself, so if you glue it to glass, there may be wide temperature variations from one area of the bed to another, and that can lead to problems getting prints to stick. Here's a thermal image of a Taz printer that came from the factory with a heater glued to the glass bed. It was very difficult to get prints to stick to it.
After the glass broke I replaced the bed plate with a piece of cast tooling plate and glued the original heater to it. The result:

If you're going to use glass, put it on top of an aluminum heat spreader to which the heater is glued. If you don't use a flat piece of aluminum such as cast tooling plate or you use a heater that's smaller than the plate, you're right back to having uneven temperature on the glass because air gaps between the aluminum and glass won't transfer the heat to the glass very well. You need a flat heat spreader as well as a flat piece of glass. So you're back to using tooling plate.
-
@percar HI , my bed is 320mm x 310mm which is the same size as a CR10s Pro , so I can use the heater / glass / magmatic spring steel top from I CR10S pro without getting bespoke sizes .
COLD I'm using the glass from my CR10s pro and it's super level , but printing with a cold bed you have problem removing the print .
So I can use the spring steel and print cold or use glass and heat it up so cooling will remove the print.
-
@mrehorstdmd I think I'm using a 310mm x 310mm heater on a 320mm x 310mm , but I think I'm going to call that a full bed heater.
-
@peter247 Congrats on the delivery. IIRC, I had to wait the full 10 days for mine but that was a few years ago.
I think you'll be fine. Just for info, my bed is 400 x 400 and I chose to use 12mm thick aluminium but if I did it again, I'd settle for 10mm or possibly even 8mm if money was tight. I also like to print on glass as I like to have the ability to slide out the glass as soon as a print finishes, then slide in new sheet and start another print while the first one is cooling. That's quite important for me because I also chose to fit 12mm of semi rigid insulation under the plate so it takes for ever to cool down.
As Mark has said, a kinematic mount of some sort will negate the possibility of distortion due to thermal expansion. In my case, I chose to mount the plate to the frame using 4 countersunk bolts which pass through stainless steel pillars set into holes in the insulation. The plate itself is thus fairly free to expand and contract, but very little heat gets transferred to the frame to which it is fixed. So the frame itself remains cool which prevents any binding of the linear guides which are attached to the fame (not the plate).
After much toing and froing with a specialised glass company, I ended up with plane float glass, 6mm thick. We tried various alternatives including shot blasting and other coatings but none worked better than plain glass. Having it toughened was fairly disastrous as the process itself leads to distortion and what starts life as a flat sheet ends up bowed - only by about 0.5mm but that's plenty too much for a build plate.
These days I use a quick squirt of 3D Lac. This allows me to lay down the first layer at normal print speed of 60 to 80mm /sec but once the glass cools, the lightest of taps will release the part. Except for wood fibre filament - never, ever use 3D Lac with that because you'll end up destroying the printed part with a hammer and chisel trying to remove it (I know that from experience).

-
@deckingman 400mmx400mmx12mm that is a seriously heavy bit of aluminium ?
I like to print on glass with a bit of 3D lac for petg and try to use just glass for pla with 3d lac at the times I can't get part to stick .
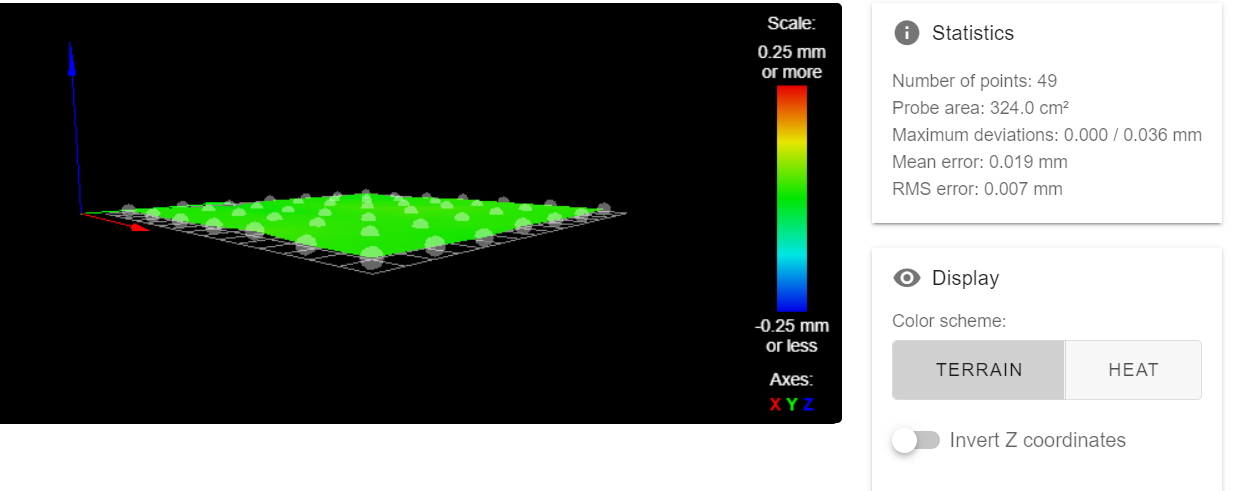
Not totally sure what is meant by a kinematic mount , but I must be something right with the glass setup because I've heated the bed up to 100c and can't see a big change with the height map.
I think I may try removing the glass and check if the aluminium is distorting and the glass is correcting the error ?I've tried homing Z cold and heating the bed upto 100c and probing it , and I do get expedition , but nice and even .
I need insulation under the heater because heat looks to be radiating a lot that way . ( I'm thinking of fully enclosing it , so not sure it maters )
Do you fit a thermo fuse on your bed ?
-
@peter247 said in Aluminium plate for heat bed what alloy type ?:
........... Not totally sure what is meant by a kinematic mount , .................
You can look up the dictionary definition of kinematics but in the case of a build plate, it means mounting it in such a way that it is free to expand and contract without distortion. The other important consideration is that thermal expansion does not cause the linear guides to bind or stick. That is to say, the bed will always be free to move in the Z direction, regardless of any movement due to expansion in the X or Y directions.
Do you fit a thermo fuse on your bed ?
If I'm totally honest, the answer is no. That's mostly just laziness on my part as I do have a thermal cut-out but I have never yet got around to fitting it. I'm not too worried about it because the heater is appropriately sized and in the event of a runaway situation such as a MOSFET failure, the bed will not attain a temperature which would be a fire hazard. I'm more concerned with making the printer as safe as can be with a 240V heater attached. To that end, I have a lot of earth bonding of the plate and frame and use an RCD as well.
-
@peter247 Kinematic bed mount is explained here: https://drmrehorst.blogspot.com/2017/07/ultra-megamax-dominator-3d-printer-bed.html
I later redesigned the mounts for the leveling screws - update here: https://drmrehorst.blogspot.com/2019/04/more-changes-to-ummds-z-axis.html
If your printer uses three screws to lift the bed in Z you can skip the bed support like I used and put the leveling screws for the kinematic mount on the Z blocks.
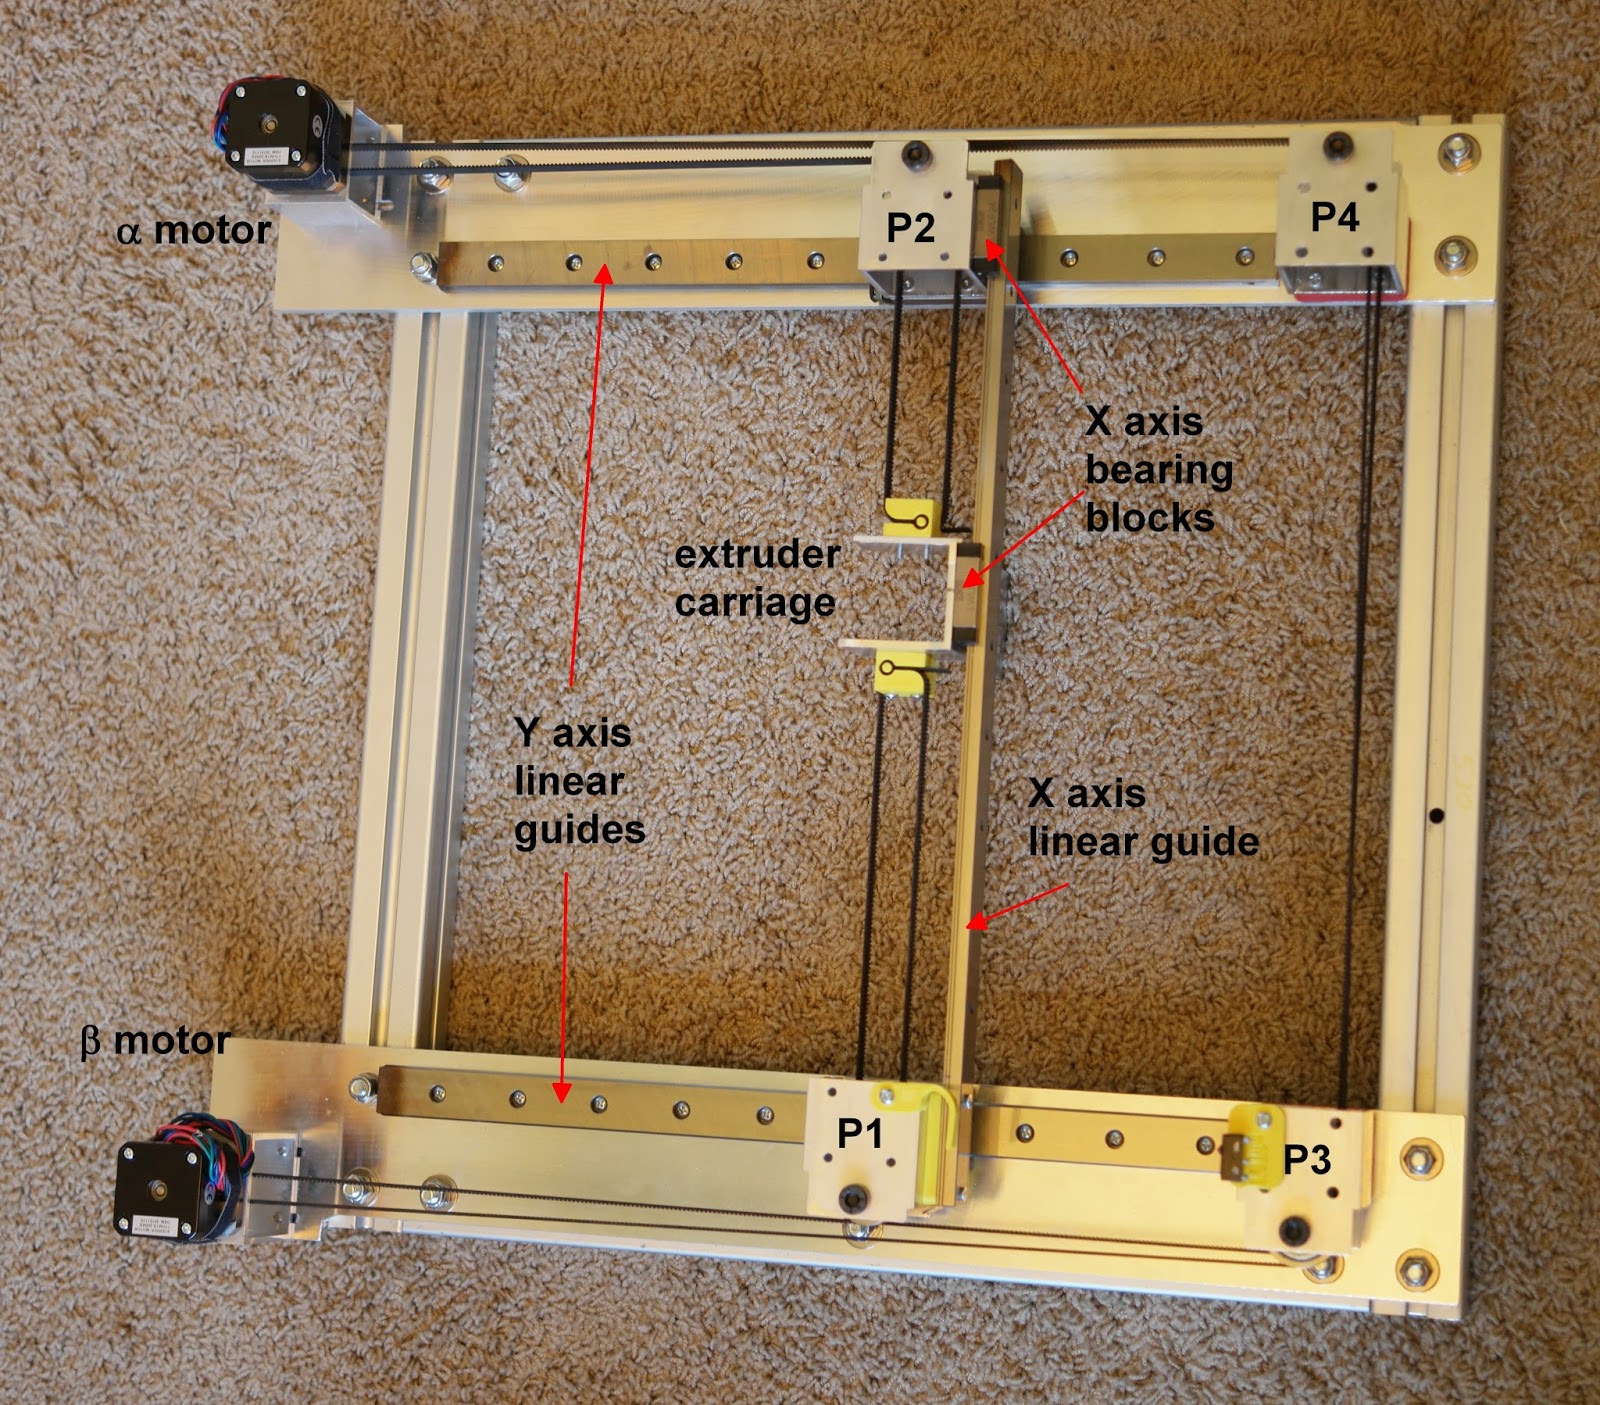
Corexy mechanisms, made using linear guides for the X and Y axis, can bind when the temperature changes, depending on how they are built. In my printer, the X axis is a linear guide that spans the two Y axis linear guides. I have a chamber heater and sometimes operate the machine at 50C to print ABS. When the machine heats up, the Y axis guides move apart a fraction of a mm. The X axis guide, made of steel, expands much less than the printer's aluminum frame. That situation could lead to the mechanism binding because the Y axis rails are trying to move apart and the X axis rail is trying to hold them together, creating a lot of rotational torque on the Y axis bearing blocks. Most designs prevent the binding problem by mounting an aluminum rail or tube between the Y axis bearing blocks and mount the X axis guide rail on the aluminum. The X axis aluminum will expand with the rest of the frame and the mechanism won't bind. I prevent the problem by using two bearing blocks for the X axis, one for the extruder carriage, and the other mounted on the pulley block (P2 in the photo) at one end of the X axis. That allows the X axis guide rail to slide in the X direction when the Y axis rails move apart and prevents binding. Machines using end-supported round rails for the X and Y axes don't usually have a problem with binding because the rails can flex.

-
mrehorstdmd
You are incorrect with the kinematic mount. What will happen is that the outer edge will always be cooler than the mid area of the plate unless you have chamber heat that will equalize the plate temperature. This is what will cause warpage...do the math. I had heater that was full width and length of the plate that I was using.
I am questioning the glass that you were using as you said it broke. Im not sure that it was borosilicate as it is very difficult to break unless you are using very thin glass. I am using 10mm thick and heat up is not an issue as i am using mains heater at 15 watts per square inch. It takes about a minute to heat from room temp to 100c and the heat is very uniform across the glass except for the outer 10mm.
Thicker glass will give you more uniform temperature across the surface. -
@percar said in Aluminium plate for heat bed what alloy type ?:
mrehorstdmd
You are incorrect with the kinematic mount. What will happen is that the outer edge will always be cooler than the mid area of the plate unless you have chamber heat that will equalize the plate temperature. This is what will cause warpage...do the math.
The thermal images that @mrehorstdmd posted disprove your hypothesis. Far from suggesting that he "do the math", I would suggest that you take a look at the actual, real world data that has been presented.
-
@percar The Taz came with a glass bed that was 4 or 5 mm thick, as I recall. It broke when someone was trying to remove a print that stuck too well after they slathered the plate with glue -to try to get their print to stick.
The kinematic mount has nothing to do with heat distribution in the bed plate. It simply allows the aluminum plate to expand laterally without putting any force on the mounting/leveling screws. If the plate expands when it heats up and you don't use a kinematic mount, there will be a lot of lateral force applied somewhere, usually to the leveling screws in most plate mounting schemes. That will cause something to flex- maybe the bed supports, maybe the bed plate- it depends on how it is built.
In theory, a glass bed would not expand much at all, so a kinematic mount should not be needed if you glue the heater directly to the glass. I suppose that if glass is thick enough it might allow even heat distribution, eventually. The bed plate also acts as a heatsink for the heater. The heaters don't heat evenly- some areas are hotter than others, and a thermally conductive plate helps even the heater temperature out as well as providing an evenly heated surface on which to print.
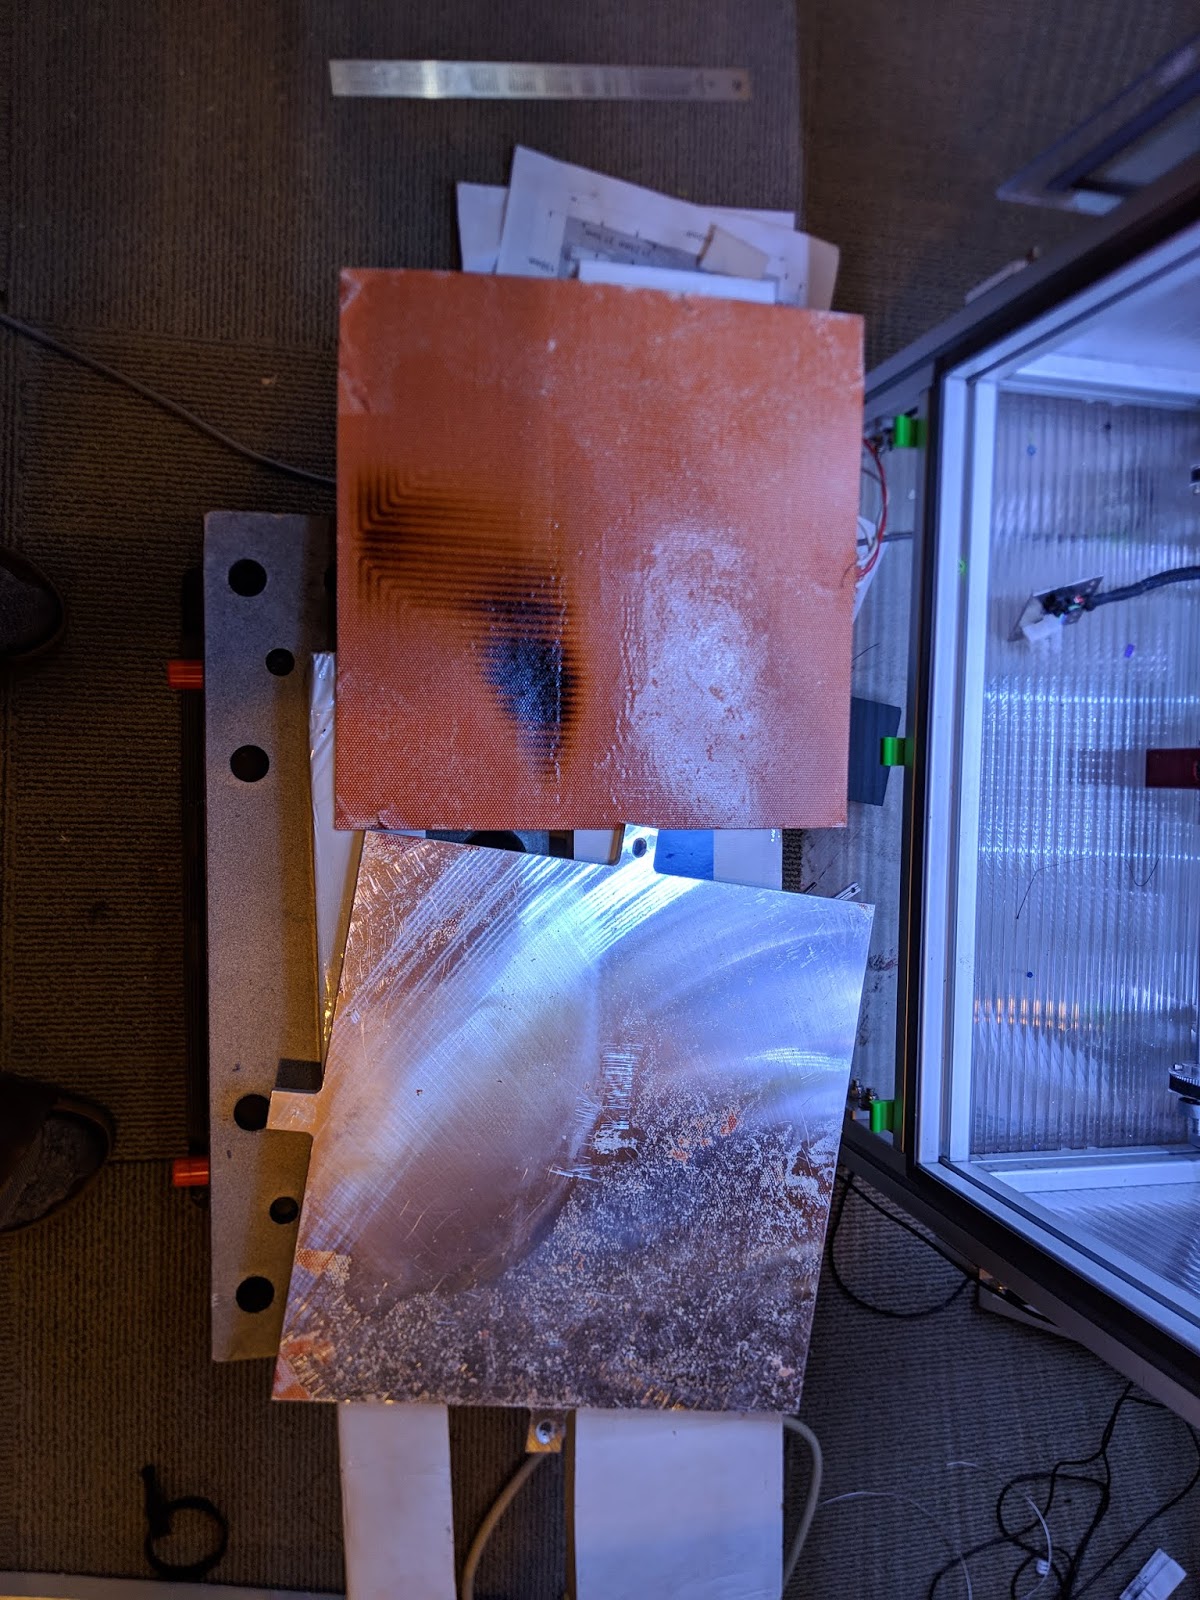
You're using a LOT of power to get that thick glass to heat up. It would be interesting to see thermal images of your heater and the bed surface. I'd be concerned about exceeding the maximum temperature rating of the heater (or the adhesive holding it to the glass) when you first start up the bed heating process. I had the self-stick adhesive fail in my printer after a couple years of almost daily temperature cycling. It allowed air bubbles to form between the heater and the plate. The result was the heater was scorched in those areas:

This was a 5.2W/sq. in. heater, which is normally regarded as a LOT of power density. You're using 3x that power. Yikes! I sure hope you have at least one TCO stuck to the heater...
When I replaced the heater I used high temperature silicone to bond it to the plate instead of the self-adhesive stuff that usually comes on the heaters. I'm hoping that will never let go. I think it's been about 2 years now and it appears to be OK.
The thick glass you're using will respond to heat input very slowly which I think would make it more difficult to control its temperature. Maybe the higher heater power you're using would compensate for that. Where is the bed temperature sensor in your machine?
If you use an aluminum heat spreader under the glass, it's still a good idea to use a kinematic mount. I think it's obvious that a piece of aluminum foil wouldn't make a good heat spreader. So how thick does the heat spreader need to be? I don't know. You wouldn't want to go too thin because the plate needs to support its own weight in addition to spreading the heat. For a 300x300 mm bed, 1/4" plate works fine. I've used 1/4" plate and 8 mm plate and both work fine. I haven't run into cast tooling plate less than 1/4" thick, but maybe someone in the civilized world supplies it in thinner pieces, like maybe 5 mm or so.
-
I am using high temperature silicon for the adessive. I had this under a press during curing so that there were no voids. I am using 2 heating pads each with their own controls and scr. Each pad has its own safety to prevent over heating. Each pad has type K thermocouple. Heater control is commercial heater control with an analog input so that Duet and control temperatures. The controller has safety cutoff if it runs outside of the set range plus the safety switches. I have been using this for a few years without issue. Thickness of the glass is important as the thicker glass gives more stable temperatures.