Smart effector poor sensitivity
-
Hi,
I've just finished building and started setting up another machine, a Kossel XL+ based on DC42s design.The frame is from a surplus Think3DPrint3Dkit bought on ebay and I've used a Duet 6HC with SBC and a new Smart effector V3.
Trying that for the first time, it triggers OK on a firm tap - but going through the delta calibration sequence after setting Z0, the trigger height shown for G30 S-1 was -1.67mm and it pushed rather hard in to the bed plate, sliding sideways slightly as well, which I'm pretty sure is not correct!
The smart effector is fitted with a Flex3drive unit that came in the mechanical kit, installed using nylon washers above and below the PCB to avoid clamping directly to it.
It has a new threaded V6 heatsink, no washer below and the supplied plastic nut above.
*** Just realised looking at the photo - I have a small piece of bowden tube between the flex3drive and heatsink; I wonder if that is affecting the sensitivity?
However, I've not run any filament through it yet - and having filament clamped in the extruder immediately above the PCB will also affect sensitivity, at a guess?
Is the smart effector only supposed to be used with the nozzle at full temperature, once the machine initial setup is done?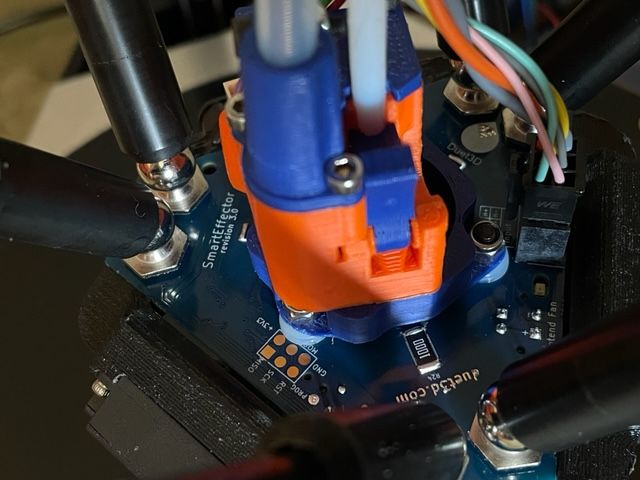
Config file:
; Configuration file for Duet 3 (firmware version 3.3) ; executed by the firmware on start-up ; ; generated by RepRapFirmware Configuration Tool v3.3.10 on Sun Dec 12 2021 14:32:10 GMT+0000 (Greenwich Mean Time) ; General preferences M575 P1 S1 B57600 ; enable support for PanelDue G90 ; send absolute coordinates... M83 ; ...but relative extruder moves M550 P"Kossel" ; set printer name M665 R172 L360.24 B150 H467.3 ; Set delta radius, diagonal rod length, printable radius and homed height M666 X0 Y0 Z0 ; put your endstop adjustments here, or let auto calibration find them ; CAN Bus boot wait G4 S2 ;wait for expansion boards to start ; Drives M569 P0.0 S0 ; physical drive 0.0 goes backwards M569 P0.1 S0 ; physical drive 0.1 goes backwards M569 P0.2 S0 ; physical drive 0.2 goes backwards M569 P0.3 S1 ; physical drive 0.3 goes forwards M584 X0.0 Y0.1 Z0.2 E0.3 ; set drive mapping M350 E8 I0 ; configure microstepping without interpolation M350 X16 Y16 Z16 I1 ; configure microstepping with interpolation M92 X160.00 Y160.00 Z160.00 E1900.00 ; set steps per mm M566 X1200.00 Y1200.00 Z1200.00 E6.00 ; set maximum instantaneous speed changes (mm/min) M203 X18000.00 Y18000.00 Z18000.00 E2400.00 ; set maximum speeds (mm/min) M201 X1000.00 Y1000.00 Z1000.00 E120.00 ; set accelerations (mm/s^2) M906 X1500 Y1500 Z1500 E1250 I30 ; set motor currents (mA) and motor idle factor in per cent M84 S30 ; Set idle timeout ; Axis Limits M208 Z0 S1 ; set minimum Z ; Endstops M574 X2 S1 P"^io1.in" ; configure switch-type (e.g. microswitch) endstop for high end on X via pin ^io1.in M574 Y2 S1 P"^io2.in" ; configure switch-type (e.g. microswitch) endstop for high end on Y via pin ^io2.in M574 Z2 S1 P"^io3.in" ; configure switch-type (e.g. microswitch) endstop for high end on Z via pin ^io3.in ; Z-Probe M558 P8 R0.4 C"io4.in+io4.out" H5 F1200 T6000 ; set Z probe type to effector and the dive height + speeds M558 H30 ;*** Remove this line after delta calibration has been done and new delta parameters have been saved G31 P100 X0 Y0 Z0.1 ; set Z probe trigger value, offset and trigger height M557 R85 S20 ; define mesh grid ; Heaters M308 S0 P"temp0" Y"thermistor" A"Bed" T100000 B4138 ; configure sensor 0 as thermistor on pin temp0 M950 H0 C"out0" T0 ; create bed heater output on out0 and map it to sensor 0 M307 H0 B0 S1.00 ; disable bang-bang mode for the bed heater and set PWM limit M140 H0 ; map heated bed to heater 0 M143 H0 S120 ; set temperature limit for heater 0 to 120C ; M308 S1 P"temp1" Y"PT1000" A"Tool" ; configure sensor 1 as a PT1000 on pin temp1 M950 H1 C"out1" T1 ; create nozzle heater output on out1 and map it to sensor 1 M307 H1 B0 S1.00 ; disable bang-bang mode for heater and set PWM limit M143 H1 S280 ; set temperature limit for heater 1 to 280C ; Fans M950 F0 C"out4" Q500 ; create fan 0 on pin out5 and set its frequency M106 P0 S0 H-1 ; set fan 0 value. Thermostatic control is turned off M950 F1 C"out5" Q500 ; create fan 1 on pin out6 and set its frequency M106 P1 S1 H1 T45 ; set fan 1 value. Thermostatic control is turned on ; Tools M563 P0 D0 H1 F0 ; define tool 0 G10 P0 X0 Y0 Z0 ; set tool 0 axis offsets G10 P0 R0 S0 ; set initial tool 0 active and standby temperatures to 0C ; Custom settings are not defined ; Power control M80 C"pson" ; Turn on 24V Power M80 ; Heater tuning ; Bed M307 H0 B0 R0.313 C594.5 D5.76 S1.00 V23.8 ; Hot end M307 H1 B0 R2.202 C335.8 D3.99 S1.00 V23.8 ; Miscellaneous T0 ; select first tool -
 undefined rjenkinsgb marked this topic as a question
-
I've just taken about 1mm off the internal bowden link and tried the zero sequence again.
This time the G30 S-1 returned -1.8mm, with it pushing the head sideways several mm.
The internal tube change does not seem to have any effect.
Is there some fundamental problem using the flex3drive with a smart effector? I can re-do it as a bowden feed if that is the case. -

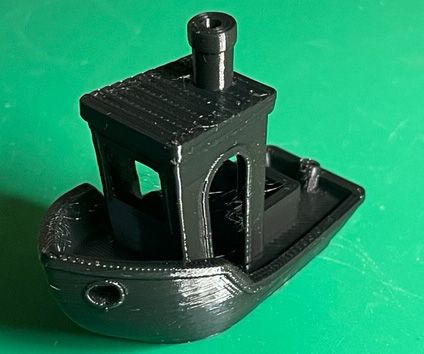
After checking over everything, I discovered I'd not got one of the pulleys clamped square on a flat on the motor shaft - it could rock slightly under load, slipping on the other screw.Even like that, it produced a pretty good benchy as the first ever print, after manually levelling it, but it was badly messing up the smart effector probing.
With the pulley now properly tight, it's working, but still does not seem as sensitive as I thought it should be, from the docs; I have the probe offset at -0.85mm and that gives a good first layer.
Is that reasonable or still excessive?
-
@rjenkinsgb my probe offset is the default -0.1 and it prints the first layer well
-
I'm not a smart effector user myself, but perhaps this is useful?
-
@phaedrux
Thanks, that has improved things, but I'm still not sure if it is working with the sensitivity it is supposed to have?With the sensitivity at 20, the trigger value was around -0.38
I have it at 15 now to give a trigger at -0.275; it no longer look like its trying to break things and I have a rather better delta calibration data set, but it is also randomly getting false triggers with the LED flickering every so often.
Robert J.
Printers: Overlord pro, Kossel XL+ with Duet 6HC and "Frankentron", TronXY X5SA Pro converted to E3D toolchange with Duet 6HC and 1LC toolboards.
-
Perhaps @Dc42 has a better idea on the sensitivity.
-
@rjenkinsgb we will replace your SE under warranty. Please email warranty@duet3d.com and include a link to this thread.
Duet WiFi hardware designer and firmware engineer
Please do not ask me for Duet support via PM or email, use the forum
http://www.escher3d.com, https://miscsolutions.wordpress.com -
@dc42
OK, thank you.I have a Smart effector V2 board that came with the Kossel parts, so I'll try rebuilding on that and see how it compares.
I did not want to change anything without some feedback, in case other diagnostics were needed or the flexdrive was a known cause of low sensitivity.
ps. I had to reverse the heater connector on the V3 as the supplied orientation meant the wires came out too near the magball screw, that is also used for a fan attachment with the parts I was using.
-
I've just finished rebuilding the hot end on to the older smart effector board that came with the Kossel frame.
I've used the exact same parts as I did on the brand new V3 one.
These are the results of the first test G30 S-1 probes, with default sensitivity: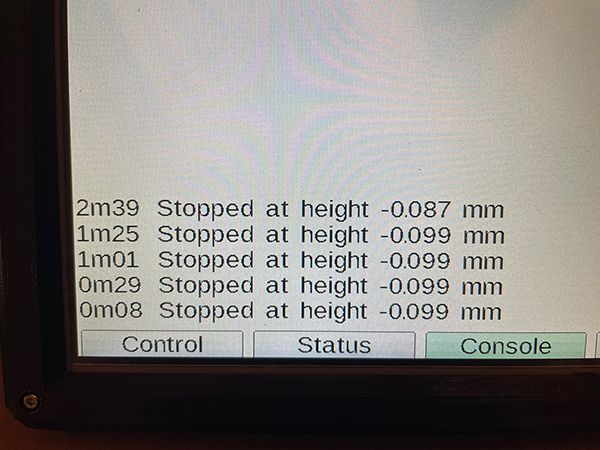
Fantastic!
I think it is safe to say the other one did have a serious problem!
I'll return that in the next few days.Thanks.
-
undefined rjenkinsgb has marked this topic as solved
-
undefined rjenkinsgb referenced this topic
-
 undefined duetpredatorconvert referenced this topic